Mercedes W210 Rear Window Regulator: Ultimate Replacement Guide
The Mercedes W210 Rear Window Regulator, a common point of failure, can be replaced with ease following this guide from CARDIAGTECH.NET. Addressing issues like crunching noises and window movement problems, this article will cover replacement procedures, focusing on enhancing your repair capabilities and saving you money. Learn about window motor, power window, and auto repair.
Contents
- 1. Understanding the Mercedes W210 Rear Window Regulator
- 1.1 What is a Window Regulator?
- 1.2 Common Symptoms of a Failing Rear Window Regulator
- 1.3 Why Rear Window Regulators Fail in the W210
- 2. Tools and Parts Needed for Replacement
- 2.1 Essential Tools
- 2.2 Required Parts
- 2.3 Where to Buy Parts
- 3. Step-by-Step Guide to Replacing the Rear Window Regulator
- 3.1 Safety Precautions
- 3.2 Removing the Door Panel
- 3.3 Accessing the Window Regulator
- 3.4 Removing the Old Window Regulator
- 3.5 Installing the New Window Regulator
- 3.6 Reassembling the Door Panel
- 3.7 Final Steps
- 4. Troubleshooting Common Issues
- 4.1 Window Moves Slowly or Erratically
- 4.2 Window Does Not Move at All
- 4.3 Window Falls into the Door
- 4.4 Unusual Noises
- 5. Maintaining Your Mercedes W210 Window Regulators
- 5.1 Regular Lubrication
- 5.2 Inspecting for Wear
- 5.3 Keeping the Window Tracks Clean
- 5.4 Addressing Issues Promptly
- 6. The Advantage of Using CARDIAGTECH.NET Tools
- 6.1 Precision and Accuracy
- 6.2 Durability and Longevity
- 6.3 Ease of Use
- 6.4 Comprehensive Selection
- 6.5 Statistics on DIY Auto Repair
- 7. Cost Savings of DIY Repair
- 7.1 Mechanic Costs
- 7.2 DIY Repair Costs
- 7.3 Potential Savings
- 8. Enhancing Your Auto Repair Skills
- 8.1 Online Resources
- 8.2 Training Courses
- 8.3 Practice and Experience
- 9. When to Seek Professional Help
- 9.1 Complex Electrical Issues
- 9.2 Lack of Experience
- 9.3 Time Constraints
- 9.4 Specialized Tools
- 10. Staying Safe During Auto Repairs
- 10.1 Use Proper Safety Gear
- 10.2 Disconnect the Battery
- 10.3 Use Jack Stands
- 10.4 Work in a Well-Ventilated Area
- 10.5 Follow Instructions
- 10.6 Industry Insights on Auto Repair Safety
- 11. The Future of Auto Repair
- 11.1 Electric Vehicles
- 11.2 Advanced Driver Assistance Systems (ADAS)
- 11.3 Telematics and Remote Diagnostics
- 11.4 3D Printing
- 11.5 Augmented Reality (AR)
- 12. Environmental Considerations in Auto Repair
- 12.1 Proper Disposal of Waste Materials
- 12.2 Use of Environmentally Friendly Products
- 12.3 Minimizing Waste
- 12.4 Conserving Resources
- 12.5 Industry Initiatives for Environmental Protection
- 13. How to Choose the Right Replacement Parts
- 13.1 OEM vs. Aftermarket Parts
- 13.2 Quality and Reliability
- 13.3 Compatibility
- 13.4 Warranty
- 13.5 Industry Standards for Part Quality
- 14. Legal Aspects of DIY Auto Repair
- 14.1 Local Regulations
- 14.2 Environmental Regulations
- 14.3 Liability
- 14.4 Insurance
- 14.5 Consumer Protection Laws for Auto Repairs
- 15. Diagnosing Window Regulator Problems
- 15.1 Listen for Unusual Noises
- 15.2 Check the Window Movement
- 15.3 Inspect the Wiring
- 15.4 Test the Motor
- 15.5 Consult a Wiring Diagram
- 15.6 Using Diagnostic Tools for Accurate Assessment
- 16. Tips for Working with Rivets
- 16.1 Use the Right Rivet Gun
- 16.2 Drill Out Rivets Carefully
- 16.3 Wear Safety Glasses
- 16.4 Use the Correct Rivet Size
- 16.5 Set Rivets Properly
- 16.6 Innovations in Riveting Technology
- 17. Understanding Window Motor Functionality
- 17.1 How Window Motors Work
- 17.2 Common Window Motor Problems
- 17.3 Testing Window Motors
- 17.4 Replacing Window Motors
- 17.5 Advancements in Window Motor Design
- 18. Exploring Power Window Systems
- 18.1 Components of a Power Window System
- 18.2 How Power Window Systems Work
- 18.3 Common Power Window Problems
- 18.4 Troubleshooting Power Window Systems
- 18.5 Integration of Power Window Systems with Vehicle Electronics
- 19. Auto Glass Repair Basics
- 19.1 Types of Auto Glass
- 19.2 Common Auto Glass Problems
- 19.3 Repairing Auto Glass
- 19.4 Replacing Auto Glass
- 19.5 Innovations in Auto Glass Technology
- 20. Conclusion: Empowering Your Mercedes W210 Repairs
1. Understanding the Mercedes W210 Rear Window Regulator
The Mercedes-Benz W210, produced from 1995 to 2002, is known for its elegance and reliability. However, like all vehicles, certain components are prone to wear and tear. One such component is the rear window regulator. The window regulator is the mechanism that allows you to raise and lower the windows. Over time, these regulators can fail, leading to frustrating issues. This article will guide you through understanding, troubleshooting, and replacing the rear window regulator in your Mercedes W210. This knowledge helps you better grasp concepts like window lift motor function and auto glass repair.
1.1 What is a Window Regulator?
A window regulator is a mechanical assembly that controls the movement of a vehicle’s window. It typically consists of a motor, gears, and a cable or scissor mechanism that raises and lowers the window glass. In the Mercedes W210, the rear window regulator is a cable-operated system, which, while efficient, is susceptible to wear and breakage over time.
1.2 Common Symptoms of a Failing Rear Window Regulator
Recognizing the symptoms of a failing window regulator is crucial for timely repair. Here are some common signs:
- Slow or Jerky Window Movement: The window moves up or down slowly or in a jerky, uneven manner.
- Grinding or Crunching Noises: Unusual noises when operating the window switch.
- Window Falling into the Door: The window suddenly drops down into the door cavity.
- Window Not Moving at All: The window does not respond when the switch is activated.
- Motor Runs But Window Doesn’t Move: You can hear the motor working, but the window remains stationary.
1.3 Why Rear Window Regulators Fail in the W210
Several factors contribute to the failure of rear window regulators in the Mercedes W210:
- Wear and Tear: The cable and plastic components can degrade over time due to constant use.
- Environmental Factors: Exposure to temperature changes and moisture can cause the cable to corrode and the plastic parts to become brittle.
- Stress on Components: The cable-pulley system in the rear regulators is more prone to failure compared to the scissor-type design in the front.
- Poor Maintenance: Lack of lubrication and regular checks can accelerate wear.
2. Tools and Parts Needed for Replacement
Before starting the replacement process, gather all the necessary tools and parts. Having everything on hand will make the job smoother and more efficient.
2.1 Essential Tools
- Torx and Hex Drivers: These are essential for removing the various screws and bolts in the door panel.
- Screwdrivers: Both flathead and Phillips head screwdrivers will be needed.
- Rivet Gun: The rear window regulator is typically held in place with rivets, which need to be drilled out and replaced.
- Drill: For drilling out the old rivets.
- Panel Removal Tools: These help to remove the door panel without damaging it.
- Socket Set: For removing bolts and nuts.
- Pliers: For various tasks, such as removing clips and connectors.
- Multimeter: For checking electrical connections.
2.2 Required Parts
- New Rear Window Regulator: Purchase a high-quality replacement regulator.
- Rivets: Ensure you have the correct size and type of rivets for re-installing the regulator.
- Door Panel Clips: These often break during panel removal, so it’s good to have replacements on hand.
- Lubricant: Use a silicone-based lubricant to ensure smooth window operation.
- Electrical Contact Cleaner: For cleaning electrical connections.
2.3 Where to Buy Parts
You can purchase the necessary parts from various sources:
- CARDIAGTECH.NET: Offers a wide range of auto parts and tools, including Mercedes-Benz window regulators.
- Mercedes-Benz Dealerships: Provide genuine OEM parts, ensuring the best fit and quality.
- Online Retailers: Sites like Amazon, eBay, and specialized auto parts websites offer a variety of options.
- Local Auto Parts Stores: NAPA, AutoZone, and Advance Auto Parts are reliable sources for aftermarket parts.
When purchasing parts, ensure they are compatible with your specific Mercedes W210 model year. The cost of a rear window regulator can range from $50 to $200, depending on the brand and quality.
3. Step-by-Step Guide to Replacing the Rear Window Regulator
Follow these detailed steps to safely and effectively replace the rear window regulator in your Mercedes W210.
3.1 Safety Precautions
- Disconnect the Battery: Before starting any electrical work, disconnect the negative terminal of the battery to prevent accidental shorts or airbag deployment.
- Wear Safety Glasses: Protect your eyes from debris when drilling out rivets.
- Use Gloves: Protect your hands from sharp edges and chemicals.
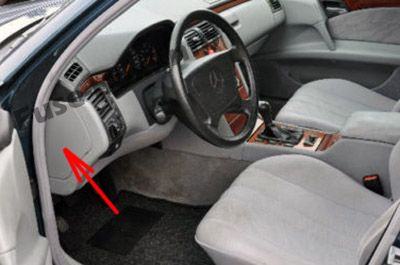
3.2 Removing the Door Panel
-
Remove the Interior Door Handle Trim: Use a small screwdriver or panel removal tool to gently pry off the trim around the interior door handle.
-
Remove the Screws: Locate and remove all screws holding the door panel in place. These are typically found around the door handle, armrest, and along the bottom edge of the panel.
-
Pry Off the Door Panel: Use a panel removal tool to carefully pry the door panel away from the door frame. Start at the bottom and work your way around the edges. Be gentle to avoid breaking the plastic clips.
-
Disconnect Electrical Connectors: Once the door panel is loose, disconnect any electrical connectors attached to the panel, such as those for the window switch, door lock, and speakers.
-
Remove the Door Panel: Lift the door panel up and away from the door frame.
3.3 Accessing the Window Regulator
-
Remove the Vapor Barrier: Carefully peel back the plastic vapor barrier that covers the inside of the door. This barrier protects the interior from moisture.
-
Locate the Window Regulator: The window regulator is located inside the door cavity. It is usually attached to the door frame with rivets or bolts.
-
Disconnect the Window Motor: Disconnect the electrical connector from the window motor.
3.4 Removing the Old Window Regulator
- Support the Window: If the window is not already in the fully raised position, carefully raise it and secure it in place with tape or clamps. This will prevent the window from falling into the door.
- Drill Out the Rivets: Use a drill to carefully drill out the rivets that hold the window regulator in place. Be careful not to damage the door frame or the window glass.
- Remove the Regulator: Once the rivets are removed, carefully remove the old window regulator from the door.
3.5 Installing the New Window Regulator
- Position the New Regulator: Place the new window regulator into the door cavity, aligning it with the mounting holes.
- Attach the Regulator: Secure the new regulator to the door frame using new rivets or bolts. Ensure they are tightly fastened.
- Connect the Window Motor: Reconnect the electrical connector to the window motor.
- Test the Window: Before reassembling the door panel, test the window to ensure it moves smoothly up and down.
- Lubricate Moving Parts: Apply a silicone-based lubricant to the moving parts of the regulator to ensure smooth operation.
3.6 Reassembling the Door Panel
- Reattach the Vapor Barrier: Carefully reattach the plastic vapor barrier to the inside of the door.
- Reconnect Electrical Connectors: Reconnect all electrical connectors to the door panel.
- Align the Door Panel: Align the door panel with the door frame and press it into place, ensuring all the plastic clips are securely fastened.
- Reinstall the Screws: Reinstall all the screws that hold the door panel in place.
- Reinstall the Interior Door Handle Trim: Snap the interior door handle trim back into place.
3.7 Final Steps
- Reconnect the Battery: Reconnect the negative terminal of the battery.
- Test the Window Operation: Test the window to ensure it moves smoothly and correctly.
- Check for Proper Alignment: Ensure the window is properly aligned and seals tightly when closed.
- Clean Up: Clean up any debris or tools from the work area.
4. Troubleshooting Common Issues
Even with careful installation, you may encounter some issues. Here are some common problems and how to troubleshoot them.
4.1 Window Moves Slowly or Erratically
- Cause: Insufficient lubrication or misaligned regulator.
- Solution: Apply silicone-based lubricant to the moving parts of the regulator. Check the alignment of the regulator and adjust as needed.
4.2 Window Does Not Move at All
- Cause: Electrical issue or faulty motor.
- Solution: Check the electrical connections to the motor. Use a multimeter to test the motor. If the motor is faulty, replace it.
4.3 Window Falls into the Door
- Cause: Regulator cable has snapped or the regulator is not properly secured.
- Solution: Replace the window regulator. Ensure the regulator is securely attached to the door frame.
4.4 Unusual Noises
- Cause: Debris in the regulator mechanism or worn components.
- Solution: Clean the regulator mechanism. Replace any worn components.
5. Maintaining Your Mercedes W210 Window Regulators
Proper maintenance can extend the life of your window regulators and prevent premature failure.
5.1 Regular Lubrication
- Frequency: Lubricate the window regulators at least once a year.
- Product: Use a silicone-based lubricant.
- Application: Apply the lubricant to the moving parts of the regulator, including the cable, pulleys, and gears.
5.2 Inspecting for Wear
- Frequency: Inspect the window regulators during regular maintenance checks.
- Look For: Signs of wear, such as frayed cables, cracked plastic parts, and loose connections.
- Action: Replace any worn components before they fail completely.
5.3 Keeping the Window Tracks Clean
- Frequency: Clean the window tracks regularly.
- Method: Use a soft cloth and a mild cleaning solution to remove dirt and debris from the window tracks.
- Benefit: This helps the window move smoothly and reduces stress on the regulator.
5.4 Addressing Issues Promptly
- Action: If you notice any symptoms of a failing window regulator, address the issue promptly.
- Reason: Delaying repairs can lead to more significant damage and higher repair costs.
6. The Advantage of Using CARDIAGTECH.NET Tools
When it comes to repairing your Mercedes W210, using high-quality tools can make all the difference. CARDIAGTECH.NET offers a range of tools specifically designed for automotive repairs, providing several advantages:
6.1 Precision and Accuracy
CARDIAGTECH.NET tools are engineered for precision, ensuring accurate and reliable repairs. This is crucial when working on delicate components like window regulators.
6.2 Durability and Longevity
Constructed from high-quality materials, CARDIAGTECH.NET tools are built to last. This means you won’t have to replace your tools frequently, saving you money in the long run.
6.3 Ease of Use
CARDIAGTECH.NET tools are designed with the user in mind, featuring ergonomic designs and intuitive operation. This makes your repair tasks easier and more efficient.
6.4 Comprehensive Selection
CARDIAGTECH.NET offers a comprehensive selection of tools, ensuring you have everything you need for your Mercedes W210 repairs. From Torx and hex drivers to rivet guns and panel removal tools, they have you covered.
6.5 Statistics on DIY Auto Repair
Recent statistics indicate a growing trend in DIY auto repairs. According to a survey by the Auto Care Association, 70% of vehicle owners perform some type of maintenance or repair on their vehicles themselves. This trend is driven by factors such as cost savings, convenience, and the satisfaction of working on one’s own car. By using high-quality tools from CARDIAGTECH.NET, DIYers can ensure their repairs are done correctly and safely.
7. Cost Savings of DIY Repair
One of the primary reasons many Mercedes W210 owners choose to perform their own repairs is to save money. Let’s break down the potential cost savings of replacing the rear window regulator yourself versus taking it to a professional mechanic.
7.1 Mechanic Costs
- Labor Costs: Mechanics typically charge between $75 and $150 per hour for labor. Replacing a window regulator can take 2-3 hours, resulting in labor costs of $150 to $450.
- Parts Costs: Mechanics often mark up the cost of parts, adding to the overall expense.
- Total Cost: The total cost of having a mechanic replace the rear window regulator can range from $250 to $650 or more.
7.2 DIY Repair Costs
- Parts Costs: As mentioned earlier, a replacement window regulator can cost between $50 and $200.
- Tools Costs: If you already have the necessary tools, there are no additional costs. If you need to purchase tools, a basic set can cost between $50 and $150.
- Total Cost: The total cost of replacing the rear window regulator yourself can range from $100 to $350.
7.3 Potential Savings
By performing the repair yourself, you can save between $150 and $300 or more. This makes DIY repair a cost-effective option for many Mercedes W210 owners.
8. Enhancing Your Auto Repair Skills
Performing DIY repairs on your Mercedes W210 can be a rewarding experience. It not only saves you money but also enhances your auto repair skills. Here are some ways to further develop your skills:
8.1 Online Resources
- YouTube Tutorials: Numerous channels offer step-by-step tutorials on auto repair, including specific videos on Mercedes W210 window regulator replacement.
- Online Forums: Websites like Benzworld and Mercedes-Benz Owners’ Forums provide valuable information and advice from other Mercedes owners.
- DIY Auto Repair Websites: Websites like CARDIAGTECH.NET offer articles, guides, and resources for DIY auto repair.
8.2 Training Courses
- Community Colleges: Many community colleges offer auto repair courses that cover a wide range of topics, from basic maintenance to advanced diagnostics.
- Vocational Schools: Vocational schools provide specialized training in auto repair, preparing you for a career in the automotive industry.
- Online Courses: Online platforms like Udemy and Coursera offer auto repair courses that you can take from the comfort of your own home.
8.3 Practice and Experience
- Start with Simple Repairs: Begin with basic maintenance tasks like oil changes and brake pad replacements before tackling more complex repairs.
- Document Your Work: Keep a record of the repairs you perform, including the tools and parts you use, and any challenges you encounter.
- Learn from Your Mistakes: Everyone makes mistakes, but the key is to learn from them and improve your skills.
9. When to Seek Professional Help
While DIY repair can be cost-effective and rewarding, there are times when it’s best to seek professional help.
9.1 Complex Electrical Issues
If you encounter complex electrical issues, such as problems with the car’s computer system or airbag system, it’s best to consult a professional mechanic.
9.2 Lack of Experience
If you lack experience with auto repair or are uncomfortable performing the repair yourself, it’s best to leave it to the professionals.
9.3 Time Constraints
If you don’t have the time to perform the repair yourself, or if you need the car back on the road quickly, it’s best to take it to a mechanic.
9.4 Specialized Tools
If the repair requires specialized tools that you don’t have access to, it’s best to seek professional help.
10. Staying Safe During Auto Repairs
Safety should always be your top priority when performing auto repairs. Here are some essential safety tips to keep in mind:
10.1 Use Proper Safety Gear
- Safety Glasses: Protect your eyes from debris and chemicals.
- Gloves: Protect your hands from sharp edges and chemicals.
- Work Boots: Protect your feet from falling objects.
10.2 Disconnect the Battery
Always disconnect the negative terminal of the battery before starting any electrical work.
10.3 Use Jack Stands
When working under a vehicle, always use jack stands to support the car. Never rely solely on a jack.
10.4 Work in a Well-Ventilated Area
When working with chemicals, such as solvents and cleaners, work in a well-ventilated area to avoid inhaling harmful fumes.
10.5 Follow Instructions
Always follow the manufacturer’s instructions when using tools and equipment.
10.6 Industry Insights on Auto Repair Safety
According to the National Institute for Occupational Safety and Health (NIOSH), auto repair shops can be hazardous workplaces if proper safety measures are not followed. Common hazards include exposure to chemicals, risk of injury from tools and equipment, and potential for electrical shock. By following safety guidelines and using appropriate safety gear, DIYers can minimize these risks and ensure a safe working environment.
11. The Future of Auto Repair
The automotive industry is constantly evolving, with new technologies and innovations emerging all the time. Here are some trends that are shaping the future of auto repair:
11.1 Electric Vehicles
The rise of electric vehicles (EVs) is transforming the auto repair landscape. EVs require different maintenance and repair procedures than traditional gasoline-powered vehicles. Mechanics need to be trained in EV technology and equipped with specialized tools to work on these vehicles.
11.2 Advanced Driver Assistance Systems (ADAS)
ADAS technologies, such as lane departure warning and automatic emergency braking, are becoming increasingly common in new vehicles. These systems require specialized calibration and repair procedures.
11.3 Telematics and Remote Diagnostics
Telematics systems enable remote diagnostics, allowing mechanics to identify and diagnose problems without physically inspecting the vehicle. This can save time and money for both the mechanic and the vehicle owner.
11.4 3D Printing
3D printing is being used to create custom parts and components for auto repair. This can be particularly useful for repairing older vehicles where parts are no longer readily available.
11.5 Augmented Reality (AR)
AR technology is being used to provide mechanics with real-time information and guidance during repairs. This can help mechanics perform repairs more quickly and accurately.
12. Environmental Considerations in Auto Repair
Auto repair can have a significant impact on the environment. Here are some ways to minimize the environmental impact of your auto repairs:
12.1 Proper Disposal of Waste Materials
Dispose of waste materials, such as used oil, coolant, and batteries, properly. Many auto parts stores offer recycling programs for these materials.
12.2 Use of Environmentally Friendly Products
Use environmentally friendly products, such as biodegradable cleaners and lubricants.
12.3 Minimizing Waste
Minimize waste by reusing parts and materials whenever possible.
12.4 Conserving Resources
Conserve resources, such as water and electricity, when performing auto repairs.
12.5 Industry Initiatives for Environmental Protection
Organizations like the Environmental Protection Agency (EPA) have initiatives aimed at promoting environmental stewardship in the automotive industry. These initiatives encourage auto repair shops to adopt best practices for waste management, pollution prevention, and resource conservation. By following these guidelines, DIYers can contribute to a cleaner and more sustainable environment.
13. How to Choose the Right Replacement Parts
Selecting the right replacement parts is crucial for ensuring the longevity and reliability of your Mercedes W210. Here are some factors to consider when choosing replacement parts:
13.1 OEM vs. Aftermarket Parts
- OEM Parts: Original Equipment Manufacturer (OEM) parts are made by the same manufacturer that made the original parts for your vehicle. OEM parts are typically more expensive but offer the best fit and quality.
- Aftermarket Parts: Aftermarket parts are made by third-party manufacturers. Aftermarket parts are typically less expensive but can vary in quality.
13.2 Quality and Reliability
Choose parts from reputable manufacturers known for their quality and reliability. Read reviews and compare specifications to make an informed decision.
13.3 Compatibility
Ensure the parts you choose are compatible with your specific Mercedes W210 model year and trim level.
13.4 Warranty
Look for parts that come with a warranty. A warranty provides peace of mind and protects you against defects.
13.5 Industry Standards for Part Quality
Organizations like the Automotive Parts Remanufacturers Association (APRA) set standards for the quality and performance of auto parts. Look for parts that meet or exceed these standards to ensure they are reliable and durable.
14. Legal Aspects of DIY Auto Repair
While DIY auto repair can be a rewarding hobby, it’s important to be aware of the legal aspects involved. Here are some things to keep in mind:
14.1 Local Regulations
Check your local regulations regarding auto repair. Some municipalities may have restrictions on where and when you can perform repairs.
14.2 Environmental Regulations
Be aware of environmental regulations regarding the disposal of waste materials. Improper disposal of hazardous materials can result in fines and penalties.
14.3 Liability
If you perform repairs on a vehicle that you don’t own, you may be liable for any damages or injuries that result from your work.
14.4 Insurance
Check your insurance policy to see if it covers DIY auto repairs. Some policies may not cover damages or injuries that occur while performing repairs.
14.5 Consumer Protection Laws for Auto Repairs
Consumer protection laws vary by state and municipality, but they generally require auto repair shops to provide accurate estimates, obtain authorization for repairs, and perform work in a competent manner. While these laws primarily apply to professional repair shops, DIYers can still benefit from understanding their rights and responsibilities as consumers.
15. Diagnosing Window Regulator Problems
Before you start replacing parts, it’s essential to accurately diagnose the problem. Here are some steps to help you diagnose window regulator issues:
15.1 Listen for Unusual Noises
Pay attention to any unusual noises when operating the window switch. Grinding, crunching, or clicking sounds can indicate a problem with the regulator.
15.2 Check the Window Movement
Observe the window’s movement. If it moves slowly, erratically, or not at all, there may be an issue with the regulator or motor.
15.3 Inspect the Wiring
Check the wiring and connectors for any signs of damage or corrosion. Use a multimeter to test the electrical connections.
15.4 Test the Motor
Use a multimeter to test the window motor. If the motor is not receiving power, there may be a problem with the switch or wiring.
15.5 Consult a Wiring Diagram
Refer to a wiring diagram for your Mercedes W210 to help you trace the electrical circuits and identify any potential problems.
15.6 Using Diagnostic Tools for Accurate Assessment
Advanced diagnostic tools, such as OBD-II scanners, can provide valuable information about the performance of various vehicle systems, including the window regulator. These tools can help you identify fault codes, monitor sensor data, and perform diagnostic tests to pinpoint the source of the problem.
16. Tips for Working with Rivets
Many auto repairs, including window regulator replacement, involve working with rivets. Here are some tips for working with rivets safely and effectively:
16.1 Use the Right Rivet Gun
Use a rivet gun that is appropriate for the size and type of rivets you are using.
16.2 Drill Out Rivets Carefully
When drilling out rivets, use a drill bit that is slightly larger than the diameter of the rivet. Drill slowly and carefully to avoid damaging the surrounding material.
16.3 Wear Safety Glasses
Wear safety glasses to protect your eyes from flying debris when drilling or setting rivets.
16.4 Use the Correct Rivet Size
Use rivets that are the correct size and length for the application.
16.5 Set Rivets Properly
When setting rivets, ensure they are properly seated and crimped. Use a rivet set to help you achieve a professional finish.
16.6 Innovations in Riveting Technology
Modern riveting tools offer features like adjustable pressure settings, ergonomic designs, and quick-change rivet heads. These innovations make riveting easier, faster, and more precise, improving the overall quality of your auto repairs.
17. Understanding Window Motor Functionality
The window motor is a critical component of the window regulator system. Understanding how it works can help you diagnose and repair window regulator problems.
17.1 How Window Motors Work
Window motors are typically small electric motors that drive the window regulator mechanism. When you activate the window switch, the motor turns, causing the regulator to raise or lower the window.
17.2 Common Window Motor Problems
Common window motor problems include:
- Motor Failure: The motor stops working completely.
- Slow Operation: The motor operates slowly or sluggishly.
- Intermittent Operation: The motor works sometimes but not others.
- Noise: The motor makes unusual noises, such as grinding or clicking.
17.3 Testing Window Motors
Use a multimeter to test the window motor. Check for power and ground at the motor connector. If the motor is receiving power but not working, it may need to be replaced.
17.4 Replacing Window Motors
Replacing a window motor typically involves removing the door panel, disconnecting the motor from the regulator, and installing the new motor.
17.5 Advancements in Window Motor Design
Modern window motors incorporate features like built-in thermal protection, overload protection, and improved gear designs. These advancements enhance the reliability and durability of window motors, reducing the need for frequent replacements.
18. Exploring Power Window Systems
Power windows are a convenience feature that has become standard in most vehicles. Understanding how power window systems work can help you troubleshoot and repair window regulator problems.
18.1 Components of a Power Window System
The main components of a power window system include:
- Window Switch: The switch that controls the operation of the window.
- Window Motor: The electric motor that drives the window regulator.
- Window Regulator: The mechanism that raises and lowers the window.
- Wiring: The electrical wiring that connects the components.
- Control Module: Some vehicles have a control module that manages the power window system.
18.2 How Power Window Systems Work
When you activate the window switch, it sends a signal to the window motor, causing it to turn. The motor drives the window regulator, which raises or lowers the window.
18.3 Common Power Window Problems
Common power window problems include:
- Window Not Working: The window does not respond when the switch is activated.
- Window Working Intermittently: The window works sometimes but not others.
- Window Moving Slowly: The window moves slowly or sluggishly.
- Window Falling into the Door: The window drops down into the door cavity.
18.4 Troubleshooting Power Window Systems
Troubleshooting power window systems involves checking the window switch, motor, regulator, wiring, and control module. Use a multimeter to test the electrical connections.
18.5 Integration of Power Window Systems with Vehicle Electronics
Modern vehicles often integrate power window systems with other electronic systems, such as central locking, remote keyless entry, and anti-theft systems. This integration allows for advanced features like one-touch operation, automatic window closing, and remote window control.
19. Auto Glass Repair Basics
While replacing the window regulator, you might also need to address issues with the auto glass itself. Here are some basics of auto glass repair:
19.1 Types of Auto Glass
The main types of auto glass include:
- Windshield: Laminated glass that is designed to withstand impacts.
- Side Windows: Tempered glass that shatters into small, blunt pieces when broken.
- Rear Window: Tempered glass that is similar to side windows.
19.2 Common Auto Glass Problems
Common auto glass problems include:
- Cracks: Cracks in the windshield or windows.
- Chips: Small chips in the windshield or windows.
- Breaks: Shattered or broken glass.
19.3 Repairing Auto Glass
Small chips and cracks in the windshield can often be repaired using a repair kit. Larger cracks and breaks typically require replacing the glass.
19.4 Replacing Auto Glass
Replacing auto glass involves removing the old glass, cleaning the frame, and installing the new glass. This is a job best left to professionals.
19.5 Innovations in Auto Glass Technology
Modern auto glass incorporates features like built-in UV protection, acoustic dampening, and embedded antennas. These innovations enhance the safety, comfort, and functionality of vehicles.
20. Conclusion: Empowering Your Mercedes W210 Repairs
Replacing the rear window regulator in your Mercedes W210 can seem daunting, but with the right knowledge, tools, and a step-by-step guide, it’s a manageable DIY project. You can save money, enhance your auto repair skills, and ensure your Mercedes W210 continues to provide reliable service by understanding the components, following safety precautions, and troubleshooting common issues.
Remember, CARDIAGTECH.NET is your reliable partner for high-quality tools and parts. Whether you need a Torx driver, a rivet gun, or a replacement window regulator, CARDIAGTECH.NET has you covered. Take the time to maintain your window regulators, address issues promptly, and choose the right replacement parts. With these tips, you’ll be well-equipped to keep your Mercedes W210 running smoothly for years to come.
Ready to get started on your Mercedes W210 rear window regulator replacement? Don’t let a faulty window regulator keep you from enjoying your drive. Contact CARDIAGTECH.NET today for expert advice and top-quality tools. Our team is ready to assist you with all your automotive repair needs. Reach out to us at 276 Reock St, City of Orange, NJ 07050, United States, or call us on WhatsApp at +1 (641) 206-8880. Visit our website at CARDIAGTECH.NET for more information. Let us help you get your windows rolling smoothly again!
- What is a window regulator?
A window regulator is a mechanical device that raises and lowers the windows in a vehicle. It usually consists of a motor, gears, and a cable or scissor mechanism. - How do I know if my window regulator is bad?
Common symptoms include slow or jerky window movement, grinding noises, the window falling into the door, or the window not moving at all. - Can I replace a window regulator myself?
Yes, with the right tools, parts, and guidance, you can replace a window regulator yourself. This article provides a step-by-step guide. - What tools do I need to replace a window regulator?
Essential tools include Torx and hex drivers, screwdrivers, a rivet gun, a drill, panel removal tools, a socket set, and pliers. - Where can I buy a replacement window regulator?
You can purchase replacement window regulators from CARDIAGTECH.NET, Mercedes-Benz dealerships, online retailers like Amazon and eBay, or local auto parts stores. - How much does it cost to replace a window regulator?
The cost of a replacement window regulator ranges from $50 to $200, depending on the brand and quality. Professional installation can add $150 to $450 in labor costs. - How do I maintain my window regulators?
Regularly lubricate the moving parts with a silicone-based lubricant, inspect for wear, keep the window tracks clean, and address any issues promptly. - What safety precautions should I take when replacing a window regulator?
Disconnect the battery, wear safety glasses and gloves, and use jack stands when working under a vehicle. - What do I do if the new window regulator doesn’t work?
Check the electrical connections, test the motor with a multimeter, and ensure the regulator is properly aligned and secured. - When should I seek professional help for window regulator replacement?
Seek professional help for complex electrical issues, lack of experience, time constraints, or if specialized tools are required.