Mercedes Sprinter Van Conversion Windows: Ultimate Guide & Pricing
Mercedes Sprinter Van Conversion Windows are essential for transforming your cargo van into a comfortable and functional living space or mobile workshop. CARDIAGTECH.NET offers the best aftermarket windows to improve your Sprinter van conversion, with superior quality and great value. Explore our range of options, including camper-style windows, custom window solutions, and reliable installation services.
Contents
- 1. Understanding Mercedes Sprinter Van Conversion Windows
- 1.1. Why Install Conversion Windows?
- 1.2. Types of Sprinter Van Conversion Windows
- 1.3 Key Factors to Consider When Choosing Windows
- 2. Exploring Window Options for Sprinter Van Conversions
- 2.1. Aftermarket Camper-Style Windows
- 2.2. Custom Window Solutions
- 2.3. Window Materials and Construction
- 2.4. Tinting Options
- 2.5. Pricing Considerations
- 3. Installation Guide for Sprinter Van Conversion Windows
- 3.1. DIY vs. Professional Installation
- 3.2. Step-by-Step Installation Process
- 3.3. Essential Tools and Materials
- 3.4. Tips for a Successful Installation
- 4. Maintaining and Caring for Your Conversion Windows
- 4.1. Regular Cleaning
- 4.2. Inspecting for Damage
- 4.3. Preventing Leaks
- 4.4. Winterizing Your Windows
- 5. Mercedes Sprinter Van Window Options from CARDIAGTECH.NET
- 5.1. Why Choose CARDIAGTECH.NET for Your Van Windows?
- 5.2. Featured Window Products
- 5.3. How to Order
- 6. Frequently Asked Questions (FAQ)
1. Understanding Mercedes Sprinter Van Conversion Windows
Mercedes Sprinter van conversion windows enhance your vehicle’s aesthetics, functionality, and comfort. Selecting the right windows involves considering various factors such as window types, sizes, materials, and installation methods. This comprehensive guide ensures you make informed decisions to improve your van conversion project.
1.1. Why Install Conversion Windows?
Adding windows to your Sprinter van offers numerous advantages, making your conversion more enjoyable and practical.
- Natural Light: Windows bring in natural light, reducing the need for artificial lighting during the day and creating a brighter, more welcoming interior.
- Ventilation: Opening windows provides fresh air circulation, which helps regulate temperature and reduce condensation, essential for comfortable living.
- Views: Windows offer panoramic views of your surroundings, connecting you with nature and enhancing your travel experience.
- Safety: Windows improve visibility, making driving safer by reducing blind spots and providing a clearer view of your surroundings.
- Aesthetics: Adding stylish windows enhances your van’s exterior, giving it a customized, professional look.
1.2. Types of Sprinter Van Conversion Windows
Choosing the right type of window depends on your needs and the layout of your van. Here are the most common types:
- Awning Windows: Hinged at the top and swing outward, providing ventilation even during light rain.
- Sliding Windows: Feature two or more panels that slide horizontally, offering adjustable ventilation.
- Fixed Windows: Non-opening windows provide natural light and views without ventilation.
- T-Slider Windows: Built in a T-slide configuration, with the top half fixed and the bottom half sliding horizontally, contouring to the van’s sidewall curvature.
- Bunk Windows: Smaller windows often placed in sleeping areas for light and ventilation.
1.3 Key Factors to Consider When Choosing Windows
Several factors should guide your choice of windows for your Mercedes Sprinter van conversion:
- Size and Placement: Consider the dimensions of the window and where it will be installed on the van. Ensure it fits the available space and complements the van’s design.
- Material: Opt for high-quality materials like tempered glass and powder-coated aluminum frames for durability and longevity.
- Tinting: Choose the right level of tint to reduce glare and UV exposure while maintaining privacy. Dark grey tint is standard, but clear options are available.
- Ventilation: Ensure the window type offers adequate ventilation to maintain comfortable air circulation inside the van.
- Insulation: Look for windows with good insulation properties to help regulate temperature and reduce energy costs.
- Installation: Determine whether you’ll install the windows yourself or hire a professional. Ensure you have the necessary tools and expertise for a successful installation.
2. Exploring Window Options for Sprinter Van Conversions
Selecting the right windows for your Mercedes Sprinter van conversion involves considering various factors such as window type, material, and features. Here’s an in-depth look at available options:
2.1. Aftermarket Camper-Style Windows
Aftermarket camper-style windows are designed specifically for van conversions, offering a perfect fit and seamless integration with your Sprinter van. These windows typically require a new cutout in a blank panel for installation and are not intended to replace factory glass.
Key Features:
- High-Quality Materials: Made with automotive-grade powder-coated aluminum extrusions for durability and a sleek look.
- Tempered Safety Glass: Equipped with 1/4″ solid tempered safety glass, available in dark grey tint (standard) or clear (upon request).
- T-Slide Configuration: Side sliding door windows and forward driver’s side windows feature a T-slide design, with the top half fixed and the bottom half sliding horizontally.
- Standard Amenities: Include sliding screens, interior clamp-rings, and black color-keyed stainless steel screws for easy installation.
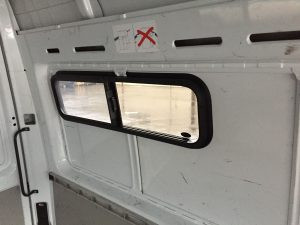
Sprinter Van Interior
2.2. Custom Window Solutions
For unique requirements, custom window solutions provide flexibility in terms of size, shape, and features. These windows are designed to meet specific needs and preferences, enhancing the overall functionality and aesthetics of your van conversion.
Benefits of Custom Windows:
- Tailored Fit: Custom windows are made to exact specifications, ensuring a perfect fit and seamless integration with your van’s design.
- Unique Designs: You can choose from various shapes, sizes, and styles to create a personalized look that reflects your individual taste.
- Special Features: Custom windows can be equipped with specialized features such as integrated blinds, bug screens, and enhanced insulation.
- Optimized Functionality: Designed to maximize natural light, ventilation, and views, custom windows improve your van’s overall comfort and livability.
2.3. Window Materials and Construction
The materials used in the construction of your van conversion windows play a significant role in their durability, performance, and appearance. Here’s a detailed look at the common materials and construction methods:
| Material | Description | Advantages | Disadvantages |
|---|---|---|---|
| Tempered Glass | A type of safety glass that is heat-treated to increase its strength and shatter resistance. | Strong and durable, shatter-resistant, provides excellent clarity and visibility. | More expensive than standard glass, cannot be cut or modified after tempering. |
| Aluminum Frames | Lightweight and corrosion-resistant, aluminum frames are commonly used in van conversion windows. They are powder-coated for added durability and a sleek finish. | Lightweight, strong, corrosion-resistant, available in various colors and finishes. | Can be more expensive than other frame materials, may require specialized tools for installation. |
| Sliding Screens | Sliding screens are essential for van conversion windows, providing ventilation while keeping insects out. They are typically made of durable mesh and aluminum frames. | Allows fresh air circulation, keeps bugs out, easy to install and remove for cleaning. | May reduce visibility slightly, can be damaged by sharp objects or excessive force. |
| Clamp Rings | Interior clamp rings are used to secure the window to the van’s frame, ensuring a tight and weather-resistant seal. | Provides a secure and weather-resistant seal, easy to install and adjust. | May require additional insulation to prevent drafts, can be visible from inside the van. |
| Stainless Steel Hardware | Stainless steel screws and hardware are used for their corrosion resistance and durability. | Corrosion-resistant, durable, provides a secure and long-lasting connection. | Can be more expensive than other hardware options, may require specialized tools for installation. |
2.4. Tinting Options
Tinting your Sprinter van conversion windows provides numerous benefits, including reduced glare, UV protection, and increased privacy. Here are the common tinting options:
- Dark Grey Tint: Standard tint option that reduces glare and provides privacy while allowing ample natural light.
- Clear Glass: Available upon request, clear glass offers maximum visibility and natural light, ideal for those who prefer unobstructed views.
- Custom Tint Levels: Depending on your specific needs, you can choose from a range of custom tint levels to achieve the desired balance of privacy and light control.
2.5. Pricing Considerations
The cost of Sprinter van conversion windows varies depending on the type, size, material, and features. Here’s a general overview of pricing considerations:
- Aftermarket Camper-Style Windows: Prices range from $300 to $600 per window, depending on size and features.
- Custom Window Solutions: Custom windows can cost significantly more, depending on the complexity of the design and the materials used.
- Installation Costs: Professional installation can add $100 to $300 per window, depending on the installer’s rates and the complexity of the job.
Note: Prices mentioned above are approximate and may vary based on the supplier and specific requirements.
3. Installation Guide for Sprinter Van Conversion Windows
Installing windows in your Mercedes Sprinter van requires careful planning, the right tools, and a systematic approach. Whether you choose to do it yourself or hire a professional, understanding the installation process is essential for a successful conversion.
3.1. DIY vs. Professional Installation
Deciding between DIY and professional installation depends on your skills, experience, and comfort level.
DIY Installation:
- Pros: Cost savings, flexibility, and control over the installation process.
- Cons: Requires time, effort, and specialized tools, potential for errors if not done correctly.
Professional Installation:
- Pros: Ensures proper installation, reduces the risk of errors, and saves time and effort.
- Cons: Higher cost, less control over the process, and potential scheduling delays.
3.2. Step-by-Step Installation Process
Here is a step-by-step guide to installing windows in your Sprinter van:
-
Preparation:
- Gather all necessary tools and materials, including safety glasses, gloves, measuring tape, marker, drill, jigsaw, sealant, and window installation kit.
- Clean the installation area and mark the cutout according to the window’s dimensions.
-
Cutting the Opening:
- Drill pilot holes at the corners of the marked cutout.
- Use a jigsaw to carefully cut along the marked lines, ensuring a smooth and even cut.
-
Preparing the Edges:
- Deburr the edges of the cutout with a file or sandpaper to prevent sharp edges.
- Apply rust-resistant primer to the exposed metal to prevent corrosion.
-
Applying Sealant:
- Apply a generous bead of sealant around the perimeter of the cutout.
- Ensure the sealant is compatible with the window frame and van’s surface.
-
Installing the Window:
- Carefully position the window in the cutout, aligning it with the edges.
- Press the window firmly against the sealant to create a watertight seal.
-
Securing the Window:
- Use the provided screws or clamps to secure the window to the van’s frame.
- Tighten the screws evenly to avoid distorting the window frame.
-
Finishing Touches:
- Remove any excess sealant with a plastic scraper or solvent.
- Inspect the window for leaks and apply additional sealant if necessary.
3.3. Essential Tools and Materials
Having the right tools and materials is crucial for a successful window installation:
- Safety Glasses and Gloves: Protect your eyes and hands from debris and sharp edges.
- Measuring Tape and Marker: Accurately measure and mark the cutout dimensions.
- Drill and Jigsaw: Cut the opening in the van’s panel.
- Sealant and Applicator: Create a watertight seal between the window and the van.
- Screws or Clamps: Secure the window to the van’s frame.
- Deburring Tool: Smooth the edges of the cutout.
- Rust-Resistant Primer: Protect exposed metal from corrosion.
3.4. Tips for a Successful Installation
- Accurate Measurements: Double-check all measurements before cutting to ensure a proper fit.
- Smooth Cuts: Use a sharp blade and steady hand to make clean and even cuts.
- Proper Sealing: Apply sealant generously and evenly to create a watertight seal.
- Even Tightening: Tighten screws evenly to avoid distorting the window frame.
- Patience: Take your time and avoid rushing the installation process.
4. Maintaining and Caring for Your Conversion Windows
Proper maintenance and care are essential for prolonging the life of your Sprinter van conversion windows and ensuring they continue to perform optimally.
4.1. Regular Cleaning
Regular cleaning helps keep your windows looking their best and prevents the buildup of dirt and grime.
- Exterior Cleaning: Wash the exterior of the windows with a mild soap and water solution. Use a soft cloth or sponge to avoid scratching the glass.
- Interior Cleaning: Clean the interior of the windows with a glass cleaner and a microfiber cloth. Avoid using abrasive cleaners that can damage the tint or finish.
- Screen Cleaning: Remove and clean the sliding screens regularly to remove dust and debris. Use a soft brush or vacuum cleaner to gently clean the mesh.
4.2. Inspecting for Damage
Regularly inspect your windows for signs of damage, such as cracks, chips, or leaks. Addressing these issues promptly can prevent further damage and costly repairs.
- Glass Inspection: Check the glass for cracks, chips, or scratches. Replace damaged glass as soon as possible to prevent further damage and ensure safety.
- Seal Inspection: Inspect the seals around the windows for signs of wear or damage. Replace worn or damaged seals to prevent leaks.
- Frame Inspection: Check the window frames for corrosion, cracks, or other damage. Repair or replace damaged frames to maintain the window’s structural integrity.
4.3. Preventing Leaks
Preventing leaks is crucial for maintaining a dry and comfortable interior in your Sprinter van.
- Proper Installation: Ensure windows are installed correctly with a watertight seal.
- Regular Inspections: Check seals and frames regularly for signs of wear or damage.
- Re-Sealing: Re-seal windows as needed to maintain a watertight seal.
4.4. Winterizing Your Windows
Winterizing your windows can help protect them from the harsh effects of cold weather and prevent damage.
- Insulation: Add insulation around the windows to help regulate temperature and prevent condensation.
- Covering: Cover windows with insulated covers to protect them from snow and ice.
- Sealing: Ensure seals are in good condition to prevent drafts and leaks.
5. Mercedes Sprinter Van Window Options from CARDIAGTECH.NET
CARDIAGTECH.NET offers a range of high-quality Mercedes Sprinter van conversion windows designed to meet diverse needs and preferences. Our windows are crafted using premium materials and advanced manufacturing techniques to ensure durability, performance, and aesthetic appeal.
5.1. Why Choose CARDIAGTECH.NET for Your Van Windows?
Choosing CARDIAGTECH.NET for your van windows ensures you receive top-quality products and exceptional customer service. Here are several reasons to choose us:
- Premium Quality: Our windows are made with high-quality materials, including tempered glass and powder-coated aluminum frames, ensuring durability and longevity.
- Wide Selection: We offer a wide range of window options, including aftermarket camper-style windows and custom solutions, to meet diverse needs and preferences.
- Expert Advice: Our team of experts can provide guidance and support to help you choose the right windows for your Sprinter van conversion project.
- Competitive Pricing: We offer competitive pricing on all our windows, providing excellent value for your investment.
- Customer Satisfaction: We are committed to ensuring customer satisfaction and providing exceptional service from start to finish.
5.2. Featured Window Products
Explore some of our featured window products designed for Mercedes Sprinter van conversions:
| Product | Description | Features | Price |
|---|---|---|---|
| Sprinter-SS (Side Slider) | Designed for all Sprinter models, this window fits either the driver or passenger side. | Interior Frame-Fit Dimensions: 35-3/4″ x 9-3/4″, Exterior Flange Dimensions: 37-1/4″ x 11-1/4″, includes sliding removable screen. | $315.00 ea. |
| 144-1 (144″ Wheel Base Side Door) | Specifically designed for the passenger side of Sprinter vans with a 144″ wheelbase, featuring a T-Slider configuration. | Interior Frame-Fit Dimensions: 42″ x 23-1/2″, Exterior Flange Dimensions: 43-1/2″ x 25″, T-Slider design for adjustable ventilation. | $548.00 ea. |
| 144-2 (144″ Wheel Base Front Quarter) | Designed for the driver’s side of Sprinter vans with a 144″ wheelbase, this T-Slider window provides ventilation and natural light. | Interior Frame-Fit Dimensions: 42″ x 23-1/2″, Exterior Flange Dimensions: 43-1/2″ x 25″, T-Slider design for adjustable ventilation. | $548.00 ea. |
| 144-3 (144″ Rear Quarter Panel) | This T-Slider window fits either the driver or passenger side of Sprinter vans with a 144″ wheelbase, ideal for rear quarter panel placement. | Interior Frame-Fit Dimensions: 51-3/16″ x 23-1/2″, Exterior Flange Dimensions: 52-11/16″ x 25″, T-Slider design for adjustable ventilation. | $532.00 ea. |
| 170-1 (170″ Wheel Base Side Door) | Designed for the passenger side of Sprinter vans with a 170″ wheelbase, this T-Slider window fits the side door. | Interior Frame-Fit Dimensions: 42″ x 23-1/2″, Exterior Flange Dimensions: 43-1/2″ x 25″, T-Slider design for adjustable ventilation. | $548.00 ea. |
| 170-2 (170″ Front Quarter Panel) | This T-Slider window is designed for the driver’s side of Sprinter vans with a 170″ wheelbase, providing ventilation and light. | Interior Frame-Fit Dimensions: 42″ x 23-1/2″, Exterior Flange Dimensions: 43-1/2″ x 25″, T-Slider design for adjustable ventilation. | $548.00 ea. |
| 170-3 (170″ Middle/Rear Quarter Panel) | Designed for either the driver or passenger side of Sprinter vans with a 170″ wheelbase, this T-Slider window fits middle or rear panels. | Interior Frame-Fit Dimensions: 36-7/8″ x 23-3/8″, Exterior Flange Dimensions: 38-3/8″ x 24-7/8″, T-Slider design for adjustable ventilation. | $464.00 ea. |
Note: Prices and dimensions are approximate and may vary. Contact CARDIAGTECH.NET for the most accurate and up-to-date information.
5.3. How to Order
Ordering your Mercedes Sprinter van conversion windows from CARDIAGTECH.NET is easy and convenient. Follow these steps:
- Browse Our Products: Visit our website at CARDIAGTECH.NET to explore our wide selection of window options.
- Select Your Windows: Choose the windows that best meet your needs and add them to your cart.
- Place Your Order: Follow the checkout process to provide your shipping and payment information.
- Receive Your Windows: Your windows will be shipped to your specified address, ready for installation.
6. Frequently Asked Questions (FAQ)
Here are some frequently asked questions about Mercedes Sprinter van conversion windows:
1. What are the benefits of installing conversion windows in my Sprinter van?
- Conversion windows provide natural light, ventilation, views, and enhance the overall aesthetics of your van.
2. What types of windows are available for Sprinter van conversions?
- Available types include awning windows, sliding windows, fixed windows, and T-slider windows.
3. Can I install conversion windows myself, or should I hire a professional?
- DIY installation is possible with the right tools and experience, but professional installation ensures proper fitting and reduces the risk of errors.
4. What materials are used for Sprinter van conversion windows?
- Common materials include tempered glass, aluminum frames, and stainless steel hardware.
5. How do I maintain and care for my conversion windows?
- Regular cleaning, inspecting for damage, preventing leaks, and winterizing your windows are essential for maintenance.
6. What is the cost of Sprinter van conversion windows?
- Prices vary depending on the type, size, and material, ranging from $300 to $600 per window.
7. Where can I purchase high-quality Sprinter van conversion windows?
- You can purchase high-quality windows from CARDIAGTECH.NET, offering a wide selection and expert advice.
8. What is the standard tint for Sprinter van conversion windows?
- The standard tint is dark grey, providing privacy and reducing glare. Clear glass is also available upon request.
9. How do I choose the right size and placement for my conversion windows?
- Consider the dimensions of the window and the available space on your van, ensuring it complements the van’s design and functionality.
10. Do conversion windows come with a warranty?
- Yes, most conversion windows come with a warranty. Check with the manufacturer or supplier for specific details.
Ready to transform your Mercedes Sprinter van with high-quality conversion windows? Contact CARDIAGTECH.NET today for expert assistance and personalized solutions.
- Address: 276 Reock St, City of Orange, NJ 07050, United States
- WhatsApp: +1 (641) 206-8880
- Website: CARDIAGTECH.NET
Our team of experts is ready to help you select the perfect windows for your Sprinter van conversion, ensuring a seamless and enjoyable experience. Whether you need assistance with choosing the right products, understanding the installation process, or any other questions, we are here to support you.
Don’t wait! Contact CARDIAGTECH.NET today and take the first step towards improving your Mercedes Sprinter van conversion.
Let CARDIAGTECH.NET help you create the ultimate mobile living space with our premium Mercedes Sprinter van conversion windows. Contact us now and discover the difference quality and expertise can make!