Is your W220 Mercedes rear window sunshade stuck, broken, or simply not working? At CARDIAGTECH.NET, we provide expert guidance on How To Fix Rear Window Sunshade On W220 Mercedes and ensure smooth operation. Discover expert tips, step-by-step instructions, and reliable solutions to restore your sunshade, plus information on where to find high-quality repair tools and components to get your Mercedes back in perfect condition.
Contents
- 1. Understanding the Rear Window Sunshade System
- 1.1 Components of the Sunshade System
- 1.2 Operational Overview
- 1.3 Common Problems with the Sunshade
- 2. Preliminary Checks and Diagnostic Steps
- 2.1 Visual Inspection
- 2.2 Electrical Checks
- 2.3 Switch Testing
- 3. Step-by-Step Guide to Diagnosing the Issue
- 3.1 Accessing the Sunshade Motor
- 3.2 Inspecting the Motor and Drive Mechanism
- 3.3 Testing the Motor
- 3.4 Checking the Control Module
- 4. Step-by-Step Repair Guide
- 4.1 Replacing a Faulty Motor
- 4.2 Repairing or Replacing the Drive Mechanism
- 4.3 Fixing Electrical Issues
- 4.4 Addressing Sunshade Jamming
- 5. Tools and Materials Needed
- 5.1 Essential Tools
- 5.2 Necessary Materials
- 6. Tips for Maintaining Your Rear Window Sunshade
- 6.1 Regular Cleaning
- 6.2 Lubrication
- 6.3 Proper Usage
- 7. When to Seek Professional Help
- 7.1 Complex Electrical Issues
- 7.2 Internal Control Module Problems
- 7.3 Extensive Damage
- 8. The Importance of Genuine Mercedes-Benz Parts
- 8.1 Superior Quality
- 8.2 Perfect Fit
- 8.3 Warranty Protection
- 8.4 Maintaining Vehicle Value
- 8.5 Where to Find Genuine Parts
- 9. Addressing Specific W220 Model Variations
- 9.1 S-Class (S430, S500, S600)
- 9.2 Long Wheelbase (LWB) Models
- 9.3 Model Year Differences
- 10. Advanced Diagnostic Techniques
- 10.1 Using a Diagnostic Scanner
- 10.2 Checking CAN Bus Communication
- 10.3 Oscilloscope Analysis
- 11. Cost Analysis of Repairing vs. Replacing the Sunshade
- 11.1 Repair Costs
- 11.2 Replacement Costs
- 11.3 Factors to Consider
- 12. Ensuring Safety During the Repair Process
- 12.1 Disconnecting the Battery
- 12.2 Using Proper Tools
- 12.3 Wearing Safety Gear
- 12.4 Working in a Well-Ventilated Area
- 12.5 Following Instructions
- 13. Troubleshooting Common Issues
- 13.1 Sunshade Not Moving
- 13.2 Sunshade Moving Slowly
- 13.3 Sunshade Making Noise
- 14. Community Insights and Forums
- 14.1 Online Forums
- 14.2 Social Media Groups
- 14.3 Local Car Clubs
- 15. Case Studies: Real-World Repair Examples
- 15.1 Case Study 1: Motor Replacement
- 15.2 Case Study 2: Drive Mechanism Repair
- 15.3 Case Study 3: Electrical Wiring Issue
- 16. The Future of Automotive Sunshade Technology
- 16.1 Smart Sunshades
- 16.2 Advanced Materials
- 16.3 Customization Options
- 17. Sunshade Alternatives and Upgrades
- 17.1 Aftermarket Sunshades
- 17.2 Window Tinting
- 17.3 Reflective Shades
- 18. Common Mistakes to Avoid During Repair
- 18.1 Using Incorrect Parts
- 18.2 Neglecting Safety Precautions
- 18.3 Overlooking Electrical Issues
- 18.4 Forgetting Lubrication
- 19. Resources for W220 Mercedes-Benz Owners
- 19.1 Online Forums
- 19.2 Repair Manuals
- 19.3 Parts Suppliers
- 20. Conclusion: Restoring Your W220 Sunshade
- Q1: Why is my rear window sunshade not working on my W220 Mercedes?
- Q2: How do I check the fuse for the rear window sunshade?
- Q3: Can I replace the sunshade motor myself?
- Q4: What tools do I need to repair the rear window sunshade?
- Q5: How do I lubricate the sunshade tracks?
- Q6: What if the sunshade is jammed?
- Q7: How do I test the sunshade motor?
- Q8: Is it better to repair or replace the sunshade?
- Q9: What are the signs of a faulty control module?
- Q10: Where can I find genuine Mercedes-Benz parts for the sunshade repair?
1. Understanding the Rear Window Sunshade System
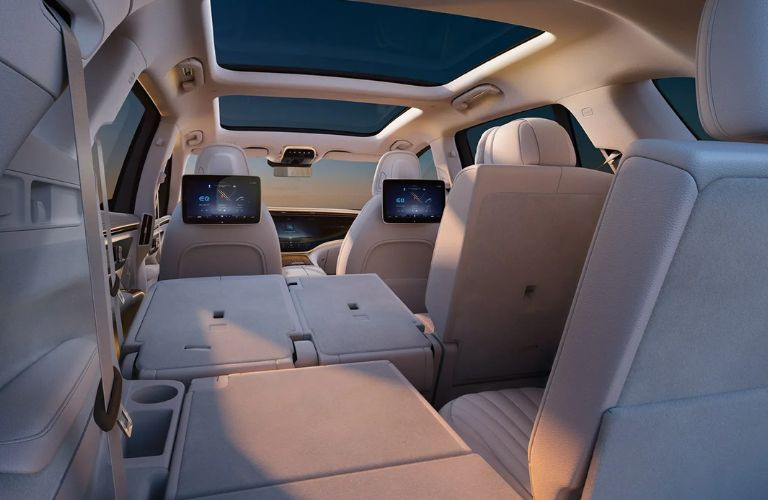
The rear window sunshade on a W220 Mercedes is more than just a convenience; it’s an integral part of the vehicle’s comfort and privacy system. Understanding how it works can help you diagnose and fix issues effectively. This section delves into the components, operation, and typical problems associated with the sunshade system.
1.1 Components of the Sunshade System
The rear window sunshade system in a W220 Mercedes consists of several key components that work together to raise and lower the sunshade smoothly. Here’s a breakdown:
- Sunshade Screen: The retractable mesh screen that blocks sunlight.
- Motor: An electric motor that powers the movement of the sunshade.
- Drive Mechanism: Gears and linkages that translate the motor’s rotation into the sunshade’s vertical movement.
- Control Switch: Usually located on the center console or rear seat controls, this switch allows the driver or passengers to operate the sunshade.
- Wiring Harness: Electrical wiring that connects the motor, switch, and control module.
- Control Module: A small electronic unit that manages the sunshade’s operation, often integrated with other vehicle systems.
1.2 Operational Overview
When you activate the sunshade via the control switch, the following sequence occurs:
- Signal Initiation: The control switch sends a signal to the control module.
- Module Activation: The control module activates the motor.
- Motor Engagement: The motor turns the drive mechanism.
- Sunshade Movement: The drive mechanism raises or lowers the sunshade screen.
- Position Sensing: Sensors within the system detect the sunshade’s position and stop the motor when it reaches the desired height.
1.3 Common Problems with the Sunshade
Several common issues can affect the rear window sunshade in a W220 Mercedes:
- Motor Failure: The motor may fail due to wear and tear, electrical issues, or overheating.
- Broken Drive Mechanism: Gears or linkages can break or become dislodged, preventing the sunshade from moving.
- Electrical Problems: Faulty wiring, blown fuses, or a malfunctioning control module can disrupt the system’s operation.
- Sunshade Jamming: The sunshade screen may become jammed or misaligned, hindering its movement.
- Switch Malfunction: A defective control switch can prevent the sunshade from responding to commands.
2. Preliminary Checks and Diagnostic Steps
Before diving into a complex repair, performing a few preliminary checks can save you time and effort. These steps help identify the most obvious issues and guide you toward more targeted diagnostics.
2.1 Visual Inspection
Begin with a thorough visual inspection of the sunshade and its surrounding area:
- Sunshade Screen: Look for any visible damage, such as tears, holes, or fraying. Make sure the screen is properly aligned within its tracks.
- Tracks and Guides: Check the tracks and guides along which the sunshade moves. Ensure they are clean and free of obstructions.
- Movement: Try to gently move the sunshade up and down manually. Note any points where it binds or feels excessively tight.
2.2 Electrical Checks
Electrical issues are a common cause of sunshade malfunctions. Perform these checks:
- Fuse Inspection: Locate the fuse for the rear window sunshade in the vehicle’s fuse box (refer to your owner’s manual for the exact location). Inspect the fuse for any signs of damage or a blown filament. Replace the fuse with a new one of the same rating if necessary.
- Voltage Test: Use a multimeter to check the voltage at the sunshade motor connector. With the sunshade switch activated, you should see a voltage reading close to the vehicle’s battery voltage (approximately 12V). If there’s no voltage, the problem likely lies in the wiring, switch, or control module.
2.3 Switch Testing
The control switch may be the source of the problem. Here’s how to test it:
- Continuity Test: Use a multimeter to check the continuity of the switch in both the “up” and “down” positions. The switch should show continuity when activated and no continuity when at rest.
- Switch Replacement: If the switch fails the continuity test, consider replacing it with a new one. Ensure the replacement switch is compatible with your W220 model.
3. Step-by-Step Guide to Diagnosing the Issue
If the preliminary checks don’t reveal the problem, a more detailed diagnostic process is needed. Follow these steps to pinpoint the exact cause of the sunshade malfunction.
3.1 Accessing the Sunshade Motor
To inspect the motor and drive mechanism, you’ll need to access them. This usually involves removing the rear seat and possibly the rear deck panel.
-
Rear Seat Removal:
- Locate the release latches or bolts that secure the rear seat. These are typically found at the front edge of the seat cushion.
- Release the latches or remove the bolts, then lift the seat cushion up and out of the vehicle.
- Remove the seatback by unbolting it from the vehicle’s frame.
-
Rear Deck Panel Removal:
- Remove any screws or clips that secure the rear deck panel.
- Carefully lift the panel, being mindful of any wiring or components attached to it.
3.2 Inspecting the Motor and Drive Mechanism
With the sunshade motor accessible, perform these inspections:
- Motor Condition: Check the motor for any signs of physical damage, such as cracks or melted plastic. Look for corrosion on the motor terminals.
- Wiring Connections: Ensure that all wiring connections to the motor are secure and free of corrosion.
- Drive Mechanism: Inspect the gears and linkages for any broken or dislodged parts. Lubricate the mechanism with a suitable grease to ensure smooth operation.
3.3 Testing the Motor
To test the motor directly, follow these steps:
- Direct Power: Disconnect the motor from the vehicle’s wiring harness.
- Apply Voltage: Connect the motor directly to a 12V power source (such as a battery or a bench power supply).
- Observe Operation: Observe whether the motor runs smoothly and in the correct direction. If the motor doesn’t run or runs erratically, it may need to be replaced.
3.4 Checking the Control Module
The control module manages the sunshade’s operation and can be a source of problems.
- Location: Locate the control module for the rear window sunshade. It’s often located under the rear seat or in the trunk.
- Visual Inspection: Check the module for any signs of damage, such as burnt components or corrosion.
- Module Testing: If possible, use a diagnostic scanner to check for any error codes related to the sunshade system. This can help pinpoint specific issues within the module.
4. Step-by-Step Repair Guide
Once you’ve identified the problem, you can proceed with the repair. Here’s a step-by-step guide for common sunshade issues:
4.1 Replacing a Faulty Motor
If the motor is found to be defective, replacement is usually the best option.
- Disconnect Wiring: Disconnect the wiring harness from the old motor.
- Remove Old Motor: Unbolt or unclip the old motor from its mounting bracket.
- Install New Motor: Install the new motor in the mounting bracket and secure it with bolts or clips.
- Reconnect Wiring: Reconnect the wiring harness to the new motor.
- Test Operation: Test the sunshade to ensure the new motor is working correctly.
4.2 Repairing or Replacing the Drive Mechanism
If the drive mechanism is damaged, you may be able to repair it by replacing individual parts, or you may need to replace the entire mechanism.
- Disassemble Mechanism: Disassemble the drive mechanism to access the damaged parts.
- Replace Parts: Replace any broken or worn gears, linkages, or bushings.
- Reassemble Mechanism: Reassemble the drive mechanism, ensuring all parts are properly aligned and lubricated.
- Test Operation: Test the sunshade to ensure the repaired drive mechanism is working correctly.
4.3 Fixing Electrical Issues
Electrical problems can range from simple to complex. Here are some common solutions:
- Wiring Repair: Repair any damaged or frayed wires by splicing in new sections of wire and insulating the connections.
- Connector Cleaning: Clean any corroded electrical connectors with a wire brush and electrical contact cleaner.
- Wiring Replacement: Replace entire sections of wiring if they are severely damaged or corroded.
4.4 Addressing Sunshade Jamming
If the sunshade is jamming, follow these steps:
- Clear Obstructions: Remove any obstructions from the sunshade tracks, such as dirt, debris, or foreign objects.
- Lubricate Tracks: Lubricate the sunshade tracks with a silicone-based lubricant to reduce friction.
- Realignment: Gently realign the sunshade screen within the tracks to ensure smooth movement.
5. Tools and Materials Needed
Having the right tools and materials on hand will make the repair process much smoother and more efficient.
5.1 Essential Tools
- Socket Set: A set of sockets and wrenches for removing bolts and nuts.
- Screwdriver Set: A variety of screwdrivers for removing screws.
- Multimeter: For testing electrical circuits and components.
- Wire Strippers and Crimpers: For repairing or replacing wiring.
- Pliers: For gripping and manipulating parts.
- Panel Removal Tools: For safely removing interior panels without causing damage.
5.2 Necessary Materials
- Replacement Motor: A new motor that is compatible with your W220 model.
- Drive Mechanism Parts: Replacement gears, linkages, or bushings as needed.
- Electrical Wire: Automotive-grade wire for repairing or replacing wiring.
- Electrical Connectors: Replacement connectors for wiring repairs.
- Fuses: Replacement fuses of the correct amperage rating.
- Lubricant: Silicone-based lubricant for lubricating the sunshade tracks and drive mechanism.
- Electrical Contact Cleaner: For cleaning corroded electrical connectors.
- Tape: Electrical tape for insulating wiring connections.
6. Tips for Maintaining Your Rear Window Sunshade
Proper maintenance can extend the life of your rear window sunshade and prevent future problems.
6.1 Regular Cleaning
Keep the sunshade screen and tracks clean to prevent jamming and ensure smooth operation.
- Dust Removal: Regularly vacuum the sunshade screen to remove dust and debris.
- Track Cleaning: Clean the tracks with a soft brush and mild detergent to remove dirt and grime.
6.2 Lubrication
Lubricate the sunshade tracks and drive mechanism periodically to reduce friction and prevent wear.
- Lubricant Application: Apply a small amount of silicone-based lubricant to the tracks and drive mechanism.
- Frequency: Lubricate the system every six months or as needed.
6.3 Proper Usage
Avoid putting excessive stress on the sunshade by operating it gently and avoiding obstructions.
- Gentle Operation: Raise and lower the sunshade slowly and smoothly.
- Obstruction Avoidance: Ensure that there are no objects blocking the sunshade’s path.
7. When to Seek Professional Help
While many sunshade issues can be resolved with DIY repairs, some problems may require professional attention.
7.1 Complex Electrical Issues
If you’re not comfortable working with electrical systems or if you’re unable to diagnose the problem, it’s best to seek help from a qualified technician.
7.2 Internal Control Module Problems
Problems within the control module may require specialized diagnostic equipment and expertise.
7.3 Extensive Damage
If the sunshade system is severely damaged, it may be more cost-effective to have it professionally repaired or replaced.
8. The Importance of Genuine Mercedes-Benz Parts
When repairing your W220 Mercedes rear window sunshade, using genuine Mercedes-Benz parts can make a significant difference in the longevity and performance of the repair. Here’s why:
8.1 Superior Quality
Genuine Mercedes-Benz parts are manufactured to the highest standards, ensuring they meet the exact specifications of your vehicle. This results in better performance and a longer lifespan compared to aftermarket parts.
8.2 Perfect Fit
Genuine parts are designed to fit seamlessly into your W220, which reduces the risk of installation issues and ensures the sunshade operates smoothly.
8.3 Warranty Protection
Using genuine parts often comes with a warranty, providing peace of mind and protection against defects.
8.4 Maintaining Vehicle Value
Using genuine parts helps maintain the value of your Mercedes-Benz, as it shows that you care about the quality and authenticity of your vehicle.
8.5 Where to Find Genuine Parts
- Authorized Mercedes-Benz Dealers: Purchase directly from a dealer for guaranteed authenticity.
- Online Mercedes-Benz Parts Retailers: Many reputable online retailers specialize in genuine Mercedes-Benz parts. Ensure they are authorized to sell these parts.
- CARDIAGTECH.NET: Offers a range of high-quality, compatible parts and tools for your Mercedes-Benz repairs.
9. Addressing Specific W220 Model Variations
The W220 Mercedes-Benz series includes several models, each with slight variations in the rear window sunshade system. Understanding these differences can help you tailor your repair approach.
9.1 S-Class (S430, S500, S600)
The S-Class models (S430, S500, and S600) typically come with a more sophisticated sunshade system.
- Motor Variations: The S600 may have a more powerful motor due to additional features.
- Control Systems: The electronic control systems might be more integrated with other vehicle functions.
9.2 Long Wheelbase (LWB) Models
Long Wheelbase models may have larger sunshades and more robust mechanisms to cover the extended window area.
- Sunshade Size: Ensure replacement sunshades are the correct size for LWB models.
- Motor Power: LWB models might require a higher torque motor to operate the larger sunshade effectively.
9.3 Model Year Differences
The W220 was produced from 1998 to 2005, and there may be subtle differences in the sunshade system across these years.
- Wiring Changes: Check for any changes in the wiring diagrams for different model years.
- Component Updates: Some components may have been updated or redesigned over the years.
10. Advanced Diagnostic Techniques
For complex issues, advanced diagnostic techniques can help pinpoint the exact problem within the sunshade system.
10.1 Using a Diagnostic Scanner
A diagnostic scanner can read error codes from the vehicle’s computer, providing valuable information about the sunshade system.
- Error Code Interpretation: Learn how to interpret the error codes to identify specific faults.
- Live Data Monitoring: Monitor live data from the sunshade system to see how it operates in real-time.
10.2 Checking CAN Bus Communication
The sunshade system communicates with other vehicle systems via the Controller Area Network (CAN) bus.
- CAN Bus Testing: Use a CAN bus tester to check for communication errors between the sunshade module and other modules.
- Wiring Integrity: Ensure the CAN bus wiring is intact and free from shorts or breaks.
10.3 Oscilloscope Analysis
An oscilloscope can be used to analyze the electrical signals within the sunshade system.
- Signal Pattern Analysis: Compare the signal patterns to known good patterns to identify anomalies.
- Component Testing: Test individual components by observing their electrical signals.
11. Cost Analysis of Repairing vs. Replacing the Sunshade
Deciding whether to repair or replace the rear window sunshade depends on the extent of the damage and the associated costs.
11.1 Repair Costs
Repairing the sunshade can be cost-effective if the damage is minor.
- Parts Costs: Replacement parts like motors, gears, and switches can range from $50 to $300.
- Labor Costs: DIY repairs can save on labor costs, but professional labor can range from $100 to $500, depending on the complexity.
11.2 Replacement Costs
Replacing the entire sunshade unit can be more expensive but may be necessary for extensive damage.
- Unit Costs: A complete sunshade unit can cost between $500 and $1500.
- Installation Costs: Professional installation can add another $200 to $600 to the total cost.
11.3 Factors to Consider
- Damage Extent: Minor issues like a broken gear might justify repair, while a completely failed motor or damaged screen may warrant replacement.
- Vehicle Value: Consider the overall value of your W220 when deciding on the repair approach.
- DIY Skills: Assess your DIY skills and comfort level before attempting a repair.
12. Ensuring Safety During the Repair Process
Safety should always be a top priority when working on your vehicle.
12.1 Disconnecting the Battery
Disconnect the negative terminal of the battery before starting any electrical work to prevent shocks or shorts.
12.2 Using Proper Tools
Use the correct tools for the job to avoid damaging components or injuring yourself.
12.3 Wearing Safety Gear
Wear safety glasses and gloves to protect your eyes and hands from debris and chemicals.
12.4 Working in a Well-Ventilated Area
Work in a well-ventilated area to avoid inhaling harmful fumes.
12.5 Following Instructions
Follow the repair instructions carefully and double-check your work to ensure everything is done correctly.
13. Troubleshooting Common Issues
Even with careful repair, issues can still arise. Here’s how to troubleshoot common problems.
13.1 Sunshade Not Moving
- Check Power Supply: Ensure the motor is receiving power.
- Inspect Motor: Test the motor directly to see if it runs.
- Examine Drive Mechanism: Look for broken or jammed components.
13.2 Sunshade Moving Slowly
- Lubricate Tracks: Apply lubricant to reduce friction.
- Check Motor Torque: The motor might be weak and need replacement.
- Inspect Wiring: Ensure there are no voltage drops due to corroded wiring.
13.3 Sunshade Making Noise
- Lubricate Moving Parts: Apply lubricant to reduce friction and noise.
- Inspect for Loose Components: Tighten any loose bolts or screws.
- Check for Wear: Worn gears or bushings can cause noise.
14. Community Insights and Forums
Leveraging the experience of other W220 owners can provide valuable insights and tips for repairing your sunshade.
14.1 Online Forums
Engage with online forums dedicated to Mercedes-Benz vehicles. Share your experiences and ask for advice from other owners.
14.2 Social Media Groups
Join social media groups focused on Mercedes-Benz cars. These groups can be a great resource for troubleshooting and finding repair solutions.
14.3 Local Car Clubs
Connect with local car clubs to meet other Mercedes-Benz enthusiasts. They may have valuable knowledge and resources for repairing your sunshade.
15. Case Studies: Real-World Repair Examples
Examining real-world repair examples can provide practical insights and guidance.
15.1 Case Study 1: Motor Replacement
- Problem: Sunshade stopped working.
- Diagnosis: Faulty motor.
- Solution: Replaced the motor with a genuine Mercedes-Benz part.
- Outcome: Sunshade working perfectly.
15.2 Case Study 2: Drive Mechanism Repair
- Problem: Sunshade jammed halfway.
- Diagnosis: Broken gear in the drive mechanism.
- Solution: Replaced the damaged gear.
- Outcome: Sunshade moving smoothly.
15.3 Case Study 3: Electrical Wiring Issue
- Problem: Sunshade not responding to the switch.
- Diagnosis: Corroded wiring in the control circuit.
- Solution: Replaced the damaged wiring.
- Outcome: Sunshade functioning as intended.
16. The Future of Automotive Sunshade Technology
As automotive technology evolves, so does the technology behind sunshades.
16.1 Smart Sunshades
- Automatic Adjustment: Sunshades that automatically adjust based on sunlight intensity.
- Integration with Vehicle Systems: Seamless integration with the vehicle’s climate control and navigation systems.
16.2 Advanced Materials
- Lightweight Materials: Use of lightweight materials to reduce weight and improve fuel efficiency.
- UV Protection: Enhanced UV protection to protect passengers from harmful rays.
16.3 Customization Options
- Personalized Designs: Options for personalized sunshade designs and materials.
- Remote Control: Control the sunshade remotely via a smartphone app.
17. Sunshade Alternatives and Upgrades
If you’re looking for alternatives to the factory sunshade or want to upgrade your system, here are some options.
17.1 Aftermarket Sunshades
- Variety of Styles: Choose from a variety of styles and materials to suit your preferences.
- Easy Installation: Many aftermarket sunshades are designed for easy DIY installation.
17.2 Window Tinting
- Permanent Solution: Window tinting provides a permanent solution for reducing sunlight and glare.
- UV Protection: High-quality window tinting can block harmful UV rays.
17.3 Reflective Shades
- Removable Options: Reflective shades are removable and can be easily stored when not needed.
- Heat Reduction: Effective at reducing heat buildup inside the vehicle.
18. Common Mistakes to Avoid During Repair
Avoiding common mistakes can save you time and prevent further damage to your vehicle.
18.1 Using Incorrect Parts
- Compatibility: Ensure replacement parts are compatible with your W220 model.
- Quality: Use high-quality parts from reputable suppliers.
18.2 Neglecting Safety Precautions
- Battery Disconnection: Always disconnect the battery before electrical work.
- Safety Gear: Wear safety glasses and gloves.
18.3 Overlooking Electrical Issues
- Wiring Inspection: Thoroughly inspect wiring for damage or corrosion.
- Fuse Check: Check fuses before assuming more complex problems.
18.4 Forgetting Lubrication
- Track Lubrication: Lubricate sunshade tracks for smooth operation.
- Mechanism Lubrication: Lubricate the drive mechanism to prevent wear.
19. Resources for W220 Mercedes-Benz Owners
Here are some valuable resources for W220 Mercedes-Benz owners.
19.1 Online Forums
- MBWorld: A popular forum for Mercedes-Benz enthusiasts.
- BenzWorld: Another great resource for W220 owners.
19.2 Repair Manuals
- Haynes Manuals: Provide detailed repair instructions and diagrams.
- Factory Service Manuals: The most comprehensive source of information for repairing your W220.
19.3 Parts Suppliers
- Mercedes-Benz Dealers: Purchase genuine parts directly from a dealer.
- Online Retailers: Reputable online retailers specializing in Mercedes-Benz parts.
20. Conclusion: Restoring Your W220 Sunshade
Fixing your rear window sunshade on a W220 Mercedes-Benz can be a rewarding DIY project. By following these steps, you can diagnose and repair common issues, ensuring your sunshade operates smoothly and enhances your driving experience. Remember to prioritize safety and use high-quality parts for the best results.
Are you facing challenges in finding the right tools or components for your W220 Mercedes-Benz repair? Don’t let the difficulties hold you back. Contact us at CARDIAGTECH.NET today! Our team of experts is ready to provide personalized advice and solutions tailored to your needs. We offer a wide range of high-quality tools and parts, ensuring you have everything necessary to complete your repair efficiently and effectively. Reach out via Whatsapp at +1 (641) 206-8880 or visit our website CARDIAGTECH.NET for immediate assistance. Let us help you restore your Mercedes-Benz to its optimal condition. Our address is 276 Reock St, City of Orange, NJ 07050, United States. Get in touch now and experience the CARDIAGTECH.NET difference!
Q1: Why is my rear window sunshade not working on my W220 Mercedes?
The sunshade may not work due to a faulty motor, broken drive mechanism, electrical issues, or a malfunctioning switch.
Q2: How do I check the fuse for the rear window sunshade?
Locate the fuse box (refer to your owner’s manual), find the fuse for the sunshade, and inspect it for damage or a blown filament.
Q3: Can I replace the sunshade motor myself?
Yes, if you have basic mechanical skills and the right tools, you can replace the motor yourself. Follow a step-by-step guide for assistance.
Q4: What tools do I need to repair the rear window sunshade?
You’ll need a socket set, screwdriver set, multimeter, wire strippers, pliers, and panel removal tools.
Q5: How do I lubricate the sunshade tracks?
Apply a small amount of silicone-based lubricant to the tracks to reduce friction and ensure smooth operation.
Q6: What if the sunshade is jammed?
Clear any obstructions from the tracks, lubricate the tracks, and gently realign the sunshade screen.
Q7: How do I test the sunshade motor?
Disconnect the motor from the wiring harness and apply voltage directly from a 12V power source.
Q8: Is it better to repair or replace the sunshade?
It depends on the extent of the damage. Minor issues can be repaired, while extensive damage may warrant replacement.
Q9: What are the signs of a faulty control module?
Signs include the sunshade not responding to the switch, intermittent operation, or error codes related to the sunshade system.
Q10: Where can I find genuine Mercedes-Benz parts for the sunshade repair?
You can purchase genuine parts from authorized Mercedes-Benz dealers or reputable online retailers specializing in Mercedes-Benz parts.