Mercedes 9000 Fault Code: Diagnosis And Repair Guide
Mercedes 9000 Fault Code indicating potential issues within the vehicle’s system and CARDIAGTECH.NET offers advanced diagnostic tools to accurately identify and address these problems, ensuring optimal vehicle performance. We provide a solution to fix it. Common causes include faulty sensors, wiring issues, or software glitches.
Contents
- 1. Understanding the Mercedes 9000 Fault Code
- 1.1. What Does the Fault Code 9000 Mean?
- 1.2. Common Symptoms Associated With the 9000 Fault Code
- 1.3. Potential Causes of the Mercedes 9000 Fault Code
- 2. Step-by-Step Guide to Diagnosing the Mercedes 9000 Fault Code
- 2.1. Tools and Equipment Needed
- 2.2. Step-by-Step Diagnostic Process
- 2.3. Interpreting Diagnostic Results
- 3. Repairing the Mercedes 9000 Fault Code
- 3.1. Common Repair Procedures
- 3.2. Step-by-Step Repair Instructions
- 3.3. Post-Repair Verification
- 4. Preventive Measures to Avoid the Mercedes 9000 Fault Code
- 4.1. Regular Maintenance Tips
- 4.2. Best Practices for Vehicle Care
- 4.3. The Role of Regular Diagnostic Checks
- 5. Advanced Diagnostic Techniques for the Mercedes 9000 Fault Code
- 5.1. Using Oscilloscopes and Multimeters for Advanced Testing
- 5.2. CAN Bus Diagnostics
- 5.3. ECU Programming and Coding
- 6. The Importance of Using Mercedes-Benz Specific Diagnostic Tools
- 6.1. Enhanced Diagnostic Capabilities
- 6.2. Compatibility and Accuracy
- 6.3. Examples of Mercedes-Benz Specific Diagnostic Tools
- 7. The Role of CARDIAGTECH.NET in Solving Mercedes-Benz Diagnostic Issues
- 7.1. High-Quality Diagnostic Tools Offered
- 7.2. Benefits of Purchasing Tools from CARDIAGTECH.NET
- 7.3. How CARDIAGTECH.NET Can Assist with the 9000 Fault Code
- 8.1. Case Study 1: Faulty Oxygen Sensor
- 8.2. Case Study 2: Corroded Wiring Connector
- 8.3. Case Study 3: ECU Software Glitch
1. Understanding the Mercedes 9000 Fault Code
The Mercedes 9000 fault code is a diagnostic trouble code (DTC) that indicates a problem within the vehicle’s electronic systems. This code, often encountered in Mercedes-Benz vehicles, signifies a range of potential issues, from sensor malfunctions to wiring problems or software glitches. A thorough understanding of this code and its potential causes is essential for effective diagnosis and repair.
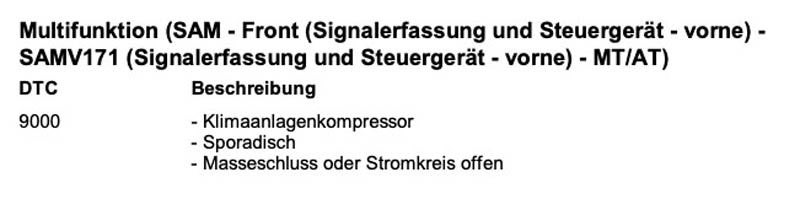
1.1. What Does the Fault Code 9000 Mean?
The fault code 9000 in a Mercedes-Benz typically points to a communication error within the vehicle’s Controller Area Network (CAN) bus system. The CAN bus is a critical component that allows various electronic control units (ECUs) to communicate with each other. When fault code 9000 appears, it often means that one or more ECUs are unable to transmit or receive data correctly, leading to a disruption in the vehicle’s overall operation. This disruption can manifest in various ways, affecting different systems and components.
1.2. Common Symptoms Associated With the 9000 Fault Code
When the Mercedes 9000 fault code is triggered, it can lead to a variety of noticeable symptoms that affect the vehicle’s performance and functionality. These symptoms can range from minor inconveniences to significant operational issues, making it essential to address the problem promptly. Here are some common symptoms associated with the 9000 fault code:
- Malfunctioning Electrical Components: The most common symptom is the erratic behavior or complete failure of electrical components. This can include lights not working properly, issues with the power windows, or problems with the central locking system.
- Engine Performance Issues: The engine may exhibit unusual behavior, such as rough idling, stalling, or a noticeable decrease in power. These issues can arise because the engine control unit (ECU) isn’t receiving the correct data from other sensors and modules.
- Transmission Problems: The transmission system may experience difficulties, such as erratic shifting or a failure to shift gears smoothly. This can lead to a jerky driving experience or, in severe cases, render the vehicle undrivable.
- ABS and ESP Malfunctions: The anti-lock braking system (ABS) and electronic stability program (ESP) may fail to operate correctly. Warning lights on the dashboard may illuminate, indicating that these safety systems are compromised.
- HVAC System Problems: The heating, ventilation, and air conditioning (HVAC) system might not function as expected. You may notice that the air conditioning doesn’t cool properly, or the heating system fails to provide adequate warmth.
- Dashboard Warning Lights: Numerous warning lights may appear on the dashboard, signaling that various systems are malfunctioning. These lights can include the check engine light, ABS warning light, ESP warning light, and others.
- Problems Starting the Vehicle: In some instances, the vehicle may have difficulty starting or may not start at all. This can be due to the immobilizer system not recognizing the key or the ECU not receiving the necessary signals to initiate the starting sequence.
Addressing these symptoms promptly can prevent further damage and ensure the vehicle operates safely and efficiently. Regular diagnostic checks and timely repairs are essential for maintaining the performance and reliability of your Mercedes-Benz.
1.3. Potential Causes of the Mercedes 9000 Fault Code
The Mercedes 9000 fault code can stem from a variety of underlying issues within the vehicle’s electronic systems. Identifying the precise cause is crucial for effective repair. Here are some potential causes of the Mercedes 9000 fault code:
- Faulty Sensors:
- Description: Defective sensors can send incorrect data to the ECUs, disrupting the communication on the CAN bus.
- Examples: Oxygen sensors, mass airflow sensors, and crankshaft position sensors.
- Wiring Issues:
- Description: Damaged, corroded, or loose wiring can interrupt the flow of data between ECUs.
- Examples: Broken wires, frayed insulation, and loose connectors.
- Software Glitches:
- Description: Software bugs or corrupted data in the ECUs can cause communication errors.
- Examples: Outdated software versions, corrupted firmware, and software conflicts.
- ECU Malfunctions:
- Description: A failing ECU can be unable to properly send or receive data, leading to communication errors.
- Examples: Damaged ECU due to electrical surges, water damage, or internal component failure.
- CAN Bus Problems:
- Description: Issues within the CAN bus itself can disrupt communication between ECUs.
- Examples: Damaged CAN bus wires, faulty CAN bus transceivers, and termination resistor issues.
- Battery Issues:
- Description: A weak or failing battery can cause voltage fluctuations that affect the operation of the ECUs.
- Examples: Low battery voltage, corroded battery terminals, and a battery that is not holding a charge.
- Grounding Issues:
- Description: Poor grounding can lead to electrical noise and interference, disrupting communication on the CAN bus.
- Examples: Loose ground connections, corroded ground wires, and inadequate grounding points.
- Aftermarket Accessories:
- Description: Improperly installed or malfunctioning aftermarket accessories can interfere with the vehicle’s electrical system.
- Examples: Faulty alarm systems, poorly installed audio equipment, and incompatible electronic devices.
- Environmental Factors:
- Description: Extreme conditions such as heat, cold, or moisture can damage electrical components and wiring.
- Examples: Corrosion due to moisture, heat-related damage to ECUs, and cold-induced wiring issues.
Identifying the specific cause of the 9000 fault code requires a systematic approach, beginning with a thorough diagnostic check.
2. Step-by-Step Guide to Diagnosing the Mercedes 9000 Fault Code
Diagnosing the Mercedes 9000 fault code requires a systematic approach to pinpoint the root cause of the issue. This process involves using diagnostic tools, performing visual inspections, and conducting specific tests to identify the source of the problem. Here’s a detailed, step-by-step guide to help you diagnose the Mercedes 9000 fault code effectively.
2.1. Tools and Equipment Needed
Before starting the diagnostic process, gather all the necessary tools and equipment. Having the right tools on hand will make the process smoother and more efficient. Here is a list of essential items:
- OBD-II Scanner:
- A high-quality OBD-II scanner is crucial for reading and clearing fault codes. A scanner with Mercedes-Benz specific capabilities is highly recommended. CARDIAGTECH.NET provides a range of OBD-II scanners that are compatible with Mercedes-Benz vehicles, offering advanced diagnostic features.
- Multimeter:
- A multimeter is essential for testing voltage, continuity, and resistance in electrical circuits. It helps in identifying wiring issues and faulty components.
- Wiring Diagrams:
- Wiring diagrams for your specific Mercedes-Benz model are invaluable for tracing circuits and identifying connection points. These diagrams provide a detailed layout of the vehicle’s electrical system.
- Socket Set and Wrenches:
- A set of sockets and wrenches is necessary for removing and installing components, such as sensors and ECUs.
- Screwdrivers:
- Both flathead and Phillips head screwdrivers are needed for various tasks, including removing panels and securing components.
- Inspection Light:
- A good inspection light helps in visually inspecting wiring, connectors, and components in hard-to-reach areas.
- Cleaning Supplies:
- Electrical contact cleaner and a wire brush are useful for cleaning corroded connections and ensuring good electrical contact.
- Personal Protective Equipment (PPE):
- Safety glasses and gloves are essential to protect yourself from potential hazards during the diagnostic process.
- Diagnostic Software:
- Mercedes-Benz specific diagnostic software (e.g., XENTRY, DAS) can provide deeper insights into the vehicle’s systems and help pinpoint the exact cause of the fault code.
2.2. Step-by-Step Diagnostic Process
Follow these steps to systematically diagnose the Mercedes 9000 fault code:
Step 1: Connect the OBD-II Scanner
- Locate the OBD-II port, typically found under the dashboard on the driver’s side.
- Plug the OBD-II scanner into the port and turn on the ignition (without starting the engine).
- Navigate to the “Read Codes” or “Diagnostic Codes” section on the scanner.
- Record all the fault codes that appear, including the 9000 code. Note any other related codes, as they can provide additional clues.
Step 2: Research the Fault Codes
- Consult the vehicle’s service manual or online resources to understand the meaning and potential causes of each fault code.
- Focus on the 9000 code and any related codes to identify common issues and troubleshooting steps.
Step 3: Perform a Visual Inspection
- Inspect all visible wiring, connectors, and components related to the systems identified by the fault codes.
- Look for signs of damage, such as frayed wires, corroded connectors, and loose connections.
- Pay close attention to the wiring harness and connectors near the ECUs and sensors.
Step 4: Check the Battery
- Use a multimeter to check the battery voltage. A fully charged battery should read around 12.6 volts.
- Inspect the battery terminals for corrosion and clean them if necessary.
- Test the battery’s ability to hold a charge using a load tester.
Step 5: Inspect and Test Sensors
- Identify the sensors related to the fault codes and inspect their wiring and connectors.
- Use a multimeter to test the sensor’s voltage, resistance, and continuity, comparing the readings to the specifications in the service manual.
- Replace any sensors that are found to be faulty.
Step 6: Check Wiring Continuity
- Use a multimeter to check the continuity of the wiring between the sensors, ECUs, and other components.
- Disconnect the battery before performing continuity tests to avoid damaging the electrical system.
- Repair or replace any wires with breaks or shorts.
Step 7: Inspect and Test ECUs
- Inspect the ECUs for signs of physical damage, such as water intrusion or burnt components.
- Check the ECU connectors for corrosion and loose connections.
- If possible, use Mercedes-Benz specific diagnostic software to test the ECU’s functionality and communication capabilities.
Step 8: Check the CAN Bus System
- Use an oscilloscope or a CAN bus analyzer to monitor the communication signals on the CAN bus.
- Look for any disruptions, noise, or missing signals that could indicate a problem with the CAN bus wiring or transceivers.
- Test the CAN bus termination resistors to ensure they are within the specified range (typically around 120 ohms).
Step 9: Clear the Fault Codes and Retest
- After completing the necessary repairs, clear all the fault codes using the OBD-II scanner.
- Start the engine and let the vehicle run for a while.
- Recheck for any new fault codes that may appear.
Step 10: Road Test the Vehicle
- If no new fault codes appear, take the vehicle for a road test to ensure that the issue has been resolved.
- Monitor the vehicle’s performance and check for any unusual behavior.
- If the 9000 fault code returns, repeat the diagnostic process, focusing on the areas that were not previously checked.
2.3. Interpreting Diagnostic Results
Interpreting the results of the diagnostic process is crucial for identifying the root cause of the Mercedes 9000 fault code. Here’s how to interpret your findings:
- Consistent Fault Codes: If the 9000 fault code consistently reappears after clearing it, this indicates an ongoing issue that needs to be addressed. Focus on the systems and components associated with the code.
- Related Fault Codes: Pay attention to any related fault codes that appear alongside the 9000 code. These codes can provide valuable clues about the source of the problem.
- Sensor Readings: Compare the sensor readings obtained during the diagnostic process to the specifications in the service manual. Deviations from the specified range can indicate a faulty sensor.
- Wiring Issues: If you find damaged, corroded, or loose wiring, this is likely contributing to the fault code. Repair or replace the wiring as needed.
- ECU Problems: If the ECU is not functioning correctly or is unable to communicate with other modules, it may need to be reprogrammed or replaced.
- CAN Bus Disruptions: Disruptions in the CAN bus communication signals indicate a problem with the CAN bus wiring or transceivers.
- Battery Issues: Low battery voltage or a failing battery can cause a variety of electrical problems. Ensure the battery is in good condition and properly charged.
By following this step-by-step guide and carefully interpreting the diagnostic results, you can effectively diagnose the Mercedes 9000 fault code and implement the necessary repairs to restore your vehicle to optimal performance. Remember to consult the vehicle’s service manual and seek professional assistance when needed.
3. Repairing the Mercedes 9000 Fault Code
After diagnosing the Mercedes 9000 fault code, the next step is to implement the necessary repairs to resolve the underlying issue. The specific repairs will depend on the root cause identified during the diagnostic process. Here’s a comprehensive guide to repairing common issues associated with the Mercedes 9000 fault code.
3.1. Common Repair Procedures
- Replacing Faulty Sensors:
- Procedure: Identify the faulty sensor based on the diagnostic results. Disconnect the sensor’s electrical connector and remove the sensor from its mounting location. Install the new sensor and reconnect the electrical connector.
- Tools Needed: Socket set, wrenches, screwdrivers, electrical contact cleaner.
- Example: Replacing a faulty oxygen sensor that is sending incorrect data to the ECU.
- Repairing Wiring Issues:
- Procedure: Locate the damaged wiring and disconnect the battery. Use a wire stripper to remove the damaged section of wire. Splice in a new section of wire using butt connectors or solder. Protect the connection with heat shrink tubing or electrical tape.
- Tools Needed: Wire stripper, butt connectors, soldering iron, heat shrink tubing, electrical tape, multimeter.
- Example: Repairing a frayed wire in the wiring harness that connects to the ECU.
- Updating or Reprogramming ECUs:
- Procedure: Use Mercedes-Benz specific diagnostic software (e.g., XENTRY, DAS) to update or reprogram the ECU. Follow the software’s instructions carefully.
- Tools Needed: Mercedes-Benz diagnostic software, laptop, OBD-II connector.
- Example: Updating the ECU software to fix a known bug that is causing communication errors.
- Replacing a Damaged ECU:
- Procedure: Disconnect the battery. Remove the damaged ECU from its mounting location. Disconnect the electrical connectors and connect them to the new ECU. Install the new ECU in its mounting location and reconnect the battery.
- Tools Needed: Socket set, wrenches, screwdrivers.
- Note: The new ECU may need to be programmed to match the vehicle’s VIN and configuration.
- Repairing CAN Bus Issues:
- Procedure: Inspect the CAN bus wiring for damage or corrosion. Repair or replace any damaged sections of wire. Check the CAN bus termination resistors to ensure they are within the specified range (typically around 120 ohms). Replace any faulty transceivers.
- Tools Needed: Multimeter, wire stripper, butt connectors, soldering iron, heat shrink tubing, electrical tape.
- Example: Repairing a damaged CAN bus wire that is disrupting communication between ECUs.
- Cleaning or Replacing Corroded Connectors:
- Procedure: Disconnect the connector and inspect it for corrosion. Use electrical contact cleaner and a wire brush to clean the connector. If the connector is severely corroded, replace it with a new one.
- Tools Needed: Electrical contact cleaner, wire brush, pliers.
- Example: Cleaning corroded connectors on the ECU to ensure proper electrical contact.
3.2. Step-by-Step Repair Instructions
Follow these step-by-step instructions for common repair procedures associated with the Mercedes 9000 fault code:
Step 1: Replacing a Faulty Sensor
- Preparation: Gather the necessary tools and a new sensor. Disconnect the battery to prevent electrical damage.
- Locate the Sensor: Identify the faulty sensor based on the diagnostic results and locate it in the vehicle.
- Disconnect the Electrical Connector: Disconnect the electrical connector from the sensor.
- Remove the Old Sensor: Use the appropriate socket or wrench to remove the sensor from its mounting location.
- Install the New Sensor: Install the new sensor in its mounting location and tighten it to the specified torque.
- Reconnect the Electrical Connector: Reconnect the electrical connector to the sensor.
- Test the Repair: Reconnect the battery and start the engine. Use the OBD-II scanner to clear the fault codes and verify that the 9000 code does not return.
Step 2: Repairing Wiring Issues
- Preparation: Gather the necessary tools and materials, including a wire stripper, butt connectors, soldering iron, heat shrink tubing, and electrical tape. Disconnect the battery.
- Locate the Damaged Wiring: Identify the damaged section of wiring.
- Cut the Damaged Section: Use the wire stripper to cut out the damaged section of wire.
- Splice in a New Section of Wire: Use the wire stripper to remove the insulation from the ends of the wires. Connect the new section of wire using butt connectors or solder.
- Protect the Connection: Cover the connection with heat shrink tubing or electrical tape to protect it from moisture and corrosion.
- Test the Repair: Reconnect the battery and use a multimeter to check the continuity of the wiring. Start the engine and use the OBD-II scanner to clear the fault codes and verify that the 9000 code does not return.
Step 3: Cleaning Corroded Connectors
- Preparation: Gather the necessary tools and materials, including electrical contact cleaner and a wire brush. Disconnect the battery.
- Locate the Corroded Connector: Identify the corroded connector.
- Disconnect the Connector: Disconnect the connector and inspect it for corrosion.
- Clean the Connector: Use electrical contact cleaner and a wire brush to clean the connector.
- Reconnect the Connector: Reconnect the connector and ensure it is securely attached.
- Test the Repair: Reconnect the battery and start the engine. Use the OBD-II scanner to clear the fault codes and verify that the 9000 code does not return.
3.3. Post-Repair Verification
After completing the repairs, it’s essential to verify that the issue has been resolved. Here are the steps to follow for post-repair verification:
- Clear Fault Codes: Use the OBD-II scanner to clear all fault codes from the vehicle’s system.
- Test Drive: Take the vehicle for a test drive to ensure that the symptoms associated with the 9000 fault code have been resolved.
- Monitor Performance: Monitor the vehicle’s performance and check for any unusual behavior.
- Recheck for Fault Codes: After the test drive, use the OBD-II scanner to recheck for any new or recurring fault codes.
- Confirm Resolution: If the 9000 fault code does not return and the vehicle is performing as expected, the repair is successful.
4. Preventive Measures to Avoid the Mercedes 9000 Fault Code
Preventing the Mercedes 9000 fault code involves proactive maintenance and care of your vehicle’s electrical systems. Regular inspections, proper maintenance, and timely repairs can help avoid the issues that lead to this fault code. Here are some preventive measures to keep your Mercedes-Benz running smoothly and avoid the 9000 fault code.
4.1. Regular Maintenance Tips
- Routine Inspections:
- Schedule regular inspections of your vehicle’s electrical systems, including wiring, connectors, and sensors. Look for signs of damage, corrosion, or wear.
- Battery Maintenance:
- Regularly check the battery voltage and ensure it is within the specified range (around 12.6 volts when fully charged). Clean any corrosion from the battery terminals and ensure the battery is securely mounted.
- Wiring Checks:
- Inspect the wiring harness for any signs of damage, such as frayed wires, cracked insulation, or loose connections. Repair or replace any damaged wiring promptly.
- Connector Maintenance:
- Check the connectors for corrosion and ensure they are securely attached. Use electrical contact cleaner to clean any corroded connectors.
- Sensor Checks:
- Periodically check the sensors to ensure they are functioning correctly. Use an OBD-II scanner to monitor sensor readings and look for any deviations from the specified range.
- Software Updates:
- Keep the vehicle’s software up to date by installing the latest updates from Mercedes-Benz. These updates often include bug fixes and improvements that can help prevent communication errors.
- Professional Servicing:
- Schedule regular servicing with a qualified Mercedes-Benz technician. They can perform a thorough inspection of the vehicle’s systems and identify any potential issues before they become major problems.
4.2. Best Practices for Vehicle Care
- Avoid Water Damage:
- Protect your vehicle from water damage by avoiding driving through deep puddles or flooded areas. Water can damage electrical components and cause corrosion.
- Proper Installation of Aftermarket Accessories:
- If you install any aftermarket accessories, such as audio equipment or alarm systems, ensure they are installed correctly by a qualified technician. Improper installation can interfere with the vehicle’s electrical system.
- Use Quality Replacement Parts:
- When replacing any components, use high-quality replacement parts that meet or exceed the original equipment manufacturer (OEM) specifications.
- Monitor Vehicle Performance:
- Pay attention to any changes in your vehicle’s performance, such as rough idling, stalling, or erratic shifting. These symptoms can indicate an underlying issue that needs to be addressed.
- Regular Cleaning:
- Keep the engine bay clean and free of debris. Dirt and debris can trap moisture and cause corrosion.
- Proper Storage:
- If you store your vehicle for an extended period, disconnect the battery to prevent it from draining. Use a battery maintainer to keep the battery charged.
4.3. The Role of Regular Diagnostic Checks
Regular diagnostic checks play a crucial role in preventing the Mercedes 9000 fault code and maintaining the overall health of your vehicle. By performing routine diagnostic scans, you can identify potential issues early and address them before they escalate into major problems.
- Early Detection:
- Regular diagnostic checks can help detect issues before they cause noticeable symptoms. This allows you to address problems early, before they lead to more extensive damage.
- Fault Code Monitoring:
- By monitoring the vehicle’s fault codes, you can identify any potential problems and take corrective action. The OBD-II scanner will alert you to any issues, even if they are not yet causing symptoms.
- Performance Analysis:
- Diagnostic checks can provide valuable insights into the vehicle’s performance. You can monitor sensor readings, engine parameters, and other data to identify any deviations from the norm.
- Preventive Maintenance:
- Regular diagnostic checks can help you identify preventive maintenance tasks that need to be performed. This can include replacing worn components, cleaning connectors, and updating software.
- Cost Savings:
- By addressing issues early, you can prevent them from escalating into more costly repairs. Regular diagnostic checks can save you money in the long run.
5. Advanced Diagnostic Techniques for the Mercedes 9000 Fault Code
When basic diagnostic methods fail to pinpoint the cause of the Mercedes 9000 fault code, advanced diagnostic techniques may be necessary. These techniques involve using specialized tools and procedures to delve deeper into the vehicle’s electronic systems and identify elusive issues.
5.1. Using Oscilloscopes and Multimeters for Advanced Testing
- Oscilloscope Testing:
- Purpose: An oscilloscope is a valuable tool for visualizing electrical signals and identifying anomalies that a multimeter cannot detect.
- Procedure: Connect the oscilloscope to the CAN bus or sensor circuits to monitor the waveform patterns. Look for any disruptions, noise, or missing signals that could indicate a problem.
- Benefits: Allows you to see the actual electrical signals, identify intermittent issues, and diagnose communication problems.
- Advanced Multimeter Testing:
- Purpose: A multimeter can be used to perform more advanced tests, such as measuring voltage drops and parasitic draws.
- Voltage Drop Testing: Measure the voltage drop across a circuit to identify areas of high resistance. Excessive voltage drop can indicate a problem with wiring or connectors.
- Parasitic Draw Testing: Measure the parasitic draw on the battery to identify components that are drawing excessive current when the vehicle is turned off. This can help identify faulty modules or wiring issues.
5.2. CAN Bus Diagnostics
- CAN Bus Analyzer:
- Purpose: A CAN bus analyzer is a specialized tool for monitoring and analyzing the communication signals on the CAN bus.
- Procedure: Connect the CAN bus analyzer to the vehicle’s diagnostic port and monitor the data traffic. Look for any error messages, missing messages, or corrupted data.
- Benefits: Provides detailed insights into the CAN bus communication and helps identify the source of communication errors.
- CAN Bus Wiring Inspection:
- Purpose: Inspect the CAN bus wiring for damage or corrosion.
- Procedure: Visually inspect the CAN bus wiring for any signs of damage. Use a multimeter to check the continuity and resistance of the CAN bus wires.
- Benefits: Helps identify wiring issues that can disrupt communication on the CAN bus.
- Termination Resistor Testing:
- Purpose: The CAN bus uses termination resistors to ensure proper communication.
- Procedure: Use a multimeter to measure the resistance of the termination resistors. The resistance should be around 120 ohms.
- Benefits: Ensures that the CAN bus is properly terminated, which is essential for reliable communication.
5.3. ECU Programming and Coding
- ECU Programming:
- Purpose: ECU programming involves updating or replacing the software in the ECU.
- Procedure: Use Mercedes-Benz specific diagnostic software (e.g., XENTRY, DAS) to program the ECU. Follow the software’s instructions carefully.
- Benefits: Can fix software bugs, improve performance, and resolve communication errors.
- ECU Coding:
- Purpose: ECU coding involves configuring the ECU to match the vehicle’s specific options and features.
- Procedure: Use Mercedes-Benz specific diagnostic software to code the ECU. Follow the software’s instructions carefully.
- Benefits: Ensures that the ECU is properly configured for the vehicle’s specific options and features, which is essential for proper operation.
- ECU Adaptation:
- Purpose: ECU adaptation involves teaching the ECU to work with new components, such as sensors or actuators.
- Procedure: Use Mercedes-Benz specific diagnostic software to perform the adaptation procedure. Follow the software’s instructions carefully.
- Benefits: Ensures that the ECU is properly adapted to the new components, which is essential for optimal performance.
6. The Importance of Using Mercedes-Benz Specific Diagnostic Tools
When diagnosing and repairing issues in Mercedes-Benz vehicles, the use of Mercedes-Benz specific diagnostic tools cannot be overstated. These specialized tools provide a level of access and functionality that generic OBD-II scanners simply cannot match.
6.1. Enhanced Diagnostic Capabilities
- Deeper System Access:
- Mercedes-Benz specific diagnostic tools provide access to all of the vehicle’s electronic systems, including the engine, transmission, ABS, ESP, and more. This allows you to perform comprehensive diagnostics and identify issues that would be missed by generic scanners.
- Advanced Functionality:
- These tools offer advanced functionality, such as ECU programming, coding, and adaptation. This allows you to update the software in the ECU, configure it to match the vehicle’s specific options and features, and teach it to work with new components.
- Fault Code Interpretation:
- Mercedes-Benz specific tools provide detailed information about fault codes, including the cause of the code, the affected system, and the recommended repair procedures. This helps you diagnose issues more accurately and efficiently.
6.2. Compatibility and Accuracy
- Accurate Data Readings:
- Mercedes-Benz specific tools are designed to provide accurate data readings from the vehicle’s sensors and systems. This ensures that you are working with reliable information when diagnosing issues.
- System Compatibility:
- These tools are fully compatible with all Mercedes-Benz models, ensuring that you can diagnose and repair any vehicle in the Mercedes-Benz lineup.
- Software Updates:
- Mercedes-Benz specific tools receive regular software updates to ensure they are compatible with the latest models and systems. This helps you stay up-to-date with the latest technology and diagnostic procedures.
6.3. Examples of Mercedes-Benz Specific Diagnostic Tools
- XENTRY/DAS:
- XENTRY/DAS is the official diagnostic software used by Mercedes-Benz dealerships and authorized service centers. It provides access to all of the vehicle’s systems and offers advanced functionality, such as ECU programming, coding, and adaptation.
- iCarsoft MB II:
- The iCarsoft MB II is a popular aftermarket diagnostic tool that offers many of the same features as XENTRY/DAS. It is compatible with all Mercedes-Benz models and provides access to all of the vehicle’s systems.
- Autel MaxiSys Elite:
- The Autel MaxiSys Elite is a high-end diagnostic tool that offers advanced functionality and comprehensive coverage of Mercedes-Benz vehicles. It is a popular choice among professional technicians.
Mercedes Diagnostic Tools
- The Autel MaxiSys Elite is a high-end diagnostic tool that offers advanced functionality and comprehensive coverage of Mercedes-Benz vehicles. It is a popular choice among professional technicians.
7. The Role of CARDIAGTECH.NET in Solving Mercedes-Benz Diagnostic Issues
CARDIAGTECH.NET stands out as a premier provider of diagnostic tools, tailored to meet the needs of both seasoned mechanics and DIY enthusiasts. By offering a wide array of high-quality diagnostic equipment, CARDIAGTECH.NET empowers users to accurately identify and efficiently resolve a multitude of vehicle issues, thus ensuring optimal performance.
7.1. High-Quality Diagnostic Tools Offered
CARDIAGTECH.NET prides itself on supplying an extensive range of diagnostic tools specifically designed for Mercedes-Benz vehicles, each selected to deliver precision and reliability. Our inventory includes:
- OBD-II Scanners: These tools are essential for reading and clearing fault codes, providing a critical first step in diagnosing issues. CARDIAGTECH.NET offers advanced scanners with Mercedes-Benz specific capabilities, ensuring comprehensive diagnostic coverage.
- Mercedes-Benz Specific Diagnostic Software: Software such as XENTRY/DAS provides in-depth access to vehicle systems, enabling advanced functions like ECU programming, coding, and adaptation. This software is crucial for performing detailed diagnostics and complex repairs.
- Multimeters: Essential for testing voltage, continuity, and resistance in electrical circuits, multimeters help identify wiring issues and faulty components.
- CAN Bus Analyzers: These specialized tools monitor and analyze communication signals on the CAN bus, helping to identify disruptions and errors in data transmission.
7.2. Benefits of Purchasing Tools from CARDIAGTECH.NET
Choosing CARDIAGTECH.NET as your provider of diagnostic tools comes with numerous advantages:
- Wide Selection: A broad array of tools ensures you find the perfect match for your diagnostic requirements.
- Quality Assurance: Each tool is selected for its reliability and precision, ensuring effective diagnostics.
- Expert Support: Access to expert advice to help you choose the right tools and troubleshoot issues.
- Competitive Pricing: High-quality tools are offered at competitive prices, providing excellent value for your investment.
- Customer Satisfaction: A commitment to ensuring every customer is satisfied with their purchase.
7.3. How CARDIAGTECH.NET Can Assist with the 9000 Fault Code
When facing a Mercedes 9000 fault code, CARDIAGTECH.NET provides targeted support to help you resolve the issue efficiently:
- Accurate Diagnosis:
- CARDIAGTECH.NET offers high-quality OBD-II scanners that provide accurate readings of fault codes, enabling you to identify the underlying issues.
- Component Testing:
- Multimeters and other testing tools help you assess the functionality of sensors, wiring, and other components, ensuring you can pinpoint the source of the problem.
- Software Solutions:
- Mercedes-Benz specific diagnostic software allows for ECU programming, coding, and adaptation, resolving software glitches and communication errors that contribute to the 9000 fault code.
- Expert Guidance:
- CARDIAGTECH.NET provides expert guidance on using diagnostic tools effectively, helping you navigate the diagnostic process and implement the necessary repairs.
- Tool Recommendations:
- CARDIAGTECH.NET can recommend the best tools for your specific needs, ensuring you have the equipment necessary to tackle the 9000 fault code and other diagnostic challenges.
To illustrate the diagnostic and repair processes for the Mercedes 9000 fault code, here are a few real-world examples:
8.1. Case Study 1: Faulty Oxygen Sensor
- Vehicle: 2015 Mercedes-Benz C300
- Symptoms: The vehicle exhibited rough idling, decreased fuel efficiency, and the check engine light was illuminated. The OBD-II scanner revealed the 9000 fault code along with a code indicating a faulty oxygen sensor.
- Diagnosis: The technician used a multimeter to test the oxygen sensor and found that it was not functioning within the specified range.
- Repair: The technician replaced the faulty oxygen sensor with a new one. After clearing the fault codes, the vehicle ran smoothly, and the check engine light did not return.
- Tools Used: OBD-II scanner, multimeter, socket set, wrenches.
8.2. Case Study 2: Corroded Wiring Connector
- Vehicle: 2012 Mercedes-Benz E350
- Symptoms: The vehicle experienced intermittent electrical issues, including malfunctioning lights and power windows. The OBD-II scanner revealed the 9000 fault code.
- Diagnosis: The technician performed a visual inspection and found a corroded wiring connector near the ECU.
- Repair: The technician cleaned the corroded connector with electrical contact cleaner and secured it properly. After clearing the fault codes, the electrical issues were resolved, and the 9000 fault code did not return.
- Tools Used: OBD-II scanner, electrical contact cleaner, wire brush.
8.3. Case Study 3: ECU Software Glitch
- Vehicle: 2018 Mercedes-Benz GLC300
- Symptoms: The vehicle displayed various warning lights on the dashboard, and the transmission was shifting erratically. The OBD-II scanner revealed the 9000 fault code.
- Diagnosis: The technician used Mercedes-Benz specific diagnostic software to check the ECU