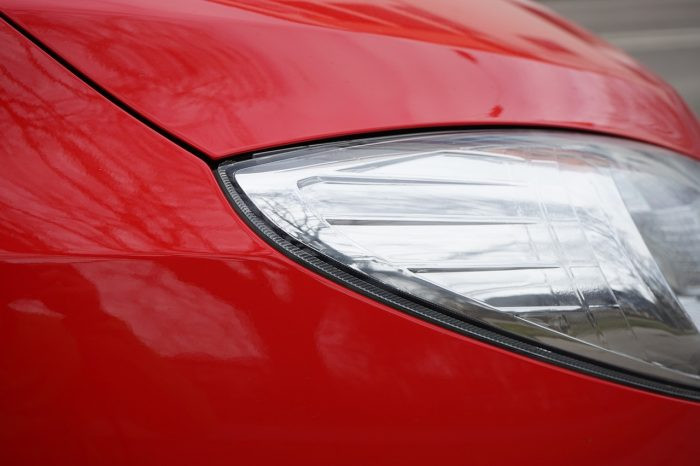
**Easy Steps: How to Fix Small Chipped Paint on Car**
Is your car marred by unsightly paint chips? CARDIAGTECH.NET understands the frustration. This guide provides a detailed, SEO-optimized approach on How To Fix Small Chipped Paint On Car, transforming your vehicle’s appearance and protecting it from further damage. Follow our expert tips for seamless auto paint chip repair and achieve professional-looking results! Let’s get started with automotive touch-up.
Contents
- 1. Understanding the Enemy: What Causes Paint Chips?
- 2. Is DIY Repair Right for You? Evaluating the Damage
- 3. Essential Tools & Materials: Gearing Up for Success
- 4. Step-by-Step Guide: The DIY Paint Chip Repair Process
- 5. Advanced Techniques: Tackling Tricky Paint Chips
- 6. Protecting Your Investment: Preventing Future Paint Chips
- 7. Cost-Effective Solutions: DIY vs. Professional Repair
- 8. The Importance of Color Matching: Achieving a Seamless Finish
- 9. Don’t Ignore Rust: Addressing Corrosion Before It Spreads
- 10. Professional Assistance: When to Call in the Experts at CARDIAGTECH.NET
- FAQ: Your Paint Chip Repair Questions Answered
1. Understanding the Enemy: What Causes Paint Chips?
Paint chips, those irritating blemishes on your car’s otherwise pristine surface, are often the result of everyday driving hazards. Here’s a breakdown of the most common culprits:
- Road Debris: Gravel, small stones, and other loose materials kicked up by tires are major offenders. These projectiles, especially at highway speeds, can impact your car’s paint with surprising force.
- Winter Road Treatments: Salt and grit used to de-ice roads in winter are highly abrasive and can cause significant paint damage. These materials are often scattered across the road surface and easily strike your vehicle.
- Environmental Factors: Prolonged exposure to sunlight, acid rain, and other environmental contaminants can weaken the paint’s integrity, making it more susceptible to chipping.
- Poor Paint Quality: In some cases, factory paint application may be inadequate, leading to thinner or less durable paint that chips more easily.
- Accidents & Contact: Minor fender-benders, contact with other vehicles or objects when parking, or even careless door dings can result in chipped paint.
Being aware of these causes can help you take preventative measures, such as avoiding driving too closely behind other vehicles or using protective films, to minimize the risk of paint chips. However, despite your best efforts, they are often unavoidable. Let’s move on to how to remedy them.
Road debris causing paint chips
2. Is DIY Repair Right for You? Evaluating the Damage
Before diving into a DIY paint chip repair, it’s essential to assess the damage and determine if you can tackle the job effectively. Here’s a guide to help you decide:
- Size and Severity: Small, shallow chips that haven’t penetrated the primer layer are ideal for DIY repair. However, larger, deeper chips that expose bare metal or show signs of rust may require professional attention.
- Location: Chips in easily accessible areas, such as the hood or door panels, are generally easier to repair yourself. Chips in tight or complex areas, such as around door handles or intricate body lines, may be more challenging.
- Number of Chips: A few isolated chips can usually be handled with a DIY approach. However, if your car has numerous chips scattered across multiple panels, it might be more efficient and cost-effective to seek professional help.
- Your Skill Level: Be honest about your experience with car care and paint repair. If you’re not comfortable with detail work or lack the necessary tools and equipment, it’s best to leave the job to a professional.
- Rust Presence: If the chip has already started to rust, it’s crucial to address the rust before attempting any paint repair. This may involve sanding, rust removal products, and priming, which can add complexity to the DIY process.
- Color Matching: Accurately matching the paint color is critical for a seamless repair. If you’re unsure about your ability to obtain a perfect match or blend the paint effectively, professional assistance may be necessary.
If you determine that a DIY repair is appropriate, proceed with confidence and follow the steps outlined in this guide. However, if you have any doubts or concerns, don’t hesitate to consult with a professional at CARDIAGTECH.NET for expert advice and service. Contact us at Whatsapp: +1 (641) 206-8880.
3. Essential Tools & Materials: Gearing Up for Success
Before you start your paint chip repair, gather all the necessary tools and materials. Having everything on hand will streamline the process and ensure a professional-looking result. Here’s a comprehensive checklist:
- Cleaning Supplies:
- Car Wash Soap: For washing the affected area to remove dirt and grime.
- Grease and Wax Remover: To eliminate any residue that could interfere with paint adhesion.
- Rubbing Alcohol: For a final cleaning to ensure a pristine surface.
- Microfiber Cloths: Soft, lint-free cloths for cleaning and applying products.
- Surface Preparation:
- Fine-Grit Sandpaper (2000-3000 grit): For smoothing rough edges around the chip.
- Sanding Block: To provide a flat, even surface for sanding.
- Detail Brush: A small brush for precise sanding in tight areas.
- Paint Application:
- Touch-Up Paint: Matched to your car’s exact color code (available at CARDIAGTECH.NET).
- Primer: To provide a base for the touch-up paint and improve adhesion.
- Clear Coat: To protect the touch-up paint and provide a glossy finish.
- Fine-Tipped Applicators: Small brushes, toothpicks, or applicator pens for applying paint in thin layers.
- Blending & Finishing:
- Rubbing Compound: For removing excess paint and blending the repair with the surrounding paint.
- Polishing Compound: For refining the finish and restoring shine.
- Wax: To protect the repaired area and enhance the overall appearance.
- Buffing Pad: For applying rubbing and polishing compounds (optional, but recommended).
- Safety Gear:
- Gloves: To protect your hands from chemicals and paint.
- Mask: To avoid inhaling fumes.
- Eye Protection: To shield your eyes from splashes and debris.
Investing in high-quality tools and materials from CARDIAGTECH.NET will significantly improve your chances of achieving a professional-looking repair. Don’t compromise on quality – your car deserves the best. We’re located at 276 Reock St, City of Orange, NJ 07050, United States.
4. Step-by-Step Guide: The DIY Paint Chip Repair Process
With your tools and materials in hand, it’s time to tackle the paint chip repair. Follow these step-by-step instructions for a flawless finish:
- Preparation is Key:
- Wash the area around the chip thoroughly with car wash soap and water.
- Use a grease and wax remover to eliminate any remaining residue.
- Wipe the area with rubbing alcohol and a clean microfiber cloth.
- Allow the surface to dry completely.
- Smooth the Edges:
- Wrap fine-grit sandpaper (2000-3000 grit) around a sanding block.
- Gently sand the edges of the chip to remove any raised or jagged edges.
- Be careful not to sand too aggressively or damage the surrounding paint.
- Wipe away any sanding dust with a clean microfiber cloth.
- Prime Time:
- Apply a thin layer of primer to the chip using a fine-tipped applicator.
- Allow the primer to dry completely according to the manufacturer’s instructions.
- If necessary, lightly sand the primed area with fine-grit sandpaper to smooth out any imperfections.
- Wipe away any sanding dust.
- Apply Touch-Up Paint:
- Shake the touch-up paint thoroughly to ensure proper mixing.
- Apply a thin layer of touch-up paint to the chip using a fine-tipped applicator.
- Avoid applying too much paint at once, as this can lead to runs or drips.
- Allow the paint to dry completely between coats.
- Apply multiple thin coats until the paint is level with the surrounding surface.
- Clear Coat Protection:
- Apply a thin layer of clear coat to the repaired area.
- Allow the clear coat to dry completely according to the manufacturer’s instructions.
- The clear coat will protect the touch-up paint and provide a glossy finish.
- Blending Magic:
- Apply a small amount of rubbing compound to a buffing pad.
- Gently rub the repaired area in a circular motion to remove any excess paint and blend the repair with the surrounding paint.
- Be careful not to rub too aggressively or damage the surrounding paint.
- Wipe away any rubbing compound residue with a clean microfiber cloth.
- Polishing Perfection:
- Apply a small amount of polishing compound to a clean buffing pad.
- Gently polish the repaired area in a circular motion to refine the finish and restore shine.
- Wipe away any polishing compound residue with a clean microfiber cloth.
- Wax On, Wax Off:
- Apply a thin layer of wax to the repaired area to protect the paint and enhance the overall appearance.
- Buff the wax with a clean microfiber cloth to a high shine.
Following these steps carefully will help you achieve a seamless paint chip repair that restores your car’s beauty and protects it from further damage. Remember, patience and attention to detail are key to success. If you need any assistance or have questions, don’t hesitate to reach out to the experts at CARDIAGTECH.NET.
5. Advanced Techniques: Tackling Tricky Paint Chips
While the standard repair process works well for most small paint chips, some situations require more advanced techniques. Here are a few tips for tackling tricky paint chips:
- Deep Chips: For chips that have penetrated the primer and exposed bare metal, it’s crucial to address the metal before applying primer and paint. Use a rust converter to neutralize any rust and prevent it from spreading. Then, apply a thin layer of body filler to level the surface before priming and painting.
- Multiple Chips: If your car has numerous chips in close proximity, consider using a “blobbing” technique. Apply a small blob of touch-up paint to each chip and allow it to dry completely. Then, use a razor blade or a detailing knife to carefully level the paint with the surrounding surface. Finally, blend and polish the area as described in the standard repair process.
- Edges of Panels: Chips along the edges of panels can be challenging to repair because they’re often exposed to more wear and tear. Use a flexible sanding block to conform to the contours of the panel and ensure even sanding. Apply multiple thin coats of paint to build up the finish and provide adequate protection.
- Matching Metallic Paints: Metallic paints can be difficult to match and blend seamlessly. To achieve the best results, use a blending agent to help the metallic flakes disperse evenly and avoid a “tiger stripe” effect. Apply the paint in thin, even coats and allow it to dry completely between coats.
Mastering these advanced techniques will allow you to tackle even the most challenging paint chip repairs with confidence. Remember, practice makes perfect, so don’t be afraid to experiment and refine your skills.
6. Protecting Your Investment: Preventing Future Paint Chips
Once you’ve repaired your car’s paint chips, it’s essential to take steps to prevent future damage. Here are some effective strategies for protecting your investment:
- Maintain a Safe Following Distance: Reduce your risk of stone chips by maintaining a safe following distance from other vehicles, especially trucks and construction vehicles that are more likely to kick up debris.
- Avoid Gravel Roads: Whenever possible, avoid driving on gravel roads or unpaved surfaces that are notorious for causing paint chips. If you must drive on these roads, proceed slowly and cautiously.
- Invest in Mud Flaps: Mud flaps can help deflect rocks and debris away from your car’s paint, especially the lower panels and wheel wells.
- Consider Paint Protection Film (PPF): PPF is a transparent, self-healing film that can be applied to vulnerable areas of your car, such as the hood, bumper, and fenders. It provides excellent protection against stone chips, scratches, and other types of damage.
- Regular Washing and Waxing: Regularly washing and waxing your car can help protect the paint from environmental contaminants and make it more resistant to chipping.
- Park Strategically: Avoid parking in areas where your car is likely to be exposed to flying debris, such as near construction sites or busy streets.
By implementing these preventative measures, you can significantly reduce your risk of future paint chips and keep your car looking its best for years to come.
7. Cost-Effective Solutions: DIY vs. Professional Repair
When dealing with paint chips, one of the first questions that come to mind is: “Should I fix it myself, or should I take it to a professional?” The answer depends on several factors, including the extent of the damage, your skill level, and your budget. Here’s a breakdown of the costs and benefits of DIY vs. professional repair:
| Factor | DIY Repair | Professional Repair |
|---|---|---|
| Cost | $20 – $100 (depending on the quality of materials) | $100 – $500+ (depending on the extent of the damage and the shop’s rates) |
| Skill Level | Requires basic car care knowledge and attention to detail | Requires specialized skills and experience |
| Time Investment | Several hours, including preparation, application, and drying | Typically 1-2 days, depending on the shop’s workload |
| Quality of Result | Can achieve good results with patience and proper technique | Generally provides a more seamless and professional-looking finish |
| Best For | Small, isolated chips on easily accessible areas | Larger, deeper chips, multiple chips, chips on complex areas, or when a perfect color match is critical |
| Materials Needed | Car wash soap, grease remover, rubbing alcohol, sandpaper, primer, touch-up paint, clear coat, rubbing compound, polishing compound, wax, applicators, cloths | Specialized tools and equipment, including spray guns, color-matching systems, and paint booths |
Ultimately, the decision of whether to DIY or go professional depends on your individual circumstances and preferences. If you’re confident in your abilities and willing to invest the time and effort, DIY repair can be a cost-effective solution. However, if you’re unsure about your skills or the damage is significant, seeking professional help is the best way to ensure a high-quality repair. At CARDIAGTECH.NET, we offer both DIY supplies and professional repair services to meet your needs. Give us a call today!
8. The Importance of Color Matching: Achieving a Seamless Finish
One of the most critical aspects of paint chip repair is achieving an accurate color match. A mismatched paint color will make the repair stand out like a sore thumb and detract from your car’s overall appearance. Here’s why color matching is so important and how to ensure a seamless finish:
- Factory Paint Codes: Your car’s paint code is typically located on a sticker inside the driver’s side door jamb or in the engine compartment. This code identifies the exact color of your car’s paint as it was originally manufactured.
- Fading and Aging: Over time, your car’s paint will fade and change due to exposure to sunlight and other environmental factors. This means that even if you use the correct paint code, the touch-up paint may not be a perfect match for the existing paint.
- Blending Techniques: To compensate for fading and aging, it’s essential to blend the touch-up paint with the surrounding paint. This involves gradually feathering the edges of the repair to create a smooth transition.
- Professional Color Matching: Professional auto body shops have sophisticated color-matching systems that can accurately analyze your car’s paint and create a custom-mixed touch-up paint that is a perfect match.
- Test Before You Commit: Before applying touch-up paint to your car, always test it in an inconspicuous area to ensure a good match. If the color is significantly different, consider having a custom-mixed paint created.
At CARDIAGTECH.NET, we understand the importance of color matching. That’s why we offer a wide range of touch-up paints that are precisely matched to your car’s factory paint code. We also provide professional color-matching services to ensure a seamless finish. Contact us today to find the perfect paint match for your car.
9. Don’t Ignore Rust: Addressing Corrosion Before It Spreads
If a paint chip has exposed bare metal, it’s crucial to address any signs of rust before attempting to repair the paint. Rust is a corrosive process that can weaken the metal and cause significant damage if left untreated. Here’s how to handle rust in paint chip repairs:
- Identify Rust: Look for reddish-brown discoloration or flaking on the exposed metal. Even small spots of rust can spread quickly if not addressed.
- Remove Loose Rust: Use a wire brush or sandpaper to remove any loose or flaking rust from the area. Be careful not to damage the surrounding paint.
- Apply Rust Converter: Apply a rust converter to the affected area. Rust converters chemically neutralize the rust and convert it into a stable, paintable surface. Follow the manufacturer’s instructions carefully.
- Prime the Area: Once the rust converter has dried, apply a thin layer of primer to the area. The primer will provide a base for the touch-up paint and improve adhesion.
- Follow Paint Repair Steps: Proceed with the standard paint chip repair process, including applying touch-up paint, clear coat, blending, and polishing.
Ignoring rust can lead to more extensive and costly repairs down the road. By addressing rust promptly and properly, you can protect your car’s metal and ensure a long-lasting paint repair.
10. Professional Assistance: When to Call in the Experts at CARDIAGTECH.NET
While DIY paint chip repair can be a rewarding and cost-effective solution, there are times when it’s best to call in the experts at CARDIAGTECH.NET. Here are some situations where professional assistance is recommended:
- Extensive Damage: If your car has numerous paint chips, large areas of damaged paint, or significant rust, professional repair is the best option.
- Complex Areas: Chips on complex areas of the car, such as around door handles, mirrors, or body lines, can be challenging to repair properly.
- Color Matching Difficulties: If you’re unable to achieve an accurate color match with DIY methods, professional color-matching services can ensure a seamless finish.
- Lack of Experience: If you’re not comfortable with car care or paint repair, it’s best to leave the job to a professional.
- Time Constraints: If you don’t have the time or patience to perform a DIY repair, professional service can save you time and hassle.
At CARDIAGTECH.NET, we have the expertise, tools, and experience to handle all types of paint chip repairs. Our skilled technicians use advanced techniques and high-quality materials to restore your car’s paint to its original beauty. We also offer a wide range of other auto body repair services, including dent removal, scratch repair, and collision repair. Contact us today at Whatsapp: +1 (641) 206-8880 or visit our website CARDIAGTECH.NET to schedule an appointment or request a free estimate. Don’t let paint chips detract from your car’s appearance any longer!
FAQ: Your Paint Chip Repair Questions Answered
Here are some frequently asked questions about paint chip repair:
- How long does it take for touch-up paint to dry?
- Touch-up paint typically dries to the touch in 30 minutes to an hour. However, it can take up to 24 hours for the paint to fully cure.
- Can I wash my car after applying touch-up paint?
- It’s best to wait at least 24 hours after applying touch-up paint before washing your car. This will allow the paint to fully cure and prevent it from being damaged by the wash.
- What’s the best way to apply touch-up paint?
- Apply touch-up paint in thin, even coats using a fine-tipped applicator. Avoid applying too much paint at once, as this can lead to runs or drips.
- How can I prevent touch-up paint from looking blotchy?
- To prevent touch-up paint from looking blotchy, blend the edges of the repair with the surrounding paint using rubbing compound and polishing compound.
- Can I use a clear coat over touch-up paint?
- Yes, applying a clear coat over touch-up paint will protect the paint and provide a glossy finish.
- What’s the best way to remove excess touch-up paint?
- Remove excess touch-up paint with a razor blade or detailing knife. Be careful not to damage the surrounding paint.
- How can I find my car’s paint code?
- Your car’s paint code is typically located on a sticker inside the driver’s side door jamb or in the engine compartment.
- Can I use touch-up paint on plastic bumpers?
- Yes, you can use touch-up paint on plastic bumpers. However, you may need to use a special adhesion promoter to ensure proper paint adhesion.
- How can I protect my car from future paint chips?
- Protect your car from future paint chips by maintaining a safe following distance, avoiding gravel roads, investing in mud flaps, and considering paint protection film.
- Where can I buy high-quality touch-up paint and repair supplies?
- CARDIAGTECH.NET offers a wide selection of high-quality touch-up paint and repair supplies. Visit our website or contact us today to find the perfect products for your needs.
Ready to say goodbye to those unsightly paint chips? Contact CARDIAGTECH.NET today for expert advice, high-quality products, and professional repair services. We’re here to help you restore your car’s beauty and protect your investment.
- Address: 276 Reock St, City of Orange, NJ 07050, United States
- Whatsapp: +1 (641) 206-8880
- Website: CARDIAGTECH.NET
Let CARDIAGTECH.NET be your trusted partner for all your auto body repair needs! We are always ready to assist.

