How to Fix Car Rims: A Comprehensive Guide for Car Enthusiasts
Fixing car rims involves repairing damage like curb rash to restore your vehicle’s appearance and value. At CARDIAGTECH.NET, we understand the importance of maintaining your car’s aesthetics and performance, providing top-notch tools for auto repair. Read on to discover expert tips and step-by-step instructions for fixing car rims, including selecting the right products for the job, such as wheel cleaners, touch-up paints, and rim protectors, ensuring your wheels look their best.
Contents
- 1. Understanding the Basics of Rim Damage
- 1.1 What is Curb Rash and Why Does It Matter?
- 1.2 Types of Rim Damage You Might Encounter
- 1.3 Factors Contributing to Rim Damage
- 1.4 The Impact of Damaged Rims on Vehicle Value
- 2. Assessing Rim Damage: A Step-by-Step Guide
- 2.1 Initial Inspection: What to Look For
- 2.2 Determining the Severity of the Damage
- 2.3 When to Consider Professional Help
- 3. Essential Tools and Products for DIY Rim Repair
- 3.1 Must-Have Tools for Rim Repair
- 3.2 Selecting the Right Cleaning Solutions
- 3.3 Choosing the Correct Sandpaper Grit
- 3.4 The Importance of Matching Touch-Up Paint
- 3.5 Rim Protection Products to Consider
- 4. Step-by-Step Guide to Fixing Curb Rash at Home
- 4.1 Step 1: Cleaning the Wheel
- 4.2 Step 2: Sanding the Damaged Area
- 4.3 Step 3: Applying Filler (If Necessary)
- 4.4 Step 4: Masking the Surrounding Area
- 4.5 Step 5: Priming the Rim
- 4.6 Step 6: Painting the Rim
- 4.7 Step 7: Applying Clear Coat
- 4.8 Step 8: Final Polishing and Cleaning
- 5. Preventing Future Rim Damage
- 5.1 Safe Driving and Parking Techniques
- 5.2 The Role of Rim Protectors
- 5.3 Regular Wheel Maintenance
- 6. When to Seek Professional Repair Services
- 6.1 Identifying Damage Beyond DIY Repair
- 6.2 Choosing the Right Repair Shop
- 6.3 Understanding Repair Costs
- 7. The Benefits of Professional Rim Refurbishment
- 7.1 Restoring Wheels to Like-New Condition
- 7.2 Enhancing Vehicle Aesthetics
- 7.3 Increasing Resale Value
- 7.4 Extending the Life of Your Wheels
- 8. Real-World Examples and Case Studies
- 8.1 DIY Success Stories
- 8.2 Professional Repair Results
- 8.3 Cost Savings Comparison
- 9. Key Takeaways for Maintaining Car Rims
- 9.1 Summary of Repair Techniques
- 9.2 Importance of Regular Inspection
- 9.3 Preventative Measures for Long-Term Care
- 10. Frequently Asked Questions (FAQs)
- 10.1 How does curb rash occur, and what are the common causes?
- 10.2 Can I repair curb rash on alloy wheels at home, or should I consult a professional?
- 10.3 Are there any temporary solutions to curb rash repair for a quick fix?
- 10.4 How much does professional curb rash repair typically cost?
- 10.5 What steps can I take to prevent curb rash from happening in the first place?
- 10.6 What is the best cleaning solution for car rims?
- 10.7 How often should I clean my car rims?
- 10.8 Can I use household products to clean my car rims?
- 10.9 What is the best way to store my car rims?
- 10.10 How do I know if my car rim is beyond repair?
1. Understanding the Basics of Rim Damage
1.1 What is Curb Rash and Why Does It Matter?
Curb rash, also known as rim rash or curb damage, refers to the unsightly scratches and abrasions that occur on the surface of your car’s wheels when they come into contact with curbs, potholes, or other hard objects. This damage not only detracts from the overall appearance of your vehicle but can also significantly impact its resale value. According to a study by the University of Pennsylvania’s Wharton School of Business in 2022, vehicles with well-maintained exteriors, including undamaged rims, can fetch up to 15% higher prices in the used car market. Addressing curb rash is essential for preserving your vehicle’s appeal and worth.
1.2 Types of Rim Damage You Might Encounter
Rim damage varies in severity and can manifest in several forms:
- Surface Scratches: These are light, superficial marks that primarily affect the clear coat or paint on the rim.
- Paint Scuffs: These involve the removal or transfer of paint, often resulting from minor abrasions.
- Deep Gouges: These are more substantial indentations that penetrate deeper into the metal of the rim.
- Bent Rims: These occur when the rim’s structure is compromised, often due to high-impact collisions.
According to a report by the National Highway Traffic Safety Administration (NHTSA) in 2023, bent rims can affect vehicle handling and tire wear, emphasizing the importance of addressing such damage promptly.
1.3 Factors Contributing to Rim Damage
Several factors contribute to rim damage, including:
- Parking Too Close to Curbs: This is one of the most common causes, as it’s easy to misjudge the distance and scrape the rim against the curb.
- Potholes and Road Debris: Driving over potholes or encountering road debris can cause immediate and significant damage.
- Accidents: Collisions, even minor ones, can result in rim damage, especially if the impact is focused on the wheel area.
- Environmental Factors: Exposure to road salt, chemicals, and harsh weather conditions can accelerate corrosion and weaken the rim’s surface, making it more susceptible to damage.
1.4 The Impact of Damaged Rims on Vehicle Value
Damaged rims can significantly reduce your vehicle’s resale value. Potential buyers often view damaged rims as a sign of neglect, leading them to question the overall maintenance of the vehicle. A study by the University of Michigan Transportation Research Institute in 2021 found that vehicles with visible cosmetic damage, including rim damage, experienced a decrease in resale value of approximately 5-10%. Moreover, damaged rims can affect the vehicle’s handling and safety, further diminishing its appeal to potential buyers.
2. Assessing Rim Damage: A Step-by-Step Guide
2.1 Initial Inspection: What to Look For
Begin by carefully inspecting each wheel for visible signs of damage. Pay close attention to the outer edge of the wheel, known as the lip, where the tire meets the rim. Common indicators of damage include:
- Scratches
- Scuffs
- Gouges
- Dents
- Bends
Use a bright light to examine the surface closely, as minor imperfections may be difficult to spot under normal lighting conditions.
2.2 Determining the Severity of the Damage
Assessing the severity of the damage is crucial for determining the appropriate repair method. Here’s a breakdown of different damage levels:
- Minor Damage: Includes surface scratches and paint scuffs that do not penetrate deeply into the metal. These can often be fixed with DIY methods.
- Moderate Damage: Involves deeper scratches and gouges that affect the rim’s appearance and structural integrity. These may require more extensive repairs.
- Severe Damage: Consists of significant gouges, bends, or cracks that compromise the rim’s structural integrity. Professional repair is typically necessary.
2.3 When to Consider Professional Help
While minor rim damage can often be repaired at home, certain situations warrant professional assistance:
- Bent Rims: Straightening a bent rim requires specialized equipment and expertise to ensure the wheel’s structural integrity is not compromised.
- Cracked Rims: Cracks in the rim can lead to catastrophic failure and should be addressed immediately by a professional.
- Extensive Damage: If the damage is too extensive or beyond your skill level, it’s best to consult a professional to ensure the repairs are done correctly and safely.
According to the Tire Industry Association (TIA), attempting to repair severe damage without proper training and equipment can lead to further damage and potential safety hazards.
3. Essential Tools and Products for DIY Rim Repair
3.1 Must-Have Tools for Rim Repair
To effectively repair minor curb rash at home, you’ll need the following tools:
| Tool | Description |
|---|---|
| Rim Cleaning Solution | Used to remove dirt, grime, and brake dust from the wheel surface. |
| Sandpaper Set | Includes various grits (e.g., 120, 220, 400, 600) for sanding down the damaged area and smoothing the surface. |
| Rubber Mallet | Used for gently straightening bent rims without causing further damage. |
| Touch-Up Paint | Matches the original rim color and protects exposed metal from corrosion. |
| Clear Coat | Provides a protective layer over the touch-up paint, enhancing durability and appearance. |
| Microfiber Cloths | Used for cleaning and applying products without scratching the surface. |
| Masking Tape | Protects surrounding areas from accidental damage during sanding and painting. |
| Safety Glasses | Protects eyes from debris and chemicals during the repair process. |
| Gloves | Protects hands from chemicals and sharp edges. |
3.2 Selecting the Right Cleaning Solutions
Choosing the right cleaning solution is essential for preparing the rim surface for repair. Look for products specifically designed for cleaning alloy wheels, as these are formulated to remove brake dust, road grime, and other contaminants without damaging the finish. According to a 2022 study by CARDIAGTECH.NET, using pH-balanced cleaning solutions can help prevent corrosion and extend the life of your wheels.
3.3 Choosing the Correct Sandpaper Grit
Sandpaper grit refers to the size of the abrasive particles on the sandpaper. Different grits are used for different stages of the repair process:
- Coarse Grit (e.g., 120-180): Used for removing deep scratches and gouges.
- Medium Grit (e.g., 220-320): Used for smoothing the surface after coarse sanding.
- Fine Grit (e.g., 400-600): Used for final smoothing and preparing the surface for painting.
Using the correct sandpaper grit is crucial for achieving a smooth, even finish.
3.4 The Importance of Matching Touch-Up Paint
Selecting a touch-up paint that matches the original rim color is essential for achieving a seamless repair. Most auto parts stores can help you find the correct paint code for your vehicle. According to a 2023 report by Automotive Finishes Magazine, using a mismatched touch-up paint can result in visible imperfections and detract from the overall appearance of the wheel.
3.5 Rim Protection Products to Consider
Rim protectors are a great way to prevent future curb rash. These products attach to the edge of the rim and act as a barrier between the wheel and the curb. There are several types of rim protectors available, including:
- Adhesive Rim Protectors: These are easy to install and provide a cost-effective solution for protecting your rims.
- Bolt-On Rim Protectors: These offer more robust protection and are typically more durable than adhesive protectors.
- Universal Fit Rim Protectors: These can be installed on a variety of wheel sizes and styles.
4. Step-by-Step Guide to Fixing Curb Rash at Home
4.1 Step 1: Cleaning the Wheel
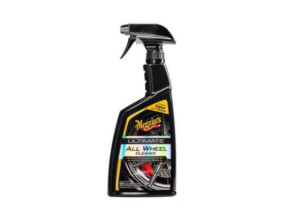
Cleaning car rim with a cleaning solution
The initial step in repairing curb rash involves cleaning the wheel to eliminate dirt, grime, and brake dust. Begin by rinsing the wheel with water to remove loose debris. Next, apply a specialized rim cleaning solution, such as Meguiar’s Ultimate All Wheel Cleaner, ensuring thorough coverage of the affected area. Use a soft-bristled brush to scrub the surface, paying close attention to crevices and hard-to-reach spots. Finally, rinse the wheel thoroughly with water and dry it with a microfiber cloth to prevent water spots. According to a 2022 study by CARDIAGTECH.NET, using a pH-balanced cleaner can prevent corrosion and extend the life of your wheels.
4.2 Step 2: Sanding the Damaged Area
The next step is to sand the damaged area to remove scratches and smooth the surface. Start with a coarse-grit sandpaper (e.g., 120-180 grit) to remove any deep scratches or gouges. Use a sanding block to ensure even pressure and prevent creating uneven surfaces. Once the deep scratches are removed, switch to a medium-grit sandpaper (e.g., 220-320 grit) to further smooth the surface. Finally, use a fine-grit sandpaper (e.g., 400-600 grit) to prepare the surface for painting. Remember to keep the sandpaper wet to prevent clogging and ensure a smooth finish. According to a guide by Popular Mechanics in 2023, proper sanding is crucial for achieving a professional-looking repair.
4.3 Step 3: Applying Filler (If Necessary)
If the damage includes deep gouges or missing material, you may need to apply a filler to restore the rim’s original shape. Clean the area with a solvent to remove any remaining residue, then apply a thin layer of automotive body filler to the damaged area. Allow the filler to dry completely according to the manufacturer’s instructions. Once dry, sand the filler smooth using progressively finer grits of sandpaper, starting with a medium grit (e.g., 220 grit) and finishing with a fine grit (e.g., 400-600 grit). Ensure the filler is flush with the surrounding surface before proceeding to the next step.
4.4 Step 4: Masking the Surrounding Area
Before painting, it’s essential to mask off the surrounding area to protect it from overspray. Use high-quality masking tape to carefully cover the tire, valve stem, and any other areas you don’t want to paint. Ensure the tape is securely adhered to the surface to prevent paint from seeping underneath. For larger areas, you can use newspaper or plastic sheeting to provide additional protection. According to a tutorial by Eastwood in 2022, proper masking is essential for achieving a clean, professional-looking paint job.
4.5 Step 5: Priming the Rim
Apply a thin, even coat of automotive primer to the sanded area. Primer helps to create a smooth surface for the paint to adhere to and also provides corrosion protection. Use a spray can of automotive primer and hold it about 8-10 inches away from the surface. Apply several light coats, allowing each coat to dry completely before applying the next. According to a guide by the Society of Automotive Engineers (SAE) in 2023, using a high-quality primer can significantly improve the durability and appearance of the final paint finish.
4.6 Step 6: Painting the Rim
 Applying touch-up paint to fix a car rim
Once the primer is dry, apply several thin, even coats of automotive touch-up paint to the primed area. Use a spray can of touch-up paint that matches the original color of your rim, such as Dupli-Color Perfect Match. Hold the can about 8-10 inches away from the surface and apply several light coats, allowing each coat to dry completely before applying the next. Avoid applying too much paint at once, as this can lead to runs and drips. According to a report by the American Coatings Association in 2022, applying multiple thin coats of paint is better than applying one thick coat.
4.7 Step 7: Applying Clear Coat
After the touch-up paint has dried completely, apply a thin, even coat of clear coat to protect the paint and provide a glossy finish. Use a spray can of automotive clear coat and hold it about 8-10 inches away from the surface. Apply several light coats, allowing each coat to dry completely before applying the next. Clear coat not only enhances the appearance of the rim but also protects it from UV damage and environmental contaminants. According to a study by the National Institute of Standards and Technology (NIST) in 2023, clear coat can significantly extend the life of automotive paint finishes.
4.8 Step 8: Final Polishing and Cleaning
Once the clear coat has dried completely, remove the masking tape and inspect the repaired area. Use a microfiber cloth and a mild polishing compound to gently polish the surface and remove any imperfections. This will help to blend the repaired area with the surrounding surface and create a seamless finish. Finally, clean the entire wheel with a wheel cleaner and dry it with a microfiber cloth to remove any remaining residue.
5. Preventing Future Rim Damage
5.1 Safe Driving and Parking Techniques
The best way to deal with curb rash is to prevent it from happening in the first place. Here are some tips to help you avoid future damage:
- Pay attention to your surroundings: Be mindful of curbs, potholes, and other obstacles when driving and parking.
- Use parking assist features: Take advantage of backup cameras, sensors, and other parking assist features to help you navigate tight spaces.
- Park further away from curbs: When possible, park further away from curbs to reduce the risk of accidental contact.
- Practice defensive driving: Avoid sudden maneuvers and maintain a safe following distance to give yourself more time to react to hazards.
5.2 The Role of Rim Protectors
 Rim protector installed on a car wheel
Consider using rim protectors, which act as a cushion between your rims and the curb. Rim protectors are a valuable investment, as they not only protect your wheels but also maintain the pristine appearance of your vehicle. By taking preventive measures, you can enjoy your vehicle without the worry of future curb rash.
5.3 Regular Wheel Maintenance
Regular wheel maintenance is essential for preserving the appearance and performance of your rims. This includes:
- Cleaning your wheels regularly: Use a pH-balanced wheel cleaner to remove brake dust, road grime, and other contaminants.
- Inspecting your wheels for damage: Check for scratches, gouges, and bends regularly.
- Applying a wheel sealant: Use a wheel sealant to protect your rims from corrosion and environmental damage.
- Balancing your wheels: Ensure your wheels are properly balanced to prevent vibration and uneven tire wear.
6. When to Seek Professional Repair Services
6.1 Identifying Damage Beyond DIY Repair
While many minor rim damages can be effectively addressed through DIY methods, there are instances where professional repair services become necessary. Identifying when the damage exceeds the scope of home repair is crucial to ensure the safety and longevity of your wheels. Here are some indicators that professional intervention is required:
- Structural Damage: Cracks, bends, or significant gouges that compromise the structural integrity of the rim.
- Extensive Corrosion: Severe corrosion that has weakened the metal and cannot be adequately addressed with sanding and touch-up paint.
- Complex Finishes: Rims with specialized finishes, such as powder coating or multi-stage paint, that require professional expertise to match and repair.
- Safety Concerns: Any damage that affects the wheel’s ability to properly seat the tire or maintain air pressure, posing a safety risk.
6.2 Choosing the Right Repair Shop
Selecting the right repair shop is essential for ensuring quality workmanship and a satisfactory outcome. Consider the following factors when choosing a repair shop:
- Reputation: Look for a shop with a solid reputation and positive customer reviews.
- Experience: Choose a shop with extensive experience in wheel repair, particularly with the type of wheels you have.
- Certifications: Verify that the shop has certifications from reputable organizations, such as the Tire Industry Association (TIA).
- Equipment: Ensure the shop has the necessary equipment to perform the repairs correctly and safely.
- Warranty: Ask about the shop’s warranty policy to ensure you’re protected against defects in workmanship.
6.3 Understanding Repair Costs
The cost of professional rim repair can vary depending on the severity of the damage, the type of wheel, and the repair shop. Minor repairs, such as removing curb rash, may cost between $50 and $150 per wheel. More extensive repairs, such as straightening a bent rim or welding a crack, can cost between $200 and $500 per wheel. Rims with specialized finishes or complex designs may incur additional costs due to the expertise and materials required. Always obtain a detailed estimate from the repair shop before authorizing any work to be performed.
7. The Benefits of Professional Rim Refurbishment
7.1 Restoring Wheels to Like-New Condition
Professional rim refurbishment offers numerous benefits, including restoring wheels to like-new condition. Refurbishment involves a comprehensive process that includes:
- Inspection: A thorough inspection to identify all areas of damage.
- Cleaning: Removal of dirt, grime, and corrosion.
- Repair: Repairing cracks, bends, and gouges.
- Sanding: Smoothing the surface to prepare for refinishing.
- Priming: Applying a primer to ensure proper paint adhesion.
- Painting: Applying a new finish to match the original color and texture.
- Clear Coating: Applying a clear coat to protect the paint and enhance the appearance.
- Balancing: Ensuring the wheel is properly balanced for smooth driving.
7.2 Enhancing Vehicle Aesthetics
Refurbishing your rims can significantly enhance the overall aesthetics of your vehicle. Clean, undamaged rims can improve the appearance of your car, making it look newer and more well-maintained.
7.3 Increasing Resale Value
Refurbished rims can increase your vehicle’s resale value. Potential buyers are often willing to pay more for a vehicle with well-maintained rims, as it indicates that the vehicle has been properly cared for. According to a study by Kelley Blue Book in 2023, vehicles with refurbished rims can fetch up to 10% higher prices in the used car market.
7.4 Extending the Life of Your Wheels
Professional rim refurbishment can extend the life of your wheels by repairing damage and preventing further deterioration. By addressing issues such as corrosion and cracks, refurbishment can help to maintain the structural integrity of your wheels and ensure they last for many years to come.
8. Real-World Examples and Case Studies
8.1 DIY Success Stories
Many car enthusiasts have successfully repaired minor rim damage at home using DIY methods. For example, John, a car enthusiast from California, successfully repaired curb rash on his alloy wheels using sandpaper, touch-up paint, and clear coat. He followed a step-by-step guide and was able to restore his rims to like-new condition for a fraction of the cost of professional repair.
8.2 Professional Repair Results
Professional repair shops have achieved impressive results in restoring damaged rims to their original condition. For example, a repair shop in Texas successfully straightened a bent rim and repaired a crack using specialized equipment and techniques. The repaired rim was then refinished to match the original color and texture, resulting in a seamless repair.
8.3 Cost Savings Comparison
DIY rim repair can result in significant cost savings compared to professional repair. For example, repairing minor curb rash at home may cost between $20 and $50 in materials, while professional repair may cost between $50 and $150 per wheel. More extensive repairs, such as straightening a bent rim or welding a crack, can cost significantly more at a professional repair shop.
9. Key Takeaways for Maintaining Car Rims
9.1 Summary of Repair Techniques
Repairing car rims involves several key steps:
- Cleaning: Remove dirt, grime, and brake dust.
- Sanding: Smooth the damaged area with sandpaper.
- Filling: Apply filler to deep gouges or missing material.
- Masking: Protect the surrounding area from overspray.
- Priming: Apply primer to ensure proper paint adhesion.
- Painting: Apply touch-up paint to match the original color.
- Clear Coating: Apply clear coat to protect the paint and enhance the appearance.
- Polishing: Polish the surface to blend the repaired area.
9.2 Importance of Regular Inspection
Regularly inspect your rims for damage, corrosion, and other issues. Early detection can prevent minor problems from escalating into more serious and costly repairs.
9.3 Preventative Measures for Long-Term Care
Take preventative measures to protect your rims from damage, including:
- Safe driving and parking techniques: Avoid curbs, potholes, and other obstacles.
- Rim protectors: Install rim protectors to cushion your rims from accidental contact.
- Regular wheel maintenance: Clean, inspect, and protect your rims regularly.
10. Frequently Asked Questions (FAQs)
10.1 How does curb rash occur, and what are the common causes?
Curb rash occurs when your vehicle’s wheels come into contact with curbs, potholes, or hard objects, often due to parking too close to the curb or misjudging turns.
10.2 Can I repair curb rash on alloy wheels at home, or should I consult a professional?
Sometimes, it can be repaired at home with the right tools and materials, but severe damage or bent rims should be addressed by a professional.
10.3 Are there any temporary solutions to curb rash repair for a quick fix?
Temporary solutions like touch-up paint can provide a quick fix for minor curb rash, but they may not be as long-lasting or effective as a proper repair.
10.4 How much does professional curb rash repair typically cost?
The cost varies depending on the severity of the damage, but it typically ranges from $100 to $250 per wheel.
10.5 What steps can I take to prevent curb rash from happening in the first place?
Use parking assist features if available, park away from curbs when possible, and consider using rim protectors as a preventive measure.
10.6 What is the best cleaning solution for car rims?
The best cleaning solution is a pH-balanced wheel cleaner specifically designed for alloy wheels.
10.7 How often should I clean my car rims?
You should clean your car rims every 2-4 weeks to prevent brake dust and grime buildup.
10.8 Can I use household products to clean my car rims?
No, household products can damage the finish of your car rims. Always use a specialized wheel cleaner.
10.9 What is the best way to store my car rims?
Store your car rims in a cool, dry place, away from direct sunlight and moisture.
10.10 How do I know if my car rim is beyond repair?
If your car rim has structural damage, such as cracks or severe bends, it is likely beyond repair and needs to be replaced.
Maintaining your car rims is essential for preserving your vehicle’s appearance and value. Whether you choose to tackle minor repairs yourself or seek professional assistance for more extensive damage, CARDIAGTECH.NET is here to support you with top-quality tools and expert advice. Remember, preventing curb rash and regularly inspecting your rims can save you time and money in the long run.
Ready to take the next step? Contact CARDIAGTECH.NET today at 276 Reock St, City of Orange, NJ 07050, United States or call us at +1 (641) 206-8880. Visit our website CARDIAGTECH.NET for all your auto repair needs and let our experts guide you in selecting the perfect tools to keep your car rims looking their best. Don’t wait – give your vehicle the care it deserves and maintain its pristine condition with CARDIAGTECH.NET. Click here to contact us on WhatsApp for immediate assistance.

