How To Fix Car Door Fabric: A Comprehensive Guide
Fixing car door fabric can seem daunting, but with the right tools and techniques, you can restore your car’s interior to its former glory. At CARDIAGTECH.NET, we provide the tools and know-how to tackle this project effectively, ensuring a professional finish. Let’s explore how to repair auto door panel upholstery, sagging fabric repair, and interior trim adhesion, all while saving you time and money with quality automotive repair solutions.
Contents
- 1. Understanding the Problem: Why Car Door Fabric Fails
- 2. Identifying the Right Tools and Materials for Car Door Fabric Repair
- 3. Step-by-Step Guide: How to Fix Sagging Car Door Fabric
- 4. Advanced Techniques for Complex Car Door Fabric Repairs
- 5. Preventive Measures: Maintaining Your Car Door Fabric
- 6. Cost Analysis: DIY vs. Professional Car Door Fabric Repair
- 7. Addressing Common Mistakes in Car Door Fabric Repair
- 8. Tools Available at CARDIAGTECH.NET for Car Door Fabric Repair
1. Understanding the Problem: Why Car Door Fabric Fails
Car door fabric can detach or sag due to several factors. Exposure to extreme temperatures, humidity, and the natural degradation of the adhesive over time are primary culprits. Understanding these causes is the first step in effectively addressing and preventing future issues.
- Heat and Sunlight: Prolonged exposure to heat and ultraviolet (UV) rays can weaken the adhesive, causing the fabric to peel away.
- Humidity: High humidity levels can infiltrate the fabric and adhesive, leading to deterioration and eventual detachment.
- Age: Over time, the adhesive loses its bonding strength, especially in older vehicles where the original materials may not have been as durable.
- Physical Stress: Frequent use of the door, leaning on the fabric, or accidental impacts can strain the adhesive and fabric.
- Poor Initial Installation: In some cases, the fabric may not have been properly installed at the factory or during a previous repair, leading to premature failure.
These elements lead to common issues such as:
- Sagging Fabric: The most common problem, where the fabric droops away from the door panel.
- Bubbling: Air pockets form between the fabric and the door panel, creating unsightly bubbles.
- Peeling Edges: The edges of the fabric start to peel away, often near the top or sides of the door.
- Complete Detachment: The entire fabric section comes loose, hanging or falling off the door panel.
Addressing these issues promptly not only improves the aesthetics of your car but also prevents further damage to the underlying materials. With the right tools from CARDIAGTECH.NET, you can restore your car’s interior with professional-quality results.
2. Identifying the Right Tools and Materials for Car Door Fabric Repair
Having the correct tools and materials is crucial for a successful car door fabric repair. At CARDIAGTECH.NET, we offer a range of high-quality products designed to make your repair process efficient and effective. Here’s a detailed list of what you’ll need:
- Adhesive:
- 3M Super 77 Multipurpose Adhesive: Ideal for its strong bond, ease of use, and minimal residue.
- Loctite High Strength Spray Adhesive: Offers excellent heat resistance and long-lasting hold.
- Permatex Body Shop Heavy Duty Contact Adhesive: A professional-grade adhesive for more demanding repairs.
- Cleaning Supplies:
- Mild Body Solvent: For removing old adhesive and contaminants without damaging the fabric or panel.
- Goo Gone: Effective for dissolving sticky residue.
- Car Shampoo or Degreaser: For cleaning overspray or spills.
- Masking Materials:
- Painter’s Tape: Provides clean lines and easy removal without damaging the surrounding surfaces.
- Duct Tape: Can be used for masking but should be applied gently to avoid residue.
- Application Tools:
- Plastic Razor or Credit Card: For smoothing the fabric and eliminating bubbles.
- Small Flathead Screwdriver: For carefully tucking edges back into place.
- Spray Gun (optional): For applying adhesive evenly over larger areas.
- Safety Gear:
- Gloves: To protect your hands from adhesives and solvents.
- Respirator or Mask: To avoid inhaling harmful fumes from adhesives and cleaning agents.
- Eye Protection: Safety glasses or goggles to prevent splashes.
- Additional Tools:
- Heat Gun (optional): For softening old adhesive and making fabric more pliable.
- Lint-Free Cloths: For wiping surfaces and applying cleaning solutions.
- Scissors or Utility Knife: For trimming excess fabric.
Table: Essential Tools and Materials for Car Door Fabric Repair
| Tool/Material | Description | Purpose | Price Range (USD) |
|---|---|---|---|
| 3M Super 77 Adhesive | Multipurpose spray adhesive | Bonding fabric to door panel | $10 – $15 |
| Loctite Spray Adhesive | High strength, heat-resistant adhesive | Ensuring a long-lasting hold in extreme conditions | $12 – $18 |
| Mild Body Solvent | Gentle cleaner for removing old adhesive | Preparing the surface for new adhesive application | $8 – $12 |
| Painter’s Tape | Masking tape that doesn’t leave residue | Protecting surrounding areas from adhesive | $5 – $8 |
| Plastic Razor/Credit Card | Smoothing tool | Eliminating bubbles and ensuring even fabric adhesion | $1 – $5 |
| Small Flathead Screwdriver | Precision tool | Tucking fabric edges neatly into place | $5 – $10 |
| Gloves | Protective wear | Preventing skin contact with adhesives and solvents | $5 – $10 (pair) |
| Respirator/Mask | Respiratory protection | Avoiding inhalation of harmful fumes | $15 – $30 |
| Heat Gun (optional) | For softening old adhesives | Assisting in the removal of old fabric and adhesive | $20 – $50 |
| Lint-Free Cloths | Cleaning and application | Wiping surfaces and applying cleaning solutions without leaving residue | $5 – $10 (pack) |
Investing in these tools and materials from CARDIAGTECH.NET ensures that you have everything you need to perform a professional-quality repair. High-quality adhesives provide a durable bond, while the right cleaning and application tools help you achieve a seamless finish.
3. Step-by-Step Guide: How to Fix Sagging Car Door Fabric
Follow these detailed steps to repair sagging car door fabric using the tools and materials recommended by CARDIAGTECH.NET. This guide will help you achieve a professional-looking result while saving time and money.
Step 1: Preparation
- Gather Your Supplies: Ensure you have all the necessary tools and materials listed in Section 2.
- Safety First: Wear gloves, eye protection, and a respirator in a well-ventilated area.
- Prepare the Door Panel: If possible, remove the door panel for easier access. Consult your vehicle’s repair manual for instructions on how to safely remove the panel.
Step 2: Cleaning the Surface
- Remove Loose Fabric: Gently peel away any loose or detached fabric from the door panel.
- Apply Mild Body Solvent: Spray a mild body solvent onto a lint-free cloth and wipe the affected area to remove old adhesive, dirt, and contaminants.
- Scrub Stubborn Residue: For stubborn residue, use Goo Gone and a plastic razor to gently scrape away the remaining adhesive. Be careful not to damage the underlying surface.
- Final Wipe: Wipe the area clean with a dry, lint-free cloth to ensure it is free of any residue.
Step 3: Masking the Area
- Apply Painter’s Tape: Use painter’s tape to mask off the surrounding areas you want to protect from adhesive overspray. Ensure the tape is firmly pressed down to create a clean line.
- Cover Adjacent Surfaces: Cover any adjacent surfaces, such as windows or seats, with plastic sheeting or paper to protect them from overspray.
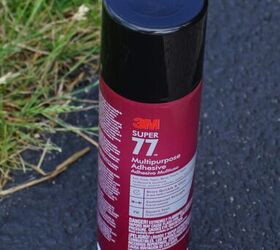
Step 4: Applying the Adhesive
- Shake the Adhesive Can: Shake the can of 3M Super 77 or your chosen adhesive thoroughly for at least one minute to ensure proper mixing.
- Spray the Adhesive: Hold the can 6-8 inches away from the surface and apply an even coat of adhesive to both the back of the fabric and the corresponding area on the door panel.
- Allow to Tack: Let the adhesive sit for 15-30 seconds to become tacky. Test by touching it lightly with your knuckle; it should feel sticky but not wet.
Step 5: Reattaching the Fabric
- Align the Fabric: Carefully align the fabric with the door panel, ensuring it is properly positioned.
- Press into Place: Starting from the center, gently press the fabric onto the door panel, working your way out to the edges.
- Smooth Out Bubbles: Use a plastic razor or credit card to smooth out any bubbles or wrinkles, working from the center outwards.
- Tuck the Edges: Use a small flathead screwdriver to carefully tuck the edges of the fabric back into place, ensuring a neat and secure finish.
Step 6: Cleaning Up Overspray
- Inspect for Overspray: Check for any adhesive overspray on the surrounding surfaces.
- Wipe with Car Shampoo or Degreaser: Use a lint-free cloth dampened with car shampoo or degreaser to gently wipe away any overspray.
- Apply Plastic Protector: Once the area is clean and dry, apply a plastic protector to the surrounding surfaces to protect them from future stains and damage.
Step 7: Final Inspection
- Check for Imperfections: Carefully inspect the repaired area for any imperfections, such as loose edges or remaining bubbles.
- Reapply Adhesive if Needed: If necessary, reapply adhesive to any loose areas and repeat the smoothing process.
- Allow to Cure: Allow the adhesive to fully cure according to the manufacturer’s instructions, typically 24-48 hours.
Detailed Table: Step-by-Step Repair Guide
| Step | Action | Materials/Tools | Estimated Time | Tips/Considerations |
|---|---|---|---|---|
| 1 | Preparation | Gloves, eye protection, respirator | 5 minutes | Ensure good ventilation; remove door panel if possible for easier access. |
| 2 | Cleaning the Surface | Mild body solvent, Goo Gone, lint-free cloths, plastic razor | 15 minutes | Gently remove old adhesive without damaging the panel. Use Goo Gone for stubborn residue. |
| 3 | Masking the Area | Painter’s tape, plastic sheeting | 10 minutes | Protect surrounding surfaces from overspray to avoid additional cleanup. |
| 4 | Applying the Adhesive | 3M Super 77 adhesive | 5 minutes | Apply an even coat to both fabric and panel. Allow to become tacky before reattaching. |
| 5 | Reattaching the Fabric | Plastic razor/credit card, small flathead screwdriver | 20 minutes | Align carefully and press from the center outwards. Use the screwdriver to tuck edges neatly. |
| 6 | Cleaning Up Overspray | Car shampoo/degreaser, plastic protector, lint-free cloths | 10 minutes | Clean overspray immediately to prevent staining. Apply plastic protector for added protection. |
| 7 | Final Inspection | None | 5 minutes | Check for imperfections and reapply adhesive if needed. Allow to cure for 24-48 hours. |
By following these steps and using the recommended tools from CARDIAGTECH.NET, you can effectively repair sagging car door fabric and restore the interior of your vehicle to its original condition.
Saggy car door fabric before repair showing detached fabric
4. Advanced Techniques for Complex Car Door Fabric Repairs
For more complex car door fabric repairs, such as those involving extensive damage or intricate designs, advanced techniques and specialized tools may be required. CARDIAGTECH.NET provides a range of advanced tools and materials to help you tackle these challenging projects with confidence.
- Using a Heat Gun:
- Softening Old Adhesive: A heat gun can be used to soften stubborn old adhesive, making it easier to remove without damaging the underlying surface. Apply heat gently and evenly, keeping the heat gun moving to avoid overheating.
- Making Fabric More Pliable: Heat can also be used to make fabric more pliable, allowing it to conform to complex shapes and contours. Be careful not to overheat the fabric, as this can cause it to shrink or distort.
- Applying Adhesive with a Spray Gun:
- Even Application: For larger areas or intricate designs, a spray gun can provide a more even and consistent application of adhesive. This ensures a stronger bond and a smoother finish.
- Adjusting Spray Pattern: Adjust the spray pattern and flow rate to match the size and shape of the area being repaired. Practice on a scrap piece of material to get a feel for the spray gun before applying adhesive to the door panel.
- Working with Intricate Designs:
- Detailed Masking: Use precision masking techniques to protect intricate designs and prevent adhesive from getting on unwanted areas. Cut the masking tape into small strips and carefully apply them around the edges of the design.
- Using Specialty Adhesives: For delicate fabrics or intricate designs, consider using specialty adhesives that are specifically designed for automotive upholstery. These adhesives offer a strong bond without damaging the fabric or affecting its appearance.
- Repairing Tears and Holes:
- Patching Material: For small tears and holes, use a patching material that matches the color and texture of the original fabric. Cut the patching material slightly larger than the tear and apply adhesive to both the patch and the surrounding fabric.
- Stitching: For larger tears, consider stitching the fabric together before applying a patch. Use a curved needle and upholstery thread that matches the color of the fabric.
Table: Advanced Techniques and Tools for Complex Repairs
| Technique/Tool | Description | Purpose | Benefits |
|---|---|---|---|
| Heat Gun | Tool for applying focused heat | Softening old adhesive, making fabric pliable | Easier adhesive removal, better fabric conformity |
| Spray Gun | Device for even adhesive application | Applying adhesive evenly over large areas or intricate designs | Consistent bond, smoother finish |
| Precision Masking | Detailed masking techniques | Protecting intricate designs from adhesive | Clean lines, professional appearance |
| Specialty Adhesives | Adhesives designed for automotive upholstery | Providing a strong bond without damaging delicate fabrics | Prevents fabric damage, ensures long-lasting hold |
| Patching Material | Fabric patch for small tears and holes | Repairing small fabric damages | Restores fabric integrity, improves appearance |
| Stitching Techniques | Using curved needle and upholstery thread | Repairing larger tears before patching | Stronger repair, prevents further tearing |
By mastering these advanced techniques and utilizing the specialized tools available at CARDIAGTECH.NET, you can confidently tackle even the most challenging car door fabric repairs and achieve professional-quality results.
5. Preventive Measures: Maintaining Your Car Door Fabric
Preventing car door fabric from sagging or detaching in the first place is key to maintaining the appearance and value of your vehicle. CARDIAGTECH.NET offers a range of products designed to protect and preserve your car’s interior. Here are some preventive measures you can take:
- Regular Cleaning:
- Vacuuming: Regularly vacuum the car door fabric to remove dirt, dust, and debris. Use a soft brush attachment to avoid damaging the fabric.
- Spot Cleaning: Clean spills and stains immediately with a mild upholstery cleaner and a lint-free cloth. Blot the area gently to avoid spreading the stain.
- Protecting from Sunlight:
- Window Tinting: Apply window tint to reduce the amount of heat and UV rays entering your vehicle. This will help prevent the adhesive from breaking down and the fabric from fading.
- Using Sunshades: Use sunshades when parking your car in direct sunlight to protect the interior from excessive heat and UV exposure.
- Maintaining Proper Ventilation:
- Air Circulation: Ensure proper air circulation inside your vehicle to reduce humidity levels. Use the air conditioning or open windows to ventilate the interior.
- Avoiding Moisture: Avoid leaving wet items inside your car, as this can increase humidity levels and promote the growth of mold and mildew.
- Applying Fabric Protectors:
- Stain-Resistant Sprays: Apply a fabric protector spray to create a barrier against stains and spills. These sprays help repel liquids and prevent them from soaking into the fabric.
- UV Protectants: Use a UV protectant spray to protect the fabric from fading and discoloration caused by sunlight.
- Regular Inspections:
- Check for Loose Edges: Regularly inspect the car door fabric for any loose edges or signs of detachment. Address any issues promptly to prevent them from worsening.
- Monitor Adhesive Condition: Monitor the condition of the adhesive by gently pressing on the fabric. If the fabric feels loose or spongy, it may be time to reapply adhesive.
Table: Preventive Measures for Car Door Fabric Maintenance
| Measure | Description | Benefits | Frequency |
|---|---|---|---|
| Regular Cleaning | Vacuuming and spot cleaning fabric | Removes dirt and stains, prevents fabric degradation | Vacuum weekly, spot clean immediately after spills |
| Window Tinting | Applying tint to car windows | Reduces heat and UV exposure, protects fabric from fading | Once, professional installation recommended |
| Using Sunshades | Placing sunshades in windows when parked | Blocks sunlight, reduces interior temperature | Every time car is parked in direct sunlight |
| Proper Ventilation | Ensuring good air circulation inside the car | Reduces humidity, prevents mold and mildew | Daily, use AC or open windows |
| Fabric Protectors | Applying stain-resistant and UV protectant sprays | Creates a barrier against stains and UV damage | Every 6 months, or as directed by product instructions |
| Regular Inspections | Checking for loose edges and adhesive condition | Catches problems early, prevents major damage | Monthly, or as part of regular car maintenance |
By following these preventive measures and using the quality products available at CARDIAGTECH.NET, you can extend the life of your car door fabric and maintain the appearance of your vehicle’s interior for years to come.
6. Cost Analysis: DIY vs. Professional Car Door Fabric Repair
Deciding whether to repair your car door fabric yourself or hire a professional depends on several factors, including the extent of the damage, your skill level, and your budget. CARDIAGTECH.NET provides the tools and materials to make DIY repairs cost-effective, but it’s important to weigh the pros and cons of each option.
DIY Repair:
- Pros:
- Cost Savings: DIY repairs can save you a significant amount of money compared to professional services. The cost of materials from CARDIAGTECH.NET is typically much lower than the labor costs charged by professionals.
- Flexibility: You can complete the repair on your own schedule and at your own pace.
- Learning Experience: DIY repairs can be a rewarding learning experience, allowing you to develop new skills and gain a better understanding of your vehicle.
- Cons:
- Time Commitment: DIY repairs can take time, especially if you are not experienced.
- Potential for Mistakes: If you make a mistake, you may end up causing further damage or having to redo the repair.
- Quality Concerns: The quality of a DIY repair may not be as high as that of a professional repair, especially if you lack the necessary skills and tools.
- Estimated Costs:
- Basic Repair Kit: $30 – $50 (includes adhesive, cleaning supplies, and application tools from CARDIAGTECH.NET)
- Advanced Repair Kit: $50 – $100 (includes heat gun, spray gun, and specialty adhesives from CARDIAGTECH.NET)
Professional Repair:
- Pros:
- High-Quality Results: Professionals have the skills, experience, and tools to deliver high-quality repairs that are often indistinguishable from the original factory finish.
- Time Savings: Professionals can complete the repair quickly and efficiently, saving you time and effort.
- Warranty: Many professional repair services offer a warranty on their work, providing you with peace of mind.
- Cons:
- High Cost: Professional repairs can be expensive, especially for complex jobs.
- Scheduling Issues: You may have to schedule an appointment and wait for the repair to be completed.
- Inconvenience: You may have to drop off your car at the repair shop and arrange for alternative transportation.
- Estimated Costs:
- Basic Repair: $100 – $300 (for simple sagging or peeling fabric)
- Complex Repair: $300 – $800 (for extensive damage or intricate designs)
Table: Cost Comparison of DIY vs. Professional Car Door Fabric Repair
| Factor | DIY Repair | Professional Repair |
|---|---|---|
| Cost | $30 – $100 (materials from CARDIAGTECH.NET) | $100 – $800 (depending on complexity) |
| Time | Several hours, depending on experience | 1-2 hours, depending on the job |
| Skill Level | Basic to intermediate | Professional |
| Quality | Can be high with proper tools and techniques from CARDIAGTECH.NET | Typically higher, with a factory-like finish |
| Convenience | High, can be done on your own schedule | Lower, requires scheduling and dropping off the car |
| Warranty | None | Often provided |
Ultimately, the decision of whether to DIY or hire a professional depends on your individual circumstances. If you are comfortable with basic automotive repairs and have the time and patience to do the job right, DIY repair with tools and materials from CARDIAGTECH.NET can be a cost-effective option. However, if you lack the necessary skills or are dealing with a complex repair, hiring a professional may be the best choice.
7. Addressing Common Mistakes in Car Door Fabric Repair
Even with the best tools and intentions, mistakes can happen during car door fabric repair. Knowing how to avoid and correct these common errors can save you time, money, and frustration. CARDIAGTECH.NET is here to help you navigate these challenges and achieve a professional finish.
- Using the Wrong Adhesive:
- Problem: Using an adhesive that is not designed for automotive upholstery can result in a weak bond, discoloration, or damage to the fabric.
- Solution: Always use an adhesive that is specifically designed for automotive upholstery, such as 3M Super 77 or Loctite High Strength Spray Adhesive. These adhesives provide a strong, long-lasting bond without damaging the fabric.
- Applying Too Much Adhesive:
- Problem: Applying too much adhesive can cause it to seep through the fabric, creating stains and a stiff, unnatural feel.
- Solution: Apply adhesive in a thin, even coat. Hold the spray can 6-8 inches away from the surface and move it in a smooth, consistent motion.
- Not Cleaning the Surface Properly:
- Problem: Failing to remove old adhesive, dirt, and contaminants can prevent the new adhesive from bonding properly.
- Solution: Thoroughly clean the surface with a mild body solvent and a lint-free cloth before applying adhesive. Use Goo Gone for stubborn residue.
- Rushing the Repair:
- Problem: Rushing the repair can result in a sloppy finish, with bubbles, wrinkles, and loose edges.
- Solution: Take your time and follow the steps carefully. Allow the adhesive to fully cure before reinstalling the door panel.
- Damaging the Fabric:
- Problem: Using abrasive cleaners or tools can damage the fabric, causing it to fade, tear, or pill.
- Solution: Use gentle cleaning products and soft tools. Avoid using excessive force when smoothing out bubbles or tucking the edges.
- Ignoring Safety Precautions:
- Problem: Failing to wear gloves, eye protection, and a respirator can expose you to harmful chemicals and fumes.
- Solution: Always wear appropriate safety gear and work in a well-ventilated area.
Table: Common Mistakes and Solutions in Car Door Fabric Repair
| Mistake | Problem | Solution |
|---|---|---|
| Using the Wrong Adhesive | Weak bond, discoloration, fabric damage | Use adhesives specifically designed for automotive upholstery (e.g., 3M Super 77) |
| Applying Too Much Adhesive | Seepage through fabric, stains, stiff feel | Apply a thin, even coat from 6-8 inches away |
| Not Cleaning the Surface | Poor adhesive bond | Thoroughly clean with mild body solvent and Goo Gone for residue |
| Rushing the Repair | Sloppy finish, bubbles, wrinkles, loose edges | Take your time, follow steps carefully, allow adhesive to cure fully |
| Damaging the Fabric | Fading, tearing, pilling | Use gentle cleaners and soft tools, avoid excessive force |
| Ignoring Safety Precautions | Exposure to harmful chemicals and fumes | Wear gloves, eye protection, and a respirator; work in a well-ventilated area |
By being aware of these common mistakes and following the recommended solutions, you can avoid costly errors and achieve a professional-quality car door fabric repair with the help of CARDIAGTECH.NET.
8. Tools Available at CARDIAGTECH.NET for Car Door Fabric Repair
CARDIAGTECH.NET offers a comprehensive range of tools and materials specifically designed for car door fabric repair. Our products are selected for their quality, durability, and ease of use, ensuring that you have everything you need to achieve professional results.
- Adhesives:
- 3M Super 77 Multipurpose Adhesive: A versatile spray adhesive known for its strong bond, ease of use, and minimal residue.
- Loctite High Strength Spray Adhesive: Offers excellent heat resistance and a long-lasting hold, ideal for demanding repairs.
- Permatex Body Shop Heavy Duty Contact Adhesive: A professional-grade adhesive for more extensive repairs, providing superior bonding strength.
- Cleaning Supplies:
- Mild Body Solvent: For safely removing old adhesive and contaminants without damaging the fabric or panel.
- Goo Gone: Effective for dissolving stubborn sticky residue, making surface preparation easier.
- Car Shampoo and Degreasers: For cleaning overspray or spills, ensuring a clean finish.
- Masking Materials:
- Painter’s Tape: Provides clean lines and easy removal without damaging surrounding surfaces.
- Plastic Sheeting: For covering and protecting adjacent surfaces from adhesive overspray.
- Application Tools:
- Plastic Razor and Credit Cards: For smoothing fabric and eliminating bubbles, ensuring even adhesion.
- Small Flathead Screwdrivers: For carefully tucking fabric edges back into place, creating a neat finish.
- Spray Guns: For applying adhesive evenly over larger areas or intricate designs, providing consistent coverage.
- Safety Gear:
- Gloves: To protect your hands from adhesives and solvents.
- Respirators and Masks: To avoid inhaling harmful fumes from adhesives and cleaning agents.
- Eye Protection: Safety glasses or goggles to prevent splashes and protect your eyes.
- Additional Tools:
- Heat Guns: For softening old adhesive and making fabric more pliable, easing the removal process.
- Lint-Free Cloths: For wiping surfaces and applying cleaning solutions without leaving residue.
- Scissors and Utility Knives: For trimming excess fabric, ensuring a precise fit.
Table: Featured Tools and Materials at CARDIAGTECH.NET
| Tool/Material | Description | Benefits | Price Range (USD) |
|---|---|---|---|
| 3M Super 77 Adhesive | Multipurpose spray adhesive | Strong bond, easy to use, minimal residue | $10 – $15 |
| Loctite Spray Adhesive | High strength, heat-resistant adhesive | Ensuring a long-lasting hold in extreme conditions | $12 – $18 |
| Mild Body Solvent | Gentle cleaner for removing old adhesive | Preparing the surface for new adhesive application | $8 – $12 |
| Painter’s Tape | Masking tape that doesn’t leave residue | Protecting surrounding areas from adhesive | $5 – $8 |
| Plastic Razor/Credit Card | Smoothing tool | Eliminating bubbles and ensuring even fabric adhesion | $1 – $5 |
| Small Flathead Screwdriver | Precision tool | Tucking fabric edges neatly into place | $5 – $10 |
| Heat Gun | For softening old adhesives | Assisting in the removal of old fabric and adhesive | $20 – $50 |
At CARDIAGTECH.NET, we understand the importance of having the right tools for the job. Our selection of car door fabric repair products ensures that you can tackle any repair with confidence, achieving professional results every time.
We understand the challenges you face as automotive technicians. The physical demands, exposure to harsh chemicals, and the need to stay updated with ever-evolving technology can be taxing. That’s why we’re committed to providing tools that enhance your efficiency, precision, and safety.
Ready to transform your car door fabric repair process?
- Efficiency: Our tools are designed to reduce repair time, allowing you to handle more jobs and increase your income.
- Precision: Achieve flawless results with our high-quality adhesives and application tools.
- Safety: Protect yourself from harmful chemicals with our safety gear.
- Profitability: Save money on materials and reduce the need for rework, boosting your bottom line.
Contact us today to learn more about how CARDIAGTECH.NET can help you:
- Address: 276 Reock St, City of Orange, NJ 07050, United States
- WhatsApp: +1 (641) 206-8880
- Website: CARDIAGTECH.NET
Let CARDIAGTECH.NET be your partner in achieving excellence in automotive repair. Your success is our priority.
Examining real-world examples of successful car door fabric repairs can provide valuable insights and inspiration. Here are a few case studies that demonstrate how the tools and techniques recommended by CARDIAGTECH.NET can be applied in different scenarios.
Case Study 1: Sagging Fabric on a Honda Civic Door Panel
- Problem: The fabric on the door panel of a 2010 Honda Civic was sagging due to adhesive failure caused by prolonged exposure to heat and sunlight.
- Solution:
- The owner removed the door panel and thoroughly cleaned the fabric and panel surface with a mild body solvent and Goo Gone.
- Painter’s tape was used to mask off the surrounding areas.
- 3M Super 77 adhesive was applied to both the fabric and the panel.
- The fabric was carefully aligned and pressed into place, using a plastic razor to smooth out bubbles.
- The edges were tucked in with a small flathead screwdriver.
- Results: The fabric was securely reattached, and the door panel looked as good as new. The owner saved approximately $200 by doing the repair themselves using materials from CARDIAGTECH.NET.
Case Study 2: Peeling Fabric on a Ford F-150 Armrest
- Problem: The fabric on the armrest of a 2015 Ford F-150 was peeling away, creating an unsightly appearance.
- Solution:
- The owner cleaned the armrest with a mild degreaser to remove dirt and oil.
- Loctite High Strength Spray Adhesive was applied to both the fabric and the armrest.
- The fabric was carefully aligned and pressed into place, ensuring a tight bond.
- The armrest was left to cure for 24 hours.
- Results: The fabric was securely reattached, and the armrest looked like new. The owner was pleased with the professional-quality results achieved using Loctite adhesive from CARDIAGTECH.NET.
Case Study 3: Torn Fabric on a BMW 3 Series Door Panel
- Problem: The fabric on the door panel of a 2012 BMW 3 Series had a small tear caused by accidental damage.
- Solution:
- The owner purchased a fabric patch that matched the color and texture of the original fabric from an auto upholstery supply store.
- The area around the tear was cleaned with a mild solvent.
- Permatex Body Shop Heavy Duty Contact Adhesive was applied to both the patch and the door panel.
- The patch was carefully aligned and pressed into place, covering the tear.
- The edges of the patch were smoothed out with a plastic razor.
- Results: The tear was effectively repaired, and the door panel looked significantly better. The owner was impressed with the strong bond provided by the Permatex adhesive from CARDIAGTECH.NET.
Table: Case Study Summary
| Case Study | Vehicle | Problem | Solution | Results |
|---|---|---|---|---|
| 1 |


