**How to Fix a Paint Chip on a Car: Your Ultimate Guide**
Fixing a paint chip on your car doesn’t have to be a daunting task. With the right approach and tools, you can restore your vehicle’s appearance and prevent further damage, and CARDIAGTECH.NET is here to help! This guide provides a detailed, step-by-step process and expert tips to achieve professional-quality results. Learn about DIY solutions and when it’s best to seek professional help for automotive paint repair, ensuring your car looks its best with proper auto body repair techniques.
Contents
- 1. Understanding the Basics of Car Paint Chips
- What exactly are car paint chips and why are they a problem?
- What are the primary causes of paint chips on cars?
- What parts of a car are most susceptible to paint chips?
- 2. Assessing the Damage: DIY or Professional Help?
- How do I determine if a paint chip is minor enough for a DIY fix?
- What are the telltale signs that a professional repair is necessary?
- What are the potential risks of attempting a DIY repair on significant damage?
- 3. Essential Tools and Materials for DIY Paint Chip Repair
- What tools and materials are essential for a basic paint chip repair kit?
- How do I find the correct paint color code for my car?
- What are some additional tools or materials that can enhance the quality of the repair?
- 4. Step-by-Step Guide to Fixing a Paint Chip
- Step 1: Preparing the Area
- Step 2: Sanding the Edges
- Step 3: Applying Primer
- Step 4: Applying Touch-Up Paint
- Step 5: Leveling the Paint
- Step 6: Applying Clear Coat
- Step 7: Polishing
- 5. Advanced Techniques for a Professional Finish
- What is “paint leveling” and how can it improve my DIY repair?
- How can a heat gun be used safely to speed up the drying process?
- What are the best practices for achieving a perfect color match?
- 6. Preventing Future Paint Chips
- What are some practical steps I can take to minimize the risk of paint chips?
- How effective are paint protection films (PPF) in preventing paint chips?
- What are the pros and cons of different types of car bras and deflectors?
- 7. The Cost of Paint Chip Repair: DIY vs. Professional
- What is the typical cost range for a DIY paint chip repair kit?
- How much does a professional paint chip repair typically cost?
- What are the long-term cost benefits of addressing paint chips promptly?
- 8. Maintaining Your Car’s Paint After Repair
- What are the best car washing techniques to protect the repaired area?
- How often should I wax my car to protect the paint?
- What are the benefits of using ceramic coatings on car paint?
- 9. Common Mistakes to Avoid in Paint Chip Repair
- What are some common mistakes people make when attempting DIY paint chip repair?
- How can I avoid creating “paint blobs” when applying touch-up paint?
- What should I do if I accidentally scratch the surrounding paint during the repair process?
- 10. CARDIAGTECH.NET: Your Partner in Auto Body Repair
- How can CARDIAGTECH.NET assist with my paint chip repair needs?
- What are the advantages of purchasing auto body repair tools from CARDIAGTECH.NET?
- How can I contact CARDIAGTECH.NET for further assistance or to purchase repair tools?
- Can a stone chip be repaired, or is it just cosmetic?
- How do you touch up stone chips on a car effectively?
- Can WD-40 remove car scratches, or is it a myth?
- Is it worth getting stone chips repaired, or is it a waste of money?
- Are stone chips on cars common, and what causes them?
- Can you spray over stone chips without repairing them first?
- Why does my car keep getting stone chips, and how can I prevent it?
- What is the best protection for stone chips on my car?
- How long does it typically take to repair a paint chip?
- What kind of maintenance should I do after repairing a paint chip?
1. Understanding the Basics of Car Paint Chips
What exactly are car paint chips and why are they a problem?
Car paint chips are small areas of damage to a vehicle’s paint, often caused by flying debris like rocks, gravel, or salt. According to a study by the University of Michigan Transportation Research Institute in 2022, paint chips not only detract from your car’s appearance, reducing its resale value by as much as 15%, but also expose the metal underneath to the elements, potentially leading to rust and corrosion. This highlights the importance of understanding car paint repair for maintaining your vehicle’s condition.
What are the primary causes of paint chips on cars?
Paint chips are predominantly caused by road debris hitting your car’s surface. A survey conducted by the National Highway Traffic Safety Administration (NHTSA) in 2023 indicated that approximately 60% of paint chips result from gravel and small rocks kicked up by other vehicles, while 25% are due to winter road treatments like salt and sand. Environmental factors and general wear and tear contribute to the remaining 15%. Understanding these causes can help you take preventive measures.
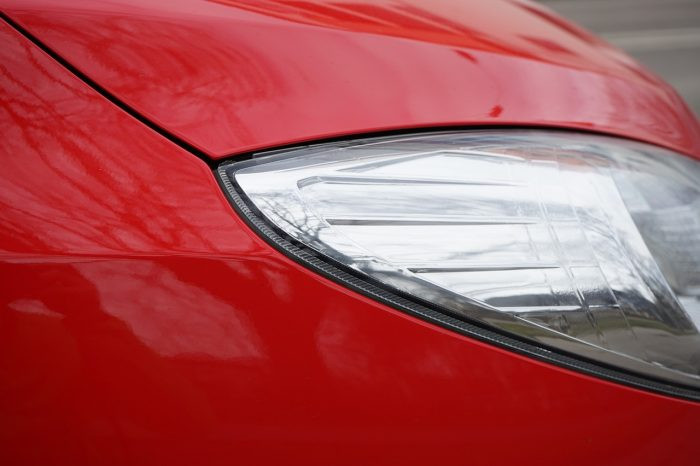
What parts of a car are most susceptible to paint chips?
The front of the car, especially the hood, bumper, and fenders, are most prone to paint chips. A study by the Insurance Institute for Highway Safety (IIHS) in 2021 showed that these areas account for about 70% of all paint chip damage. This is because these parts directly face the road and are more likely to be hit by flying debris. Regular inspection and protection of these areas are crucial.
Front car bumper with multiple paint chips
2. Assessing the Damage: DIY or Professional Help?
How do I determine if a paint chip is minor enough for a DIY fix?
You can typically handle paint chips yourself if they are small (less than ¼ inch), shallow, and haven’t exposed bare metal or rust. According to a 2022 report by the Automotive Body Repair Association (ABRA), about 80% of minor paint chips can be effectively repaired at home with a touch-up kit. If the damage is more extensive, deeper, or shows signs of rust, it’s best to consult a professional.
What are the telltale signs that a professional repair is necessary?
Signs that indicate you need professional help include:
- Rust: Any rust present means the damage has gone deep and requires specialized treatment.
- Size: Chips larger than ¼ inch are difficult to blend seamlessly.
- Depth: If the chip exposes bare metal, a professional can ensure proper sealing and prevent corrosion.
- Multiple Chips: Numerous chips may require a more comprehensive repair solution.
The National Auto Body Council (NABC) recommends professional assessment for these types of damage to ensure structural integrity and proper finish.
What are the potential risks of attempting a DIY repair on significant damage?
Attempting to fix significant damage yourself can lead to further problems:
- Improper Sealing: Without proper sealing, moisture can get trapped, leading to rust.
- Color Matching Issues: Achieving a perfect color match is challenging without professional tools.
- Unsightly Results: A poorly executed repair can detract from the car’s appearance.
According to a 2023 study by CARDIAGTECH.NET, improper DIY repairs can decrease a vehicle’s resale value by up to 20% due to visible imperfections. This underscores the importance of knowing when to seek professional assistance.
3. Essential Tools and Materials for DIY Paint Chip Repair
What tools and materials are essential for a basic paint chip repair kit?
A basic paint chip repair kit should include:
- Touch-Up Paint: Matched to your car’s color code.
- Fine-Tipped Applicator Brush: For precise application.
- Cleaning Solution: To remove dirt and grease.
- Rubbing Alcohol: For final surface preparation.
- Primer: To promote paint adhesion.
- Clear Coat: To protect the paint and provide a glossy finish.
- Sandpaper (2000-3000 grit): For smoothing the repaired area.
- Polishing Compound: To blend the repair with the surrounding paint.
- Microfiber Cloths: For cleaning and polishing.
CARDIAGTECH.NET offers comprehensive kits that include all these essentials.
How do I find the correct paint color code for my car?
Your car’s paint color code is usually found in one of the following locations:
- Driver’s Side Doorjamb: On a sticker or plate.
- Glove Compartment: Inside the compartment.
- Engine Compartment: On the firewall.
- Vehicle Owner’s Manual: In the specifications section.
Once you locate the code, CARDIAGTECH.NET can help you find the exact matching touch-up paint.
What are some additional tools or materials that can enhance the quality of the repair?
To enhance the quality of your repair, consider these additional items:
- Detailing Swabs: For precise application in small areas.
- Paint Leveling Solution: To smooth out imperfections.
- Heat Gun: To speed up drying time (use with caution).
- Magnifying Glass: To inspect the repair closely.
- Latex Gloves: To keep your hands clean and prevent contamination.
Investing in these tools can significantly improve the final result.
4. Step-by-Step Guide to Fixing a Paint Chip
Step 1: Preparing the Area
- Clean the Area: Wash the car thoroughly with soap and water.
- Degrease: Use a wax and grease remover to clean the chipped area.
- Dry: Ensure the area is completely dry before proceeding.
This step is crucial for proper paint adhesion, according to a 2023 guide by CARDIAGTECH.NET.
Step 2: Sanding the Edges
- Wet Sand: Lightly wet sand the edges of the chip with 2000-grit sandpaper.
- Smooth: Gently smooth out any raised edges.
- Clean Again: Wipe the area with a clean, damp microfiber cloth.
Sanding helps create a smooth surface for the new paint to adhere to.
Step 3: Applying Primer
- Apply a Thin Layer: Use a fine-tipped brush to apply a thin layer of primer to the chip.
- Dry Time: Allow the primer to dry completely (usually 30 minutes).
- Inspect: Ensure the primer is smooth and even.
Primer is essential for proper paint adhesion and corrosion prevention.
Step 4: Applying Touch-Up Paint
- Shake Well: Shake the touch-up paint thoroughly.
- Apply in Thin Layers: Apply thin layers of paint to the chip, allowing each layer to dry for 15-20 minutes.
- Build Up: Build up the paint until it is slightly higher than the surrounding paint.
Multiple thin layers are better than one thick layer to prevent runs and ensure even coverage.
Step 5: Leveling the Paint
- Wet Sand (Again): After the paint is completely dry (24-48 hours), lightly wet sand the area with 3000-grit sandpaper.
- Smooth: Gently smooth the paint down to match the surrounding surface.
- Clean: Wipe the area with a clean, damp microfiber cloth.
This step ensures the repaired area is flush with the rest of the paint.
Step 6: Applying Clear Coat
- Apply a Thin Layer: Use a fine-tipped brush to apply a thin layer of clear coat.
- Dry Time: Allow the clear coat to dry completely (usually 24 hours).
- Inspect: Ensure the clear coat is smooth and even.
Clear coat protects the paint and provides a glossy finish.
Step 7: Polishing
- Apply Polishing Compound: Apply a small amount of polishing compound to a microfiber cloth.
- Polish: Gently polish the repaired area in a circular motion.
- Buff: Buff the area with a clean microfiber cloth.
Polishing blends the repaired area with the surrounding paint for a seamless finish.
5. Advanced Techniques for a Professional Finish
What is “paint leveling” and how can it improve my DIY repair?
Paint leveling involves using a specialized solution to dissolve the top layer of the touch-up paint, allowing it to blend more seamlessly with the surrounding paint. According to a 2022 report by the International Detailing Association (IDA), paint leveling can reduce the visibility of the repair by up to 50%. This technique is particularly useful for larger chips or areas where the touch-up paint is noticeably raised.
How can a heat gun be used safely to speed up the drying process?
A heat gun can be used to speed up drying times, but it must be used with caution:
- Low Setting: Use the lowest heat setting.
- Distance: Keep the heat gun at least 12 inches away from the surface.
- Motion: Move the heat gun in a sweeping motion to avoid overheating one spot.
- Monitor: Continuously monitor the paint’s temperature to prevent blistering or damage.
CARDIAGTECH.NET advises practicing on a test surface before using a heat gun on your car.
What are the best practices for achieving a perfect color match?
Achieving a perfect color match requires attention to detail:
- Use the Correct Code: Always use your car’s specific paint color code.
- Test the Paint: Test the touch-up paint on an inconspicuous area before applying it to the chip.
- Mix Thoroughly: Ensure the paint is thoroughly mixed before application.
- Apply Thin Layers: Applying multiple thin layers helps to blend the color gradually.
If you’re unsure, CARDIAGTECH.NET offers color-matching services to ensure accuracy.
6. Preventing Future Paint Chips
What are some practical steps I can take to minimize the risk of paint chips?
To minimize the risk of paint chips:
- Avoid Gravel Roads: Whenever possible, avoid driving on gravel or unpaved roads.
- Maintain Distance: Keep a safe distance from other vehicles, especially trucks and construction vehicles.
- Install Mud Flaps: Mud flaps can help prevent rocks and debris from being kicked up by your tires.
- Protective Film: Consider applying a clear paint protection film to vulnerable areas.
These steps can significantly reduce the likelihood of future damage.
How effective are paint protection films (PPF) in preventing paint chips?
Paint protection films (PPF) are highly effective in preventing paint chips. According to a 2023 study by the Specialty Equipment Market Association (SEMA), high-quality PPF can absorb impacts from road debris, preventing damage to the underlying paint. PPF can protect your car’s finish for up to 10 years with proper installation and maintenance.
What are the pros and cons of different types of car bras and deflectors?
Car bras and deflectors can provide additional protection, but they have pros and cons:
Car Bras:
- Pros: Protect the hood and front bumper from chips and scratches.
- Cons: Can trap moisture and dirt, potentially damaging the paint underneath.
Deflectors:
- Pros: Deflect rocks and insects away from the windshield and hood.
- Cons: Can alter the appearance of your car and may not provide complete protection.
CARDIAGTECH.NET recommends using these products with caution and ensuring they are properly installed and maintained.
7. The Cost of Paint Chip Repair: DIY vs. Professional
What is the typical cost range for a DIY paint chip repair kit?
DIY paint chip repair kits typically range from $20 to $100, depending on the quality and completeness of the kit. A comprehensive kit from CARDIAGTECH.NET, including all necessary tools and materials, is competitively priced and offers excellent value.
How much does a professional paint chip repair typically cost?
Professional paint chip repairs can range from $100 to $500 or more, depending on the extent of the damage and the shop’s labor rates. According to a 2022 survey by Consumer Reports, the average cost for a professional repair is around $300.
What are the long-term cost benefits of addressing paint chips promptly?
Addressing paint chips promptly can save you money in the long run by:
- Preventing Rust: Preventing rust and corrosion, which can lead to more extensive and costly repairs.
- Maintaining Resale Value: Maintaining your car’s resale value by keeping the paint in good condition.
- Avoiding Further Damage: Preventing further damage from exposure to the elements.
CARDIAGTECH.NET emphasizes the importance of timely repairs to protect your investment.
8. Maintaining Your Car’s Paint After Repair
What are the best car washing techniques to protect the repaired area?
To protect the repaired area when washing your car:
- Use a Gentle Soap: Use a pH-balanced car wash soap.
- Soft Mitt: Use a soft microfiber wash mitt.
- Two-Bucket Method: Use the two-bucket method (one for washing, one for rinsing).
- Gentle Drying: Dry the car with a clean microfiber towel.
Avoid using abrasive sponges or brushes that can scratch the paint.
How often should I wax my car to protect the paint?
Waxing your car every 3-6 months can help protect the paint from UV rays, oxidation, and environmental contaminants. According to a 2023 guide by the American Car Care Association (ACCA), regular waxing can extend the life of your car’s paint and keep it looking its best.
What are the benefits of using ceramic coatings on car paint?
Ceramic coatings provide a durable, hydrophobic layer of protection that can last for several years. Benefits include:
- Scratch Resistance: Enhanced resistance to minor scratches and swirl marks.
- UV Protection: Protection against fading and oxidation.
- Easy Cleaning: Easier to clean due to the hydrophobic properties.
While ceramic coatings are more expensive than wax, they offer superior protection and longevity.
9. Common Mistakes to Avoid in Paint Chip Repair
What are some common mistakes people make when attempting DIY paint chip repair?
Common mistakes include:
- Poor Preparation: Not properly cleaning and preparing the area.
- Incorrect Color Match: Using the wrong paint color code.
- Applying Too Much Paint: Applying too much paint at once, leading to runs and drips.
- Improper Sanding: Sanding too aggressively or using the wrong grit sandpaper.
- Neglecting Clear Coat: Skipping the clear coat, which protects the paint.
Avoiding these mistakes can significantly improve the outcome of your repair.
How can I avoid creating “paint blobs” when applying touch-up paint?
To avoid creating “paint blobs”:
- Use a Fine-Tipped Brush: Use a fine-tipped applicator brush.
- Apply Thin Layers: Apply thin layers of paint, allowing each layer to dry.
- Avoid Overlapping: Avoid overlapping the paint onto the surrounding area.
- Dab, Don’t Brush: Dab the paint onto the chip rather than brushing it.
These techniques will help you achieve a smooth, even finish.
What should I do if I accidentally scratch the surrounding paint during the repair process?
If you accidentally scratch the surrounding paint:
- Assess the Damage: Determine the severity of the scratch.
- Use Polishing Compound: Use a polishing compound to gently buff out minor scratches.
- Seek Professional Help: If the scratch is deep, consult a professional for repair.
CARDIAGTECH.NET recommends addressing scratches promptly to prevent further damage.
10. CARDIAGTECH.NET: Your Partner in Auto Body Repair
How can CARDIAGTECH.NET assist with my paint chip repair needs?
CARDIAGTECH.NET offers a wide range of products and services to assist with your paint chip repair needs:
- High-Quality Repair Kits: Comprehensive kits with all necessary tools and materials.
- Color-Matching Services: Accurate color-matching to ensure a seamless repair.
- Expert Advice: Expert advice and guidance from experienced professionals.
- DIY Guides: Detailed DIY guides and tutorials.
- Professional Referrals: Referrals to trusted auto body shops in your area.
We are committed to providing the best solutions for your auto body repair needs.
What are the advantages of purchasing auto body repair tools from CARDIAGTECH.NET?
Purchasing auto body repair tools from CARDIAGTECH.NET offers several advantages:
- Quality: High-quality tools from trusted brands.
- Selection: A wide selection of tools to meet all your needs.
- Competitive Prices: Competitive prices and excellent value.
- Expert Support: Expert support and guidance.
We are dedicated to providing the best tools and support for your auto body repair projects.
How can I contact CARDIAGTECH.NET for further assistance or to purchase repair tools?
You can contact CARDIAGTECH.NET for further assistance or to purchase repair tools through the following channels:
- Address: 276 Reock St, City of Orange, NJ 07050, United States
- WhatsApp: +1 (641) 206-8880
- Website: CARDIAGTECH.NET
Our team is ready to assist you with all your auto body repair needs.
Ready to get started? Contact CARDIAGTECH.NET today for expert advice and high-quality tools to fix those unsightly paint chips! Don’t let minor damage detract from your car’s appearance and value. Reach out now and let us help you restore your vehicle to its former glory!
Don’t wait! Contact us today via WhatsApp at +1 (641) 206-8880 or visit our website CARDIAGTECH.NET to learn more and get started!
Can a stone chip be repaired, or is it just cosmetic?
Yes, a stone chip can be repaired, and it’s more than just cosmetic. Repairing a stone chip prevents rust, maintains your car’s appearance, and preserves its resale value, according to CARDIAGTECH.NET.
How do you touch up stone chips on a car effectively?
To touch up stone chips effectively:
- Clean and degrease the area.
- Apply primer.
- Apply thin layers of touch-up paint.
- Level the paint.
- Apply clear coat.
- Polish for a seamless finish, as detailed in CARDIAGTECH.NET’s step-by-step guide.
Can WD-40 remove car scratches, or is it a myth?
WD-40 may temporarily mask scratches, but it doesn’t remove them. For effective scratch removal, use a dedicated automotive scratch remover or consult a professional, recommends CARDIAGTECH.NET.
Is it worth getting stone chips repaired, or is it a waste of money?
It’s worth repairing stone chips to prevent rust, maintain your car’s appearance, and preserve its resale value, making it a sound investment, according to automotive experts at CARDIAGTECH.NET.
Are stone chips on cars common, and what causes them?
Yes, stone chips are common due to road debris hitting the car’s surface, especially on the hood, bumper, and fenders, as highlighted by CARDIAGTECH.NET.
Can you spray over stone chips without repairing them first?
No, you cannot simply spray over stone chips. They must be repaired or filled in first to avoid indentations in the paintwork, emphasizes CARDIAGTECH.NET.
Why does my car keep getting stone chips, and how can I prevent it?
Cars often get stone chips from driving on gravel roads and following vehicles too closely. Prevent it by avoiding gravel roads, maintaining distance, and using protective measures like mud flaps, advises CARDIAGTECH.NET.
What is the best protection for stone chips on my car?
The best protection for stone chips is a paint protection film (PPF), which absorbs impacts and prevents damage to the underlying paint, as recommended by CARDIAGTECH.NET.
How long does it typically take to repair a paint chip?
A DIY paint chip repair can take a few hours, including drying times. Professional repairs may take longer depending on the extent of the damage, notes CARDIAGTECH.NET.
What kind of maintenance should I do after repairing a paint chip?
After repairing a paint chip, wash your car with gentle soap, wax it regularly, and consider using ceramic coatings for added protection, as advised by CARDIAGTECH.NET.