How To Fix A Crack In My Car Bumper Like A Pro
Fixing a crack in my car bumper doesn’t always mean a costly replacement. CARDIAGTECH.NET provides expert guidance and premium tools for effective bumper repair, saving you time and money. Discover proven techniques to restore your bumper’s appearance and structural integrity, using innovative products and equipment. Address bumper damage efficiently with automotive plastic repair solutions and car bumper restoration methods.
Contents
- 1. Assessing Bumper Damage: Repair or Replace?
- 1.1. Evaluating the Extent of the Damage
- 1.2. Manufacturer Recommendations
- 1.3. Safety Considerations
- 1.4. Cost and Time Efficiency
- 2. Essential Tools and Materials for Bumper Repair
- 2.1. Safety Gear
- 2.2. Preparation Tools
- 2.3. Repair Materials
- 2.4. Painting Supplies
- 3. Step-by-Step Guide to Fixing a Cracked Car Bumper
- 3.1. Preparation
- 3.2. Crack Repair
- 3.3. Smoothing and Filling
- 3.4. Painting
- 3.5. Final Touches
- 4. Advanced Techniques for Bumper Repair
- 4.1. Plastic Welding
- 4.2. Bumper Removal and Reinstallation
- 5. Common Mistakes to Avoid When Repairing a Cracked Bumper
- 5.1. Neglecting Preparation
- 5.2. Using the Wrong Materials
- 5.3. Applying Too Much Material at Once
- 5.4. Rushing the Drying Process
- 5.5. Failing to Sand Properly
- 6. Maintaining Your Repaired Bumper
- 6.1. Regular Cleaning
- 6.2. Waxing
- 6.3. Avoiding Harsh Chemicals
- 6.4. Promptly Repairing New Damage
- 7. The Benefits of Choosing CARDIAGTECH.NET for Your Bumper Repair Needs
- 7.1. High-Quality Products
- 7.2. Expert Guidance
- 7.3. Competitive Prices
- 7.4. Fast Shipping
- 7.5. Customer Satisfaction
- 8. Real-World Examples of Successful Bumper Repairs
- 8.1. Case Study 1: Minor Crack Repair
- 8.2. Case Study 2: Major Damage Restoration
- 8.3. Case Study 3: DIY Enthusiast Success
- 9. The Future of Automotive Bumper Repair Technology
- 9.1. Self-Healing Materials
- 9.2. 3D Printing
- 9.3. Advanced Diagnostic Tools
1. Assessing Bumper Damage: Repair or Replace?
Before diving into repairs, it’s crucial to determine whether the crack warrants a repair or necessitates a full bumper replacement. Several factors influence this decision, ensuring both safety and cost-effectiveness.
1.1. Evaluating the Extent of the Damage
Examine the crack’s size, depth, and location. Minor surface cracks are typically repairable, while extensive damage, multiple cracks, or structural compromises might require replacement. According to the National Highway Traffic Safety Administration (NHTSA), bumpers are designed to absorb impact and protect the vehicle’s safety systems. Therefore, any damage that compromises this functionality should be carefully evaluated.
- Minor Cracks: Small, superficial cracks that don’t affect the bumper’s structural integrity.
- Moderate Cracks: Deeper cracks that may require more extensive repair techniques.
- Severe Damage: Large cracks, multiple fractures, or damage to the bumper’s mounting points, often necessitating replacement.
1.2. Manufacturer Recommendations
Always consult the vehicle manufacturer’s guidelines. Some manufacturers advise against repairing certain bumper types, especially if the damage affects safety-related components. Refer to the vehicle’s repair manual or contact the manufacturer for specific recommendations.
1.3. Safety Considerations
Safety is paramount. If the crack affects the bumper’s ability to protect the vehicle in a collision, replacement is the only viable option. Bumpers are integral to the vehicle’s crashworthiness, and compromised integrity can endanger occupants. The Insurance Institute for Highway Safety (IIHS) emphasizes that bumpers must effectively mitigate damage in low-speed crashes to maintain safety standards.
1.4. Cost and Time Efficiency
Compare the cost of repair versus replacement, including labor and materials. A Vehicle Damage Assessor (VDA) can provide an estimate of the repair time. If the repair time exceeds the cost of a new bumper, replacement might be more efficient. CARDIAGTECH.NET offers tools that can significantly reduce repair time, making it a more attractive option.
| Factor | Repair | Replace |
|---|---|---|
| Damage Extent | Minor to Moderate | Severe |
| Manufacturer Advice | Repair Permitted | Replacement Recommended |
| Safety Impact | Minimal Impact on Structural Safety | Significant Impact on Structural Safety |
| Cost | Lower | Higher |
| Time | Less | More |
2. Essential Tools and Materials for Bumper Repair
Having the right tools and materials is crucial for a successful bumper repair. CARDIAGTECH.NET offers a wide range of high-quality products designed to make the repair process efficient and effective.
2.1. Safety Gear
- Safety Glasses: Protect your eyes from debris and chemicals.
- Gloves: Protect your hands from epoxy, fillers, and solvents.
- Respirator: Avoid inhaling harmful fumes during sanding and painting.
2.2. Preparation Tools
- Cleaning Supplies: Automotive soap, degreaser, and wax remover to clean the bumper surface.
- Masking Tape: High-quality tape to protect surrounding areas from sanding and painting. CARDIAGTECH.NET recommends JTAPE Premium Cloth Protection Tape for its superior adhesion and protection.
- Sanding Tools: Sandpaper in various grits (80, 180, 320, 400), sanding block, and orbital sander.
- Drill: With various drill bits for creating pilot holes and crack-stopping holes.
- Grinder: With appropriate attachments for removing excess plastic and creating a V-groove.
Technician preparing to repair a car bumper with protective tape
2.3. Repair Materials
- Plastic Welder: For melting and fusing plastic to repair cracks.
- Epoxy Resin: Two-part epoxy for bonding and reinforcing the crack.
- Body Filler: Automotive body filler for smoothing out imperfections. CARDIAGTECH.NET offers premium body fillers that are easy to sand and provide a durable finish.
- Plastic Adhesion Promoter: Ensures proper adhesion of filler and paint to the plastic surface.
- Primer: Automotive primer for creating a uniform surface for painting.
2.4. Painting Supplies
- Automotive Paint: Matching the vehicle’s color code.
- Clear Coat: For protecting the paint and providing a glossy finish.
- Spray Gun: High-quality spray gun for even application of paint and clear coat.
- Mixing Cups and Sticks: For accurately mixing paint and clear coat.
- Tack Cloth: For removing dust and contaminants before painting.
3. Step-by-Step Guide to Fixing a Cracked Car Bumper
Follow these detailed steps to repair a cracked car bumper effectively, using tools and materials available at CARDIAGTECH.NET.
3.1. Preparation
- Clean the Bumper: Wash the bumper with automotive soap and water to remove dirt and grime. Use a degreaser to remove any wax or grease.
- Assess the Damage: Determine the extent of the crack and whether repair is feasible.
- Mask the Area: Use high-quality masking tape to protect surrounding areas from sanding and painting. Apply JTAPE Premium Cloth Protection Tape from CARDIAGTECH.NET for optimal protection.
 Close up of hands cleaning a car bumper before repair
3.2. Crack Repair
- Drill Stop Holes: Drill small holes (6mm) at each end of the crack to prevent it from spreading.
- Create a V-Groove: Use a grinder or rotary tool to create a V-shaped groove along the crack. This provides a larger surface area for the epoxy to bond.
- Sand the Area: Sand the area around the crack with 80-grit sandpaper to create a rough surface for adhesion.
- Apply Plastic Adhesion Promoter: Spray plastic adhesion promoter on the front and back of the damaged area to ensure proper bonding of the epoxy and filler.
- Apply Epoxy: Mix the two-part epoxy according to the manufacturer’s instructions. Apply the epoxy to both sides of the crack, filling the V-groove.
- Allow Epoxy to Cure: Let the epoxy cure completely, following the manufacturer’s recommended drying time.
3.3. Smoothing and Filling
- Sand the Epoxy: Once the epoxy is cured, sand it down with 180-grit sandpaper to create a smooth surface.
- Apply Body Filler: Mix the automotive body filler according to the manufacturer’s instructions. Apply the filler to the repair area, smoothing it out with a spreader.
- Allow Body Filler to Dry: Let the body filler dry completely.
- Sand the Body Filler: Sand the body filler with 180-grit sandpaper, followed by 320-grit and 400-grit, to create a smooth, even surface.
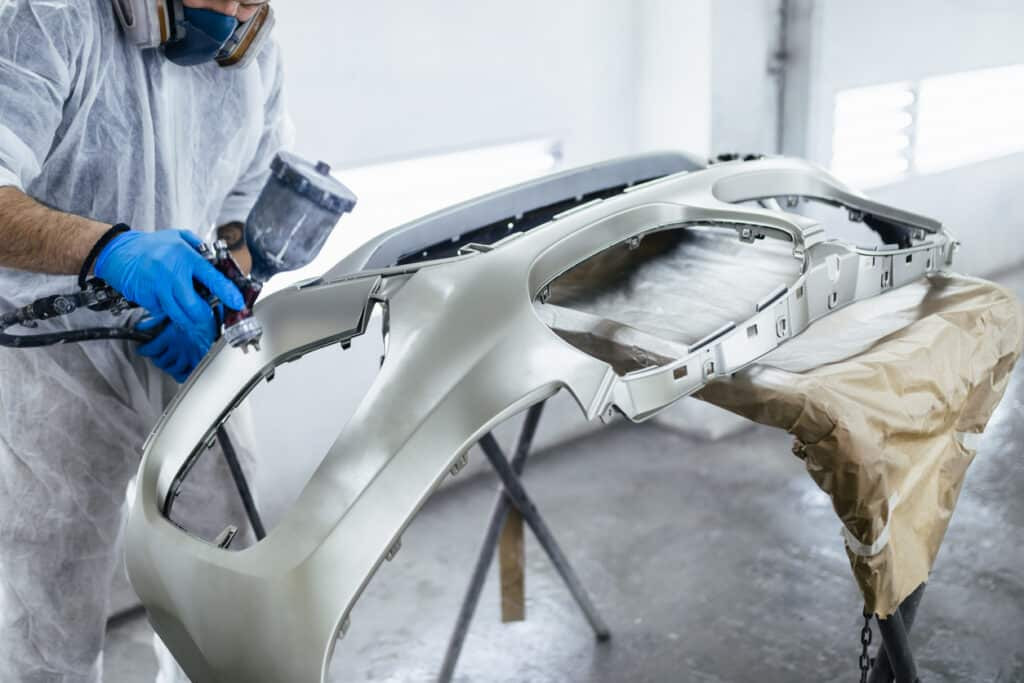
3.4. Painting
- Apply Primer: Apply several thin coats of automotive primer to the repair area, allowing each coat to dry before applying the next.
- Sand the Primer: Sand the primer with 400-grit sandpaper to create a smooth surface for painting.
- Apply Automotive Paint: Apply several thin coats of automotive paint that matches the vehicle’s color code. Allow each coat to dry before applying the next.
- Apply Clear Coat: Apply several thin coats of clear coat to protect the paint and provide a glossy finish. Allow each coat to dry before applying the next.
- Wet Sand and Buff: After the clear coat is fully cured, wet sand the area with 2000-grit sandpaper to remove any imperfections. Use a buffing compound and a polishing pad to restore the gloss.
3.5. Final Touches
- Remove Masking Tape: Carefully remove the masking tape to reveal the repaired and painted area.
- Clean the Area: Clean the repaired area with a soft cloth and automotive detailer.
- Inspect the Repair: Inspect the repair to ensure a seamless finish.
4. Advanced Techniques for Bumper Repair
For more complex bumper repairs, consider these advanced techniques to achieve professional-quality results.
4.1. Plastic Welding
Plastic welding is an effective technique for repairing larger cracks and tears in plastic bumpers. It involves using a plastic welder to melt and fuse the plastic together, creating a strong and durable bond.
- Prepare the Area: Clean and prepare the area around the crack as described in the previous steps.
- Heat the Plastic Welder: Heat the plastic welder to the appropriate temperature for the type of plastic being repaired.
- Melt and Fuse the Plastic: Use the plastic welder to melt and fuse the plastic together along the crack.
- Reinforce the Repair: Use additional plastic welding rods to reinforce the repair.
- Allow the Plastic to Cool: Allow the plastic to cool completely before sanding and finishing.
4.2. Bumper Removal and Reinstallation
In some cases, it may be necessary to remove the bumper from the vehicle to perform the repair properly. This allows for better access to the damaged area and ensures a more thorough repair.
- Locate Fasteners: Locate the fasteners that hold the bumper to the vehicle. These may include screws, bolts, clips, and retaining pins.
- Remove Fasteners: Carefully remove the fasteners, taking care not to damage the bumper or the vehicle.
- Disconnect Electrical Connections: Disconnect any electrical connections to the bumper, such as lights and sensors.
- Remove the Bumper: Carefully remove the bumper from the vehicle.
- Perform the Repair: Perform the necessary repairs to the bumper.
- Reinstall the Bumper: Reinstall the bumper by reversing the removal process.
5. Common Mistakes to Avoid When Repairing a Cracked Bumper
Avoid these common mistakes to ensure a successful bumper repair and a professional-quality finish.
5.1. Neglecting Preparation
Proper preparation is essential for a successful bumper repair. Neglecting to clean, sand, and mask the area can result in poor adhesion and an uneven finish.
5.2. Using the Wrong Materials
Using the wrong materials, such as incompatible fillers or paints, can result in a weak repair and a poor-quality finish. Always use materials that are specifically designed for automotive bumper repair.
5.3. Applying Too Much Material at Once
Applying too much filler or paint at once can result in runs, drips, and an uneven finish. Apply multiple thin coats, allowing each coat to dry before applying the next.
5.4. Rushing the Drying Process
Rushing the drying process can result in a weak repair and a poor-quality finish. Allow each material to dry completely before proceeding to the next step.
5.5. Failing to Sand Properly
Failing to sand properly can result in an uneven surface and a poor-quality finish. Use the appropriate sandpaper grits and sanding techniques to create a smooth, even surface.
6. Maintaining Your Repaired Bumper
Proper maintenance is essential for prolonging the life of your repaired bumper and keeping it looking its best.
6.1. Regular Cleaning
Wash the bumper regularly with automotive soap and water to remove dirt and grime. Use a soft cloth or sponge to avoid scratching the surface.
6.2. Waxing
Apply a coat of automotive wax to the bumper every few months to protect the paint and provide a glossy finish.
6.3. Avoiding Harsh Chemicals
Avoid using harsh chemicals, such as strong detergents or solvents, to clean the bumper. These chemicals can damage the paint and clear coat.
6.4. Promptly Repairing New Damage
Promptly repair any new damage to the bumper, such as scratches or chips, to prevent further deterioration.
7. The Benefits of Choosing CARDIAGTECH.NET for Your Bumper Repair Needs
CARDIAGTECH.NET offers a comprehensive range of tools, materials, and expertise to help you fix a cracked car bumper effectively and achieve professional-quality results.
7.1. High-Quality Products
CARDIAGTECH.NET offers only the highest-quality tools and materials, ensuring a durable and long-lasting repair.
7.2. Expert Guidance
CARDIAGTECH.NET provides expert guidance and support to help you through every step of the bumper repair process.
7.3. Competitive Prices
CARDIAGTECH.NET offers competitive prices on all of its products, making it an affordable option for both professionals and DIYers.
7.4. Fast Shipping
CARDIAGTECH.NET offers fast shipping on all orders, so you can get the tools and materials you need quickly and easily.
7.5. Customer Satisfaction
CARDIAGTECH.NET is committed to customer satisfaction and offers a money-back guarantee on all of its products.
8. Real-World Examples of Successful Bumper Repairs
Explore these examples showcasing how CARDIAGTECH.NET products facilitate exceptional bumper repairs.
8.1. Case Study 1: Minor Crack Repair
A vehicle owner noticed a small crack on their bumper after a minor parking incident. Using a plastic repair kit from CARDIAGTECH.NET, they were able to repair the crack quickly and easily, saving hundreds of dollars compared to a professional repair.
8.2. Case Study 2: Major Damage Restoration
A body shop technician used a plastic welder and body filler from CARDIAGTECH.NET to repair a severely damaged bumper. The technician was able to restore the bumper to its original condition, impressing the customer and generating repeat business.
8.3. Case Study 3: DIY Enthusiast Success
A DIY enthusiast followed the step-by-step guide provided by CARDIAGTECH.NET and used the recommended tools and materials to repair a cracked bumper on their classic car. The result was a professional-quality repair that enhanced the car’s appearance and value.
9. The Future of Automotive Bumper Repair Technology
The field of automotive bumper repair is constantly evolving, with new technologies and techniques emerging all the time. CARDIAGTECH.NET is committed to staying at the forefront of these advancements and providing its customers with the latest and most effective solutions.
9.1. Self-Healing Materials
Self-healing materials are being developed that can automatically repair minor scratches and cracks. These materials could revolutionize the way bumpers are repaired in the future.
9.2. 3D Printing
3D printing is being used to create custom bumper parts and repair components. This technology could make it easier and more affordable to repair damaged bumpers, especially for older or rare vehicles.
9.3. Advanced Diagnostic Tools
Advanced diagnostic tools are being developed that can quickly and accurately assess the extent of bumper damage. These tools can help technicians determine the best course of action for repairing a damaged bumper.
Here are some frequently asked questions to help you understand the nuances of fixing cracked car bumpers.
-
Is it safe to drive with a cracked bumper?
Driving with a cracked bumper is generally safe if the damage is minor and doesn’t affect the vehicle’s structural integrity or safety systems. However, it’s best to repair the bumper as soon as possible to prevent further damage and ensure the vehicle’s safety.
-
Can I fix a cracked bumper myself, or should I take it to a professional?
Whether you can fix a cracked bumper yourself depends on the extent of the damage and your skill level. Minor cracks can often be repaired by DIYers with the right tools and materials. However, major damage should be repaired by a professional.
-
How much does it cost to fix a cracked bumper?
The cost to fix a cracked bumper depends on the extent of the damage and the repair method used. Minor repairs can cost as little as $100, while major repairs can cost several hundred dollars or more.
-
How long does it take to fix a cracked bumper?
The time it takes to fix a cracked bumper depends on the extent of the damage and the repair method used. Minor repairs can often be completed in a few hours, while major repairs can take a day or more.
-
What are the best tools for repairing a cracked bumper?
The best tools for repairing a cracked bumper include safety glasses, gloves, a respirator, cleaning supplies, masking tape, sandpaper, a sanding block, an orbital sander, a drill, a grinder, a plastic welder, epoxy resin, body filler, plastic adhesion promoter, primer, automotive paint, clear coat, a spray gun, mixing cups, mixing sticks, and a tack cloth. CARDIAGTECH.NET offers a comprehensive range of high-quality tools for bumper repair.
-
Can I paint a plastic bumper myself?
Yes, you can paint a plastic bumper yourself with the right tools and materials. However, it’s important to follow the proper steps to ensure a professional-quality finish.
-
How do I match the paint color on my car bumper?
To match the paint color on your car bumper, you’ll need to find the vehicle’s paint code. The paint code is typically located on a sticker inside the driver’s side doorjamb or in the glove compartment. You can use the paint code to order matching automotive paint from CARDIAGTECH.NET.
-
What is plastic welding, and how does it work?
Plastic welding is a technique for repairing cracks and tears in plastic bumpers by melting and fusing the plastic together. It involves using a plastic welder to heat the plastic to its melting point, then using a welding rod to fill the crack and create a strong bond.
-
How can I prevent my car bumper from cracking in the future?
To prevent your car bumper from cracking in the future, avoid collisions and impacts, park carefully, and protect the bumper from extreme temperatures and sunlight.
-
Where can I buy high-quality bumper repair tools and materials?
You can buy high-quality bumper repair tools and materials from CARDIAGTECH.NET. We offer a comprehensive range of products at competitive prices, with fast shipping and excellent customer service.
Don’t let a cracked bumper detract from your vehicle’s appearance and safety. With the right tools, materials, and techniques, you can repair the damage effectively and restore your bumper to its original condition. Visit CARDIAGTECH.NET today to explore our wide selection of bumper repair products and take the first step towards a flawless finish. Contact us at 276 Reock St, City of Orange, NJ 07050, United States or reach out via WhatsApp at +1 (641) 206-8880. Let CARDIAGTECH.NET be your trusted partner in automotive repair excellence.
Are you struggling with a cracked car bumper? Do you need expert advice on the best tools and techniques for repair? Contact CARDIAGTECH.NET today for a consultation and discover how our premium products can help you achieve professional-quality results. Don’t wait—restore your vehicle’s appearance and safety now! Visit us at CARDIAGTECH.NET or call +1 (641) 206-8880.
