How Do You Fix Paint Damage On A Car? A Comprehensive Guide
Are you noticing unsightly blemishes on your car’s paint and wondering how to restore its pristine condition? At CARDIAGTECH.NET, we understand the frustration of car paint damage and offer effective solutions to address various issues, from minor scratches to more extensive damage. With the right tools and techniques, you can repair and protect your car’s finish, maintaining its value and appearance. Discover practical steps and expert tips for fixing paint damage, along with information about top-quality repair tools available at CARDIAGTECH.NET. We aim to equip you with the knowledge to tackle paint imperfections, ensuring your vehicle always looks its best.
Contents
- 1. Identifying Types of Car Paint Damage
- 1.1. Peeling or Cracked Paint: Causes and Solutions
- Causes of Peeling or Cracked Paint
- Solutions for Peeling or Cracked Paint
- 1.2. Scratches: Distinguishing Surface vs. Deep Scratches
- Identifying Scratch Depth
- Repairing Surface Scratches
- Repairing Deep Scratches
- 1.3. Scrapes: Effective Touch-Up Techniques
- Causes of Scrapes
- Repairing Scrapes with Touch-Up Paint
- 1.4. Dents: Addressing Paint Damage Caused by Dents
- Repairing Dents and Associated Paint Damage
- 1.5. Paint Chips: Fixing Door Edge and Road Rash
- Repairing Door Edge Chips
- Repairing Road Rash
- 2. Essential Tools and Materials for Car Paint Repair
- 2.1. Cleaning and Preparation: Ensuring a Flawless Finish
- 2.2. Sanding Techniques: Smoothing Imperfections
- Choosing the Right Sandpaper Grit
- Sanding Process
- 2.3. Priming: Creating a Solid Foundation
- Choosing the Right Primer
- Applying Primer
- 2.4. Painting: Achieving a Perfect Color Match
- Finding Your Car’s Paint Code
- Applying Touch-Up Paint
- 2.5. Clear Coating: Protecting and Enhancing the Finish
- Applying Clear Coat
- 2.6. Polishing and Buffing: Restoring the Shine
- Polishing Process
- Buffing Process
- 3. Step-by-Step Guide to Fixing Common Car Paint Damage
- 3.1. How to Fix Surface Scratches
- Materials Needed
- Step-by-Step Instructions
- 3.2. How to Fix Deep Scratches
- Materials Needed
- Step-by-Step Instructions
- 3.3. How to Fix Paint Chips
- Materials Needed
- Step-by-Step Instructions
- 4. Advanced Techniques for Car Paint Repair
- 4.1. Blending Techniques for Seamless Repairs
- Using Blending Solution
- 4.2. Wet Sanding for a Smooth Finish
- Wet Sanding Process
- 4.3. Using a Polishing Machine for Professional Results
- Polishing Machine Techniques
- 5. Maintaining Your Car’s Paint to Prevent Future Damage
- 5.1. Regular Washing and Waxing
- Washing Your Car
- Waxing Your Car
- 5.2. Protecting Your Car from the Elements
- Parking in the Shade
- Using a Car Cover
- Applying Paint Sealant
- 5.3. Promptly Addressing Minor Damage
- Fixing Scratches and Chips
- Removing Contaminants
- 6. When to Seek Professional Help
- 6.1. Extensive Damage
- 6.2. Structural Damage
- 6.3. Lack of Experience
- 7. Cost Considerations for Car Paint Repair
- 7.1. DIY Repair Costs
- Material Costs
- Tool Costs
- 7.2. Professional Repair Costs
- Typical Repair Costs
- 8. The Science Behind Car Paint: Understanding the Layers
- 8.1. Primer Layer
- Purpose of Primer
- 8.2. Base Coat Layer
- Types of Base Coats
- 8.3. Clear Coat Layer
- Purpose of Clear Coat
- 9. Environmental Considerations for Car Paint Repair
- 9.1. Using Eco-Friendly Products
- Choosing Eco-Friendly Products
- 9.2. Proper Disposal of Waste Materials
- Disposal Guidelines
- 10. Finding the Right Products at CARDIAGTECH.NET
- 10.1. Featured Products for Paint Repair
- Dr Colorchip Paint System
- Meguiar’s ScratchX
- 10.2. Why Choose CARDIAGTECH.NET for Your Automotive Needs
- Wide Selection
- Expert Advice
- Competitive Prices
- 1. What is the best way to fix a deep scratch on my car?
- 2. Can I use household products to remove scratches from my car paint?
- 3. How often should I wax my car to protect the paint?
- 4. What is the difference between rubbing compound and polishing compound?
- 5. How can I prevent paint chips on my car?
- 6. Is it worth it to repair minor paint damage on my car?
- 7. What tools do I need to repair car paint damage myself?
- 8. How do I find the correct paint code for my car?
- 9. Can I fix peeling clear coat on my car?
- 10. Where can I find high-quality car paint repair products?
1. Identifying Types of Car Paint Damage
Different types of car paint damage require different approaches. Understanding the specific issue you’re dealing with is the first step towards effective repair. Here are some common types of paint damage:
- Peeling or Cracked Paint: This occurs when the clear coat weakens and detaches from the paint layer.
- Scratches: These can range from light surface scratches to deep scratches that penetrate multiple layers of paint.
- Scrapes: Often found on bumpers and lower body panels due to contact with curbs or other obstacles.
- Dents: While not directly paint damage, dents often cause paint to crack or chip.
- Paint Chips: Small areas where the paint has been removed, commonly found on door edges and front bumpers.
1.1. Peeling or Cracked Paint: Causes and Solutions
Peeling or cracked paint is a common issue, especially in older vehicles or those frequently exposed to harsh weather conditions. Understanding the causes and how to address them can save you time and money.
Causes of Peeling or Cracked Paint
- Sun Exposure: Prolonged exposure to sunlight can weaken the clear coat, causing it to peel.
- Poor Respraying: Inadequate preparation or improper application during a respray can lead to premature peeling.
- Temperature Fluctuations: Extreme temperature changes can cause the paint to expand and contract, leading to cracks and peeling.
- Impact Damage: Physical impacts can cause the paint to crack and peel from the point of impact.
Solutions for Peeling or Cracked Paint
According to automotive experts, the only effective way to fix peeling or cracked paint is to respray the affected area. This involves:
- Sanding: The damaged area needs to be sanded down to create a smooth surface for the new paint to adhere to.
- Priming: A primer is applied to ensure proper adhesion and provide a uniform base.
- Painting: The new paint is applied in multiple coats to match the original color.
- Clear Coating: A clear coat is applied to protect the paint and provide a glossy finish.
Note: Respraying can be expensive, especially if the damage is extensive. For older cars with high mileage, it may not be a worthwhile investment.
1.2. Scratches: Distinguishing Surface vs. Deep Scratches
Scratches are inevitable, but knowing how to differentiate between surface and deep scratches is crucial for effective repair.
Identifying Scratch Depth
- Surface Scratches: These only affect the clear coat layer. They often disappear temporarily when wet.
- Deep Scratches: These penetrate the clear coat and reach the paint layer or even the metal underneath. They remain visible even when wet.
Repairing Surface Scratches
Surface scratches can often be repaired with:
- Cleaning: Thoroughly clean the area around the scratch to remove any dirt or debris.
- Rubbing Compound: Apply a small amount of gentle rubbing compound to a microfiber cloth.
- Buffing: Gently buff the scratched area in a circular motion.
- Polishing: Polish the area with a car wax to restore the shine.
Pro Tip: Meguiar’s ScratchX is a popular product for removing surface scratches and can be found at most retail stores.
Repairing Deep Scratches
Deep scratches require more extensive repair:
- Sanding: Lightly sand the area to smooth out the edges of the scratch.
- Priming: Apply a primer to the sanded area to promote adhesion.
- Painting: Carefully apply touch-up paint that matches your car’s color code.
- Clear Coating: Apply a clear coat to protect the paint and blend the repair with the surrounding area.
- Buffing and Polishing: Buff and polish the repaired area for a seamless finish.
Note: For extensive deep scratches, professional respraying by a body shop may be necessary.
1.3. Scrapes: Effective Touch-Up Techniques
Scrapes are common on bumpers and lower body panels. Addressing them promptly can prevent rust and further damage.
Causes of Scrapes
- Contact with Curbs: Front bumpers are often close to the road, making them susceptible to scrapes.
- Accidental Collisions: Hitting poles, garage sides, or other obstacles can cause scrapes.
Repairing Scrapes with Touch-Up Paint
- Cleaning: Clean the scraped area thoroughly.
- Sanding: Sand down any rough edges.
- Priming: Apply a primer to the area.
- Touch-Up Paint: Apply touch-up paint in thin layers, allowing each layer to dry before applying the next.
- Blending: Use a blending solution to help the touch-up paint blend with the surrounding paint.
- Clear Coating: Apply a clear coat for protection and shine.
Tool Recommendation: Consider using the Dr Colorchip paint system for effective and easy touch-up repairs.
1.4. Dents: Addressing Paint Damage Caused by Dents
Dents themselves don’t directly damage paint, but the impact often causes paint to chip or crack around the dent.
Repairing Dents and Associated Paint Damage
- Dent Removal: First, address the dent using paintless dent repair (PDR) techniques if possible.
- Cleaning: Clean the area around the dent and any associated paint damage.
- Sanding: Lightly sand any rough edges or chipped paint.
- Priming: Apply a primer to the affected area.
- Touch-Up Paint: Apply touch-up paint to any areas where the paint has chipped or cracked.
- Clear Coating: Apply a clear coat to protect the repaired area and blend it with the surrounding paint.
- Polishing: Polish the area to restore the shine.
Resource: Consult local car dealerships for referrals to reputable dent technicians in your area.
1.5. Paint Chips: Fixing Door Edge and Road Rash
Paint chips can occur on various parts of your car, with door edges and front bumpers being particularly susceptible.
Repairing Door Edge Chips
Door edge chips are relatively easy to fix with a touch-up kit:
- Cleaning: Clean the door edge thoroughly.
- Touch-Up Paint: Apply touch-up paint directly to the chip.
- Layering: Apply multiple thin layers, allowing each layer to dry.
- Clear Coating: Apply a clear coat for protection.
Product Recommendation: Dr Colorchip kits are highly recommended for repairing door edge chips.
Repairing Road Rash
Road rash refers to a collection of small paint chips on the hood and front bumper:
- Cleaning: Clean the affected area thoroughly.
- Touch-Up Paint: Apply touch-up paint to each chip.
- Blending: Use a blending solution to remove excess paint and blend the repairs.
- Clear Coating: Apply a clear coat for protection and shine.
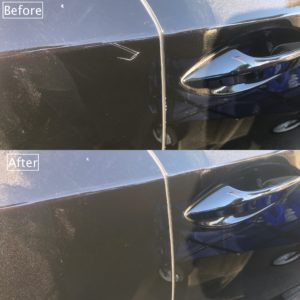
Nissan scratch repair near the door handle, showcasing before and after results
2. Essential Tools and Materials for Car Paint Repair
Having the right tools and materials is essential for successful car paint repair. Here’s a comprehensive list of what you’ll need:
- Cleaning Supplies:
- Car wash soap
- Microfiber cloths
- Detailing brushes
- Sanding Materials:
- Sandpaper (various grits)
- Sanding block
- Paint Products:
- Primer
- Touch-up paint (matching your car’s color code)
- Clear coat
- Blending solution
- Application Tools:
- Paint brushes
- Applicator sticks
- Spray gun (for larger repairs)
- Polishing and Buffing:
- Rubbing compound
- Car wax
- Buffing pads
- Polishing machine
- Safety Gear:
- Gloves
- Mask
- Eye protection
2.1. Cleaning and Preparation: Ensuring a Flawless Finish
Proper cleaning and preparation are vital for achieving a flawless paint repair. Here’s how to prepare the surface:
- Wash the Area: Use car wash soap and water to remove dirt and grime.
- Dry Thoroughly: Use a clean microfiber cloth to dry the area completely.
- Decontaminate: Use a clay bar to remove any embedded contaminants.
- Masking: Use automotive masking tape to protect surrounding areas from overspray.
2.2. Sanding Techniques: Smoothing Imperfections
Sanding is essential for smoothing out imperfections and ensuring proper adhesion of paint.
Choosing the Right Sandpaper Grit
- Heavy Scratches: Start with 400-grit sandpaper to remove heavy scratches.
- Medium Scratches: Use 800-grit sandpaper for medium scratches.
- Fine Scratches: Use 1200-grit sandpaper for fine scratches.
- Blending: Use 2000-grit sandpaper for blending and smoothing after painting.
Sanding Process
- Wet Sanding: Wet the sandpaper and the surface with water.
- Gentle Pressure: Apply gentle pressure and sand in a back-and-forth motion.
- Even Sanding: Ensure even sanding across the entire area.
- Clean and Inspect: Clean the area and inspect for any remaining imperfections.
2.3. Priming: Creating a Solid Foundation
Priming is essential for creating a solid foundation for the paint to adhere to.
Choosing the Right Primer
- Surface Primer: For minor imperfections and scratches.
- Filler Primer: For filling in deeper scratches and dents.
- Etching Primer: For bare metal surfaces.
Applying Primer
- Shake Well: Shake the primer can well before use.
- Thin Coats: Apply thin, even coats of primer.
- Drying Time: Allow each coat to dry completely before applying the next.
- Sanding: Lightly sand the primer with fine-grit sandpaper after it has dried.
2.4. Painting: Achieving a Perfect Color Match
Achieving a perfect color match is crucial for seamless paint repair.
Finding Your Car’s Paint Code
Your car’s paint code can usually be found:
- Driver’s Side Door Jamb: On a sticker or plate.
- Glove Compartment: Inside the glove compartment.
- Engine Compartment: On a plate or sticker.
Applying Touch-Up Paint
- Shake Well: Shake the touch-up paint well before use.
- Thin Coats: Apply thin, even coats of touch-up paint.
- Layering: Allow each coat to dry completely before applying the next.
- Blending: Use a blending solution to blend the touch-up paint with the surrounding area.
2.5. Clear Coating: Protecting and Enhancing the Finish
Clear coating protects the paint and enhances the finish with a glossy shine.
Applying Clear Coat
- Shake Well: Shake the clear coat can well before use.
- Thin Coats: Apply thin, even coats of clear coat.
- Drying Time: Allow each coat to dry completely before applying the next.
- Wet Sanding: Lightly wet sand the clear coat with fine-grit sandpaper after it has dried.
2.6. Polishing and Buffing: Restoring the Shine
Polishing and buffing restore the shine and remove any imperfections in the clear coat.
Polishing Process
- Apply Compound: Apply a small amount of rubbing compound to a polishing pad.
- Polishing Machine: Use a polishing machine to polish the surface in a circular motion.
- Gentle Pressure: Apply gentle pressure and overlap each pass.
- Clean and Inspect: Clean the area and inspect for any remaining imperfections.
Buffing Process
- Apply Wax: Apply a small amount of car wax to a buffing pad.
- Buffing Machine: Use a buffing machine to buff the surface in a circular motion.
- Gentle Pressure: Apply gentle pressure and overlap each pass.
- Final Wipe: Use a clean microfiber cloth to wipe off any remaining wax.
3. Step-by-Step Guide to Fixing Common Car Paint Damage
Follow these step-by-step guides to address common types of car paint damage effectively.
3.1. How to Fix Surface Scratches
Surface scratches are minor imperfections that only affect the clear coat layer.
Materials Needed
- Car wash soap
- Microfiber cloths
- Rubbing compound
- Car wax
Step-by-Step Instructions
- Wash the Area: Wash the area around the scratch with car wash soap and water.
- Dry Thoroughly: Dry the area with a clean microfiber cloth.
- Apply Rubbing Compound: Apply a small amount of rubbing compound to a microfiber cloth.
- Buff the Scratch: Gently buff the scratch in a circular motion.
- Apply Car Wax: Apply car wax to the area and buff to restore the shine.
3.2. How to Fix Deep Scratches
Deep scratches penetrate the clear coat and reach the paint layer or even the metal underneath.
Materials Needed
- Car wash soap
- Microfiber cloths
- Sandpaper (various grits)
- Primer
- Touch-up paint
- Clear coat
- Blending solution
Step-by-Step Instructions
- Wash the Area: Wash the area around the scratch with car wash soap and water.
- Dry Thoroughly: Dry the area with a clean microfiber cloth.
- Sand the Scratch: Lightly sand the scratch with fine-grit sandpaper.
- Apply Primer: Apply a thin coat of primer to the sanded area.
- Apply Touch-Up Paint: Apply thin, even coats of touch-up paint, allowing each coat to dry.
- Apply Clear Coat: Apply a thin coat of clear coat to protect the paint.
- Blend the Repair: Use a blending solution to blend the repair with the surrounding area.
- Polish and Buff: Polish and buff the area to restore the shine.
3.3. How to Fix Paint Chips
Paint chips are small areas where the paint has been removed, often caused by rocks or debris.
Materials Needed
- Car wash soap
- Microfiber cloths
- Touch-up paint
- Clear coat
- Applicator sticks
Step-by-Step Instructions
- Wash the Area: Wash the area around the paint chip with car wash soap and water.
- Dry Thoroughly: Dry the area with a clean microfiber cloth.
- Apply Touch-Up Paint: Apply touch-up paint directly to the chip using an applicator stick.
- Layering: Apply multiple thin layers, allowing each layer to dry.
- Apply Clear Coat: Apply a thin coat of clear coat to protect the paint.
- Blend the Repair: Use a blending solution to blend the repair with the surrounding area.
- Polish and Buff: Polish and buff the area to restore the shine.
4. Advanced Techniques for Car Paint Repair
For more complex paint damage, consider these advanced techniques for a professional finish.
4.1. Blending Techniques for Seamless Repairs
Blending is crucial for making repairs seamless and invisible.
Using Blending Solution
- Apply Touch-Up Paint: Apply touch-up paint to the damaged area.
- Spray Blending Solution: Spray a small amount of blending solution onto the surrounding area.
- Blend the Edges: Use a soft cloth to gently blend the edges of the touch-up paint with the surrounding paint.
- Repeat if Necessary: Repeat the process if necessary to achieve a seamless blend.
4.2. Wet Sanding for a Smooth Finish
Wet sanding helps smooth out imperfections and ensures a smooth, even finish.
Wet Sanding Process
- Prepare Sandpaper: Soak fine-grit sandpaper (2000-grit or higher) in water for several minutes.
- Wet the Area: Wet the area to be sanded with water.
- Gentle Sanding: Gently sand the area in a back-and-forth motion, keeping the surface wet.
- Rinse and Inspect: Rinse the area with water and inspect for any remaining imperfections.
- Repeat if Necessary: Repeat the process if necessary to achieve a smooth finish.
4.3. Using a Polishing Machine for Professional Results
A polishing machine can help you achieve professional-quality results when polishing and buffing.
Polishing Machine Techniques
- Apply Compound: Apply a small amount of rubbing compound to a polishing pad.
- Even Pressure: Use the polishing machine to polish the surface in a circular motion, applying even pressure.
- Overlap Passes: Overlap each pass to ensure even coverage.
- Inspect Regularly: Inspect the surface regularly and adjust your technique as needed.
5. Maintaining Your Car’s Paint to Prevent Future Damage
Prevention is key to maintaining your car’s paint and preventing future damage.
5.1. Regular Washing and Waxing
Regular washing and waxing can protect your car’s paint from the elements and prevent damage.
Washing Your Car
- Use Car Wash Soap: Use a pH-balanced car wash soap to avoid damaging the paint.
- Two-Bucket Method: Use two buckets—one for washing and one for rinsing—to prevent dirt from scratching the paint.
- Dry with Microfiber Cloth: Dry your car with a clean microfiber cloth to avoid water spots.
Waxing Your Car
- Apply Wax: Apply a thin, even coat of car wax to the paint.
- Buff: Buff the wax with a clean microfiber cloth to restore the shine.
- Regular Waxing: Wax your car every three to six months to protect the paint.
5.2. Protecting Your Car from the Elements
Protecting your car from the elements can prevent sun damage, water spots, and other issues.
Parking in the Shade
Park your car in the shade whenever possible to protect it from the sun’s harmful UV rays.
Using a Car Cover
Use a car cover to protect your car from the elements when parking outside.
Applying Paint Sealant
Apply a paint sealant to create a protective barrier against the elements.
5.3. Promptly Addressing Minor Damage
Addressing minor damage promptly can prevent it from becoming more serious.
Fixing Scratches and Chips
Fix scratches and chips as soon as possible to prevent rust and further damage.
Removing Contaminants
Remove contaminants like bird droppings and tree sap promptly to prevent them from damaging the paint.
6. When to Seek Professional Help
While many types of car paint damage can be repaired at home, some situations require professional help.
6.1. Extensive Damage
If your car has extensive paint damage, such as large areas of peeling or cracking paint, it’s best to seek professional help.
6.2. Structural Damage
If your car has structural damage, such as dents or collision damage, it’s important to have it repaired by a professional body shop.
6.3. Lack of Experience
If you lack experience or confidence in repairing car paint damage, it’s best to seek professional help to avoid making the damage worse.
7. Cost Considerations for Car Paint Repair
The cost of car paint repair can vary depending on the type and extent of the damage, as well as whether you choose to repair it yourself or hire a professional.
7.1. DIY Repair Costs
DIY repair costs typically include the cost of materials, such as sandpaper, primer, touch-up paint, and clear coat.
Material Costs
- Sandpaper: $10-$20
- Primer: $10-$20
- Touch-Up Paint: $20-$50
- Clear Coat: $15-$30
Tool Costs
- Sanding Block: $5-$10
- Applicator Sticks: $5-$10
- Polishing Machine: $50-$200
7.2. Professional Repair Costs
Professional repair costs can vary depending on the body shop and the type of repair needed.
Typical Repair Costs
- Surface Scratch Repair: $50-$150
- Deep Scratch Repair: $150-$500
- Paint Chip Repair: $100-$300
- Panel Respraying: $300-$1000
8. The Science Behind Car Paint: Understanding the Layers
To properly fix paint damage, it’s helpful to understand the layers that make up your car’s paint.
8.1. Primer Layer
The primer layer is the foundation of the paint system, providing adhesion and corrosion protection.
Purpose of Primer
- Adhesion: Promotes adhesion between the metal and the paint.
- Corrosion Protection: Protects the metal from rust and corrosion.
- Smooth Surface: Creates a smooth surface for the paint to adhere to.
8.2. Base Coat Layer
The base coat layer provides the color and appearance of the paint.
Types of Base Coats
- Solid Colors: Non-metallic colors.
- Metallic Colors: Colors with metallic flakes for a shimmering effect.
- Pearl Colors: Colors with pearl pigments for a unique, iridescent effect.
8.3. Clear Coat Layer
The clear coat layer protects the base coat and provides a glossy finish.
Purpose of Clear Coat
- Protection: Protects the base coat from scratches, UV rays, and other damage.
- Gloss: Provides a glossy, reflective finish.
- Durability: Enhances the durability of the paint system.
9. Environmental Considerations for Car Paint Repair
Car paint repair can have environmental impacts, so it’s important to take steps to minimize them.
9.1. Using Eco-Friendly Products
Use eco-friendly car wash soaps, waxes, and other products to minimize your environmental impact.
Choosing Eco-Friendly Products
- Biodegradable: Look for products that are biodegradable.
- Low VOC: Choose products with low volatile organic compounds (VOCs).
- Water-Based: Opt for water-based products instead of solvent-based ones.
9.2. Proper Disposal of Waste Materials
Dispose of waste materials, such as used sandpaper, paint cans, and rags, properly to prevent pollution.
Disposal Guidelines
- Recycle: Recycle empty paint cans and other recyclable materials.
- Hazardous Waste: Dispose of hazardous waste, such as used paint and solvents, at a designated hazardous waste collection site.
- Proper Storage: Store waste materials in sealed containers to prevent leaks and spills.
10. Finding the Right Products at CARDIAGTECH.NET
CARDIAGTECH.NET offers a wide range of tools and products for car paint repair.
10.1. Featured Products for Paint Repair
Explore our selection of top-quality products for fixing paint damage.
Dr Colorchip Paint System
The Dr Colorchip paint system is highly recommended for repairing paint chips and scratches.
- Easy to Use: Simple application process for DIY repairs.
- Excellent Results: Provides excellent results and seamless blending.
- Comprehensive Kit: Comes with everything you need to repair paint damage.
Meguiar’s ScratchX
Meguiar’s ScratchX is a popular product for removing surface scratches.
- Effective: Effectively removes surface scratches and swirl marks.
- Easy to Use: Easy to apply and buff.
- Widely Available: Can be found at most retail stores.
10.2. Why Choose CARDIAGTECH.NET for Your Automotive Needs
At CARDIAGTECH.NET, we are committed to providing high-quality tools and products for automotive repair.
Wide Selection
We offer a wide selection of tools and products for all your automotive needs.
Expert Advice
Our team of experts can provide advice and guidance to help you choose the right products for your specific needs.
Competitive Prices
We offer competitive prices and excellent value for your money.
Call to Action: Facing challenges with car paint damage and unsure where to start? Contact CARDIAGTECH.NET today for expert advice and tailored solutions. Our team can guide you through our extensive range of automotive tools and equipment, ensuring you have everything you need for successful paint repairs. Reach out to us at +1 (641) 206-8880 or visit our website CARDIAGTECH.NET for immediate assistance and to explore our product offerings. Let us help you restore your car’s appearance and maintain its value.
Here are some frequently asked questions about car paint repair to help you better understand the process.
1. What is the best way to fix a deep scratch on my car?
To fix a deep scratch, clean the area, sand it lightly, apply primer, then touch-up paint in thin layers, followed by a clear coat. Blend the edges and polish for a seamless finish.
2. Can I use household products to remove scratches from my car paint?
It’s not recommended to use household products, as they can damage the paint. Use automotive-specific products like rubbing compound and car wax.
3. How often should I wax my car to protect the paint?
Wax your car every three to six months to protect the paint from the elements and maintain its shine.
4. What is the difference between rubbing compound and polishing compound?
Rubbing compound is more abrasive and used for removing scratches, while polishing compound is finer and used for restoring shine.
5. How can I prevent paint chips on my car?
Prevent paint chips by avoiding driving on gravel roads, maintaining a safe distance from other vehicles, and applying a paint protection film.
6. Is it worth it to repair minor paint damage on my car?
Yes, repairing minor paint damage can prevent rust and further deterioration, maintaining your car’s value and appearance.
7. What tools do I need to repair car paint damage myself?
You’ll need car wash soap, microfiber cloths, sandpaper, primer, touch-up paint, clear coat, rubbing compound, and polishing compound.
8. How do I find the correct paint code for my car?
The paint code can usually be found on a sticker in the driver’s side door jamb, glove compartment, or engine compartment.
9. Can I fix peeling clear coat on my car?
The best way to fix peeling clear coat is to have the area sanded down and resprayed by a professional.
10. Where can I find high-quality car paint repair products?
You can find high-quality car paint repair products at CARDIAGTECH.NET. We offer a wide selection of tools and materials for all your automotive needs.
By following this comprehensive guide, you can effectively address various types of car paint damage and keep your vehicle looking its best. Remember, CARDIAGTECH.NET is your trusted partner for high-quality automotive tools and products. Visit our website or contact us today for expert advice and tailored solutions.
Address: 276 Reock St, City of Orange, NJ 07050, United States
Whatsapp: +1 (641) 206-8880
Website: CARDIAGTECH.NET

