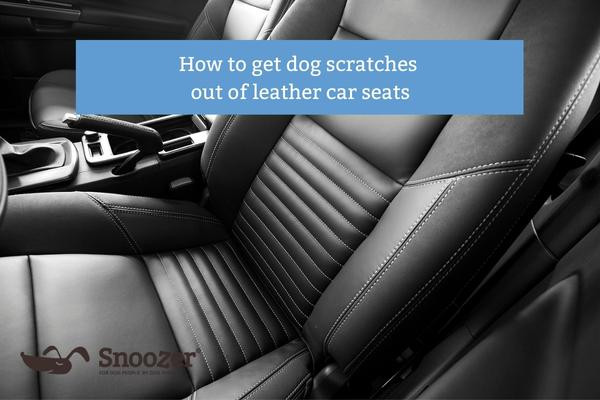
How to Fix Scratches in Leather Car Seats: A Step-by-Step Guide
Discovering scratches on your car’s leather seats can be frustrating, especially if they’re caused by your beloved dog. Fortunately, most scratches, particularly dog scratches, are often superficial and can be easily fixed at home. This guide will walk you through various methods to effectively repair scratches in your leather car seats and keep them looking their best.
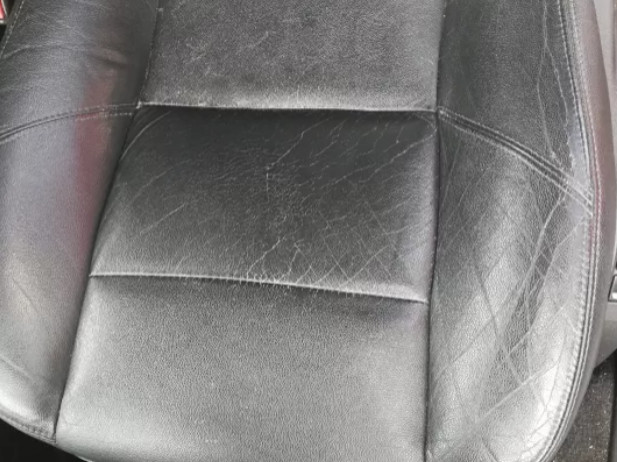
Close-up of dog scratches on a leather car seat, illustrating the need for leather car seat scratch repair.
Understanding the Type of Leather in Your Car
Before you begin any repair, it’s crucial to identify the type of leather in your car. Most modern vehicles use pigmented leather, also known as protected leather. This type is durable and has a protective coating, making it more resistant to scratches and easier to clean. However, luxury vehicles might feature higher-end leathers like Nappa, which are more delicate. If you’re unsure about your leather type, especially if you own a luxury car, it’s advisable to consult your car dealership before attempting any DIY repairs to avoid potential damage to sensitive leather.
Simple Solutions for Minor Scratches
For very light scratches, often all that’s needed is to condition the leather. Leather conditioners moisturize the material, helping to buff out minor imperfections and restore its smooth surface.
Leather Conditioner for Light Scratches
A quality leather conditioner is your first line of defense against light scratches. These products come in various forms, from creams to oils, all designed to hydrate and protect leather.
Here’s how to use a leather conditioner to fix minor scratches:
- Clean the Leather: Begin by gently cleaning the scratched area with a leather cleaner or a damp microfiber cloth to remove any dirt or debris.
- Apply Conditioner: Apply a small amount of leather conditioner to a clean, lint-free microfiber cloth.
- Buff the Scratches: Gently buff the conditioner into the scratched area using circular motions.
- Let it Dry: Allow the conditioner to absorb into the leather and dry completely for several hours, or as per the product instructions.
Household Alternatives (with Caution)
If you prefer a DIY approach or don’t have a commercial conditioner readily available, you can try homemade solutions for very minor scratches. A mixture of one part white vinegar and two parts linseed oil can act as a cleaning and conditioning agent. Alternatively, a solution of warm water with a drop of mild liquid soap and a few drops of white vinegar can also be used.
While some recommend household oils like olive oil or coconut oil, use these with caution. They can condition leather but may darken it, especially lighter shades. Avoid using colorless shoe polish, as it’s not formulated for the protected leather typically found in car interiors.
Important: Always perform a patch test in an inconspicuous area first to observe how the leather reacts to any product or homemade solution before applying it to the visible scratch.
Repairing Deeper Scratches
When scratches are more pronounced, simple conditioning might not suffice. In such cases, leather repair products can provide a more effective solution.
Leather Repair Kits
For moderate scratches, a leather repair kit can be an excellent DIY option. These kits often include color-matching compounds that allow you to precisely match your car’s leather color.
Using a leather repair kit typically involves these steps:
- Clean the Area: Thoroughly clean the scratched area.
- Color Matching: Mix the color compounds in the kit to achieve a close match to your car seat’s leather color.
- Apply Repair Compound: Carefully apply the color-matched compound to the scratch, following the kit’s instructions for application and drying time.
Leather Glue and Filler for Significant Scratches
For deeper scratches that are more noticeable, you might need to use leather glue and filler. These products are designed to fill in the scratch and restore the leather’s surface.
Here’s how to use leather glue and filler:
- Clean the Scratch: Ensure the scratched area is clean and dry.
- Apply Leather Glue: Apply leather glue into the scratch to bond the edges of the leather.
- Apply Leather Filler: Once the glue is dry, apply leather filler to fill the scratch to the level of the surrounding leather.
- Sanding: After the filler has dried, gently sand the area smooth with fine-grit sandpaper to blend it seamlessly with the rest of the seat.
- Coloring (Optional): If necessary, you can use a leather dye or colorant to further blend the repaired area with the original leather color.
When to Call a Professional
While many scratches can be fixed at home, severe damage like tears or very deep gouges might require professional attention. If you’re uncomfortable performing the repairs yourself or if the damage is extensive, it’s best to seek professional help. You can find leather repair specialists through online searches, your car dealership, or trusted auto mechanics and service centers.
Prevention is Key
Once you’ve successfully repaired the scratches, prevention is crucial to avoid future damage.
Here are some preventative measures:
- Trim Your Dog’s Nails: Regularly trim your dog’s nails and keep them smooth to minimize scratching.
- Dog Booties: Consider using dog booties when traveling with your dog in the car to prevent their nails from directly contacting the leather.
- Use Car Seat Covers: Invest in protective car seat covers, especially dog car seat hammocks or dedicated dog car seats like the Snoozer Lookout Dog Car Seat or Snoozer Reversible Hammock Dog Seat Car Cover. These not only protect against scratches but also keep your seats clean from pet hair and dirt, providing a more comfortable and safer ride for your pet.
By following these steps, you can effectively fix scratches in your leather car seats and take proactive measures to protect them from future mishaps, ensuring your car’s interior remains in top condition.