How to Fix Rusty Car: Your Comprehensive DIY Guide to Auto Body Rust Repair
Rust is a car owner’s nightmare. Left unchecked, this corrosive menace can turn a vehicle from a prized possession into a pile of scrap. While modern cars boast factory rust protection, daily use and accidental damage can compromise these defenses, paving the way for corrosion. The thought of expensive body shop repairs might be daunting, but the good news is, tackling surface rust yourself is entirely achievable and can significantly extend your car’s lifespan. With the right approach and a bit of elbow grease, you can effectively stop rust in its tracks and save a considerable amount of money.
How Much Can DIY Rust Repair Save You?
If you’ve ever looked into professional car scratch repair, you’ll know that even minor cosmetic fixes can be costly. Rust repair escalates things significantly. A professional body shop repair for rust damage can easily run into hundreds, if not thousands, of dollars, especially if multiple panels are affected.
By taking the DIY route for rust repair, you can save a substantial sum. The initial investment in tools and materials will quickly pay for itself compared to professional labor costs. Investing in a quality rust repair kit and dedicating your time will be significantly cheaper than a body shop visit.
However, let’s set some clear boundaries before diving in:
Identifying Surface Rust vs. Structural Damage
This guide focuses on surface rust repair. If your car has severe rust issues like rotted-out floorboards, holes in the bodywork, compromised sills, or chassis rail corrosion, professional intervention, including welding, is necessary. We are addressing cosmetic corrosion on panels that hasn’t yet compromised the vehicle’s structural integrity.
Car Painting Considerations
This guide will take you through the rust removal and preparation stages, culminating in priming the affected area. If you’re comfortable tackling the painting yourself, you can proceed to apply color and clear coat. Solid colors are generally easier to achieve a good match with, while metallic paints can be more challenging for DIYers to blend seamlessly.
Consider this: there’s no shame in completing the prep work yourself and then enlisting a body shop for the painting and blending. Professional spray equipment is designed for flawless finishes that aerosol cans often can’t replicate.
Step-by-Step Guide: How to Fix Rust Damage on Your Car
Modern vehicles are indeed more rust-resistant than older models, but factors like coastal climates or road salt exposure can still lead to premature rust, even before mechanical wear becomes an issue. Minor rust on non-structural areas is easily manageable and, with careful work, can be made virtually invisible.
Classic car restoration often involves cutting out rusted sections and welding in new metal. However, for everyday vehicles, fiberglass epoxy and body filler offer a simpler and more accessible repair method.
Perhaps a small stone chip or a door ding cracked the paint, initiating the rust process. This highlights the importance of regular car washes and inspections. A quick touch-up paint application can prevent minor chips from escalating into extensive rust repairs years down the line. Let’s walk through the process step-by-step.
You’ll need to gather these tools and materials:
- Angle grinder with flapper wheels (various grits)
- Wire brush (steel and nylon)
- Fiberglass epoxy gel or resin with hardener
- Body filler (automotive grade)
- Sandpaper assortment (80, 120, 240, 320, 400, 600, 800, 1000, 1500, 2000 grit) – start coarser and progressively finer.
- Sanding block (rubber or foam)
- Automotive primer (compatible with your paint system)
- Base coat car paint (matched to your car’s color code)
- 2K clear coat paint (aerosol cans are suitable for smaller repairs)
- Masking tape (automotive grade) and masking paper or plastic sheeting
- Rubbing compound (for paint correction and polishing)
- Degreaser or mineral spirits (for cleaning surfaces)
- Microfiber rags (lint-free)
- Tack cloth (for removing dust before painting)
- Personal Protective Equipment (PPE): safety glasses, gloves, respirator mask
Now, let’s get to work:
-
Preparation and Cleaning:
Begin by thoroughly cleaning the rusted area and the surrounding paintwork. Wash the car and use a degreaser to remove any wax, grease, or contaminants. Dry the area completely.
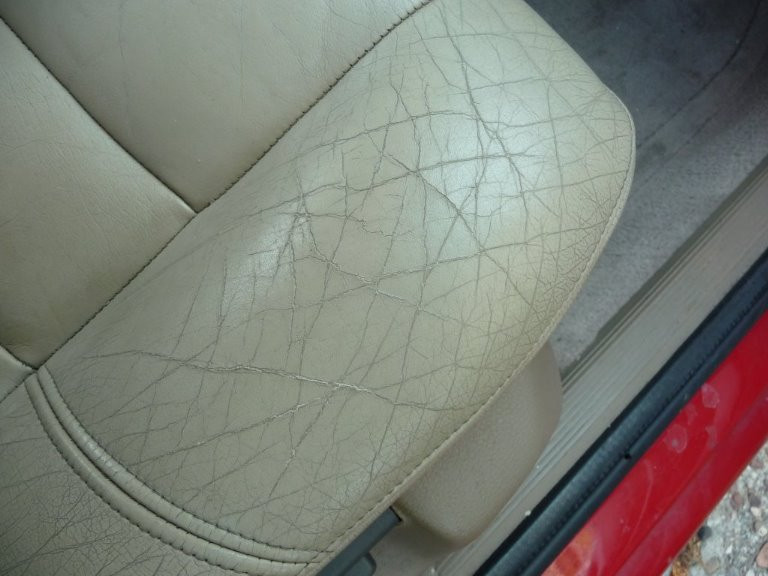
Alt text: Severely corroded car panel with bubbling paint and visible rust, showcasing the initial state of rust damage before any repair work has commenced.
-
Rust Removal – Initial Stage:
Use a wire brush (steel for heavier rust, nylon for lighter surface rust) to remove loose rust flakes and paint around the affected area. Be firm but avoid gouging the metal.
-
Grinding Down to Bare Metal:
This is where the angle grinder comes in. Fit it with a medium-grit flapper wheel (start with 80 or 120 grit). Carefully grind away the rust, working outwards from the center of the rusted area. The goal is to remove all visible rust and reach clean, shiny metal. Be cautious not to remove too much surrounding good metal. Use overlapping passes and keep the grinder moving to prevent heat buildup and warping of the panel.
Alt text: Technician utilizing an angle grinder equipped with a flapper wheel to effectively grind away rust from the car body, ensuring thorough removal of corrosion.
-
Clean Again and Assess:
Wipe down the area with mineral spirits or degreaser to remove grinding dust. Inspect the area thoroughly. Ensure all rust is gone, and you are left with clean metal. If there are any pits or small holes after grinding, fiberglass epoxy is your next step.
-
Applying Fiberglass Epoxy (If Needed):
For minor pits or thin metal after rust removal, fiberglass epoxy provides strength and seals the metal. Mix the epoxy resin and hardener according to the manufacturer’s instructions. Apply a thin layer of epoxy to the cleaned area, slightly overlapping onto the surrounding metal. Use a plastic spreader or applicator to ensure even coverage and to press the epoxy into any pits or crevices. Let it cure completely as per the product instructions.
-
Body Filler Application:
Once the epoxy is cured (if used), or directly onto clean metal, it’s time for body filler. Mix body filler and hardener as per instructions. Apply a thin layer of filler over the repair area, feathering it out beyond the repair edge onto the surrounding paint. The goal is to slightly overfill the area, as you will be sanding it back down to shape. Apply in thin coats, building up gradually to avoid air pockets and ensure proper curing. Allow each coat to cure fully.
Alt text: Auto repair specialist expertly applying body filler to the car panel in order to smooth out imperfections and prepare the surface for painting after rust remediation.
-
Sanding and Shaping the Body Filler:
Start sanding the body filler with coarser grit sandpaper (80 or 120 grit) wrapped around a sanding block. Sand in a cross-hatch pattern to gradually remove excess filler and shape the repair to match the original panel contour. As you get closer to the desired shape, switch to progressively finer grits (240, 320, 400, 600 grit) to refine the surface and remove sanding scratches. Use your hand to feel for smooth transitions and any imperfections.
-
Primer Application:
Once you are satisfied with the shape and smoothness of the body filler, thoroughly clean the area with tack cloth to remove all sanding dust. Mask off the surrounding area using masking tape and paper. Apply several thin coats of automotive primer, allowing each coat to flash dry according to the primer instructions. Primer provides a uniform surface for paint adhesion and helps reveal any remaining imperfections in the bodywork. Lightly wet sand the primer with 600 grit sandpaper after it’s fully dry to smooth out any primer texture. Clean with tack cloth again.
-
Base Coat Painting:
Apply the base coat car paint in thin, even coats, overlapping each pass. Follow the paint manufacturer’s instructions regarding drying time between coats. Apply enough coats to achieve full color coverage and a uniform finish. For best results, consider using aerosol spray cans designed for automotive touch-up, or consult a professional for paint matching and application, especially for metallic paints.
-
Clear Coat Application:
After the base coat is completely dry, apply 2K clear coat in several thin, even coats. Clear coat protects the base coat and provides gloss and depth to the finish. Allow each coat to flash dry. Apply enough coats to achieve a smooth, glossy finish.
-
Wet Sanding and Polishing (Optional but Recommended):
For an even more professional finish, you can wet sand the clear coat after it has fully cured (allow at least 24-48 hours, or as per paint instructions). Start with 1500 grit wet sandpaper, then move to 2000 grit, using plenty of water as lubricant. This removes any orange peel texture and minor imperfections in the clear coat. Follow wet sanding with rubbing compound and a polishing pad or microfiber cloth to restore the shine to a mirror finish.
-
Final Clean Up:
Remove masking tape and paper carefully. Clean the repaired area and surrounding car bodywork. Admire your rust-free handiwork!
Preventing Future Rust: Proactive Car Care
Repairing rust is one thing, preventing it is even better. Here are some key steps to minimize rust on your car:
- Regular Washing: Wash your car frequently, especially during winter months or if you live in a coastal area. Salt and road grime are major contributors to rust.
- Waxing and Sealing: Apply car wax or paint sealant regularly. This creates a protective barrier against moisture and contaminants.
- Touch Up Paint: Promptly address any stone chips, scratches, or paint damage with touch-up paint to prevent rust from starting.
- Underbody Wash: Periodically wash the undercarriage of your car, especially after winter driving, to remove salt and debris buildup.
- Garage Parking: When possible, park your car in a garage or covered area to shield it from harsh weather conditions.
- Rust Inhibitors: Consider applying rust inhibitor sprays to vulnerable areas like wheel wells and underbody panels.
Conclusion: DIY Rust Repair Empowers You
Fixing rust on your car yourself is a rewarding and cost-effective way to maintain your vehicle’s appearance and longevity. While it requires time, patience, and attention to detail, the satisfaction of restoring your car’s bodywork and saving money on professional repairs is well worth the effort. By following this comprehensive guide and practicing preventative car care, you can confidently tackle rust and keep your car looking its best for years to come.