How to Fix Metal Dents in Your Car: A Comprehensive Guide
A flawless car exterior boosts your vehicle’s aesthetic appeal, but daily driving inevitably exposes it to dents and dings. These imperfections not only diminish your car’s look and resale value but also increase the risk of rust. Repairing car dents, especially metal ones, is crucial for maintaining your vehicle’s condition and longevity.
While minor dents and door dings can often be addressed with DIY methods, more significant metal damage might require professional intervention. This guide will delve into the specifics of fixing metal dents in your car, providing you with DIY techniques, cost considerations, and when to seek professional help.
Understanding Car Dents: Types and Causes
Various incidents can lead to dents in your car, even with careful driving.
- Small Dents: Hail, road debris, or runaway shopping carts are common culprits for minor dents.
- Door Dings: These occur when doors hit other vehicles, walls, or barriers.
- Large Dents: Car accidents, falling tree branches, or substantial impacts typically cause more severe dents.
It’s important to understand the terminology associated with car damage. While “dent” and “ding” are often used interchangeably for minor damage, distinguishing between types of dents helps determine the appropriate repair approach.
Furthermore, consider the dent’s location. Car body panels are primarily made of metal (steel or aluminum), requiring different repair techniques than plastic bumpers.
Here’s a breakdown of common dent types:
| Type | Description | Removal Complexity |
|---|---|---|
| Ding | Small, shallow damage | Simple DIY |
| Round Dent | Circular indentation | Often DIY “pop-out” |
| Sharp Dent | Small, deep, pointed indentation | Challenging DIY |
| Crease Dent | Long, folded dent with paint damage | Professional recommended |
| Serious Dents | Large or multiple dents, structural damage risk | Professional essential |
Why Timely Dent Repair is Essential
Addressing car dents promptly is not just about aesthetics. Delaying repairs can lead to several issues:
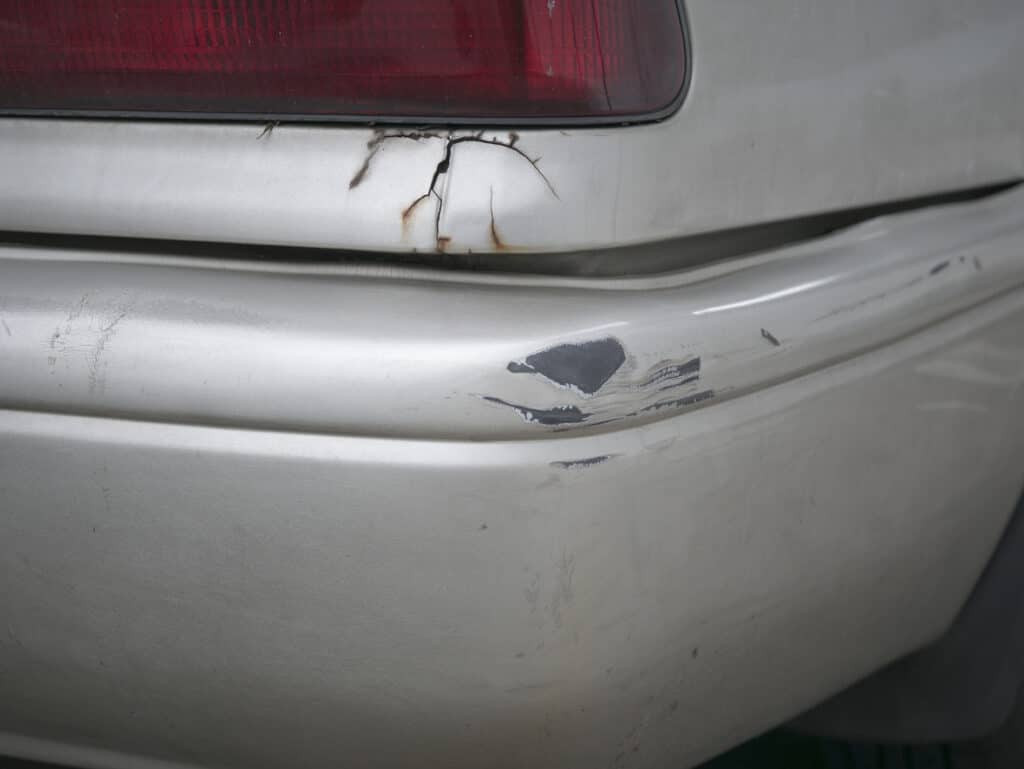
- Rust and Corrosion: Damage to the paint or body panels exposes the metal underneath, making it vulnerable to moisture and rust.
- Structural Damage: Larger dents, especially crease dents, can indicate underlying structural damage, compromising vehicle safety.
- Reduced Fuel Efficiency: Multiple dents can negatively impact aerodynamics, slightly decreasing fuel economy.
Therefore, timely dent repair is a practical and safety-conscious decision. Fortunately, various repair options are available, catering to different dent types and budgets.
DIY Metal Dent Repair: Step-by-Step Guide
For minor to moderate metal dents, DIY repair kits offer an accessible and cost-effective solution. These kits typically include tools to pull the dented metal back to its original shape.
Here’s a detailed process for fixing metal dents using a repair kit:
-
Heat the Dent (Optional for Small Dents): Use a hairdryer to gently warm the dented area. This makes the metal more pliable, especially for larger dents. Skip this step for very small, shallow dents.
-
Clean the Area: Thoroughly clean the dent and the surrounding area with soap and water, then dry with a microfiber towel. This ensures proper adhesion for the repair tools.
-
Apply Glue to Dent Puller Head: Dent repair kits come with a bridge puller and adhesive heads. Apply the provided glue to a puller head.
-
Attach Puller Head to Dent: Carefully position and press the glued head onto the deepest point of the dent. Hold it firmly for a few seconds to ensure good contact.
-
Allow Glue to Dry: Let the glue dry completely as per the kit instructions (usually 4-8 minutes). This is crucial for the puller head to effectively grip the metal.
-
Attach Bridge Puller: Once the glue is dry, attach the bridge puller over the glued head.
-
Pull the Dent Out: Slowly turn the dial on the bridge puller to apply gentle, controlled pressure. Observe the dent as you turn, stopping when the metal is flush with the surrounding panel. Avoid over-pulling, which can create new dents or damage the paint.
-
Remove Puller and Head: Detach the bridge puller. Use a hairdryer to gently heat the glue on the puller head, making it easier to remove from the car panel.
-
Clean Residue: Wipe away any remaining glue residue with a clean microfiber cloth.
-
Assess and Repeat (If Necessary): Inspect the repaired area. If the dent is not completely gone, you can repeat steps 3-9. For stubborn dents, you might need to reposition the puller head and repeat the process multiple times.
-
Paint Touch-Up (If Needed): If the dent repair caused minor paint damage, use a paint repair kit to touch up the area. Clean the area, apply primer, and then carefully apply thin layers of touch-up paint, allowing each layer to dry.
Utilizing Body Filler for Deeper Metal Dents
For dents that are difficult to remove entirely with pulling techniques, body filler (like Bondo®) provides a solution to create a smooth, even surface. Body filler is a putty-like substance that fills in the dent, creating a base for repainting.
Here’s how to use body filler for metal dent repair:
-
Clean the Dented Area: Begin by cleaning the dent and surrounding area with soap and water, then dry thoroughly.
-
Sand the Paint: Using 80-grit sandpaper and a sanding block, remove the paint from the dent and approximately 2-5 inches around it. This creates a rough surface for the body filler to adhere to.
-
Minimize the Dent (Optional): If possible, use dent removal techniques (like the puller method described above) to reduce the depth of the dent. This minimizes the amount of body filler needed.
-
Mix Body Filler: Prepare the body filler according to the manufacturer’s instructions. Typically, this involves mixing the filler with a hardener. Mix only a small amount at a time, as body filler dries quickly.
-
Apply Body Filler: Using a plastic spreader, firmly press the body filler into the dent. Apply enough filler to slightly overfill the dent, ensuring it is flush with the surrounding body panel.
-
Drying Time: Allow the body filler to dry completely. Drying times vary depending on the product and environmental conditions, usually around 15-20 minutes.
-
Initial Sanding: Once dry, use 80-grit sandpaper to begin shaping and smoothing the body filler. Remove excess filler and roughly contour it to match the surrounding panel.
-
Fine Sanding: Switch to 180-grit sandpaper to refine the shape and smooth out any rough edges. Continue sanding until the filled area is seamlessly blended with the surrounding panel.
-
Glaze Application: Apply a thin layer of glazing putty over the body filler and surrounding area. This fills in any minor imperfections and pinholes.
-
Final Sanding: After the glaze dries, sand it with 180-grit sandpaper, followed by 320-grit sandpaper. This creates a smooth, paint-ready surface.
-
Priming and Painting: Use a primer to prepare the sanded area for painting. Apply several thin coats of primer, allowing each to dry. Finally, apply matching car paint in thin coats, blending it into the surrounding paintwork. Clear coat can be applied for added protection and shine.
When to Seek Professional Dent Repair
While DIY methods are effective for many metal dents, certain situations warrant professional intervention:
- Large or Complex Dents: For extensive damage or dents in hard-to-reach areas, professional expertise is crucial.
- Crease Dents and Paint Damage: Dents with creases or significant paint damage often require specialized tools and techniques for seamless repair and repainting.
- Structural Damage Concerns: If you suspect structural damage beneath the dent, consult a professional body shop for a thorough assessment and repair.
- Desire for a Flawless Finish: For those seeking a factory-finish repair, professional body shops offer the highest level of expertise and equipment.
Professional Dent Repair Options:
-
Paintless Dent Repair (PDR): PDR is a specialized technique for removing dents without affecting the paint. Technicians use specialized tools to massage the metal back to its original shape from behind the panel. PDR is ideal for minor to medium dents without paint damage and is often more affordable and quicker than traditional body shop repairs.
-
Auto Body Shops: For larger, more complex dents, or dents with paint damage, auto body shops provide comprehensive repair services. They have the expertise and equipment for dent removal, body filler application, paint matching, and refinishing to restore your car to its pre-damage condition.
Professional Repair Costs:
-
Paintless Dent Repair (PDR):
- Small, light dents: $50-$100
- Medium dents: $75-$300
- Large dents: $300-$500
-
Auto Body Shop: Auto body shop repairs can range from hundreds to thousands of dollars depending on the dent’s size, complexity, and whether painting is required. Extensive damage can easily reach $2,000 or more. In some cases, replacing the entire body panel might be a more cost-effective option for severely damaged panels.
Financing Your Dent Repair
Car dent repair can be an unexpected expense. The Synchrony Car Care™ Credit Card can help manage these costs, offering promotional financing options for purchases over $199 at participating repair shops. This can make professional dent repair more accessible when needed.
Conclusion
Fixing metal dents in your car is essential for maintaining its appearance, value, and structural integrity. Whether you choose the DIY route for minor dents or seek professional help for more significant damage, understanding your options empowers you to address car dents effectively. Timely repair, regardless of the method, protects your vehicle from further damage and keeps it looking its best.