How to Fix Light Scratches on Car Paint: A DIY Guide

Light scratches on your car paint are an unfortunate but common occurrence. Whether it’s from stray branches, car washes, or accidental brushes with objects, these minor blemishes can detract from your vehicle’s appearance. Fortunately, fixing light scratches is often a straightforward process you can tackle yourself, saving time and money compared to professional repairs. This guide will walk you through effective DIY methods to restore your car’s paint to its former glory, focusing on the best techniques and products for removing those annoying surface imperfections.
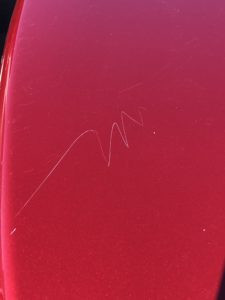
Understanding the nature of light scratches is the first step. Typically, light scratches only affect the clear coat layer of your car’s paint. The clear coat is the outermost layer designed to protect the color coat underneath and provide shine. If the scratch is superficial and hasn’t penetrated the color coat, it’s usually fixable with simple polishing and buffing techniques. You can often identify a light scratch by running your fingernail gently across it. If your nail doesn’t catch, the scratch is likely light and manageable at home.
DIY Methods for Light Scratch Removal
Several methods and products are available for DIY light scratch removal. Here we’ll explore some effective approaches, ranging from simple to slightly more involved, to help you choose the best solution for your needs.
1. Washing and Surface Preparation
Before you start any scratch removal process, thorough cleaning is crucial. Wash the affected area, and ideally the entire car, to remove dirt, grime, and any loose particles. Use a quality car wash soap and a microfiber wash mitt to prevent introducing new scratches during the cleaning process. After washing, dry the area completely with a clean microfiber towel. This clean surface allows you to accurately assess the scratches and ensures that you’re not grinding dirt into the paint during polishing.
2. Using Polishing Compound by Hand
For very light scratches and swirl marks, a polishing compound applied by hand can be sufficient. Polishing compounds contain mild abrasives that gently level out the clear coat, smoothing away the edges of the scratch and making it less visible.
Steps for Hand Polishing:
- Apply Compound: Apply a small amount of polishing compound to a soft foam applicator pad or a microfiber cloth.
- Work into Scratch: Using firm, even pressure, rub the compound into the scratch using circular or back-and-forth motions. Work in a small area at a time.
- Buff Away Haze: After working the compound for a minute or two, switch to a clean microfiber cloth and buff away the hazy residue in the same motion until the clarity is restored and the scratch appears diminished or gone.
- Inspect and Repeat: Inspect the area in good lighting. If the scratch is still visible, repeat the process. For deeper light scratches, you might need to apply slightly more pressure or use a more abrasive compound, but always start with a light touch.
Applying Turtle Wax Rubbing Compound to a scratched car panel
Image: Application of Turtle Wax Rubbing Compound on a car panel to address scratches.
Products like Turtle Wax Rubbing Compound or Scratch & Swirl Remover are designed for light scratch repair by hand. These are readily available and affordable options for tackling minor imperfections. However, for slightly more stubborn scratches, hand polishing might require more effort and time.
3. Utilizing Machine Polishers for Enhanced Results
For moderate light scratches or if you want to achieve faster and more effective results, a machine polisher can be a game-changer. Machine polishers, such as a Dual Action (DA) polisher, provide consistent and even pressure, making scratch removal more efficient and reducing the risk of damaging the paint.
Using a DA Polisher:
- Choose the Right Pad and Compound: Select a polishing pad appropriate for light scratch removal (usually foam polishing pads) and a compatible polishing compound.
- Apply Compound to Pad: Apply a few pea-sized drops of polishing compound to the polishing pad.
- Work the Area: Turn on the DA polisher at a low to medium speed and gently move it over the scratched area in overlapping passes. Maintain consistent pressure and keep the pad flat on the surface.
- Buff and Inspect: After a few passes, reduce pressure and continue polishing until the scratches are minimized. Wipe away residue with a microfiber cloth and inspect. Repeat if necessary, possibly increasing speed or pressure slightly for more correction.
 Polishing car paint with Meguiar's DA Power System for scratch removal
Image: Car paint polished with Meguiar’s machine tools, demonstrating scratch removal effectiveness.
Meguiar’s DA Power System, which attaches to a standard drill, is an example of a user-friendly machine polishing tool. It offers an orbital motion that is safer for DIYers compared to rotary buffers, reducing the chance of burning through the paint. Using a machine polisher typically yields noticeably better and faster results compared to hand polishing, especially on a larger area or with slightly deeper light scratches.
4. Considering Scratch Repair Kits for Deeper Light Scratches
For light scratches that are a bit more pronounced, scratch repair kits that include a mild sanding step can be effective. These kits usually involve wet sanding with very fine grit sandpaper to level the clear coat more aggressively before polishing.
Using a Scratch Repair Kit (like 3M Trizact):
- Wet Sanding: Lightly wet the provided fine-grit sandpaper and gently sand the scratched area in straight, back-and-forth motions. This step is crucial to level the scratch, but be very careful not to apply too much pressure or sand for too long.
- Compounding and Polishing: After sanding, use the included rubbing compound with a foam pad (often with a drill attachment) to remove sanding marks and further level the surface. Follow this with a polishing step using a polishing pad and polish to restore gloss and clarity.
 3M Trizact Scratch Repair Kit components after use on a car scratch
Image: Components of the 3M scratch repair system shown after use on a car scratch repair.
The 3M Trizact Precision Scratch Kit is designed for light to medium scratches and includes sandpaper, rubbing compound, and polish. While sanding can seem intimidating, when done carefully with the provided fine-grit paper and following kit instructions, it can significantly improve the appearance of slightly deeper light scratches that polishing alone might not fully remove.
Finishing Touches: Waxing and Protection
After successfully removing the scratches, it’s important to protect your work and the surrounding paint. Applying a quality car wax or sealant will add a layer of protection and enhance the shine of your car’s paint. Wax fills in microscopic imperfections, adds depth to the color, and provides a hydrophobic barrier against water and contaminants, helping to prevent future scratches and maintain the finish.
When to Seek Professional Help
While many light scratches can be fixed at home, it’s important to recognize when a scratch is too deep for DIY repair. If the scratch is deep enough to catch your fingernail easily, or if it has penetrated the color coat and you see a different color underneath, it’s best to consult with a professional auto detailer or body shop. Attempting to fix deep scratches yourself might lead to further damage or unsatisfactory results. Professionals have the tools and expertise to handle more complex paint repairs, ensuring a flawless finish.
Conclusion
Fixing light scratches on your car paint is a rewarding DIY task that can significantly improve your vehicle’s appearance. By understanding the types of scratches, using the right techniques and products like polishing compounds, machine polishers, or scratch repair kits, and finishing with a protective wax, you can effectively remove these imperfections and keep your car looking its best. Remember to start with the least abrasive method and always test products in an inconspicuous area first. With patience and the right approach, you can achieve professional-looking results in your own garage.