How to Fix Egg Damage on Car Paint: A Comprehensive Guide
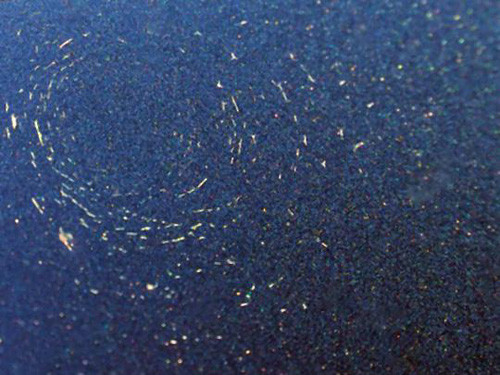
Having your car targeted by eggs can be more than just a prank; it can lead to significant damage to your vehicle’s paintwork. The misconception that the impact is the primary cause of damage is wrong. The real culprit is the egg’s composition itself. Eggs contain sulfur, a component found in amino acids within both the yolk and the white. This sulfur quickly starts a chemical reaction upon contact with your car’s paint, leading to etching and a cracked, deteriorated surface known as crazing. Similar damage can be inflicted by tree sap and bird droppings due to their acidic nature if not promptly addressed.
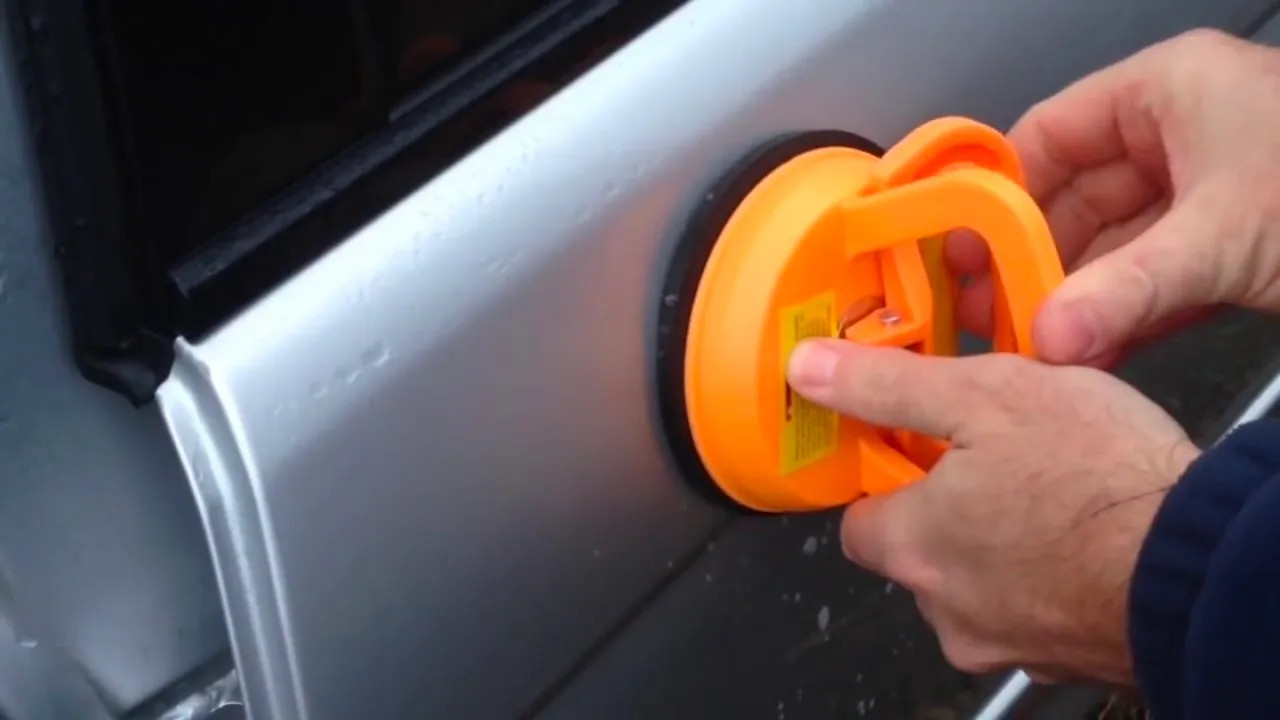
egg-damage.jpg
Fortunately, egg damage, like many other car surface issues, is often repairable. Whether you’re someone who enjoys weekend car detailing or new to car care, this guide will provide you with the steps to remedy most egg-related paint damage. For more experienced detailers, we’ll also touch upon techniques to completely resolve even more severe cases.
However, it’s critical to understand that if the egg’s corrosive components have penetrated beyond the clear coat and reached the base coat, repainting may be the only definitive solution. You may not be able to ascertain the depth of the damage until you’ve attempted the repair process detailed below.
Essential Tools and Materials
Before you begin, gather these supplies.
For Basic Repair:
- Car wash shampoo (like nextzett car wash shampoos)
- Quick detailer spray (such as nextzett Perfect Shine)
- Microfiber wash mitt or soft sponge
- Microfiber drying towels
- Car polish (nextzett No. 2 One Step Polish for mild damage)
- Soft foam or microfiber applicator pads
- Clean, plush microfiber towels for polishing
- Car wax (nextzett No. 3 Polish & Wax)
- Foam applicator pad for wax
For Advanced Repair (and/or severe damage):
- All items listed under “Basic Repair”
- More aggressive car polish (nextzett No. 1 Clean & Polish)
- Dual Action (DA) polisher (optional, but recommended for efficiency)
- Cutting foam pad for DA polisher (if using)
- Wetsanding paper (various grits, starting with 3000 grit) – Only for experienced users and severe damage
- Spray bottle with water (for wetsanding)
Step-by-Step Solution to Fix Egg Damage
Step 1: Immediate and Gentle Cleaning is Key
Time is of the essence when dealing with egg damage. The longer the egg remains on your car’s surface, especially under heat or direct sunlight, the greater the chance of it etching deeply into the clear coat and even the color base coat. In such cases, professional repainting might become necessary. Therefore, act quickly!
The primary goal is to remove the egg residue without inflicting further scratches. Avoid using abrasive materials like paper towels, old rough rags, or cloths that can scratch the paint. Also, steer clear of household glass cleaners, as they are not formulated for car paint and can sometimes worsen the issue. If you’ve already used such materials, don’t worry, the damage is likely still rectifiable, but it might require more effort.
Begin by moving your car to a shaded area so the paint surface cools down. Wash your car thoroughly using a quality car wash shampoo, like those from nextzett. If your car is already clean, or for a quicker initial response, use a quick detailer like Perfect Shine. Spray the detailer liberally on the egg-affected area. This will help to encapsulate and gently lift any loose debris and the egg residue itself, minimizing the risk of scratching during the cleaning process. Gently wipe away the egg using a clean microfiber wash mitt or a soft sponge, ensuring to rinse the mitt or sponge frequently in a separate bucket of clean water to avoid reintroducing contaminants.
The core principle here is to neutralize the etching process by removing the egg contaminant as swiftly and safely as possible.
Step 2: Assess the Damage and Choose the Right Polish
Once the area is clean and completely dry, carefully examine the paint damage. The severity will dictate the type of polish needed.
For minor etching or superficial damage, start with a fine polish like nextzett No. 2 One Step Polish. This polish is designed to refine the paint surface, remove light imperfections, and enhance gloss. Apply a small amount of No. 2 One Step Polish to a foam applicator pad or a clean microfiber cloth. Using circular or back-and-forth motions with moderate pressure, work the polish into the damaged area. If applying by hand, use a plush cotton or microfiber towel for buffing off the polish residue. Continue polishing until you see improvement in the egg damage marks.
For more noticeable or moderate damage, or if No. 2 One Step Polish isn’t yielding sufficient results, you’ll need a slightly more abrasive polish such as nextzett No. 1 Clean & Polish. This product contains stronger, yet still safe, abrasives designed to remove damaged layers of clear coat. Again, apply a small amount to a foam applicator pad or microfiber cloth. Polish the affected area with firm, even pressure. If working by hand, use a plush cotton towel. You might need multiple applications of No. 1 Clean & Polish to reduce the appearance of deeper damage. Be patient and check your progress frequently.
If you’re using a Dual Action polisher, apply a few drops of the chosen polish to a foam polishing or cutting pad (depending on damage severity). Use a medium speed setting on the DA polisher and work in overlapping passes over the damaged area.
Proper polishing is crucial to remove the etched egg damage from the car’s clear coat.
Step 3: Refine the Finish
After using No. 1 Clean & Polish (if needed for more severe damage), follow up with nextzett No. 2 One Step Polish. This step is essential for refining the paint surface and maximizing gloss. No. 2 One Step Polish will remove any micro-marring left by the more abrasive No. 1, leaving a smooth, deep, and glossy finish. Apply and work No. 2 as described in Step 2, ensuring complete and even coverage over the previously treated area.
Step 4: Advanced Damage and Considering Wet Sanding
If, after polishing with both No. 1 and No. 2 polishes, the egg damage is still apparent, particularly if it feels deep to the touch or you can still see clear etching, you might be dealing with damage that has penetrated deeper into the clear coat.
For Experienced Users Only: Wet Sanding
In cases of severe etching that polishing alone cannot rectify, wetsanding may be required. This is an advanced technique and should only be attempted by those experienced in car detailing or paint correction, as improper wetsanding can cause further damage, potentially requiring professional repainting.
Wetsanding involves using very fine grit sandpaper (typically starting with 3000 grit and moving to finer grits if necessary) along with water as a lubricant to carefully level the clear coat. The goal is to gently remove a microscopic layer of clear coat to eliminate the etching. After wetsanding, you will always need to follow up with compounding and polishing to restore the shine and clarity of the paint. If you are uncomfortable with wetsanding, it’s best to consult a professional detailer.
Step 5: Protect Your Restored Paint
Once you’ve successfully polished away the egg damage, it’s vital to protect your paint with a layer of wax. Apply nextzett No. 3 Polish & Wax using a clean foam applicator pad. Work the wax onto the entire repaired panel and any surrounding areas for consistent protection. No. 3 Polish & Wax will provide a protective barrier against oxidation, UV rays, acid rain, bird droppings, road grime, and future potential egg incidents. Waxing helps to slow down the etching effects of contaminants and makes future cleaning easier.
Prevention is Better Than Cure
While you can’t completely prevent someone from egging your car, regular car care can significantly minimize the damage and make cleanup easier. Consistent waxing creates a protective layer that reduces the direct impact of acidic substances on your clear coat.
Aim to polish and wax your car at least twice a year, especially if it’s a daily driver. For enhanced and longer-lasting protection, consider applying a high-quality sealant like nextzett SF3 Premium Protect more frequently than wax.
It’s also highly advisable to keep a clean microfiber towel and a bottle of quick detailer, such as Perfect Shine, in your car. This way, you can immediately address bird droppings, tree sap, or egg incidents even when you are away from home, minimizing potential damage and making future repairs less intensive.
Remember, the quicker you address and remove contaminants, the less likely they are to cause permanent damage, and the easier it will be to maintain your car’s pristine paint finish.
If you have any further questions or encounter particularly stubborn egg damage, don’t hesitate to contact us at CARDIAGTECH for expert advice and solutions!