How to Fix a Ding in Your Car: Your Complete DIY Guide
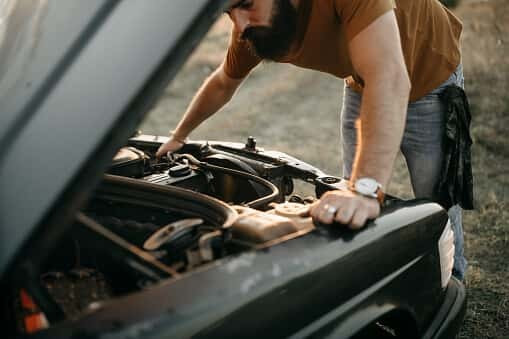
A flawless car exterior speaks volumes about your care and style. However, everyday driving inevitably exposes your vehicle to minor damages, commonly known as dings. These small imperfections can detract from your car’s appearance, diminish its resale value, and even increase the risk of rust formation over time. Therefore, knowing how to fix a ding in your car is a valuable skill for any car owner.
While significant dents and damage might necessitate professional intervention, many smaller dings, bumper indentations, and door edge chips can often be addressed with do-it-yourself (DIY) methods. From simple techniques using household items to specialized dent repair kits, there are various approaches you can take to restore your car’s smooth finish. For more extensive damage, understanding when to seek a paintless dent repair (PDR) technician or a full-service auto body shop is equally important to achieve a professional and lasting repair.
This comprehensive guide will walk you through everything you need to know about how to fix a ding in your car. We’ll cover various DIY techniques, explore professional repair options, discuss typical costs, and even touch on financing solutions to help you keep your car looking its best.
Understanding the Nature of Car Dings
It’s almost unavoidable: despite meticulous driving habits, your car is susceptible to dings. These minor damages are a common part of vehicle ownership, arising from a multitude of everyday situations.
Small dings frequently result from environmental factors like hail storms, road debris kicked up while driving, or even rogue shopping carts careening across parking lots on windy days.
Door dings are practically synonymous with parking in public spaces. They occur when your car door makes contact with another vehicle, a parking barrier, or a wall, or when someone else’s door carelessly strikes your car.
Larger car dents, while more serious, are still considered dings if they are relatively contained and superficial. These can be caused by minor traffic incidents, falling tree branches, or other moderate impacts.
While “dent” and “ding” are often used interchangeably to describe minor vehicle body damage, it’s helpful to understand the subtle difference. Generally, a ding refers to a smaller, less severe indentation, often without paint damage. Dents can range in size and severity, sometimes including creases or paint scratches. Regardless of the terminology, addressing these imperfections promptly is crucial for maintaining your car’s condition.
Beyond size, the location of the ding is a key factor in determining the repair method. Car body panels are typically constructed from metal, usually steel or aluminum. Dings on these metal panels require different repair techniques compared to those on bumpers, which are commonly made of plastic polymers designed for impact absorption.
To better understand the type of damage you’re dealing with, here’s a breakdown of common ding types:
| Type | Description | DIY Suitability |
|---|---|---|
| Ding | A small, shallow area of damage | Highly Suitable |
| Round Dent | A circular, bowl-shaped indentation | Often DIY-able |
| Sharp Dent | Small but deep, pointed indentation | More Challenging |
| Crease Dent | Elongated dent with a fold or line | Professional Advised |
| Serious Dents | Large, multiple, or structurally impacting | Professional Needed |
Once you spot a ding on your car, prompt action is recommended. Repairing it isn’t just about aesthetics; it’s about preserving your vehicle’s integrity. While DIY ding fixes are budget-friendly, costing under $100, professional repairs can range from hundreds to thousands of dollars depending on the damage extent.
Leaving dings unrepaired, especially those that have compromised the paint, can lead to moisture penetration, resulting in rust and paint peeling. Larger dings or crease dents, particularly those caused by heavier impacts like falling branches, might conceal underlying structural damage, posing a significant safety risk. Furthermore, neglecting multiple dings across your car’s body can even negatively impact fuel efficiency by disrupting airflow and increasing drag. These are compelling reasons to address car dings without delay. Fortunately, there are numerous effective options available to get your car looking its best again.
DIY Car Ding Repair Methods: Getting Started at Home
For minor dings, door edge chips, or bumper indentations, a DIY approach can be both effective and economical. Many small car dings can be successfully repaired in your own garage using readily available tools and materials.
Fixing Plastic Bumper Dings with Heat
Dings on plastic bumpers are common, especially on the front and rear of vehicles. Plastic’s flexible nature makes it surprisingly receptive to heat-based repair methods. Often, even larger bumper dings can be effectively minimized or eliminated at home with a bit of heat application and some careful manipulation. Here’s a step-by-step guide to repairing plastic bumper dings:
-
Apply Heat: Use a hairdryer set to a medium heat setting to warm the dented area. Hold the hairdryer a few inches away from the bumper and move it slowly and evenly over the ding. Heat the plastic until it becomes warm to the touch but not excessively hot or melting.
-
Cool Rapidly (For Small Dings): If the ding is small and relatively shallow, immediately following the heating step with a burst of cool compressed air (commonly available in spray cans for cleaning electronics, costing around $20 or less) can be surprisingly effective. Spray the compressed air directly onto the warmed plastic ding. The rapid temperature change can cause the plastic to contract and pop back into its original shape.
-
Use a Dent Puller (For Larger Dings or Persistent Dings): For larger or more stubborn plastic bumper dings that don’t respond to the heat and cool air method alone, a suction cup dent puller (available for $20 or less online or at auto parts stores) can provide the necessary force to reshape the plastic. Ensure the plastic is still warm from the hairdryer, then firmly attach the suction cup puller to the center of the ding. Pull outwards steadily and firmly to gently draw the dent out.
-
Smooth Out Any Minor Imperfections: After pulling out the main ding, you might notice small residual unevenness or minor dents. These can often be smoothed out by hand, gently massaging the plastic to refine the shape. Alternatively, you can reapply the suction cup puller to these smaller areas and gently manipulate them until the bumper surface is smooth and even.
Repairing Metal Car Dings with a Dent Repair Kit
For dings on metal body panels, specialized dent repair kits are readily available. These kits typically include a variety of tools designed to gently pull and reshape the metal back to its original form without damaging the paint. A standard dent repair kit can range from $40 to $99 and includes various pullers and adhesives. Here’s how to use a metal dent repair kit effectively:
-
Heat the Dent (For Deeper Dents): For deeper metal dings, applying gentle heat with a hairdryer can make the metal more pliable and easier to work with. Heat the area around the dent until it is warm to the touch. For very minor, shallow dings, you can skip this step and proceed directly to step 3.
-
Use a Dent Puller to Initiate the Pull: Utilize a suction cup dent puller (often included in dent repair kits) to begin the process of pulling the metal outwards. The goal at this stage is to reduce the depth of the ding and make it more manageable for the bridge puller tool. Attach the suction cup firmly to the center of the dent and pull outwards with steady pressure.
-
Clean the Metal Surface: Thoroughly clean the area around the dent with a microfiber towel to remove any dirt, wax, or debris. This ensures proper adhesion for the bridge puller head in the following steps.
-
Prepare the Bridge Puller: Dent repair kits typically include a bridge puller, a specialized tool designed for more precise dent removal. The kit will include adhesive heads (often referred to as bolts or tabs) that attach to the dented metal. Apply the provided adhesive to the base of one of these heads, focusing on the deepest point of the ding.
-
Attach the Bridge Puller Head: Firmly press the adhesive head onto the center of the dent, ensuring it makes good contact with the metal and the adhesive spreads evenly. Allow the adhesive to cure completely according to the kit’s instructions. This usually takes between 4 to 8 minutes, depending on the adhesive type and ambient temperature.
-
Utilize the Bridge Puller Tool: Once the adhesive is fully cured and the head is securely attached, position the bridge puller over the head, aligning it according to the kit’s instructions. Slowly turn the dial or screw mechanism on the bridge puller. This applies controlled pressure, gradually pulling the metal outwards. Work incrementally, making small adjustments and checking your progress frequently. Stop turning the dial as soon as the dent is removed and the metal panel is restored to its original contour. Avoid over-pulling, which can create a raised area.
-
Remove the Head and Puller: After the dent is removed, detach the bridge puller. To release the adhesive head, use a hairdryer to gently warm the adhesive. This softens the glue, allowing you to carefully peel or twist the head away from the car panel without damaging the paint. Once the head is removed, use a clean microfiber towel and the adhesive remover (often included in the kit) to wipe away any residual glue from the car’s surface.
-
Touch Up Paint Damage (If Necessary): Inspect the repaired area for any paint damage, such as scratches or chips that may have been present before or occurred during the ding. If you find paint imperfections, use a touch-up paint kit (available for $45-$65 from auto parts stores or online, matched to your car’s paint code). Clean the area thoroughly, apply primer if included in the kit, and then carefully apply thin coats of touch-up paint, allowing each coat to dry before applying the next, until the damaged area is concealed and blended with the surrounding paint.
Utilizing Body Filler for Imperfect Dings
Sometimes, despite your best efforts with dent pullers, a ding might not be completely eliminated, or it might have an uneven surface. In these situations, body filler, commonly known as Bondo® (starting around $13 at auto parts stores), can be used to achieve a perfectly smooth, seamless repair. Body filler is a putty-like compound that fills in the remaining dent and creates a level surface for painting. Even professional auto body technicians sometimes use body filler for minor imperfections. Here’s how to apply body filler effectively:
-
Thoroughly Clean the Dented Area: Begin by cleaning the area around the ding with soap and water to remove any dirt, grease, or contaminants. Rinse thoroughly and dry the area completely with a clean microfiber cloth.
-
Sand Away Paint (Around the Ding): To ensure proper adhesion of the body filler, you need to lightly sand away the paint within the dented area and extending about 2 to 5 inches beyond the edges of the ding. Use a sanding block or orbital sander with 80-grit sandpaper. The goal is to create a slightly roughened surface for the filler to bond to, not to remove all the paint from the entire panel.
-
Minimize the Dent (If Possible): Before applying body filler, it’s beneficial to minimize the depth of the dent as much as possible using the dent removal techniques described earlier (heat and dent puller). This reduces the amount of filler needed and results in a more durable repair.
-
Apply Body Filler: Following the manufacturer’s instructions on the body filler container, mix a small amount of body filler with the included hardener. Work quickly, as body filler has a limited working time before it begins to harden. Using a plastic spreader or applicator, firmly press the mixed body filler into the dent, ensuring it fills the entire indentation. Apply enough filler to slightly overfill the dent, creating a raised mound that extends slightly above the surrounding panel surface. This excess material will be sanded down to achieve a flush finish. Allow the body filler to dry and harden completely, typically for about 15 to 20 minutes, depending on the product and ambient conditions.
-
Initial Sanding (Shaping): Once the body filler is fully hardened, begin sanding it down to shape using 80-grit sandpaper. Use a sanding block to ensure a flat, even sanding action. The goal is to remove the excess filler and bring it down to the level of the surrounding car panel. Shape the filler to match the original contour of the vehicle.
-
Fine Sanding (Smoothing): After achieving the general shape with 80-grit sandpaper, switch to 180-grit sandpaper to refine the surface and remove any deep scratches left by the coarser grit. Continue sanding until the body filler patch is smooth and seamlessly blends with the surrounding panel. Check for any low spots or imperfections by running your hand across the repaired area.
-
Apply Glaze/Spot Putty (Optional): For an ultra-smooth, professional finish, you can apply a thin layer of glazing and spot putty (like Bondo® Glazing and Spot Putty, starting around $11) over the entire body filler area and slightly beyond. This fine-particle putty fills in any microscopic imperfections and pinholes.
-
Final Sanding (Refinement): After the glaze/spot putty has dried completely, sand it smooth using 180-grit sandpaper, followed by 320-grit sandpaper for the ultimate refinement. The 320-grit sandpaper will eliminate any visible sanding scratches and prepare the surface for priming and painting.
-
Prime and Paint: Once you are satisfied with the smoothness and shape of the repaired area, it is ready for priming and painting. Using a paint repair kit that matches your car’s paint code, apply several thin coats of primer to the sanded body filler and surrounding area, allowing each coat to dry completely. After the primer is dry, follow with thin coats of color-matched paint, again allowing for proper drying time between coats. Finish with a clear coat for added protection and shine, if included in your paint repair kit.
When to Seek Professional Car Ding Repair
While DIY methods are effective for many minor car dings, there are situations where professional expertise is highly recommended or even necessary to achieve the best possible repair and maintain your vehicle’s value and safety.
For those seeking a flawless, factory-quality finish after ding repair, contacting a reputable auto body repair shop or a specialized paintless dent repair technician is the optimal choice. Professionals possess specialized tools, extensive experience, and in-depth knowledge of vehicle construction and paint systems to deliver superior results, particularly for complex or challenging dings.
In some cases, a mobile PDR technician can come directly to your location, offering convenient on-site dent repair. For more extensive damage or repairs requiring body filler and painting, you’ll typically need to bring your vehicle to a full-service auto body shop. Regardless of the type of professional service you choose, it’s always wise to obtain estimates from 2-3 different providers in your area. This allows you to compare pricing, turnaround times, and repair approaches, ensuring you select a professional that aligns with your budget and schedule.
Paintless Dent Repair (PDR): A Specialized Approach
Paintless dent repair, commonly known as PDR, is a highly effective and increasingly popular professional technique specifically designed for repairing car dings without the need for body filler or repainting. PDR technicians are skilled specialists who utilize specialized tools to gently massage and manipulate the metal from behind the damaged panel, gradually pushing and shaping the dent back to its original contour. This method is particularly well-suited for minor dings and dents where the paint surface is intact and undamaged.
PDR offers several advantages: it is typically more affordable than traditional auto body shop repairs, it is faster, often completed in under two hours, and it preserves your vehicle’s original factory paint finish, which is crucial for maintaining resale value.
The cost of paintless dent repair varies depending on factors such as your geographic location, the size and depth of the ding, and its location on the vehicle. However, here’s a general cost guideline:
- Small, Light Dings: $50 – $100
- Medium Dings: $75 – $300
- Large Dings: $300 – $500
Auto Body Shop Repair: For Major Damage and Paint Work
If your car ding is accompanied by significant paint damage, such as scratches, chips, or cracking, or if the dent is very large, deep, or located in a complex area of the body panel, then a traditional auto body shop repair is usually necessary. Auto body shops have the facilities, equipment, and expertise to handle a wider range of damage, including dent repair, body panel replacement, and full repainting services.
You should also consult an auto body shop if you suspect structural damage beneath the surface of a ding, especially if it resulted from a significant impact. Repairing a dent at an auto body shop can range considerably in cost, potentially reaching $2,000 or more for extensive repairs involving panel replacement and repainting. For repairs estimated at $1,000 or higher, it’s worthwhile to discuss with the technician whether replacing the entire damaged body panel might be a more cost-effective solution than attempting to repair extensive damage to the existing panel. In some instances, panel replacement can actually save money and provide a more structurally sound and aesthetically pleasing result.
Regardless of the repair method you choose, remember that addressing car dings promptly is almost always more cost-effective in the long run. Early intervention prevents further damage, maintains your car’s appearance and value, and avoids potential safety issues.
To help manage the costs of car ding repair, consider using the Synchrony Car Care™ Credit Card. This card offers promotional financing options* on purchases of $199 or more at participating auto service and repair locations, making it easier to budget for vehicle maintenance and repairs and restore your car to its former glory. You can find a participating shop near you and even apply for the card today online.
*Subject to credit approval. Gas station purchases are not eligible for promotional financing. Visit www.mysynchrony.com/carcare for details and participating locations.