How to Fix a Cracked Car Bumper: A Comprehensive Guide
A cracked car bumper is more than just an eyesore; it can compromise your vehicle’s structural integrity if left unattended. Whether it’s from a minor parking mishap, a collision, or general wear and tear, bumper damage is a common issue for drivers. Body shops and car enthusiasts alike need to be well-versed in the best methods for repairing these damages efficiently and effectively.
This guide will explore when it’s appropriate to repair a cracked bumper versus when replacement is necessary. We’ll provide a detailed, step-by-step process on how to fix a cracked car bumper, covering everything from structural repairs to paintwork, helping you master the art of bumper restoration.
Repair or Replace? Assessing Your Cracked Bumper
The good news is that a cracked bumper doesn’t automatically mean a full replacement is required. Advancements in automotive plastic repair techniques have made repairs a viable and increasingly preferred option. For auto body professionals, evaluating the damage with repair in mind should be the initial approach when a vehicle arrives with a cracked bumper.
However, there are situations where replacement becomes the only sensible choice. Some vehicle manufacturers may advise against bumper repairs, necessitating a replacement. Bumpers with extensive damage, multiple cracks, or damage that has been neglected for a long time may also be beyond repair. A thorough assessment is crucial to determine the best course of action.
For minor cracks or dents that are not too deep, SMART (Small to Medium Area Repair Technology) repairs can be an ideal solution. These localized repairs can often be performed without removing the bumper, making them a more cost-effective and time-saving alternative to full bumper replacement.
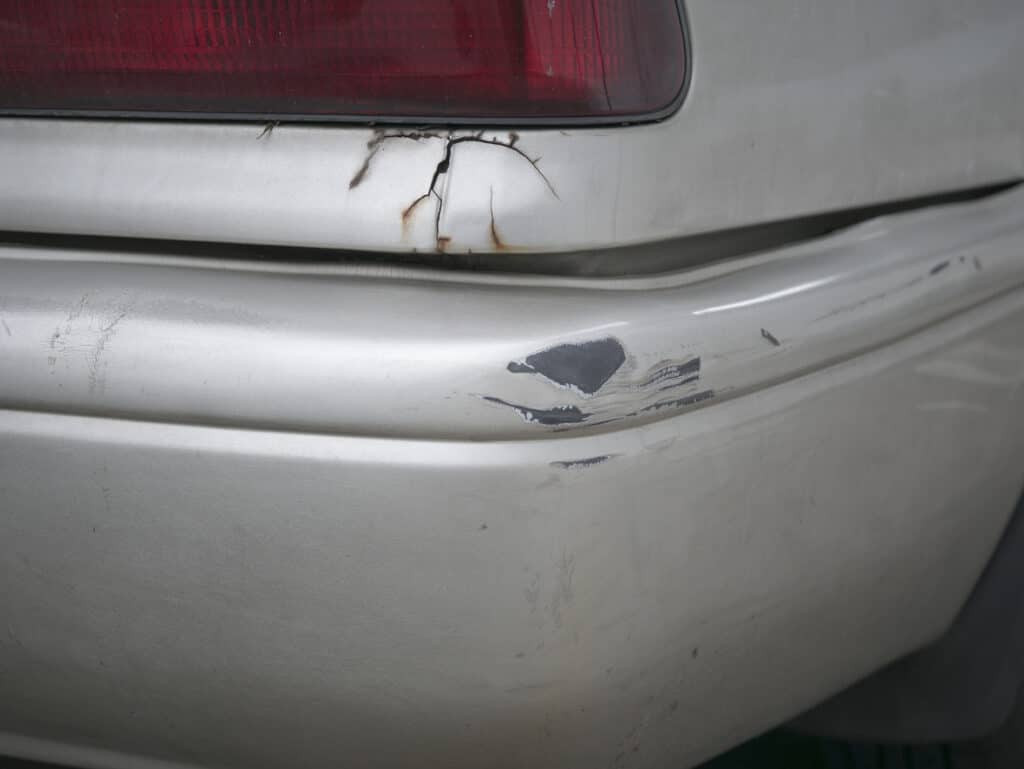
Zoomed in photo of a cracked bumper
Repairing vs. Replacing: Key Assessment Questions
To determine whether to repair or replace a cracked bumper, a case-by-case evaluation is essential. Consider these key questions during your assessment to guide your decision:
Feasibility of Repair
Begin by examining the damage to ascertain if a repair is even possible. Consult the vehicle manufacturer’s guidelines to confirm if bumper repairs are permitted for the specific model, as some manufacturers mandate replacements. The size and depth of the crack are also critical factors. Extensive or deep cracks can compromise the bumper’s structural integrity, making repair unsuitable.
Safety Implications
Safety is paramount when dealing with car part repairs or replacements. If opting for repair, rigorously evaluate whether the bumper’s structural integrity can be restored to its original safety standards. Bumpers are designed to protect vehicle occupants; a compromised structure could fail in a subsequent impact, endangering passengers.
Always prioritize replacement if manufacturer guidelines advise it. Replacement is also necessary if the underlying bumper structure is damaged or if repairs could interfere with the vehicle’s safety systems or sensors.
Efficiency and Cost-Effectiveness
For minor, isolated cracks, repair is often the most efficient route. However, extensive cracking or significant bumper damage may require considerable repair time, potentially making replacement a more efficient option.
A qualified Vehicle Damage Assessor (VDA) can estimate the labor hours needed for repair. This estimate should be compared against the cost of a new bumper, considering parts availability and delivery times. This comparison will help identify the most efficient and cost-effective solution.
Customer-Centric Approach
Ultimately, the best course of action should align with the customer’s needs and best interests. If a repair is only a temporary fix for a more significant underlying issue, it’s crucial to advise the customer accordingly. For minor damage and customers seeking a quick, economical solution, SMART repair might be ideal. For more substantial cracks, dents, or scratches, a comprehensive repair or replacement might be more appropriate. Discuss options transparently with the customer, considering their timeline and preferences.
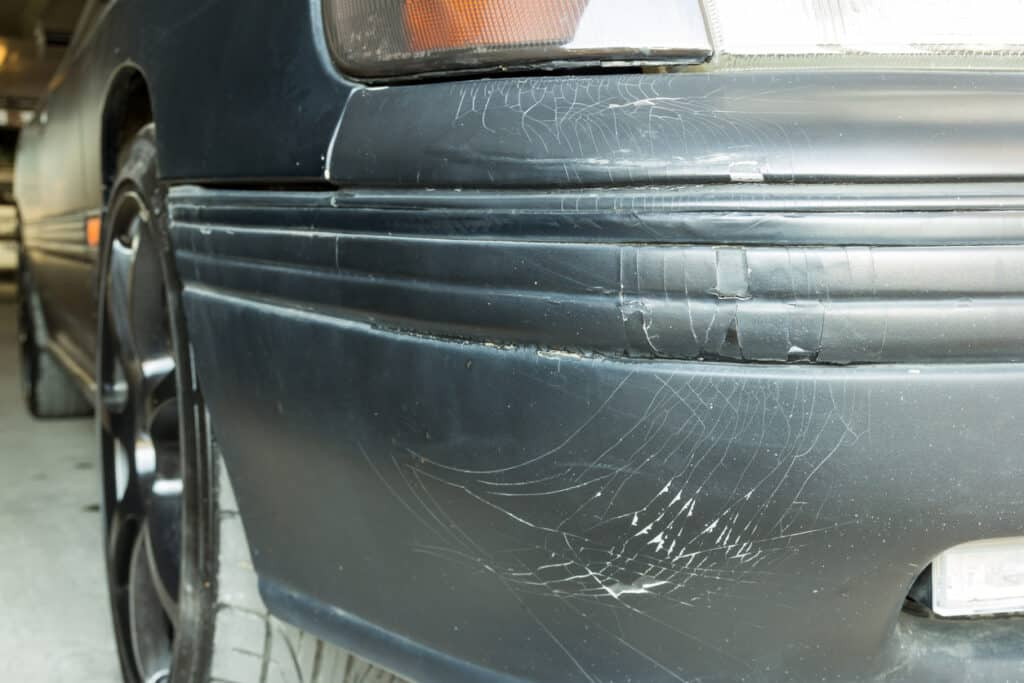 Zoomed in photo of a front bumper
Step-by-Step Guide: How to Repair a Cracked Bumper
Once you’ve decided that repairing the cracked bumper is the right approach, follow these detailed steps to achieve a professional and durable finish. While removing the bumper might be necessary for extensive damage, attempt to repair it in place whenever feasible.
Step 1: Thorough Damage Assessment
Begin with a comprehensive assessment of the damage. Removing the bumper, if possible, provides the clearest view of the crack’s extent and any hidden damage. This step definitively confirms whether repair is viable or if replacement is necessary.
Step 2: Masking the Repair Area
Protect adjacent panels and areas from drilling, sanding, and painting. Apply high-quality automotive masking tape, such as JTAPE Premium Cloth Protection Tape, around the bumper’s edges bordering other panels. This robust tape prevents unwanted damage or overspray, ensuring a clean, professional finish.
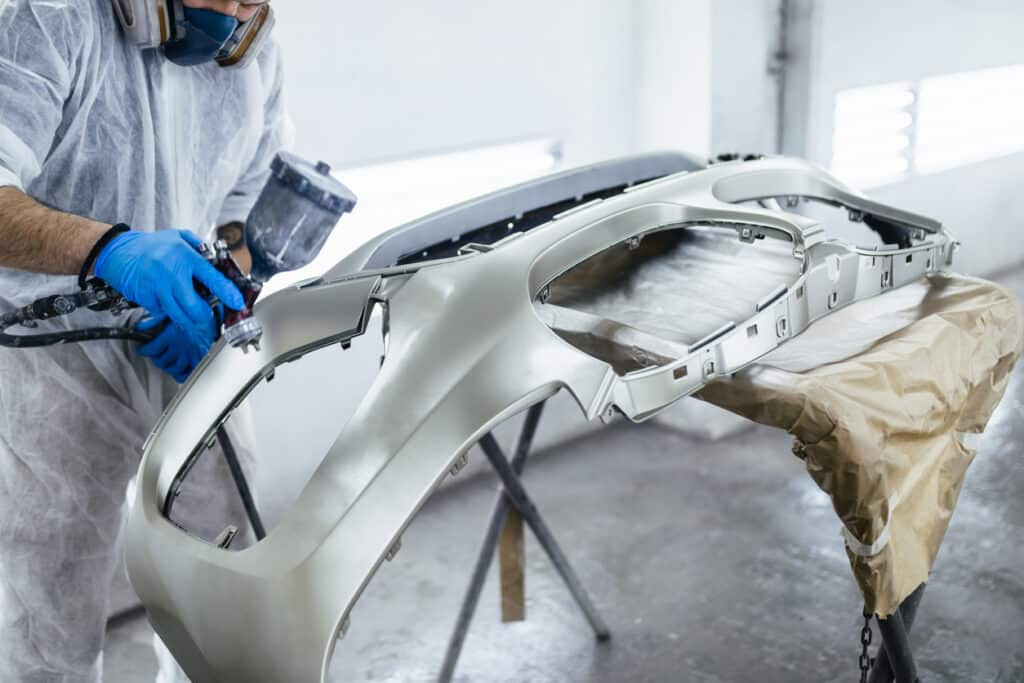 Engineer fixing a silver bumper
Step 3: Drill Stop Holes to Prevent Crack Propagation
Drill two small holes, approximately 6mm in diameter, one at each end of the crack. These “stop holes” act as barriers to prevent the crack from spreading further during the repair process and in the future.
Step 4: Carve and Grind for Enhanced Bonding
Create a larger bonding surface by carving a V-shaped groove along the crack’s front-facing edges. Use a grinder and a sharp knife to carefully remove plastic residue, following the V-pattern. This groove increases the surface area for bonding agents to adhere effectively.
Step 5: Sanding for Adhesion
Sand down the damaged area, both on the front and back of the bumper, using medium-grit sandpaper. Sanding not only smooths out damage but also creates micro-abrasions that significantly improve the adhesion of plastic adhesion promoters and paint, ensuring a lasting repair.
Step 6: Apply Plastic Adhesion Promoter
Proper preparation is crucial for successful plastic adhesion. Apply a plastic adhesion promoter to both the front and back of the sanded damage area. This promoter ensures that the epoxy and body filler applied later will bond correctly, resulting in a smooth, seamless finish.
Step 7: Epoxy Application for Structural Strength
Apply epoxy to both sides of the bumper crack, allowing sufficient drying time as per the product instructions. Start with the back side, smoothing the epoxy with a spreader, and then address the more visible front side. Epoxy provides structural reinforcement to the cracked area before filler application.
Step 8: Surface Preparation and Sanding
Once the epoxy has fully hardened, sand the area again to create a smooth, even base for the body filler. Feather the edges of the repaired area, creating a slight depression where the crack was, ready to receive the filler.
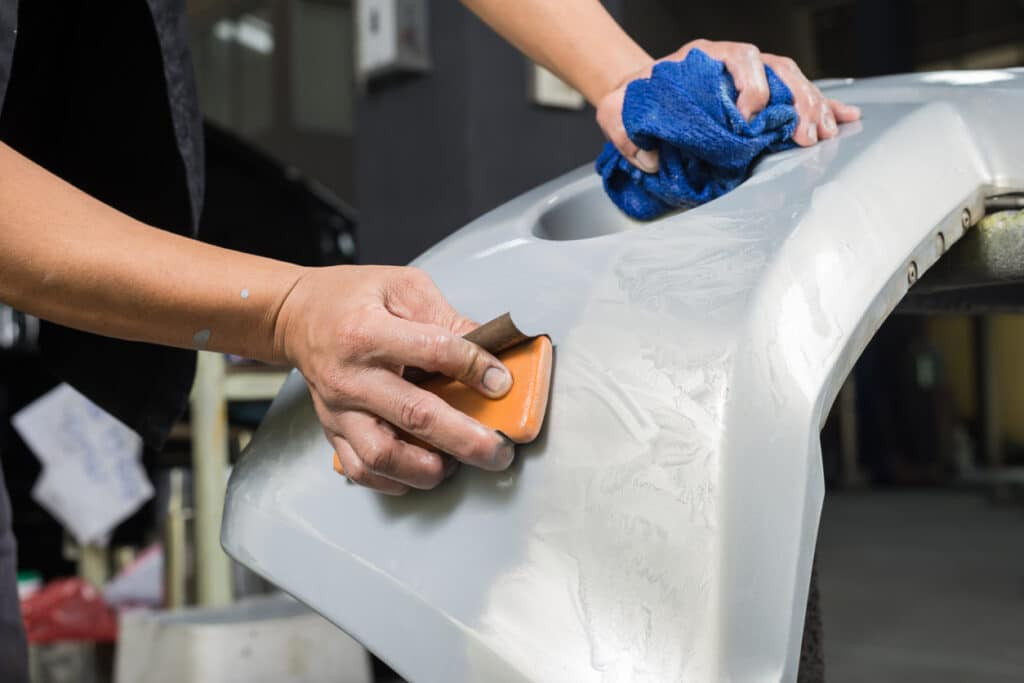 zoomed in photo of hands cleaning a bumper
Step 9: Body Filler Application for Contour Restoration
Apply pre-mixed automotive body filler evenly over the prepared repair area. Carefully follow the bumper’s contours and curves, smoothing the filler with a spreader to achieve the desired shape. This step is vital for a professional, factory-like finish. After the body filler dries completely, lightly sand the area to prepare it for painting.
Step 10: Painting for a Flawless Finish
The final step is painting the repaired plastic bumper to restore its original appearance. Use foam masking tapes, like JTAPE Foam Masking Tapes, to mask surrounding panels, creating a soft edge that allows for seamless paint blending.
Apply an even coat of primer and allow it to dry thoroughly. Follow with several coats of the base color, ensuring each coat dries before applying the next. Finish with multiple clear coat layers for protection and shine. Once the paint is cured, remove the masking tape to reveal a perfectly blended, high-quality repair that will satisfy your customer.
For minor scuffs, scratches, and hairline cracks, bumper removal may not be necessary. However, for significant damage or suspected damage on the bumper’s backside, removal is recommended for a complete assessment and repair.
If bumper removal is required, safely lift the car with a jack and locate the fasteners—pins, latches, and screws—securing the bumper. These are typically found in the wheel arches near the bumper. Remove all fasteners, including any electrical connections, to detach the bumper.
Remember, if a crack extends to the bumper’s edge, replacement is often the best practice due to potential structural weakness.
While bumper repair is often possible, replacement remains the optimal solution in certain situations. The decision ultimately rests with the skilled body shop team, prioritizing both customer satisfaction and efficient, effective repairs.
For expert automotive masking solutions and further advice on car body repair, explore the JTAPE blog for insights from industry professionals.