How to Fix Clutch in Car: A Step-by-Step Guide
The clutch is a critical component in your car’s motion transmission system. It’s responsible for smoothly connecting and disconnecting the engine from the gearbox, allowing you to shift gears and control your vehicle effectively. Whether you have a manual or automatic clutch (though this guide primarily focuses on manual systems, as automatic clutches are more complex and often require professional intervention), understanding how to maintain and, when necessary, repair your clutch is valuable for any car owner.
While clutch systems are built for durability, they aren’t indestructible. Driving habits, especially frequent stop-and-go traffic in city environments, can accelerate wear and tear. Recognizing the signs of a failing clutch and knowing the basic steps for repair can save you money and keep your car running smoothly.
In this guide, inspired by expert insights from automotive specialists like Frenkit, we’ll walk you through the process of diagnosing common clutch issues, gathering the necessary tools, and performing a clutch repair. Remember, clutch repair can be complex and requires a degree of mechanical knowledge. If you’re not comfortable with car mechanics, it’s always best to consult a professional. However, for those with some DIY experience, this guide will provide a comprehensive overview of how to approach a clutch fix.
When to Replace Your Clutch: Recognizing the Warning Signs
It’s true that clutches are designed to last, often for many years and thousands of miles. The lifespan of your clutch depends on factors like your car model, driving style, and the conditions you typically drive in. While some clutches can last over 100,000 miles, others may require attention sooner. Being aware of the common symptoms of clutch failure is crucial for timely intervention and preventing more significant problems.
Here are some key indicators that your car’s clutch might need repair or replacement:
- Increased Fuel Consumption: A slipping clutch can cause your engine to work harder to maintain speed, leading to a noticeable increase in fuel consumption. If you find yourself filling up your tank more often than usual without a change in driving habits, a worn clutch could be the culprit.
- Burning Smell: A distinct burning smell, especially when using the clutch, is a strong sign of clutch slippage. This smell is caused by the clutch disc material overheating due to excessive friction.
- Clutch Jerking or Vibrations: If you experience jerky movements or vibrations when engaging or disengaging the clutch, it could indicate uneven wear on the clutch disc or issues with the pressure plate.
- Clutch Hardness or Stiffness: A clutch pedal that feels unusually hard or stiff to press down can be a sign of problems within the clutch mechanism, potentially related to the hydraulic system or clutch cable (in older vehicles).
- Unusual Noises: Hearing loud or grinding noises when releasing the clutch pedal often points to wear in the throw-out bearing or other clutch components.
- Engine Power Loss: If your engine revs up but your car doesn’t accelerate as expected, especially when going uphill or under load, it’s a classic symptom of clutch slippage. The clutch isn’t fully engaging, resulting in a loss of power transfer to the wheels.
- Difficulty Shifting Gears (“Gear Grinding”): If you find it difficult to shift gears smoothly, especially if you hear a grinding noise when trying to engage a gear, it could be due to the clutch not fully disengaging, making gear changes challenging.
If you notice one or more of these symptoms, it’s wise to have your clutch system inspected. Early diagnosis can often prevent further damage and more costly repairs down the line.
Tools Needed for Clutch Repair: Getting Prepared
Before you begin a clutch repair, it’s essential to gather all the necessary tools. Having the right equipment will make the job safer, more efficient, and increase your chances of a successful repair. Here’s a list of tools you’ll likely need:
- Hydraulic Jack or Vehicle Lift: Lifting your car is essential to access the clutch assembly. A hydraulic jack and jack stands are the minimum requirement for home mechanics. A vehicle lift is ideal if you have access to one, as it provides more space and easier access.
- Support Columns (Jack Stands): Crucial for safety. Once you’ve lifted the car with a jack, securely place jack stands under designated support points to hold the vehicle’s weight. Never work under a car supported only by a jack.
- Comprehensive Tool Box: A well-stocked toolbox is a must. Essential tools include:
- Socket Set: Metric and possibly some SAE sockets in various sizes.
- Wrench Set: Open-end and box-end wrenches.
- Ratchet Spanner: For quickly tightening and loosening bolts.
- Screwdrivers: Phillips head and flathead screwdrivers in different sizes.
- Torque Wrench: Essential for tightening bolts to the manufacturer’s specified torque, especially for critical components like the clutch pressure plate.
- Pliers and Wire Cutters.
- Gloves: Mechanic’s gloves to protect your hands.
- Safety Glasses: To protect your eyes from debris.
- Fine Sandpaper or Emery Cloth: Used to clean rust or debris from the flywheel surface where the new clutch disc will make contact.
- Clutch Alignment Tool (Centering Device): This is a crucial tool for correctly aligning the clutch disc and pressure plate during installation. Proper alignment is vital for smooth gearbox reinstallation and clutch operation.
- Grease: High-temperature grease for lubricating specific clutch components like the input shaft splines and throw-out bearing contact points.
- Drain Pan: If you need to drain the gearbox oil (as is often recommended or necessary when removing the gearbox), you’ll need a drain pan to collect the old oil.
- Gear Oil: If you drain the gearbox oil, you’ll need to refill it with the correct type and amount of gear oil as specified by your vehicle manufacturer.
- Penetrating Oil: Helpful for loosening stubborn or rusty bolts.
- Wheel Chocks: To prevent the car from rolling when lifted.
Having all these tools readily available will streamline the repair process and minimize frustration. Before starting, double-check that you have everything you need and that your tools are in good working condition.
Step-by-Step Guide to Fixing Your Car Clutch
Disclaimer: Clutch repair is a complex mechanical procedure. If you are not experienced with automotive repair, it is highly recommended to seek professional assistance. This guide is for informational purposes only and assumes a reasonable level of mechanical aptitude and safety awareness.
Step 1: Prepare the Vehicle and Lift It Safely
- Initial Clutch Test: Before lifting the car, perform a simple test to assess clutch slippage. On a level surface, start the engine, apply the parking brake firmly, and put the car in a high gear (like 4th or 5th). Slowly release the clutch pedal.
- Good Clutch: The engine should stall almost immediately.
- Slipping Clutch: If the engine continues to run or stalls very slowly, it indicates significant clutch slippage.
- Safety First: Ensure the vehicle is parked on a level, stable surface. Engage the parking brake firmly and use wheel chocks behind the rear wheels for extra safety.
- Lift the Vehicle: Using a hydraulic jack, lift the front of the car (or all four wheels if necessary for your vehicle and access to the gearbox) to a safe working height.
- Secure with Jack Stands: Immediately and securely place jack stands under the vehicle’s designated support points. Ensure the jack stands are properly positioned and stable before proceeding. Lower the jack so the car’s weight rests firmly on the jack stands.
Step 2: Disconnect the Battery
- Locate the Battery: Open the hood and locate the car battery, typically in the engine bay.
- Disconnect Negative Terminal First: Using a wrench, loosen and remove the nut on the negative (-) battery terminal (usually black). Disconnect the negative cable and tuck it aside, ensuring it cannot accidentally touch the battery terminal.
- Disconnect Positive Terminal: Repeat the process for the positive (+) battery terminal (usually red). Disconnecting the battery prevents electrical shorts and potential damage to the vehicle’s electrical system during the repair process.
Step 3: Remove the Gearbox (Transmission)
- Access Gearbox: Depending on your car model, you may need to remove various components to access the gearbox, such as undertrays, air intake parts, or exhaust components. Consult your vehicle’s repair manual for specific instructions.
- Disconnect Linkages and Sensors: Carefully disconnect all linkages, cables, and sensors connected to the gearbox. This may include the gear shift linkage, clutch cable or hydraulic lines, speedometer cable or sensor, and any electrical connectors. Label or photograph connections to aid in reassembly.
- Drain Gearbox Oil (If Necessary): Some gearboxes require draining the oil before removal to prevent spillage. If your manual recommends this or if oil spillage is likely based on the gearbox orientation, locate the drain plug, place a drain pan underneath, and remove the plug to drain the oil.
- Support the Engine: Before removing the gearbox, ensure the engine is properly supported. An engine support bar or a jack positioned under the engine oil pan (with a piece of wood for protection) can be used to prevent the engine from tilting when the gearbox is removed.
- Unbolt Gearbox: Locate and remove all bolts securing the gearbox to the engine block. These bolts can be in various locations and may be tight. Penetrating oil can be helpful for stubborn bolts.
- Separate Gearbox from Engine: Carefully separate the gearbox from the engine. This may require some maneuvering and gentle prying. Be cautious not to let the gearbox hang by any remaining cables or hoses. The gearbox can be heavy, so it’s best to have assistance or use a transmission jack to safely lower and remove it.
Step 4: Grease Components
- Inspect Input Shaft: Once the gearbox is removed, you’ll see the input shaft of the gearbox. Clean any old grease or debris from the splines of the input shaft.
- Lubricate Input Shaft Splines: Apply a small amount of high-temperature grease to the splines of the gearbox input shaft. This lubrication ensures smooth engagement with the clutch disc hub and prevents wear.
- Grease Throw-Out Bearing Contact Points: Inspect the throw-out bearing (also called release bearing) and its contact points on the clutch fork and pressure plate. Apply a small amount of grease to these contact points to ensure smooth and quiet operation.
Step 5: Prepare Clutch for Installation
- Inspect Flywheel: Examine the flywheel surface for wear, scoring, or heat damage. Minor imperfections can often be cleaned with fine sandpaper or an emery cloth. If the flywheel is severely damaged or warped, it may need to be resurfaced or replaced by a machine shop.
- Install Clutch Disc and Pressure Plate:
- Position Clutch Disc: Place the new clutch disc against the flywheel, ensuring it’s oriented correctly (usually with the longer hub facing outwards towards the gearbox).
- Align with Centering Tool: Insert the clutch alignment tool through the center of the clutch disc and into the pilot bearing in the center of the flywheel. This tool ensures the clutch disc is perfectly centered.
- Install Pressure Plate: Position the new pressure plate over the clutch disc and onto the flywheel.
- Install Pressure Plate Bolts: Install the pressure plate bolts finger-tight initially.
- Tighten Bolts in Star Pattern: Using a torque wrench, tighten the pressure plate bolts to the manufacturer’s specified torque in a star pattern (opposite bolts sequentially) to ensure even pressure distribution. Tighten in stages, gradually increasing torque.
- Remove Alignment Tool: Once the pressure plate is securely tightened, carefully remove the clutch alignment tool.
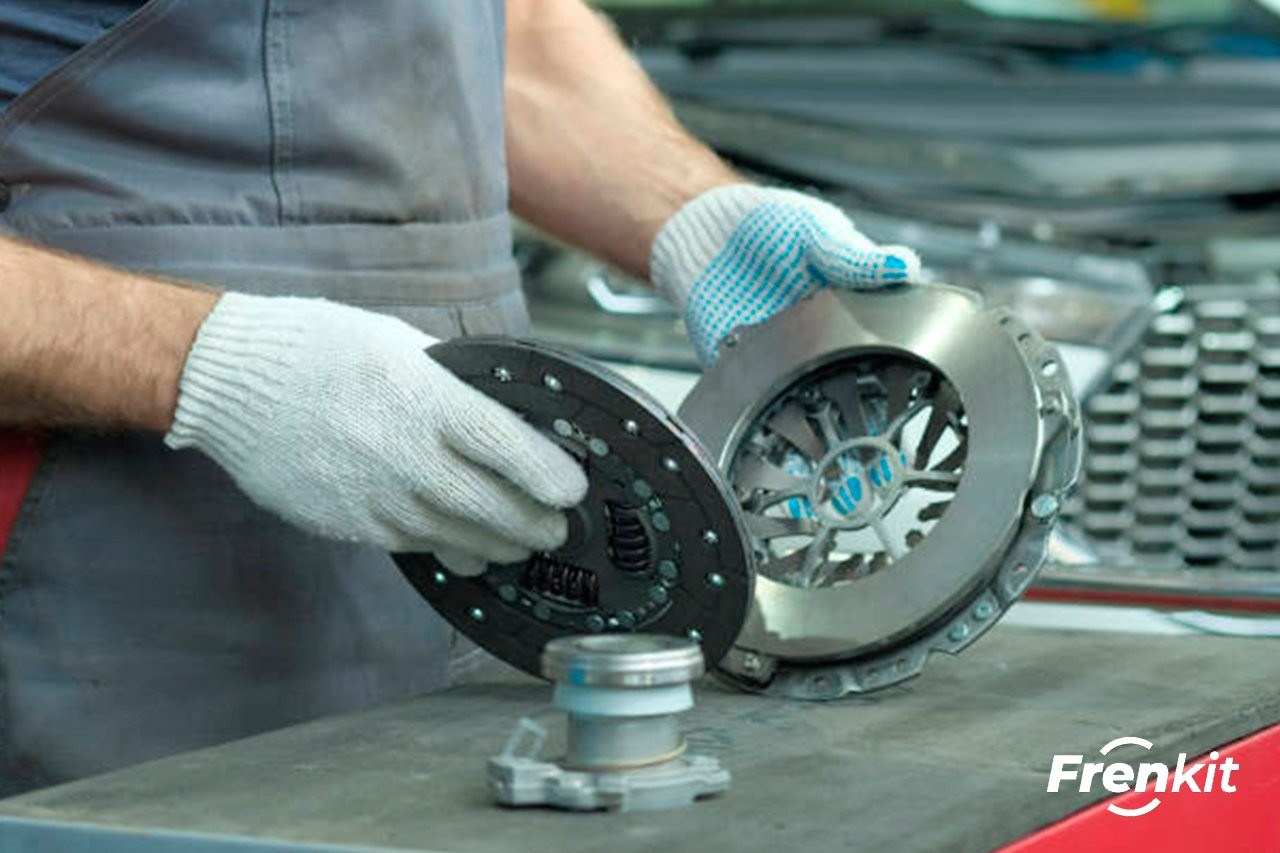
Steps to repair the clutch of your car 1
Alt text: Mechanic using a clutch alignment tool to center the clutch disc during a car clutch repair, ensuring proper alignment before installing the gearbox.
Step 6: Reinstall the Gearbox (Transmission)
- Check Centering Sleeves: Before reinstalling the gearbox, inspect the centering sleeves (dowels) located on the engine block. Ensure they are in good condition and properly aligned. These sleeves help align the gearbox with the engine.
- Position Gearbox: Carefully lift the gearbox (using a transmission jack if possible) and align it with the engine.
- Engage Input Shaft: Gently maneuver the gearbox forward, aligning the input shaft with the clutch disc hub. It may be necessary to rotate the engine flywheel slightly to help the input shaft splines engage with the clutch disc. Be patient and avoid forcing it.
- Secure Gearbox Bolts: Once the gearbox is properly seated against the engine block, install and tighten the gearbox bolts. Tighten them evenly and to the specified torque, ensuring the gearbox is securely attached to the engine.
- Reconnect Components: Reconnect all linkages, cables, sensors, and electrical connectors that were disconnected during removal. Ensure they are securely fastened.
- Refill Gearbox Oil (If Drained): If you drained the gearbox oil, refill it with the correct type and amount of new gear oil as per your vehicle’s specifications.
Step 7: Test the Clutch
- Reconnect Battery: Reconnect the battery terminals, positive (+) first, then negative (-).
- Start Engine and Test Gears: Start the engine and let it idle. Test shifting through all gears, including reverse, to ensure smooth engagement and disengagement. Listen for any unusual noises.
- Check Clutch Pedal Feel: Verify that the clutch pedal feels normal – not too stiff or too soft.
- Road Test (Carefully): If everything seems normal, carefully lower the vehicle, remove jack stands, and take it for a short, gentle road test in a safe area. Pay attention to clutch engagement, gear shifting smoothness, and any noises or vibrations.
If the clutch operates smoothly, gear changes are clean, and there are no unusual noises, your clutch repair is likely successful. However, if you experience any issues or are unsure about any aspect of the repair, it’s crucial to consult a professional mechanic for further diagnosis and assistance.
Conclusion: When to DIY and When to Seek Professional Help
Repairing a car clutch is a significant undertaking that requires mechanical skill, the right tools, and a good understanding of automotive systems. While DIY clutch replacement is possible for experienced individuals, it’s not a task to be taken lightly.
When DIY might be an option:
- You have prior experience with automotive repair, particularly gearbox removal and clutch work.
- You have a good set of tools and a safe working environment.
- You are comfortable following detailed instructions and troubleshooting potential issues.
- You have access to a vehicle repair manual specific to your car model.
When professional help is recommended:
- You are not experienced with car mechanics or lack the necessary tools.
- You are unsure about any step in the process or feel uncomfortable proceeding.
- You encounter difficulties during the repair, such as stubborn bolts or alignment issues.
- You want to ensure the repair is done correctly and safely, with warranty and professional expertise.
Ultimately, the decision to DIY or seek professional help depends on your individual skills, comfort level, and resources. If in doubt, choosing a reputable mechanic ensures the job is done right, maintaining your vehicle’s performance and safety. Regular car maintenance, including clutch checks, can help extend the life of your clutch and prevent unexpected failures.