How to Fix Cloth Car Seats: A Comprehensive DIY Guide
Cloth car seats are comfortable and can add a touch of style to your vehicle’s interior. However, they are also susceptible to stains, odors, burns, and fading over time. Instead of resorting to expensive professional detailing or seat replacements, you can effectively restore and refresh your cloth car seats yourself. This guide provides a comprehensive, step-by-step approach to cleaning, repairing, and revitalizing your car’s cloth upholstery, ensuring a fresh and inviting interior.
Understanding Common Cloth Car Seat Issues
Before diving into the repair process, it’s helpful to identify the specific issues plaguing your car seats. Common problems include:
- Stains: From spilled coffee and food to mud and grease, car seats can accumulate a variety of stains. Understanding the type of stain is crucial for effective removal.
- Odors: Lingering smells from smoke, pets, or spills can make your car interior unpleasant. Eliminating these odors requires thorough cleaning and odor neutralization.
- Burns and Tears: Cigarette burns or minor tears can damage the fabric and detract from the seat’s appearance. Repairing these damages prevents them from worsening and restores the seat’s integrity.
- Fading and Wear: Exposure to sunlight and regular use can cause the fabric to fade and wear down, making seats look old and tired. Revitalizing faded fabric and worn areas can significantly improve the overall look.
Essential Tools and Supplies for Cloth Car Seat Repair
Having the right tools and supplies will make the repair process easier and more effective. Here’s a list of essentials you might need, depending on the issues you are addressing:
- Vacuum Cleaner with Upholstery Attachment: For removing loose dirt and debris.
- Upholstery Cleaner: Choose a quality cleaner specifically designed for automotive fabrics. Consider enzyme-based cleaners for odor removal.
- Microfiber Cloths: For wiping, scrubbing, and drying.
- Soft Bristle Brush: For agitating stains and loosening dirt.
- Fabric Stain Remover: For tackling stubborn stains.
- Odor Neutralizer: For eliminating persistent odors.
- Fabric Repair Kit: For repairing minor burns and tears. These kits typically include adhesive, fabric patches, and color powders.
- Fabric Pens or Markers: For recoloring faded embroidery or small areas.
- Cotton Swabs: For precise application of repair materials and cleaning solutions in small areas.
- Water Spray Bottle: For diluting cleaners and dampening areas.
- Gloves: To protect your hands from cleaning chemicals.
- Safety Glasses: To protect your eyes from splashes and debris.
Step-by-Step Guide to Cleaning Cloth Car Seats
Cleaning is the first and often most crucial step in fixing up your cloth car seats. A thorough cleaning can remove stains, eliminate odors, and prepare the surface for further repairs.
Preparing Your Seats for Cleaning
-
Vacuum Thoroughly: Begin by vacuuming the entire seat surface, including crevices and seams, to remove loose dirt, crumbs, and pet hair. Use the upholstery attachment to reach tight spots.
Vacuuming car seats to remove dirt and debris -
Pre-treat Stains: Identify any visible stains and pre-treat them with a fabric stain remover. Follow the product instructions and allow it to sit for the recommended time before proceeding to the next step.
Deep Cleaning for Stains and Odors
-
Apply Upholstery Cleaner: Spray the upholstery cleaner evenly over the seat surface, following the manufacturer’s directions. Avoid oversaturating the fabric.
-
Agitate with Brush: Use a soft-bristle brush to gently agitate the cleaner into the fabric. Work in circular motions to loosen dirt and lift stains. For heavily soiled areas, you may need to apply a bit more pressure, but avoid scrubbing too aggressively, which can damage the fabric.
-
Wipe and Extract Dirt: Use a clean microfiber cloth to wipe away the cleaning solution and lifted dirt. Work in sections, wiping in one direction to avoid spreading dirt back onto the cleaned area. For best results and deeper cleaning, consider using a wet/dry vacuum cleaner with an upholstery attachment to extract the dirty water and cleaning solution. This will help to remove more dirt and speed up the drying process.
-
Repeat if Necessary: For stubborn stains or heavily soiled seats, you may need to repeat the cleaning process. Allow the seats to partially dry between applications to avoid oversaturation.
Drying and Preventing Future Issues
-
Air Dry Thoroughly: Allow the car seats to air dry completely. Open car doors and windows to improve ventilation and speed up drying. You can also use fans to circulate air inside the car. Avoid using heat guns or hair dryers, as excessive heat can damage the fabric.
-
Odor Neutralization (If Needed): If odors persist after cleaning, apply an odor neutralizer specifically designed for car interiors. Follow the product instructions for application. Baking soda sprinkled on the seats and vacuumed up after a few hours can also help absorb lingering odors.
-
Protect Your Clean Seats: To prevent future stains and wear, consider using car seat covers, especially if you frequently transport pets or children. Regularly vacuuming your car seats will also help to prevent dirt and grime buildup.
Repairing Minor Damage: Burns and Tears
For minor burns and tears, a fabric repair kit can be an effective DIY solution to restore the look of your cloth car seats.
Using a Fabric Repair Kit
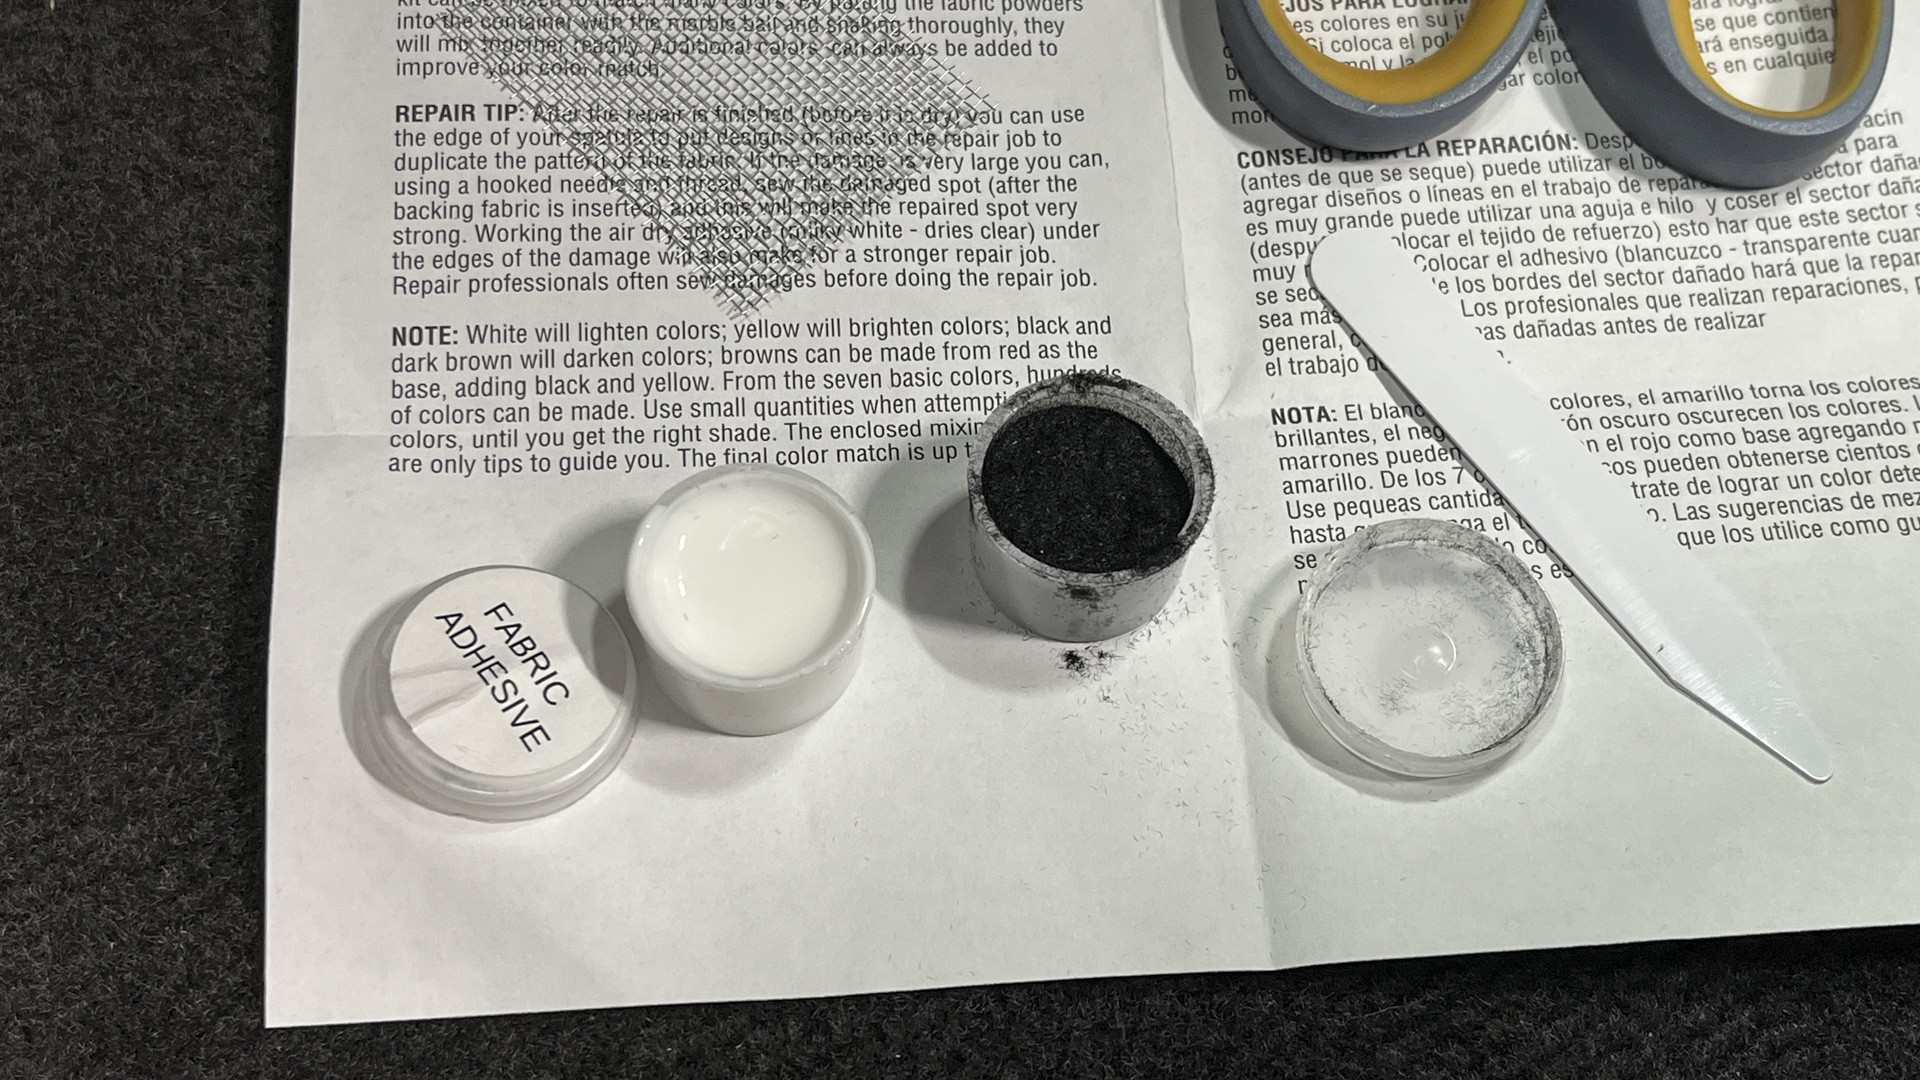
Fabric repair kits, like the Permatex Fabric Repair Kit, typically include:
- Adhesive: To bond the fabric patch and color powder.
- Color Powders: In various shades to match your seat fabric color.
- Applicator Tools: Such as small cups, spatulas, and sieves.
- Fabric Patch: To provide backing for larger holes or tears.
Step-by-Step Burn Hole Repair
-
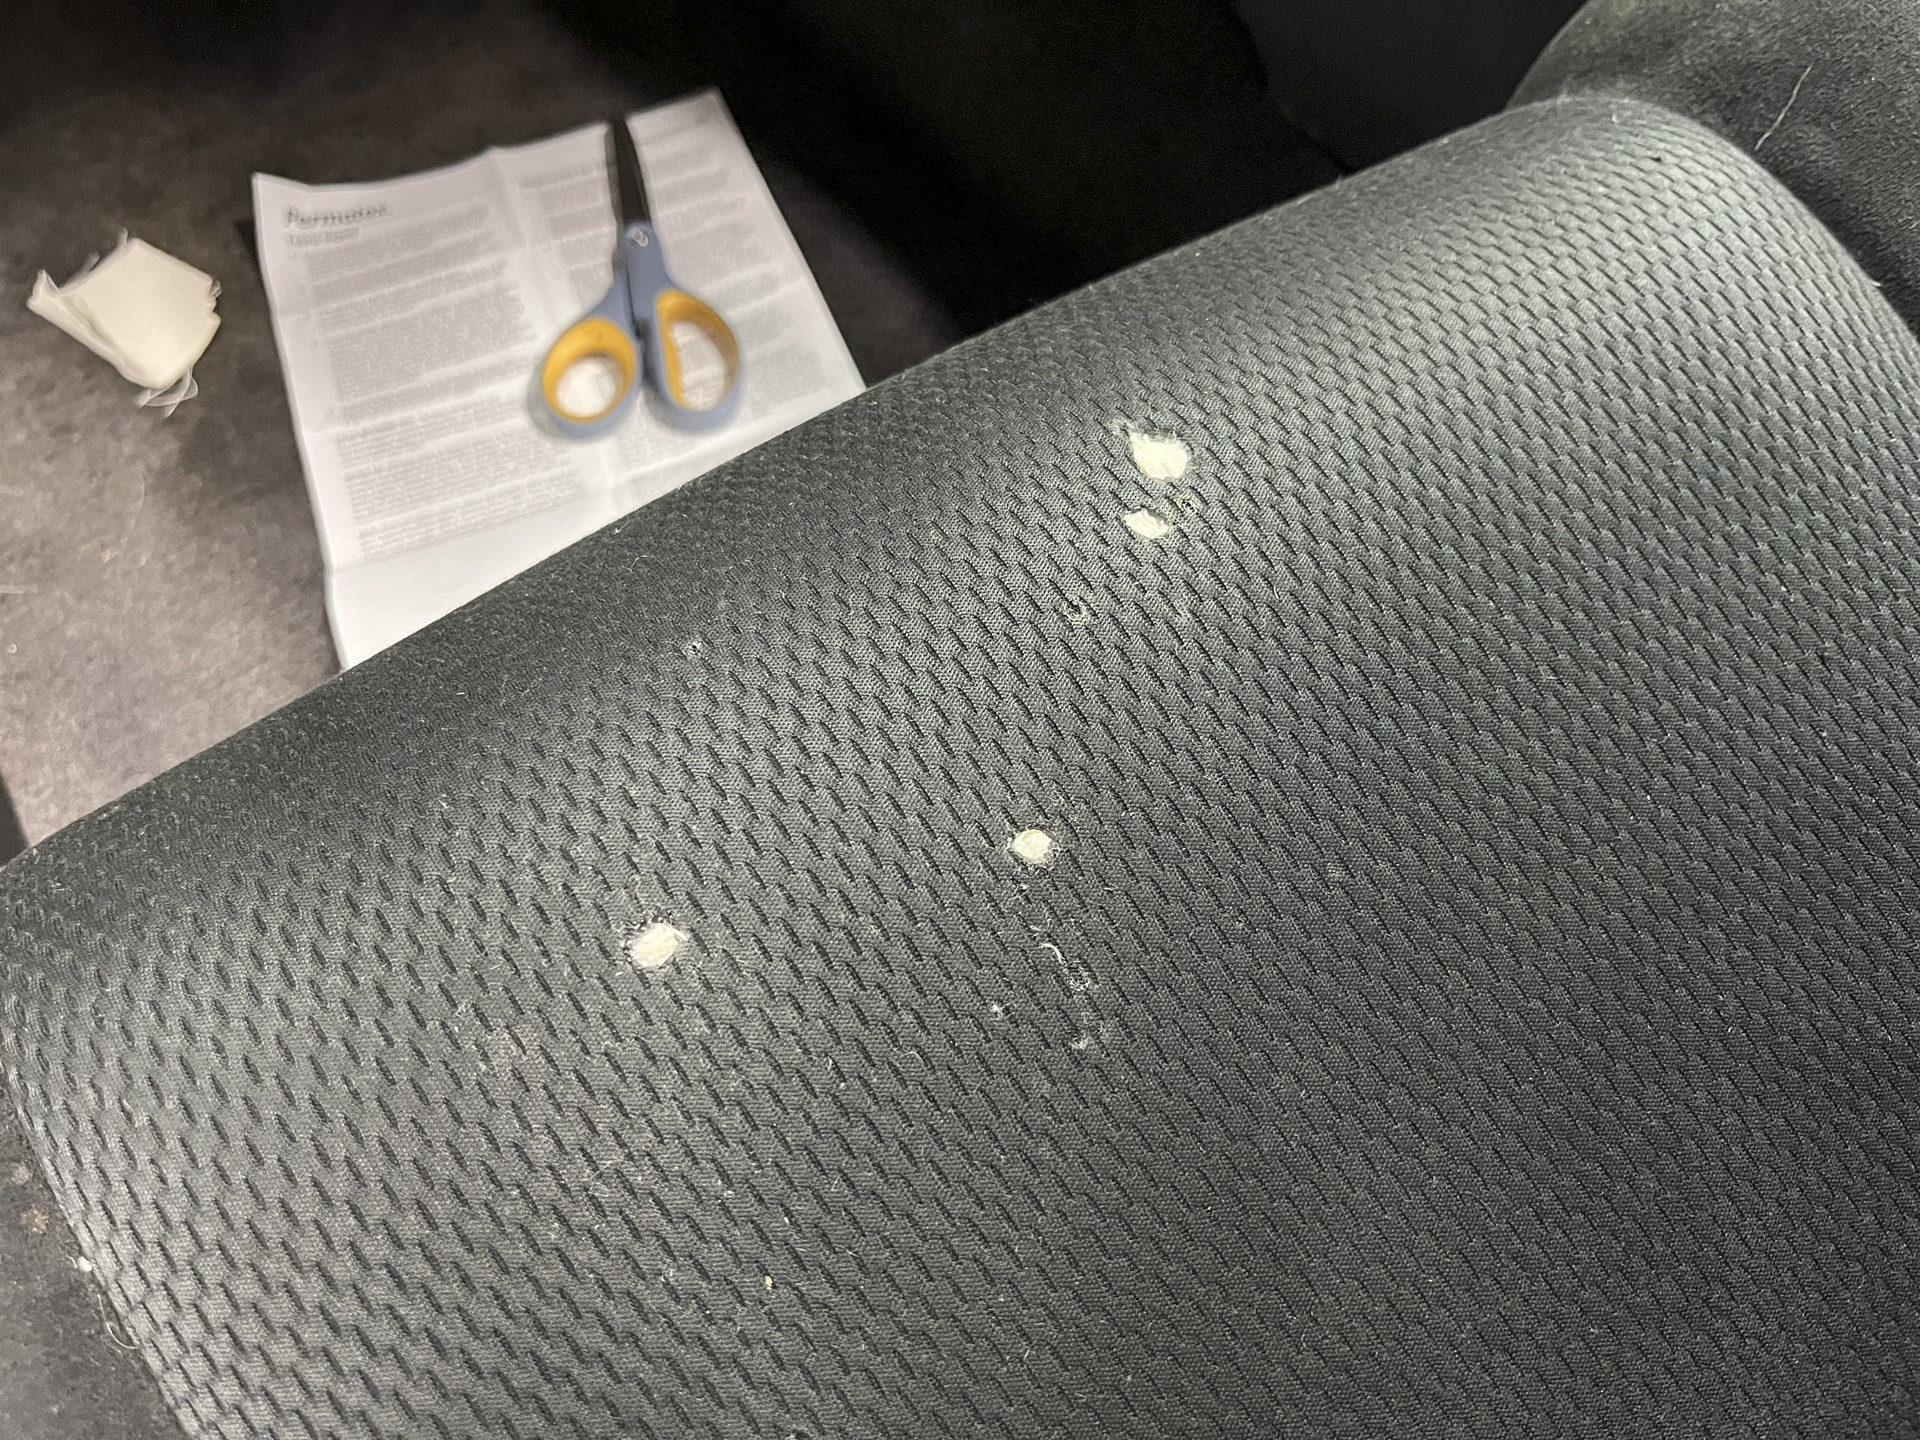
Prepare the Burn Hole: Clean around the burn hole and trim any loose or charred fibers with small scissors.
-
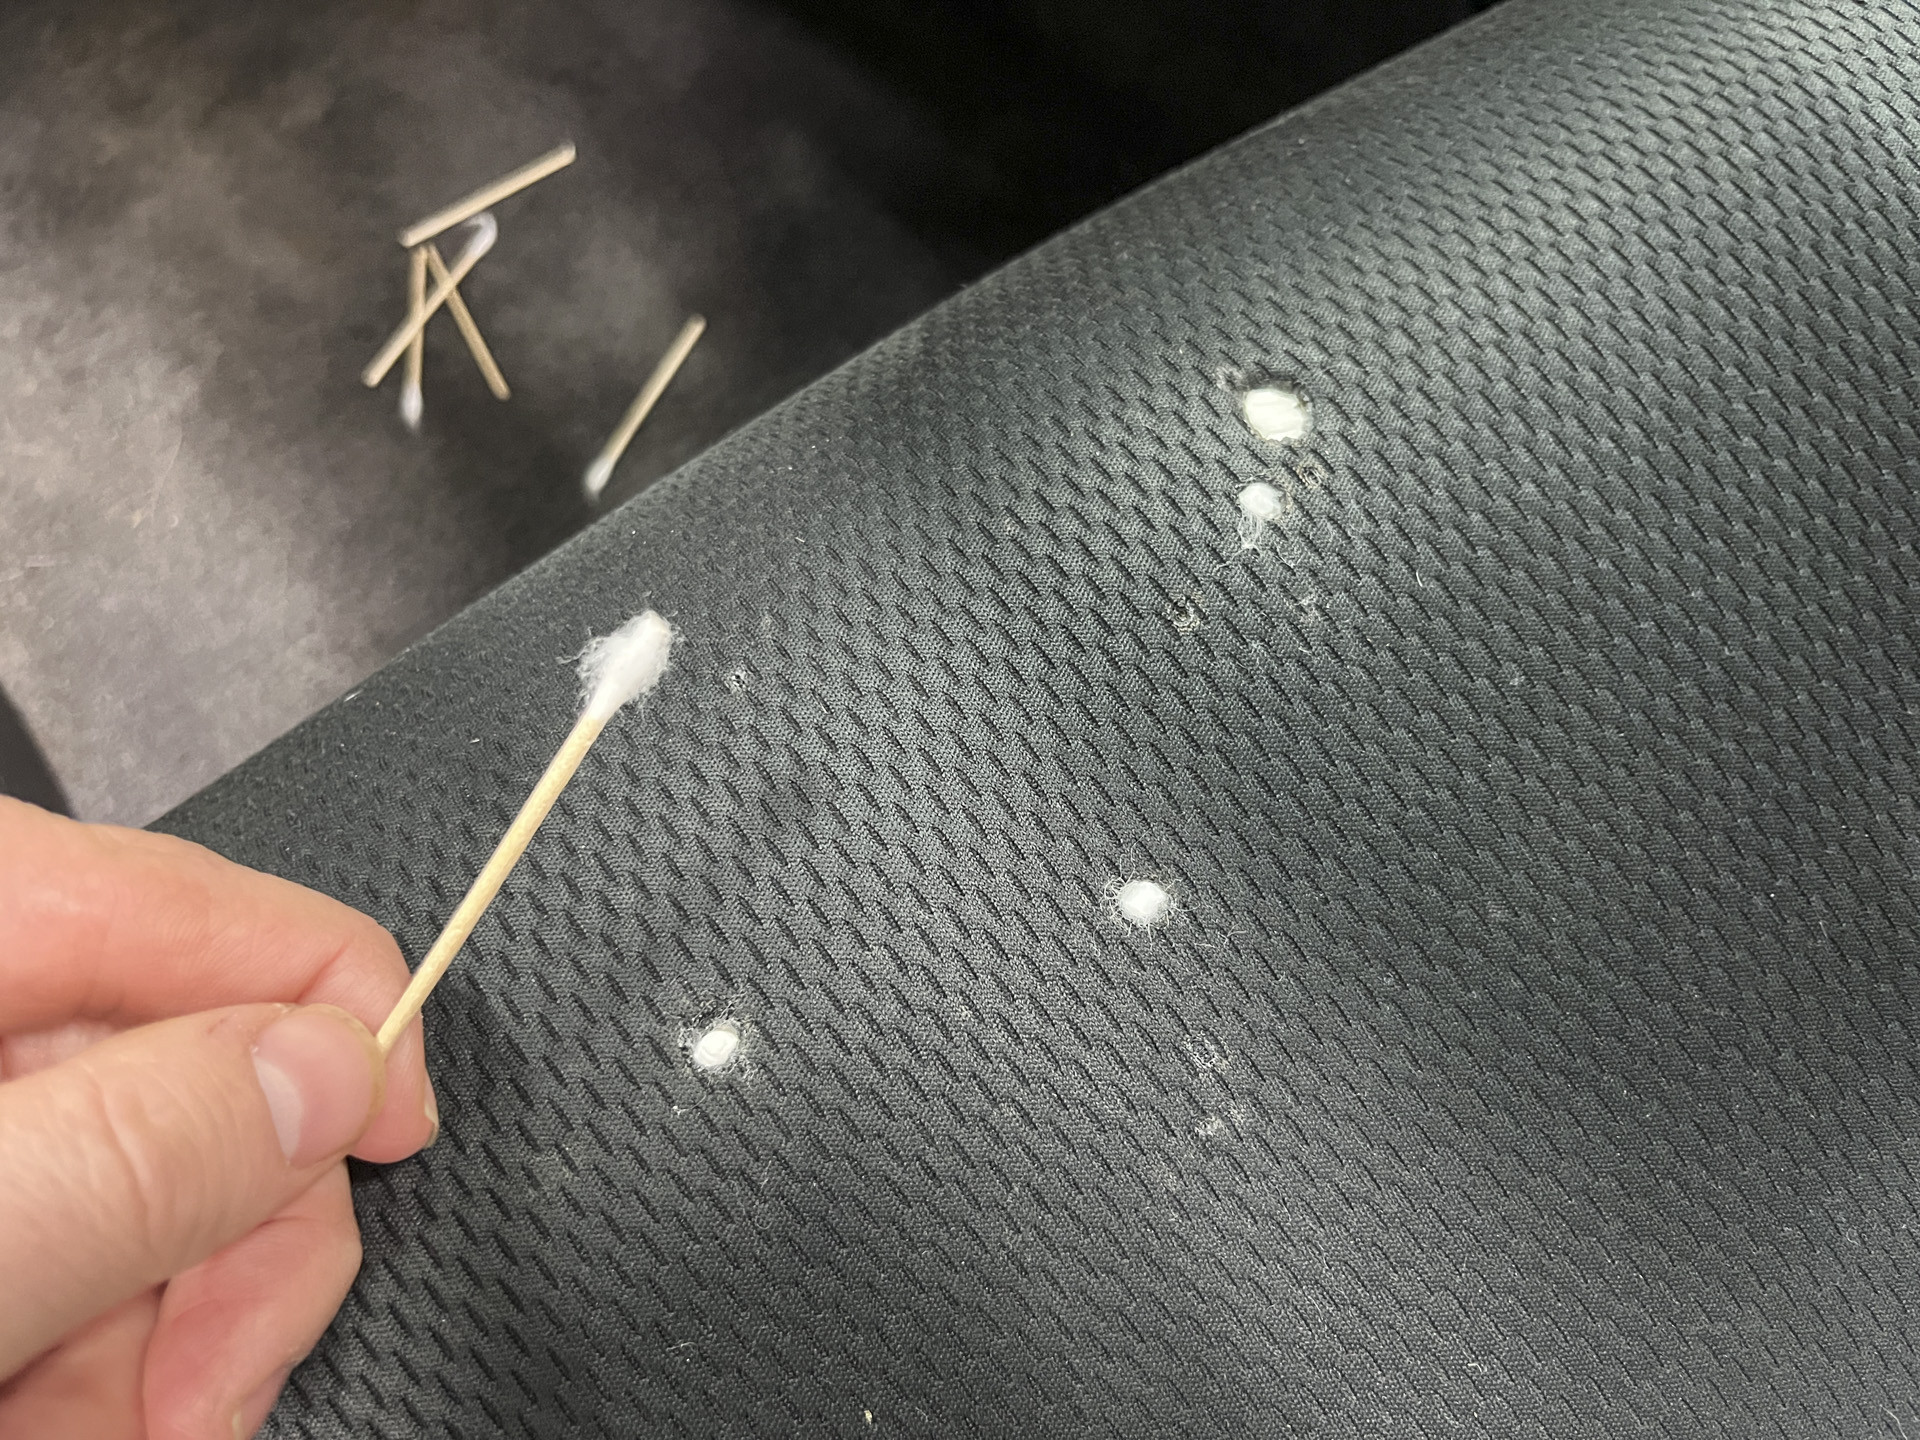
Fill with Cotton: Use a cotton swab or cotton ball to fill the burn hole with a small amount of cotton. This provides a base for the repair material.
 Components of a fabric repair kit for car seats
 -
Mix Color Powder: Select the color powder that closely matches your seat fabric. If necessary, mix different powders in the small cups provided in the kit to achieve a precise color match. Start with a small amount and adjust as needed. Refer to color mixing guides online if you’re unsure how to blend colors.
 Mixing color powders to match car seat fabric
 -
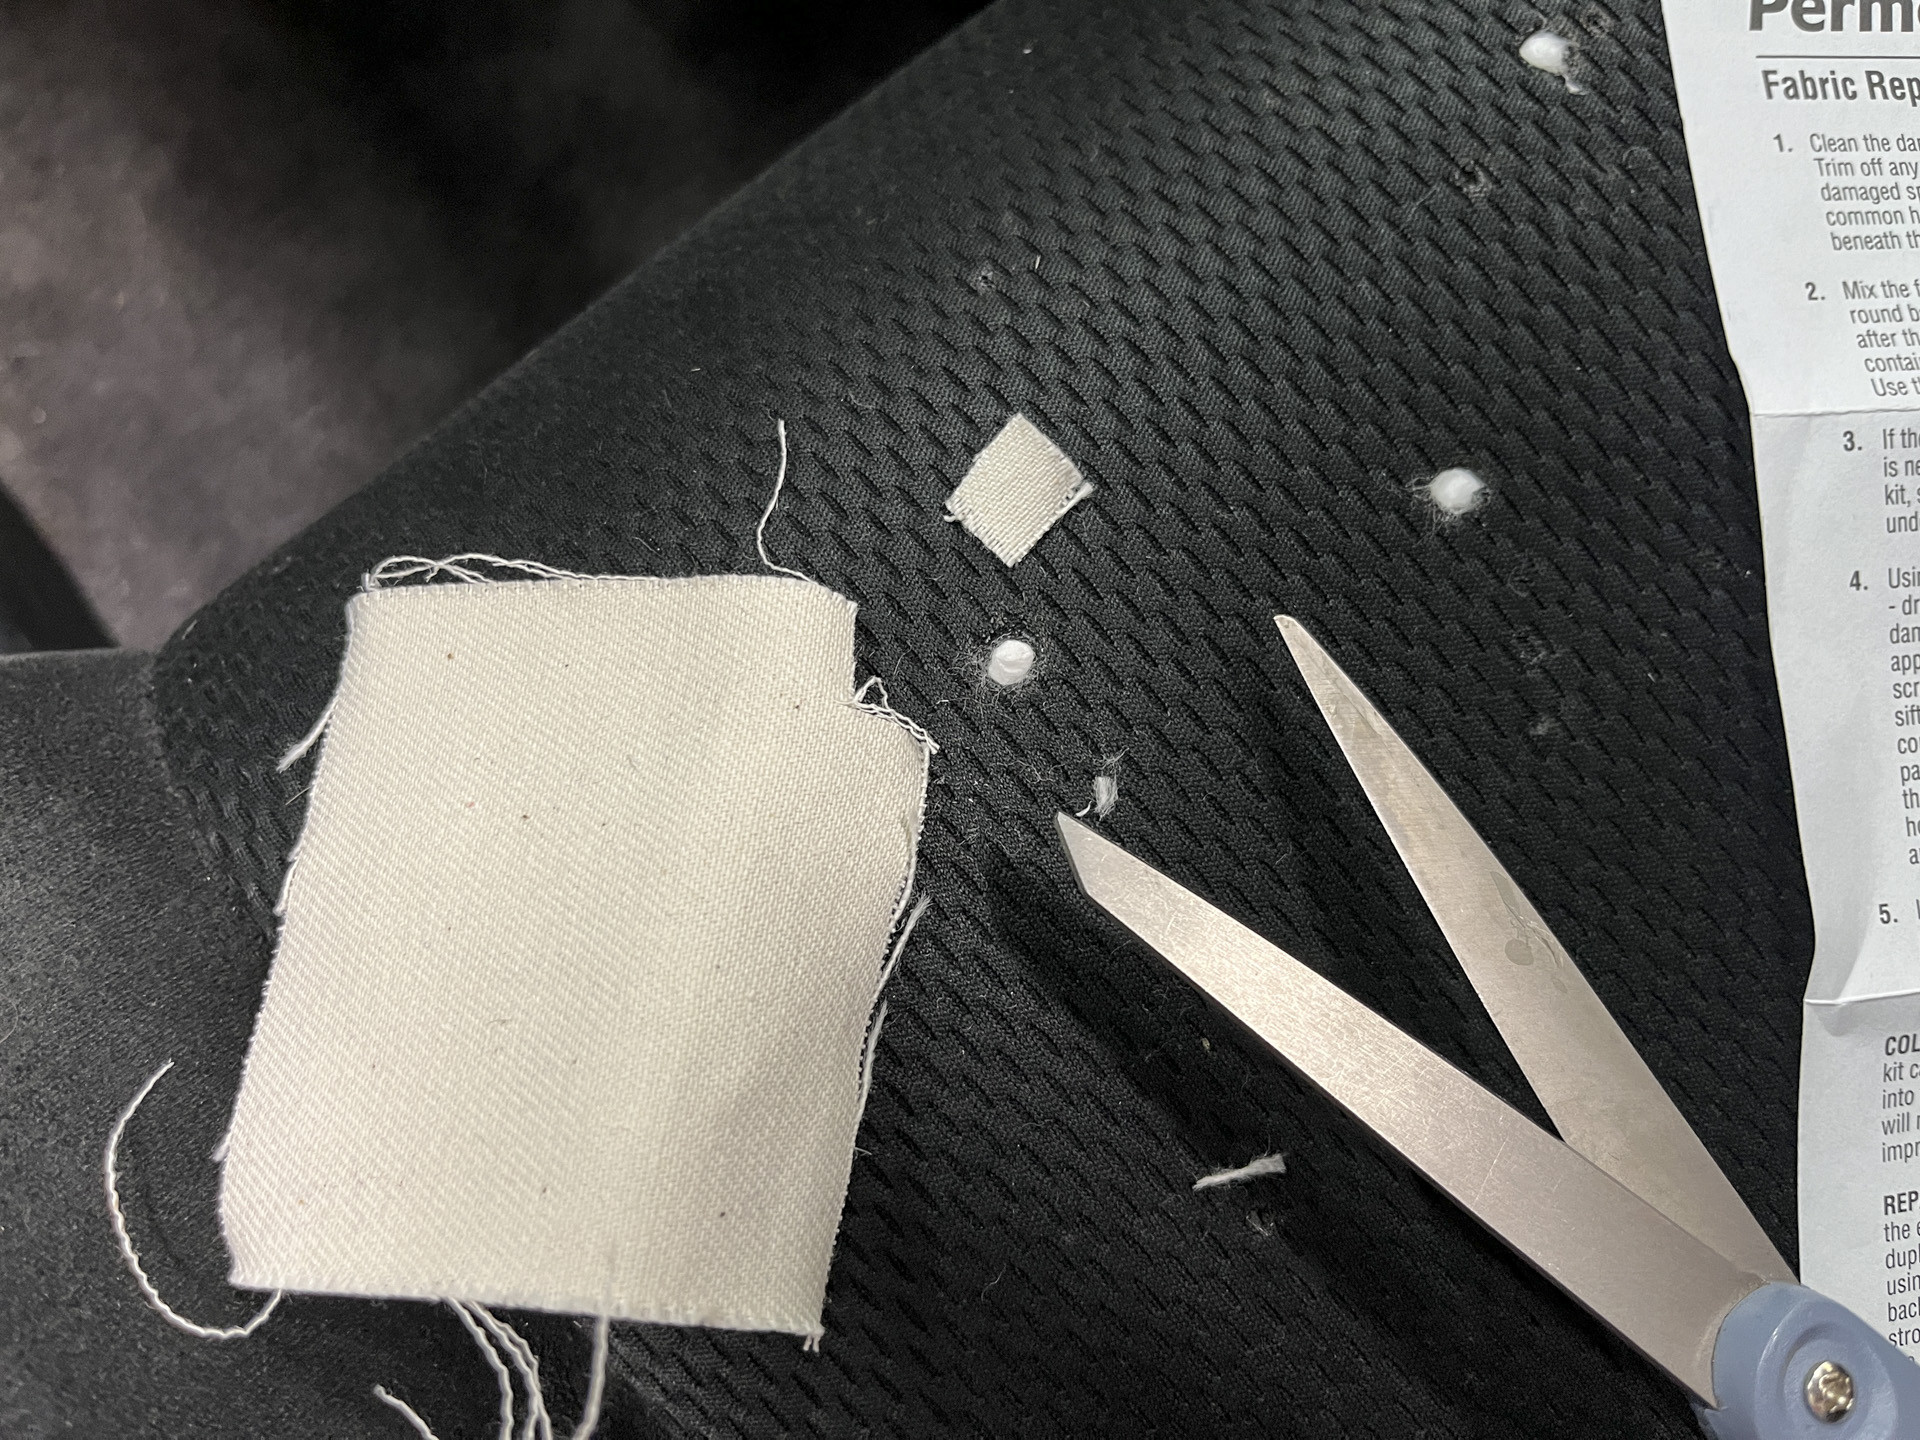
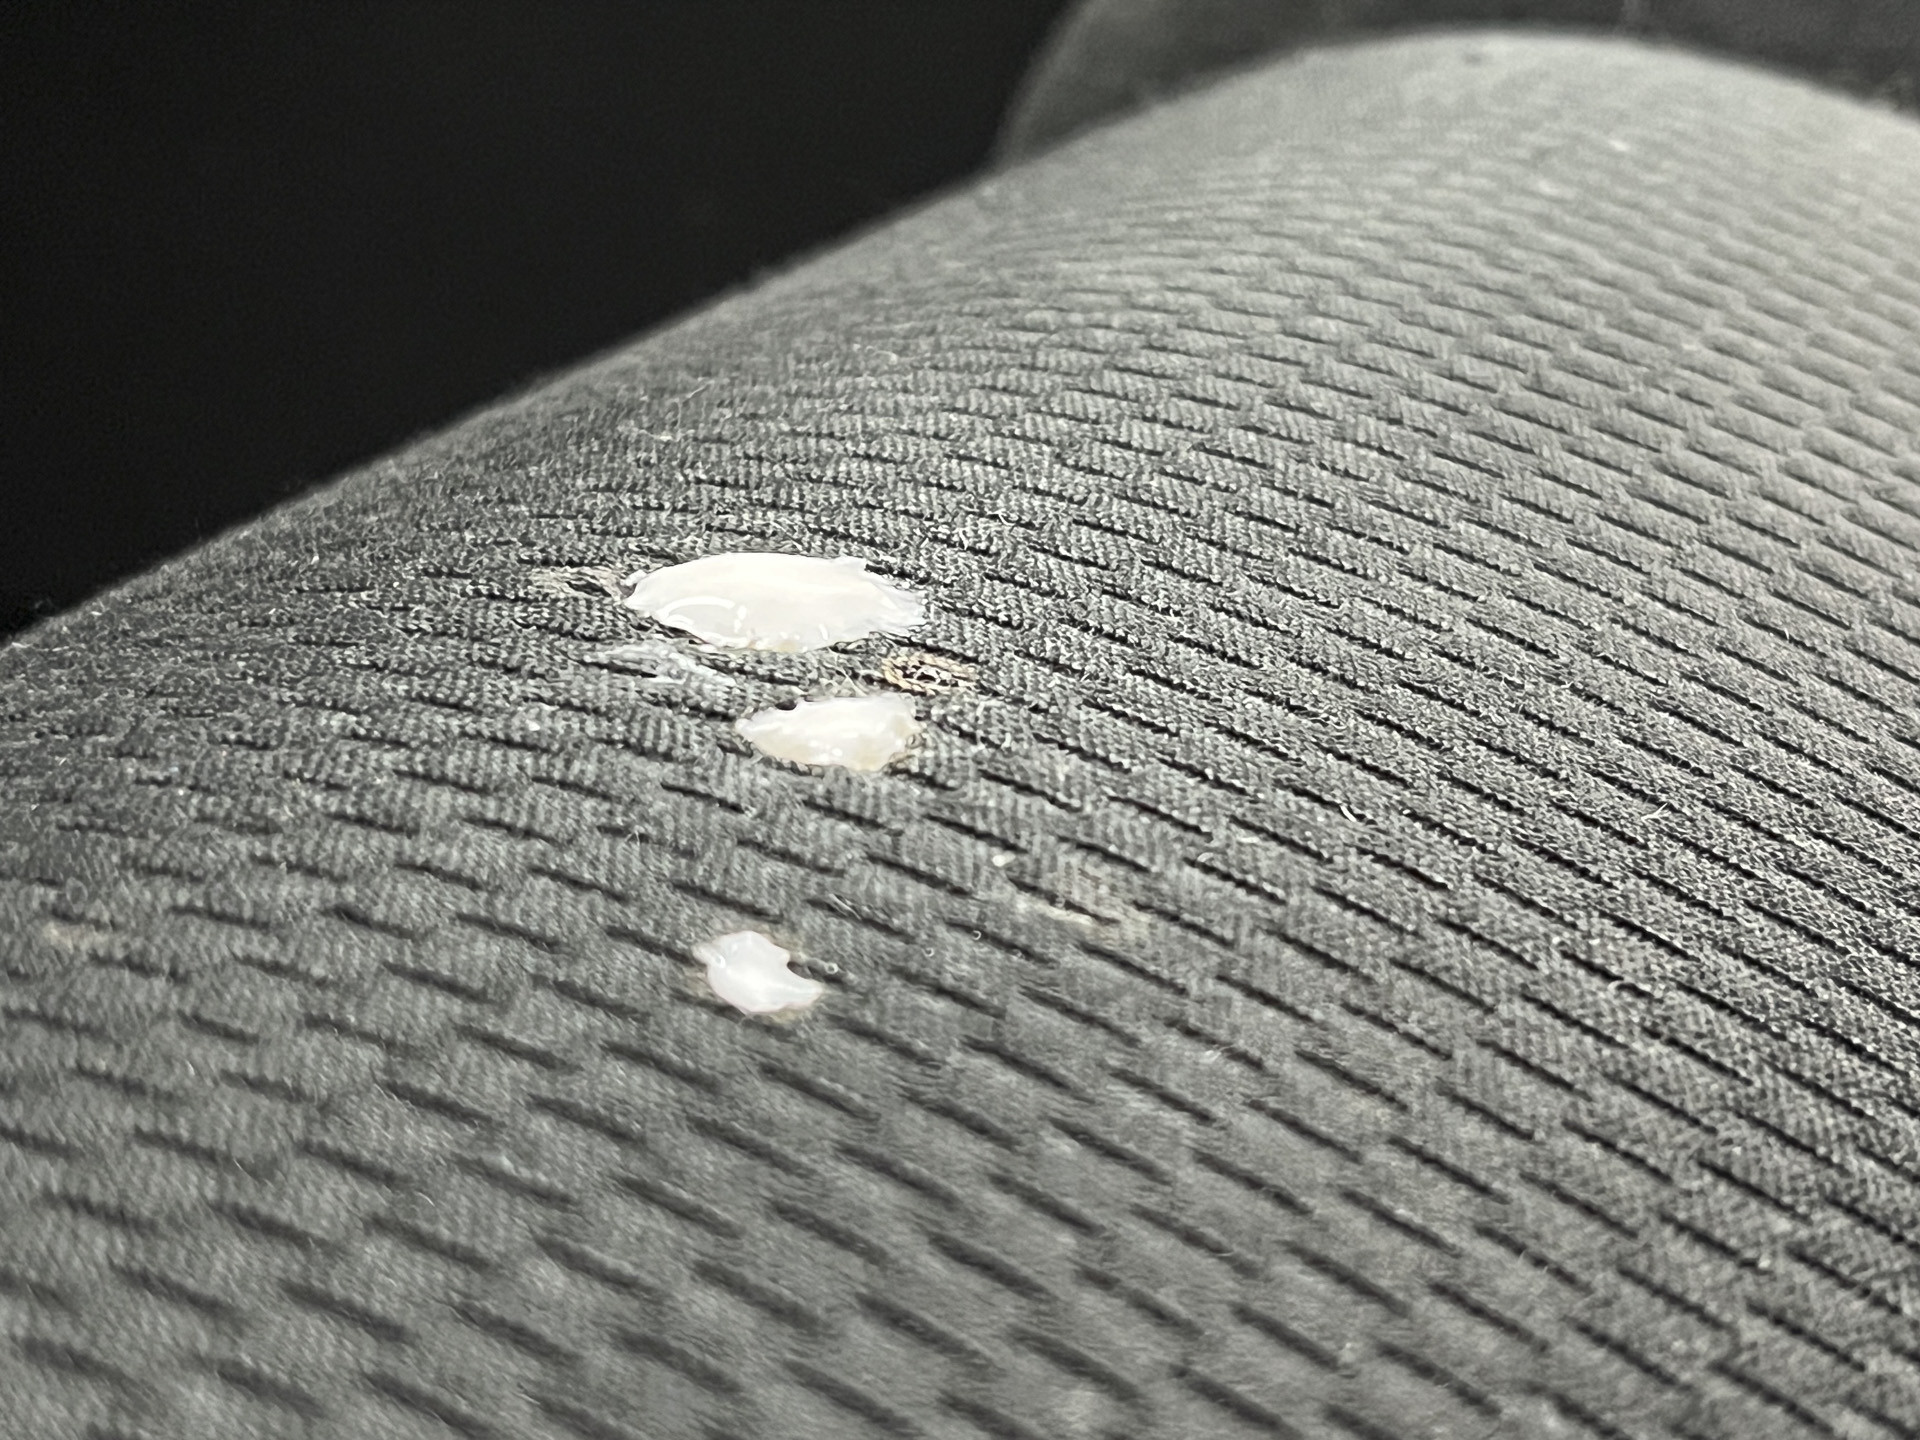
Apply Adhesive and Fabric Patch (If Needed): If the burn hole is larger, cut a small fabric patch slightly larger than the hole. Apply adhesive to the back of the patch and carefully position it over the hole, pressing down gently. If you are only repairing a small burn hole, you can skip the patch.
 Applying adhesive to a fabric patch for car seat repair
 -
Apply Color Powder: Apply adhesive to the cotton-filled burn hole or fabric patch. Use the sieve from the kit to sprinkle the mixed color powder evenly over the adhesive area. Gently tap the sieve to distribute the powder.
 Applying color powder to the adhesive area on a car seat
 -
Wait and Brush Away Excess: Allow the adhesive to dry completely according to the kit instructions. Once dry, use a soft brush to gently remove any excess powder.
 Brushing away excess powder after fabric repair
 -
Repeat Layers (If Needed): For better coverage and blending, you may need to repeat steps 5 and 6, applying thin layers of adhesive and powder until the burn hole is adequately concealed.
 Close-up of repaired burn hole in car seat fabric
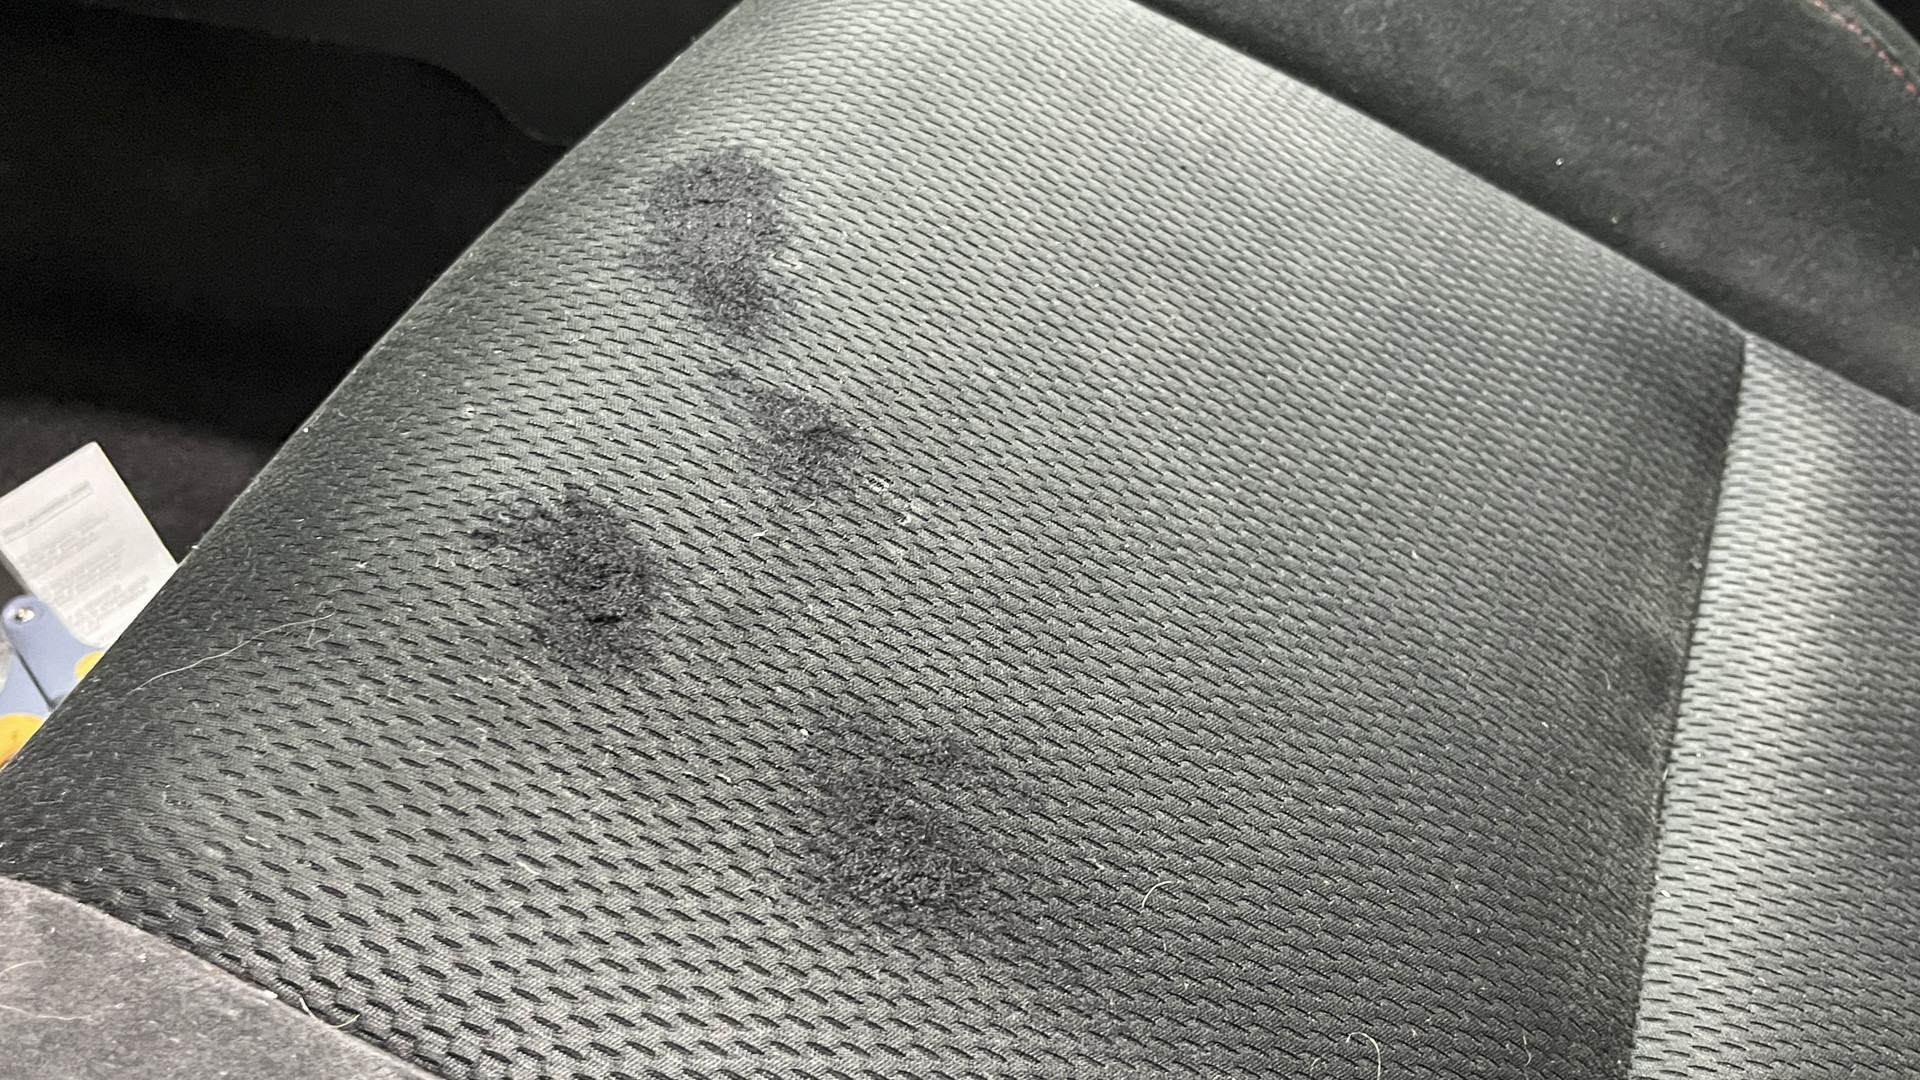 Applying more color powder for better coverage
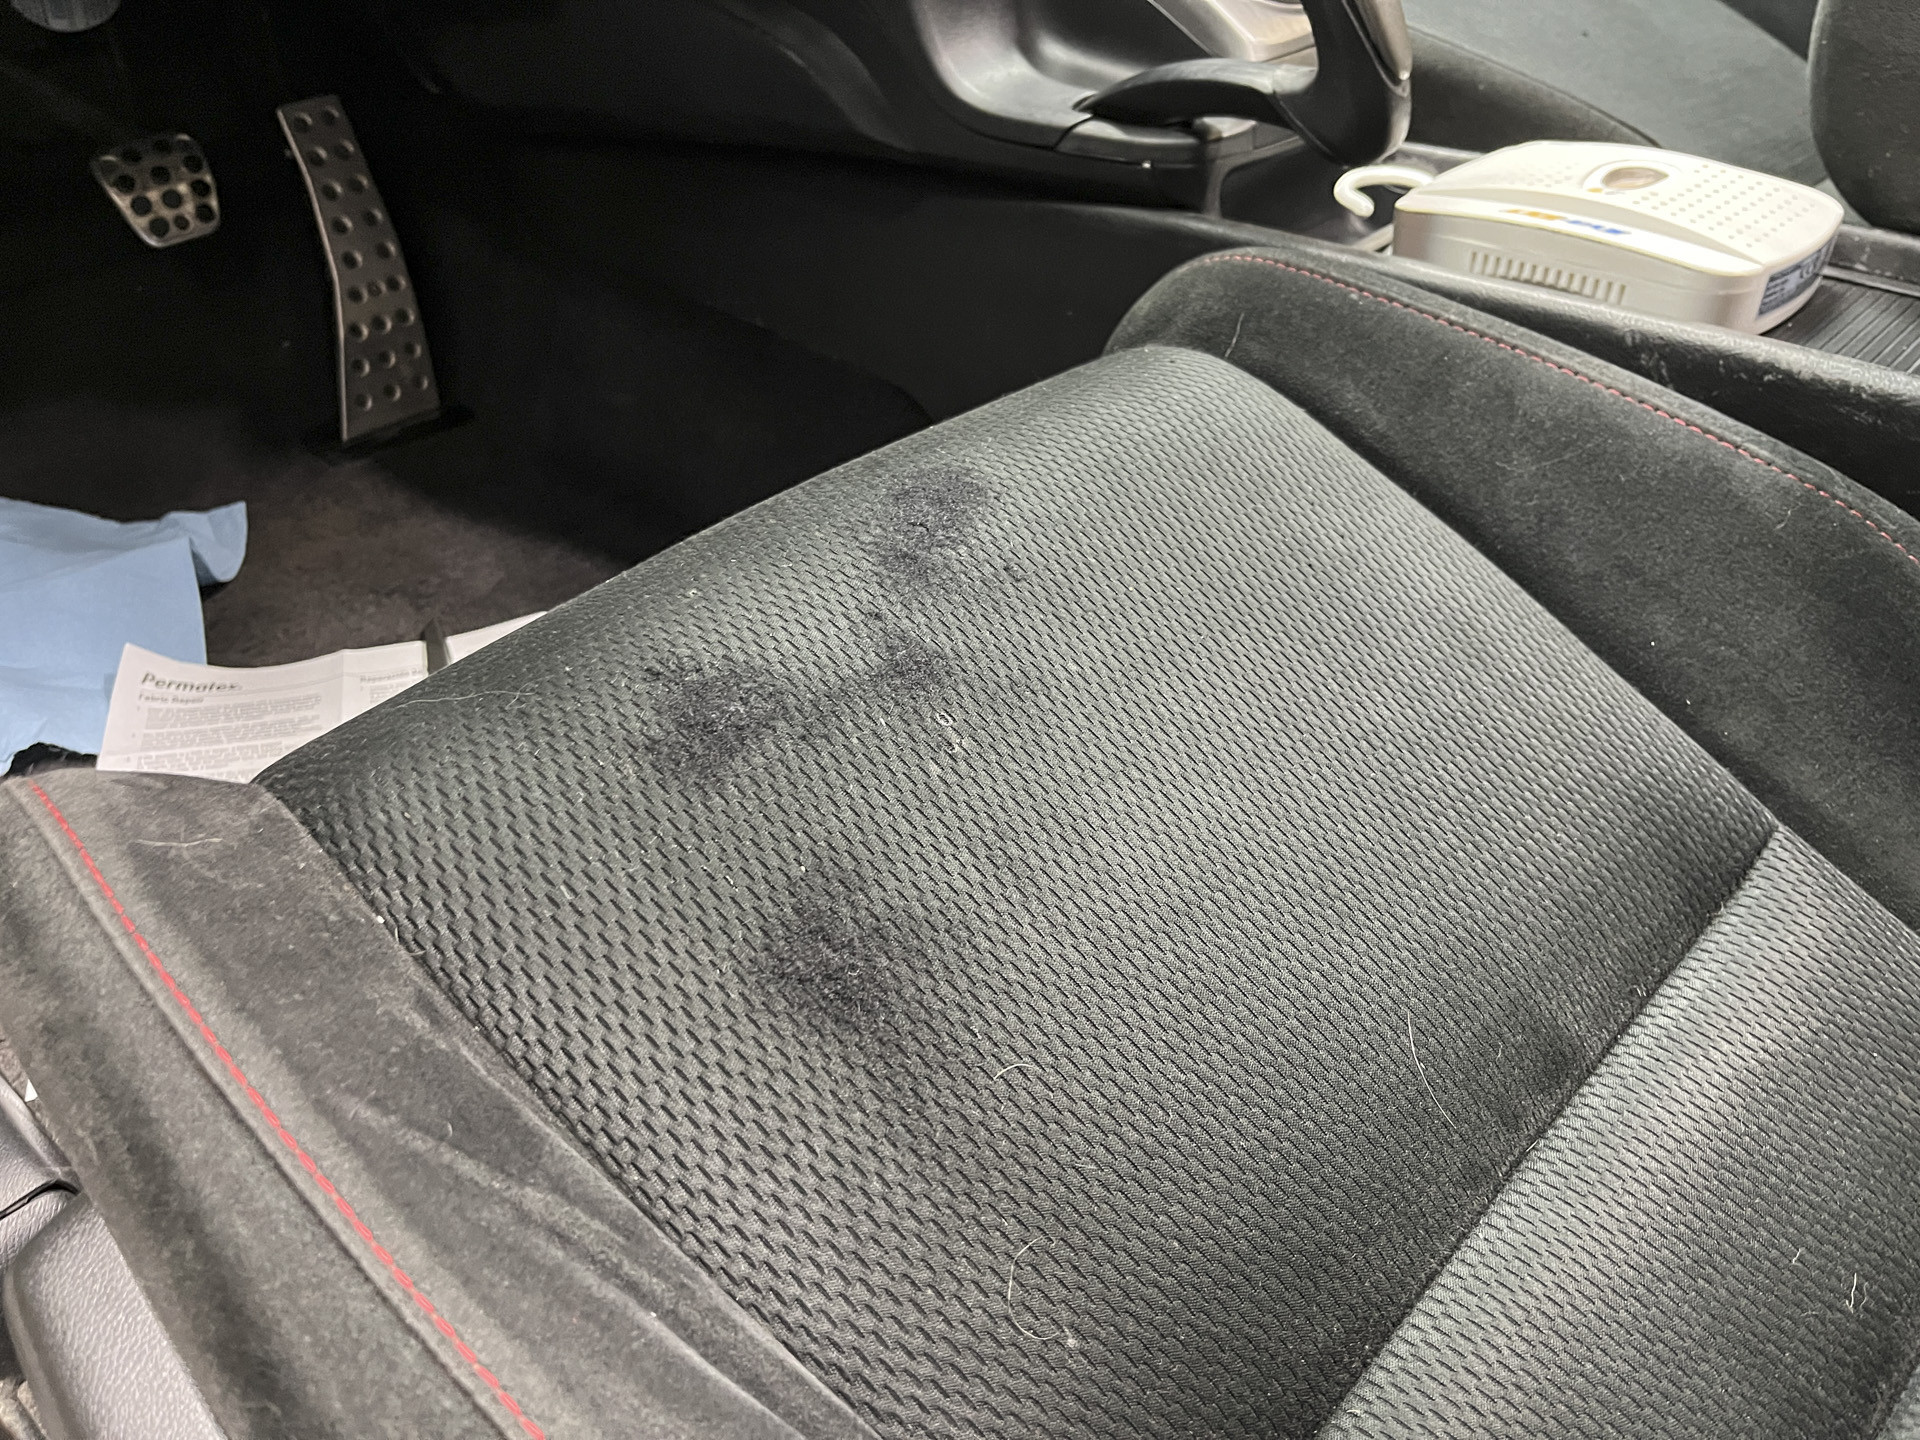 Using a brush to refine the repaired area
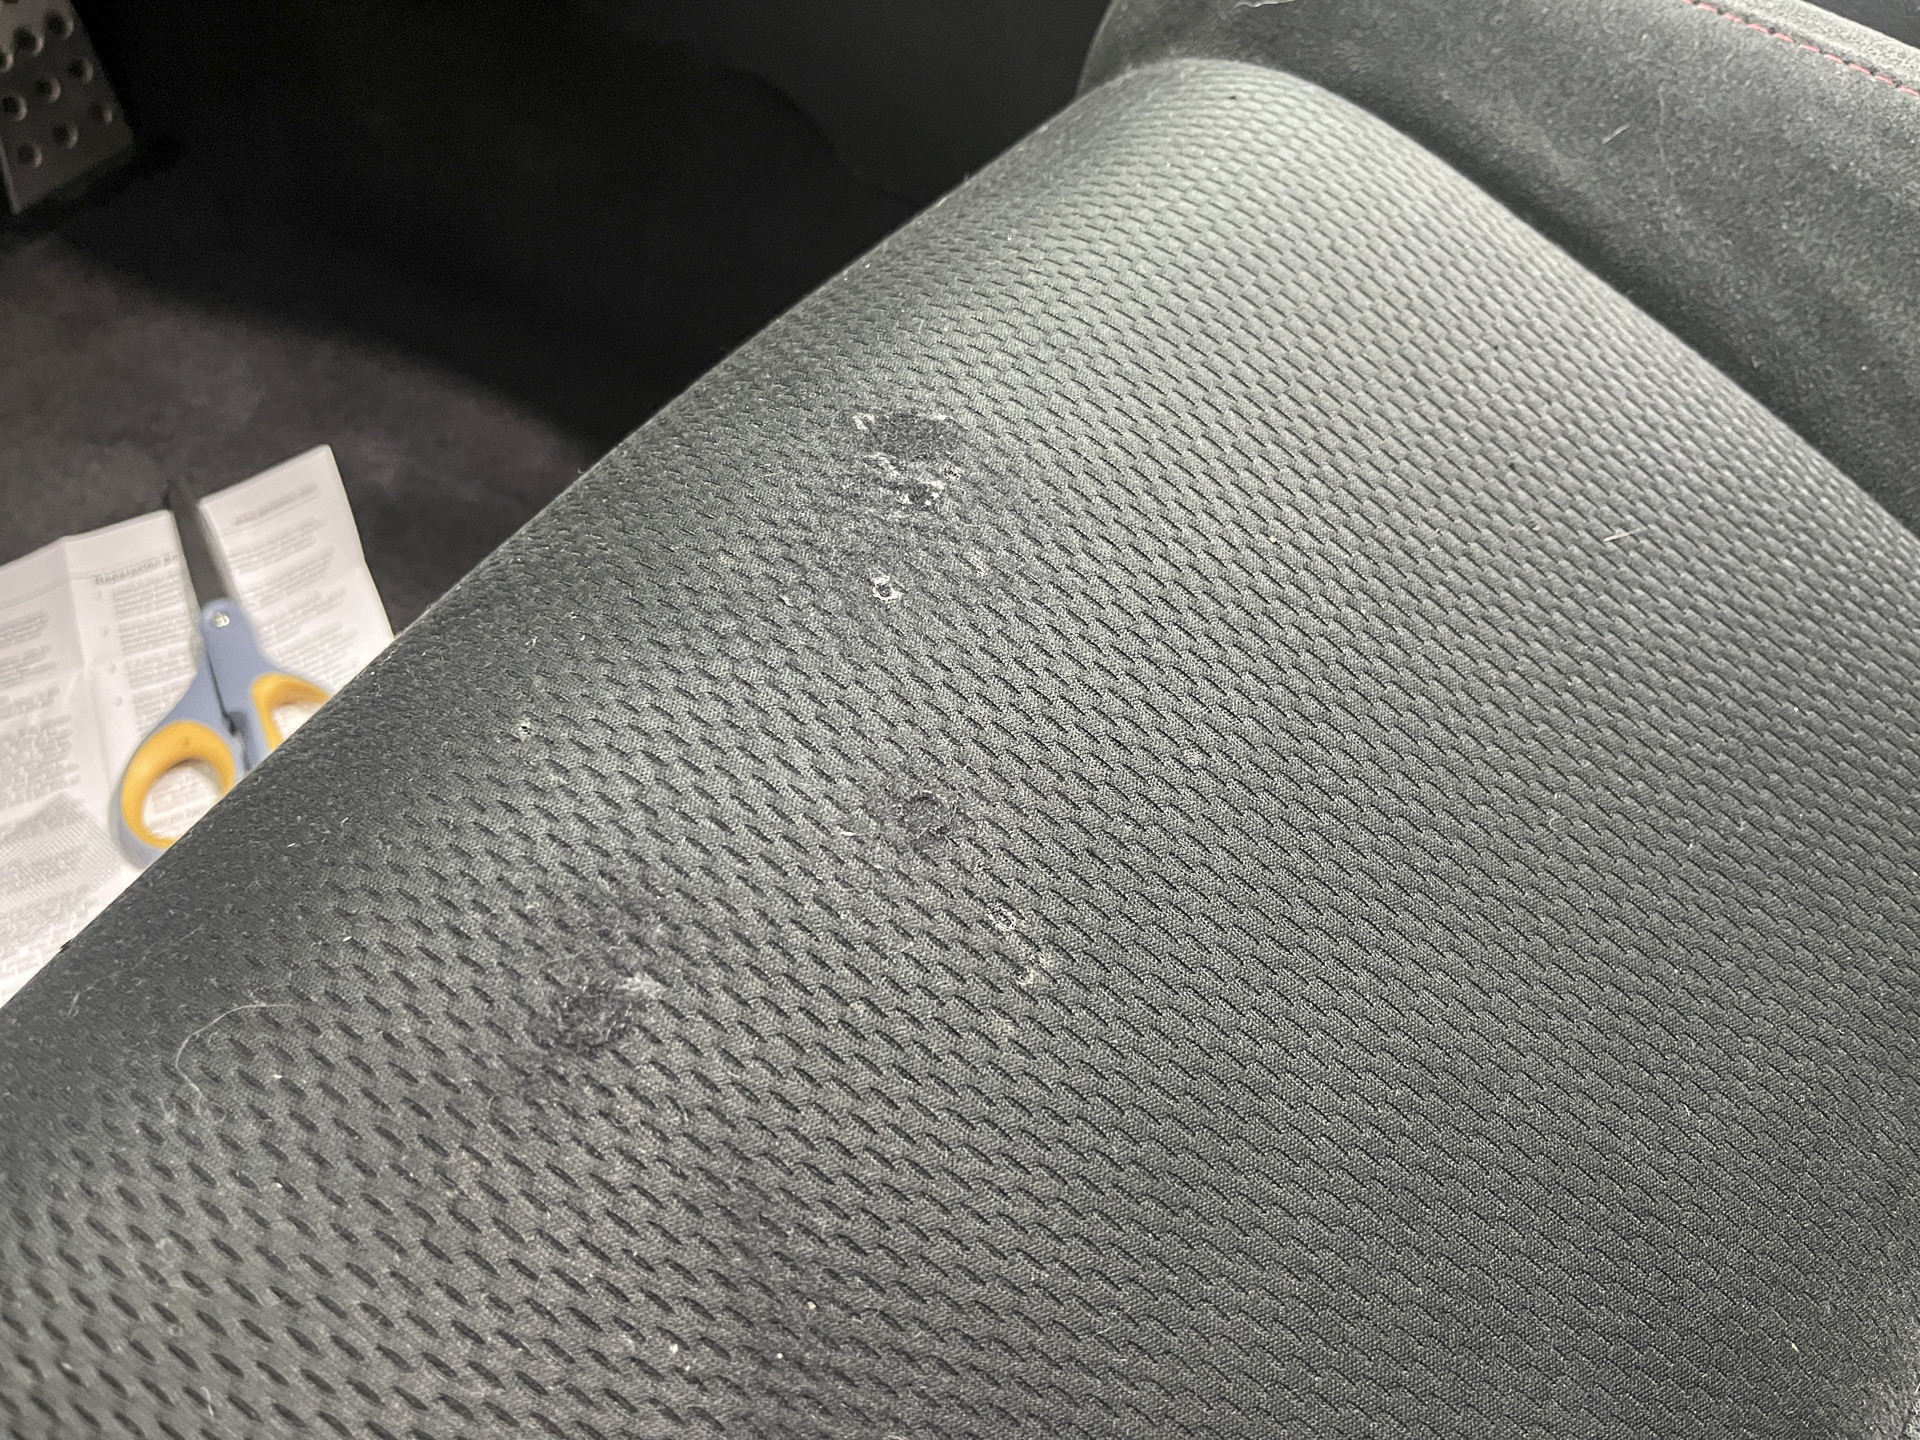 Final result of fabric burn hole repair
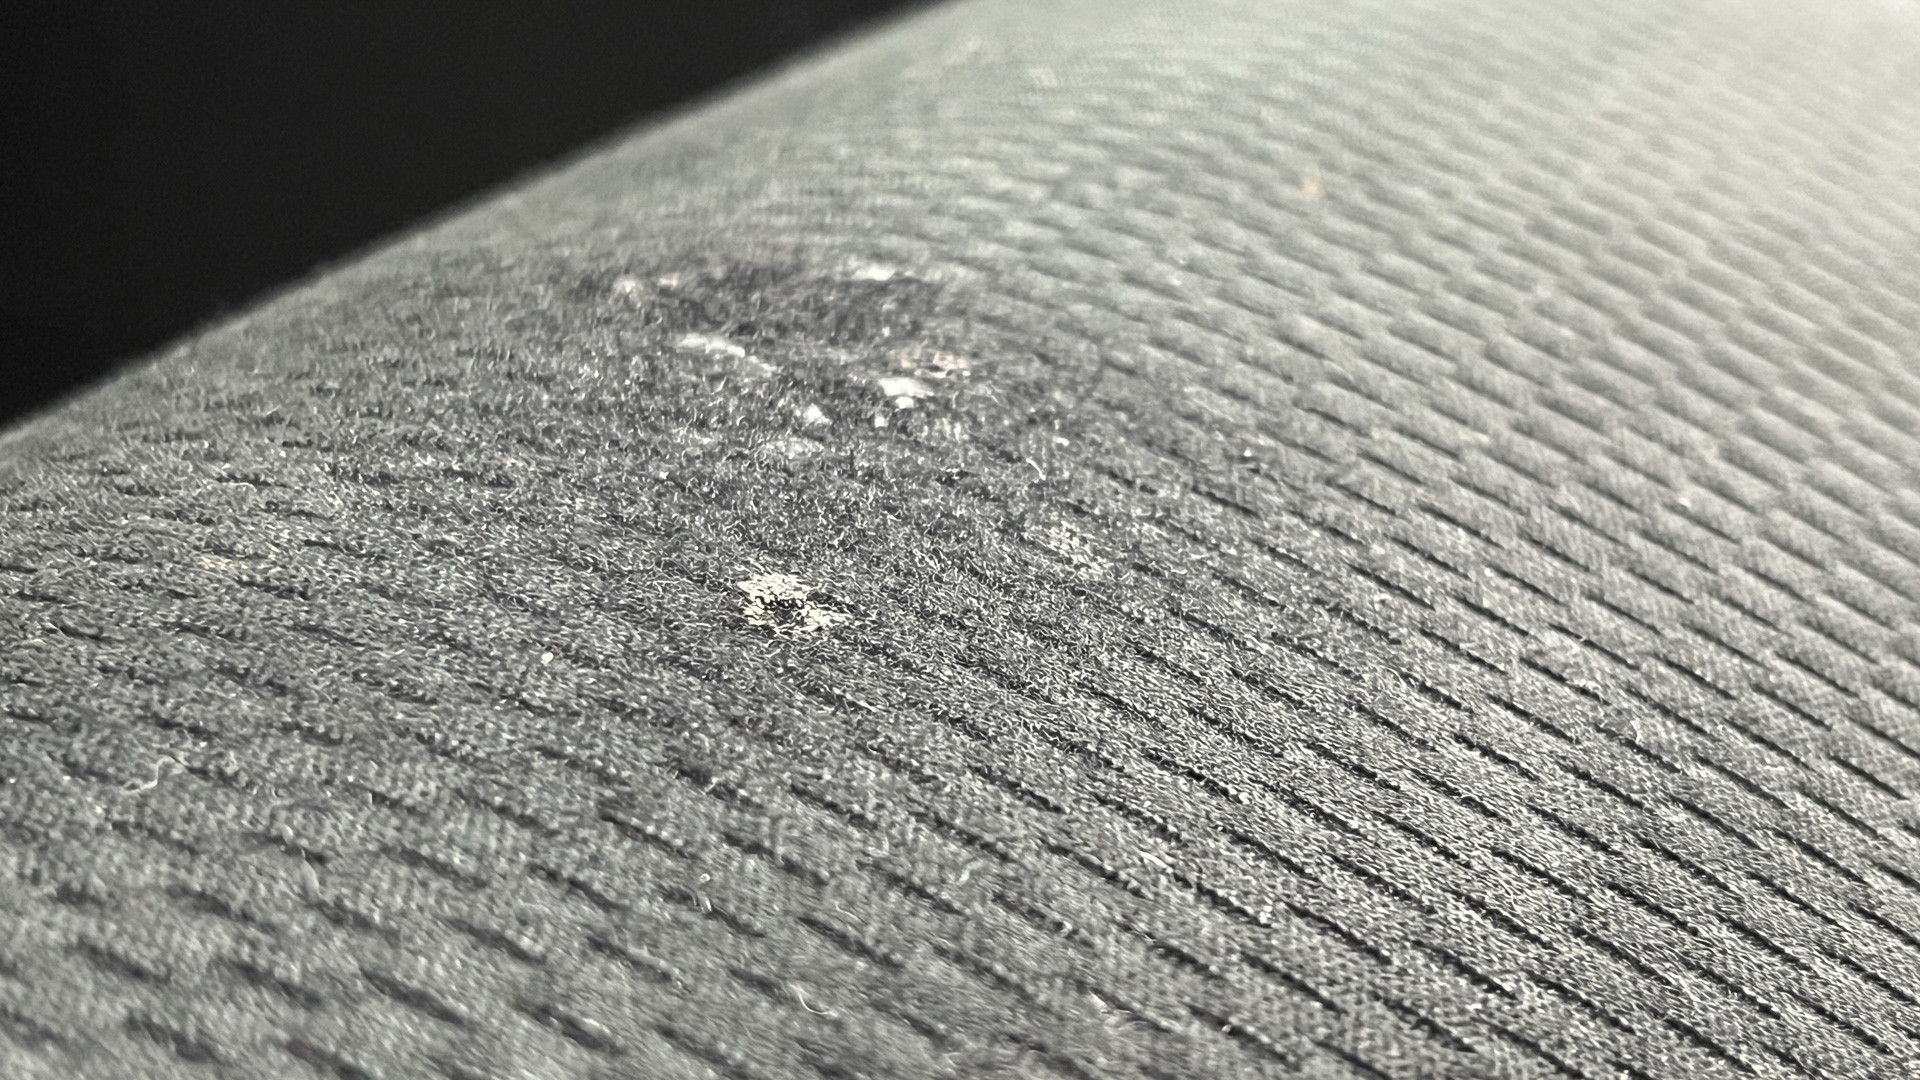 Before and after comparison of car seat burn hole repair
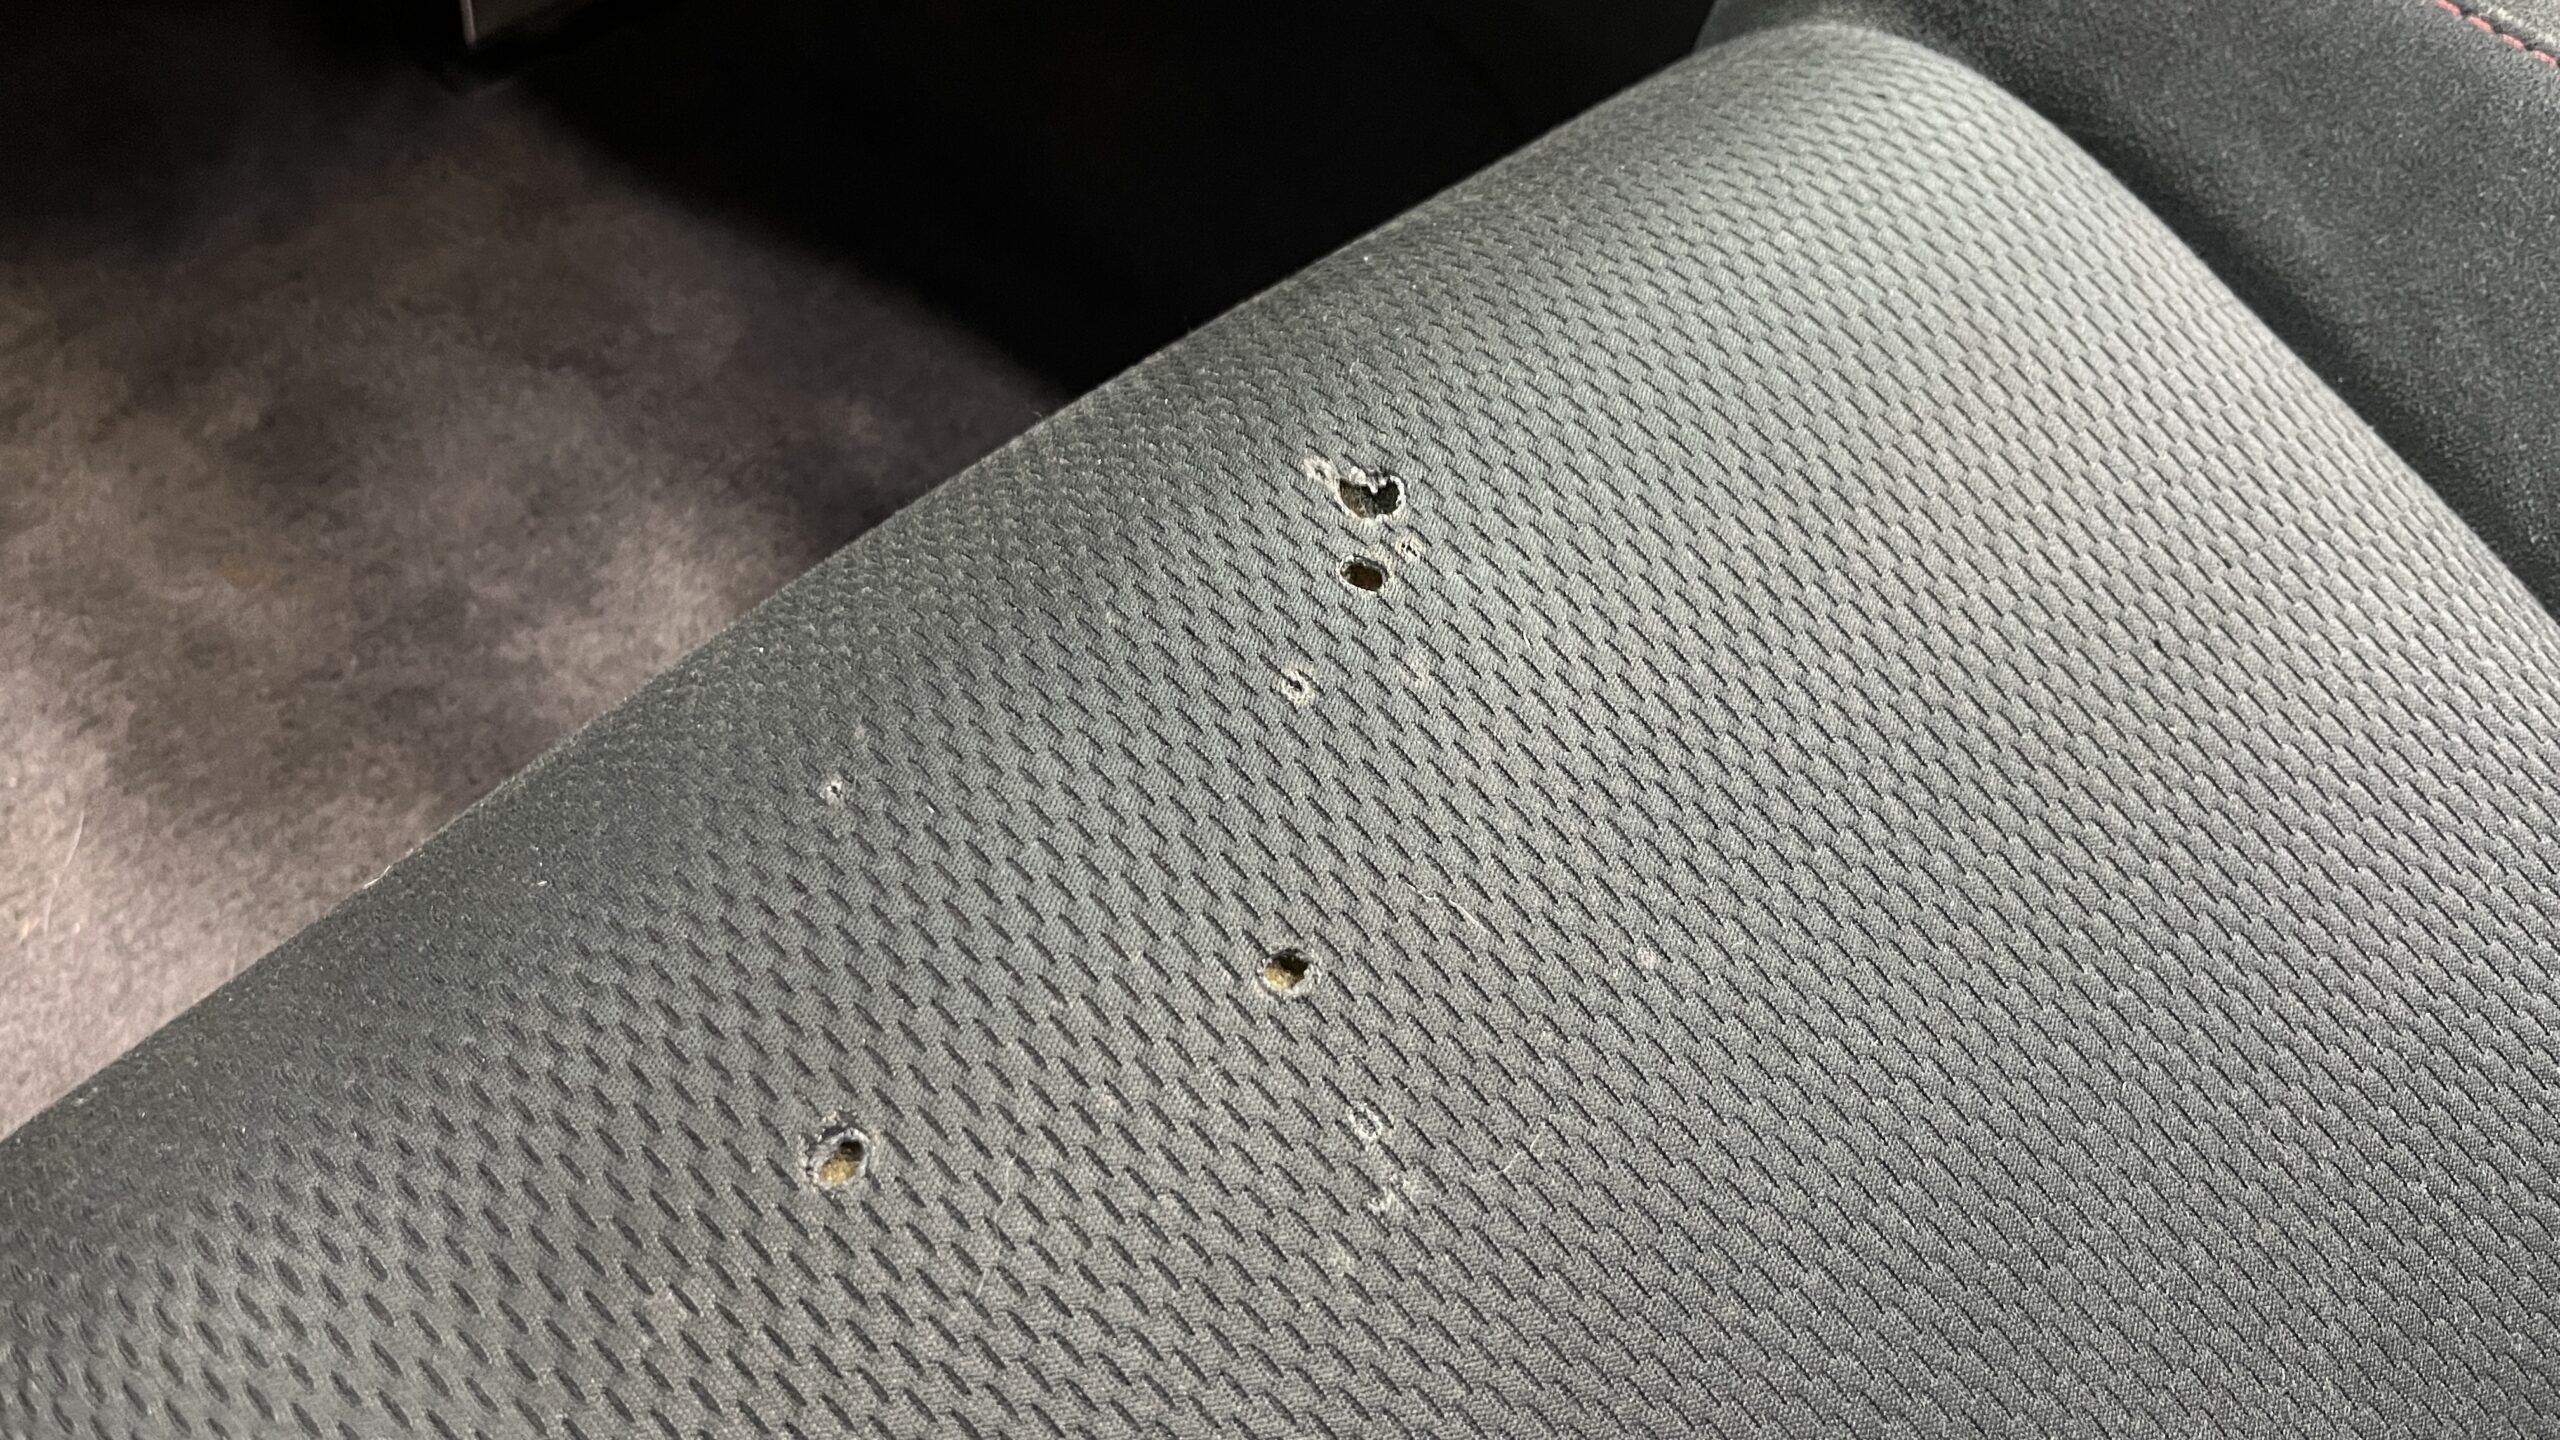 Before photo of damaged car seat
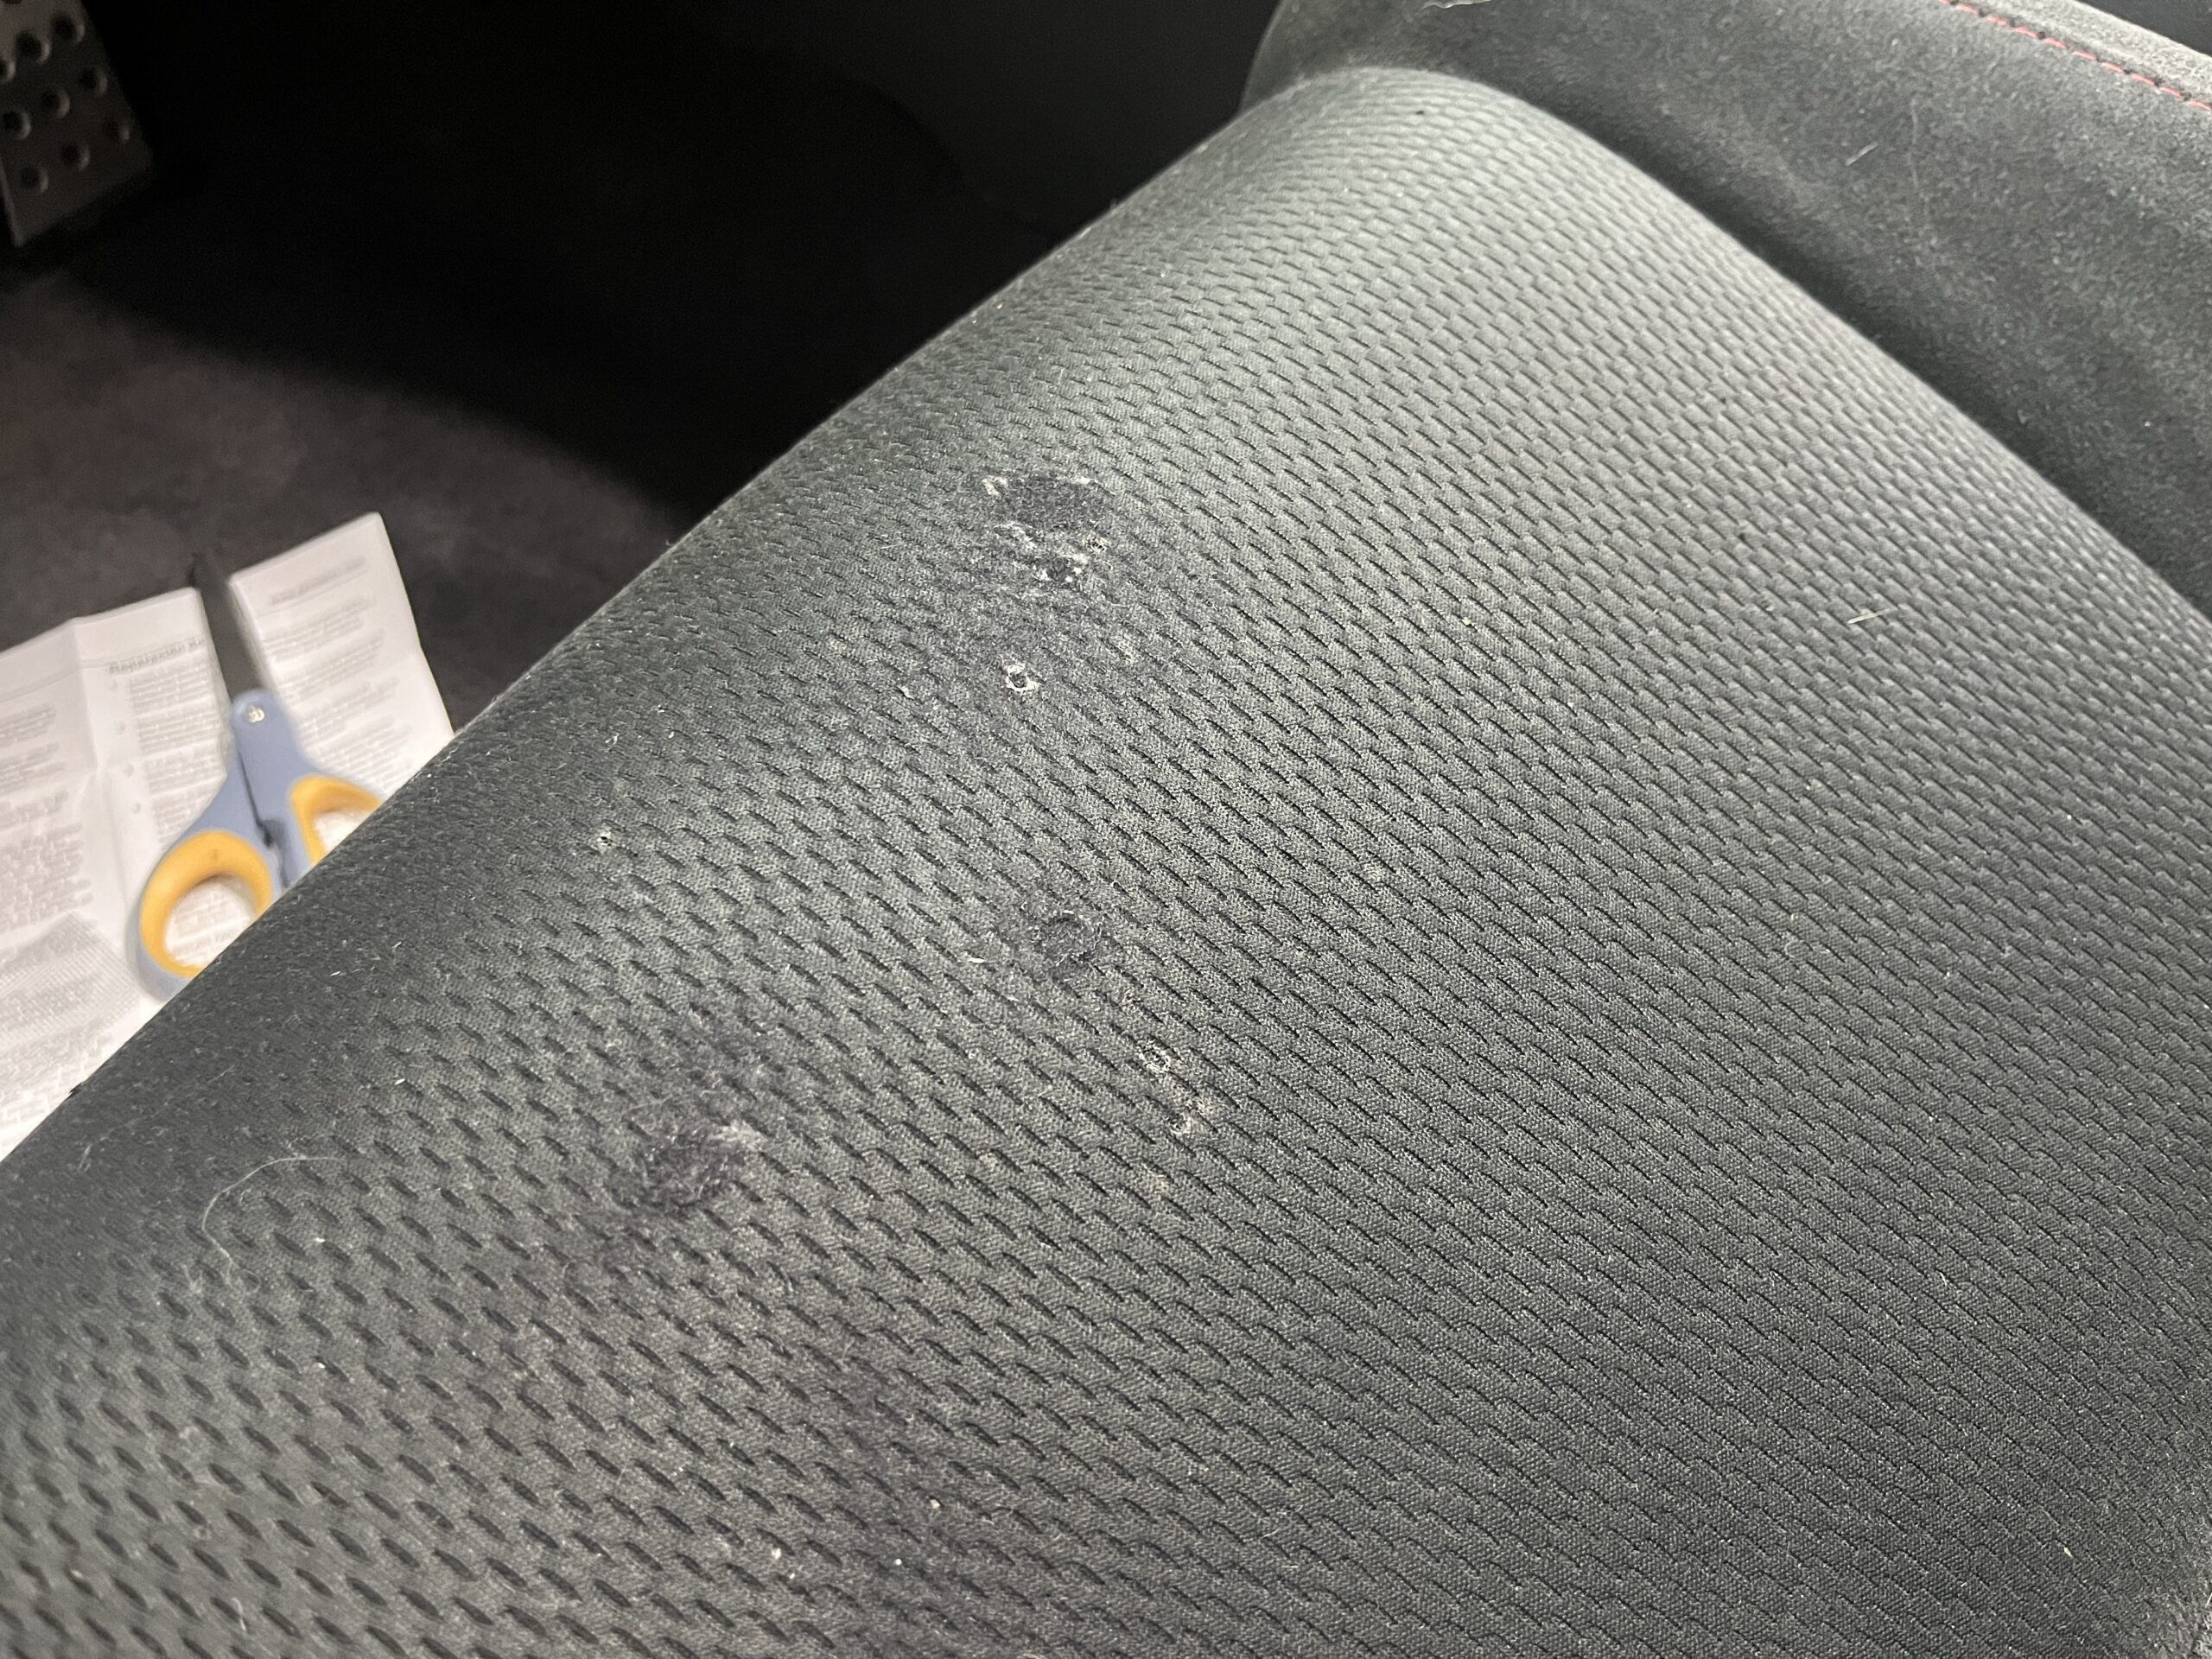 After photo of repaired car seat
Revitalizing Faded Embroidery
If your car seats have embroidered logos or designs that have faded due to sun exposure, fabric pens can be used to restore their color and vibrancy.
Using Fabric Pens for Recoloring
-
Clean the Embroidery: Gently clean the faded embroidery with a damp cloth to remove any dust or debris. Allow it to dry completely.
-
Select Fabric Pens: Choose fabric pens in colors that match the original embroidery. Primary color sets offer versatility for mixing colors if needed.
 Fabric pens for recoloring car seat embroidery
 -
Color the Embroidery: Carefully color in the faded embroidery with the fabric pens, staying within the lines of the design. Apply even strokes for consistent color. You may need to apply multiple coats for deeper color saturation, allowing each coat to dry slightly before applying the next.
-
Allow to Dry: Let the fabric pen ink dry completely. The colors will typically become more vibrant as they dry.
Application Tips for Embroidery
- Test in an Inconspicuous Area: Before coloring the entire embroidery, test the fabric pen on a hidden part of the seat or a scrap piece of similar fabric to ensure color match and ink performance.
- Use Good Lighting: Work in a well-lit area to ensure you can see the embroidery clearly and color accurately.
- Apply Light Coats: Build up the color gradually with light coats rather than applying heavy, thick layers of ink, which can bleed or look uneven.
Conclusion
Fixing cloth car seats at home is a rewarding DIY project that can save you money and significantly improve the look and feel of your car’s interior. By following these steps for cleaning, repairing, and revitalizing your seats, you can tackle common issues like stains, odors, burns, and fading. With the right tools, supplies, and a bit of patience, you can restore your cloth car seats to their former glory and enjoy a fresher, more comfortable driving experience.