How to Fix Car Tint Bubbles: A Comprehensive Guide

Car window tints enhance your vehicle’s aesthetics, providing a sleek, sophisticated look while also offering practical benefits like increased privacy and reduced heat and glare. However, those unsightly bubbles that sometimes appear can detract from the overall appeal. If you’re wondering How To Fix Car Tint Bubbles and restore that flawless finish, you’ve come to the right place. This guide will delve into the causes of these bubbles and provide a detailed, step-by-step method to effectively remove them, ensuring your car tint looks its best.
Understanding Window Tint and Bubble Formation
Before we jump into the fix, let’s briefly understand what window tint is and why bubbles occur. Window tint is essentially a robust polyester laminate, treated to achieve varying degrees of darkness. It’s applied to car windows to boost visual appeal, increase cabin privacy, and significantly reduce the amount of heat, glare, and harmful UV rays entering your vehicle.
Different types of window tint films are available, offering a spectrum of effects from subtle light tints to very dark, limo-style tints. Despite careful application, bubbles can sometimes surface post-installation, becoming a noticeable blemish. Let’s explore the common reasons behind these frustrating imperfections.
Alt text: A visually engaging image showcasing different types of car window tints, highlighting the variety of shades and finishes available for vehicle customization.
Common Causes of Car Tint Bubbles
Several factors can contribute to the formation of bubbles in your car window tint. Identifying these causes is the first step in preventing future issues.
How To Remove Bubbles From The Window Tint?
Alt text: Illustration depicting common car window tint bubble problems and emphasizing the need for effective removal solutions.
1. Improper Installation Techniques
One of the leading causes of bubbles is, undoubtedly, poor installation. Applying window tint requires precision and adherence to specific procedures. If you’re not familiar with how to properly tint car windows, mistakes are more likely to happen. For optimal adhesion and a bubble-free finish, a meticulous application process is crucial. Bubbles often arise when installers rush the job or fail to use a squeegee correctly to eliminate air and ensure the tint firmly bonds with the glass surface. For best results, especially if you’re aiming for a professional-grade look, consider professional window tinting services.
Alt text: Informative graphic promoting a step-by-step guide on car window tinting, aimed at DIY enthusiasts and professionals seeking best practices.
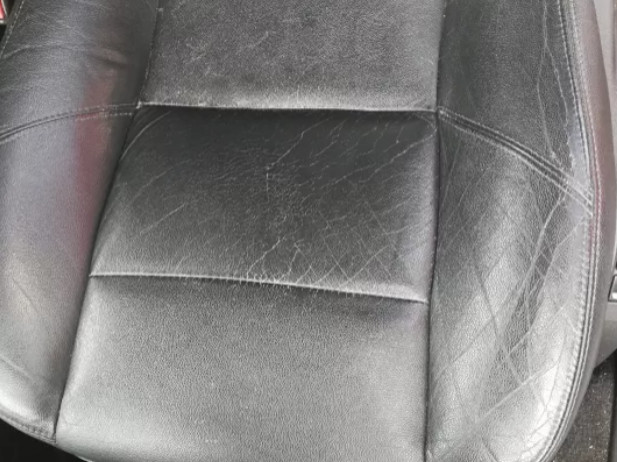
2. Substandard Tint Film Quality
The quality of the window tint film itself plays a significant role in its longevity and resistance to bubbling. Choosing a low-grade tint to save money might seem appealing initially, but these cheaper options often fall short in the long run. While they may look good immediately after application, inferior tints are prone to issues like cracking and bubbling within a few years, sometimes even sooner.
 How To Remove Bubbles From The Window Tint?
Alt text: Visual representation contrasting the durability and bubble-resistance of high-quality window tint films versus the common problems associated with low-quality alternatives.
Environmental factors, such as extreme temperature fluctuations and humidity, can also exacerbate bubbling in low-quality tints. Investing in high-quality window tint films, like those offered by reputable brands such as Vinyl Frog, is a wise decision to ensure durability and a flawless finish that lasts.
3. Inadequate Window Preparation Before Tinting
Proper window preparation is paramount for successful tint application. If the windows are not thoroughly cleaned before applying the tint, any residual debris, road grime, or environmental contaminants can become trapped, creating air pockets and leading to bubbles. Therefore, meticulous cleaning is essential. Ensure there’s not even a speck of dust on the glass surface. Vacuuming the car’s interior and the surrounding work area is also recommended to minimize contamination during the application process.
Alt text: An eye-catching flyer explaining different car window tint percentages and legal limitations, helpful for customers choosing their preferred tint darkness.
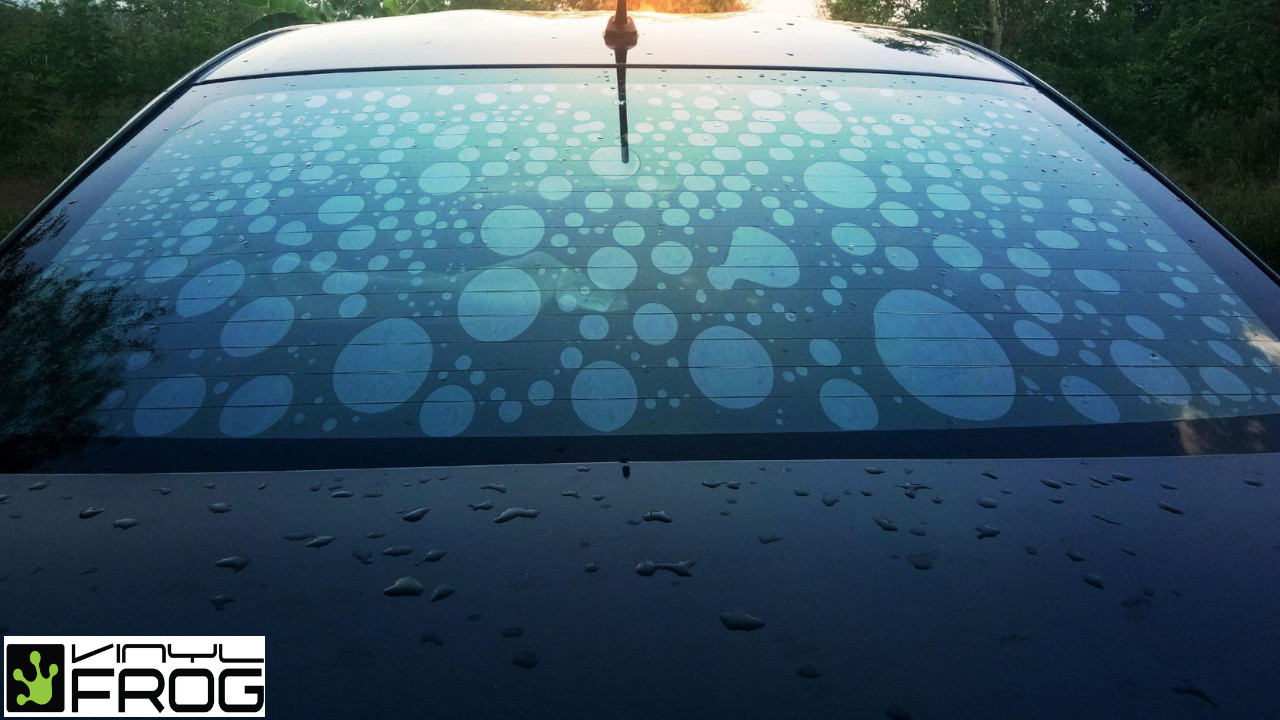
4. Temperature Fluctuations and Film Reaction
Temperature changes can significantly impact the lifespan and integrity of lower quality window tints. Car windows endure considerable temperature variations throughout the day – from intense heat in direct sunlight to cooler temperatures during the night.
Window tint is plastic-based, and prolonged exposure to intense sunlight and heat can stress the film’s structure, especially in cheaper tints. The adhesive in low-quality films can degrade, causing the tint to lose its conformity to the curved glass. This leads to stretching, cracking, and, ultimately, bubbling. Premium window tints are designed to withstand these temperature stresses much more effectively.
Essential Tools for Car Tint Bubble Removal
Before you begin the process of removing bubbles from your car window tint, gather the necessary tools to ensure an efficient and damage-free repair.
- Heat Gun or Hair Dryer: A heat gun is ideal for providing controlled heat to make the tint more pliable. A hair dryer can serve as a substitute, though it may take longer to heat the area sufficiently. Vinyl Frog offers professional-grade heat guns specifically designed for automotive film applications, ensuring even heat distribution.
- Mild Dish Soap and Water Solution: Create a mixture of mild dish soap and water in a spray bottle. This soapy water solution acts as a lubricant and helps make the tint more malleable when heated.
- Spray Bottle: A standard spray bottle to apply the soapy water solution evenly over the tinted area.
- Squeegee: A squeegee is crucial for smoothing out the bubbles and re-adhering the tint to the glass. Vinyl Frog offers a range of squeegees in different shapes and hardness levels, designed to smooth films without scratching or damaging the surface. A hard card squeegee is generally recommended for this task.
- Air Release Pen or Fine Needle: An air release pen, with its fine retractable pin, is perfect for precisely puncturing bubbles to release trapped air. Alternatively, a very fine needle or pin can be used with caution. Vinyl Frog also provides air release pens at an affordable price, designed for delicate film work.
Step-by-Step Guide: How to Remove Bubbles from Car Tint
With your tools ready, follow these steps to effectively remove air bubbles from your car window tint and restore a smooth, flawless appearance.
 How To Remove Bubbles From The Window Tint?
Alt text: A step-by-step visual guide illustrating the process of removing bubbles from car window tint using common tools and techniques.
Step 1: Gently Heat the Window Tint
Using your heat gun or hair dryer, apply heat evenly over the bubbled area of the window tint. The heat will make the tint film more flexible, allowing you to manipulate it and release trapped air. If using a heat gun, keep it moving and maintain a safe distance to avoid overheating and damaging the tint. If it’s a cold day, ensure your garage or workspace is heated to prevent the glass from cooling down too quickly, which could make the tint brittle.
Step 2: Apply Soapy Water Solution
Prepare your dish soap and water mixture in the spray bottle and generously spray it over the heated tint area. Apply the soapy water immediately after heating, while the tint is still warm. The combination of heat and soapy water will further soften the adhesive, making it easier to work with and remove bubbles. Ensure the tint is moist but not soaking wet.
Alt text: A car window showcasing a 20 percent tint, highlighting the balance between privacy and visibility for automotive window films.
Step 3: Puncture the Bubbles
Now, take your air release pen or fine needle and carefully puncture each bubble in the center. Make a very small hole in each bubble to allow the trapped air to escape. Be gentle and patient during this step to avoid tearing the film or scratching the glass underneath. Continue to lightly spray the area with soapy water to keep it moist as you work.
Step 4: Squeegee Out the Air
Using your squeegee, begin to smooth out the bubbles. Hold the squeegee at a 45-degree angle and start from the outer edge of each bubble. Apply firm, even pressure and glide the squeegee towards the tiny hole you created in the center. Use long, smooth strokes to push the air out. Avoid rushing this step to prevent tearing the tint film. Maintain a warm environment and keep the film slightly moist with soapy water throughout this process to ensure pliability and successful bubble removal.
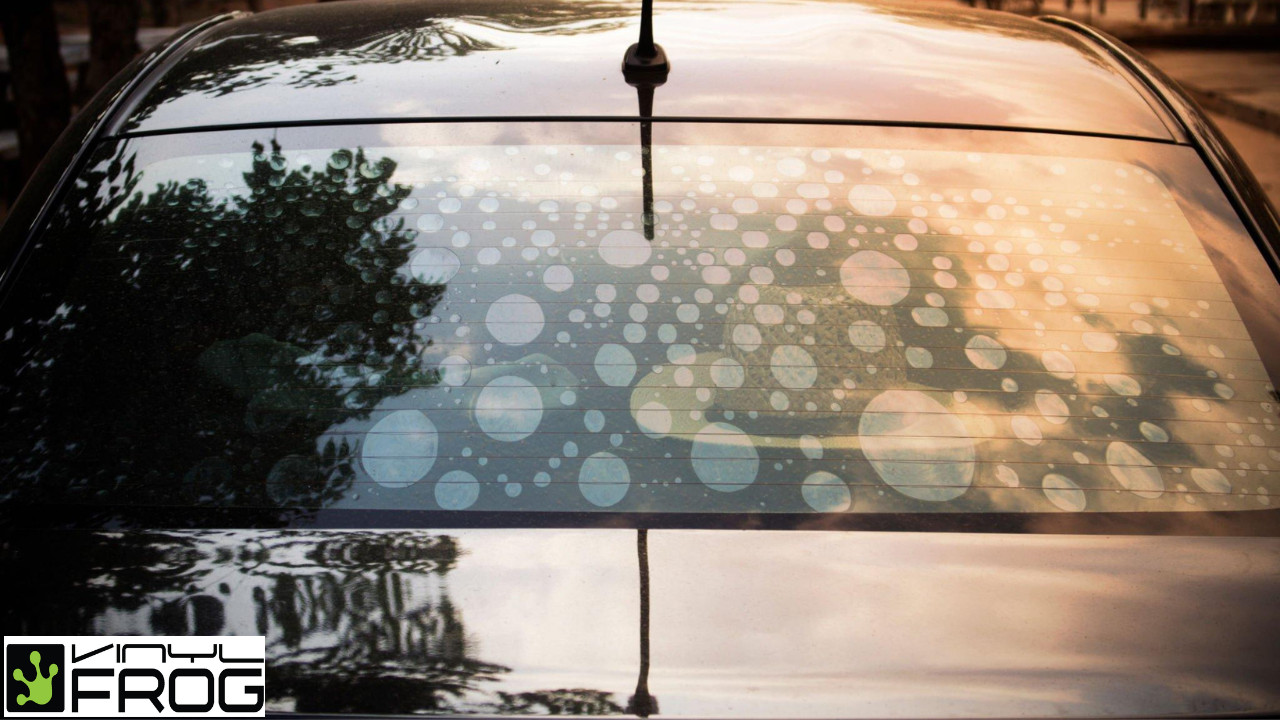
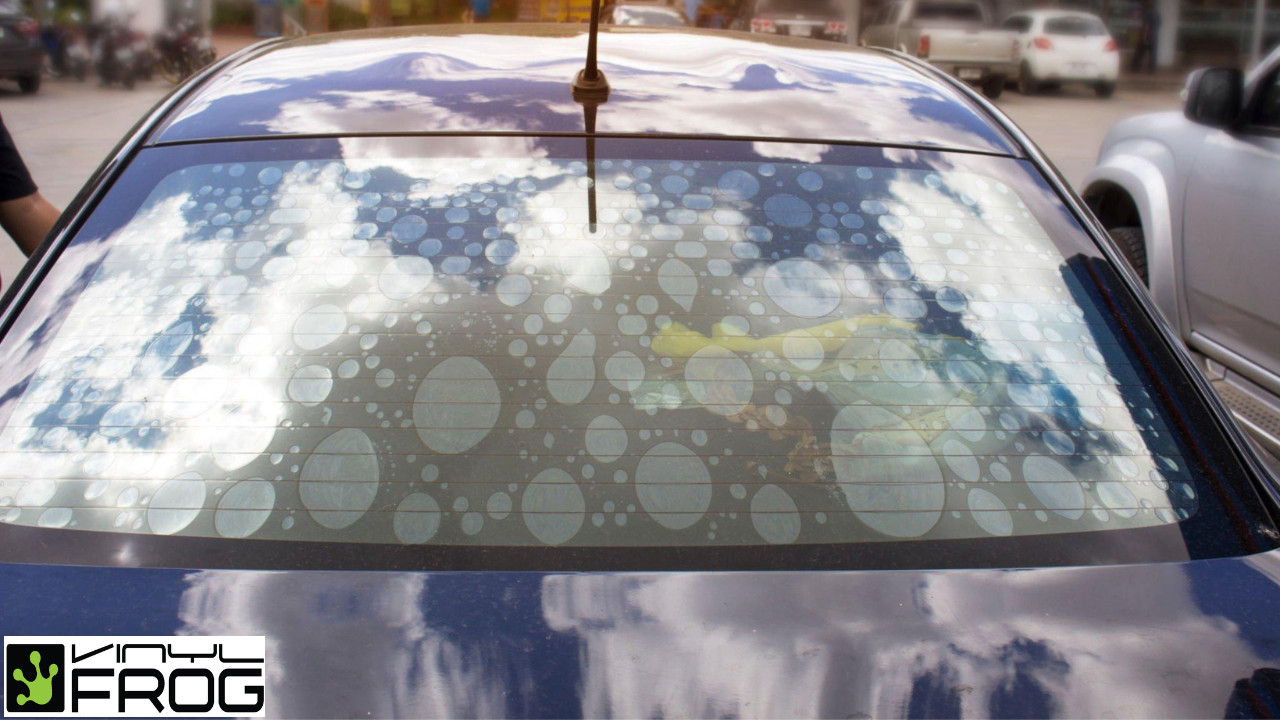
Understanding Different Types of Window Tint Bubbles
Not all bubbles are created equal, and understanding the type of bubble you’re dealing with can help you determine the best course of action.
 How To Remove Bubbles From The Window Tint?
Alt text: A comparison of different types of bubbles that can occur in car window tint, including water bubbles, air bubbles, soap bubbles, and dirt bubbles.
- Water Bubbles: These are common shortly after tint installation, caused by trapped moisture between the tint and the glass. They typically appear hazy and are usually not a cause for concern as they naturally evaporate within a few weeks.
- Air Bubbles: Hazy window tints often indicate air bubbles. Large air bubbles (over an inch) usually signal adhesive failure. Smaller air bubbles (under a quarter-inch) often result from installation errors. These smaller air bubbles are typically the ones you can remove using the method described above.
- Soap Bubbles: These are caused by residual soap left from the installation process due to improper window cleaning or application. Unlike water bubbles, they don’t disappear completely but may shrink as the adhesive cures.
- Dirt Bubbles: These are the most problematic. Caused by dirt or dust particles trapped during installation due to inadequate window cleaning. Dirt bubbles tend to worsen over time and are often impossible to remove without replacing the tint section. Prevention through meticulous window cleaning is key.
Preventing Car Tint Bubbles: Proactive Measures
Prevention is always better than cure. Avoiding bubble formation in the first place will save you time and effort. Here’s how to minimize the risk of bubbles when tinting your car windows:
Alt text: A sleek car showcasing 15 percent window tint, emphasizing the aesthetic appeal and privacy benefits of professionally applied, high-quality tint films.
- Professional Installation: If you’re not experienced with window tinting, hiring a professional installer is highly recommended. Professionals are skilled in proper application techniques and can ensure a bubble-free finish. Research and choose a reputable installer with positive reviews and experience.
- High-Quality Tint Film: Invest in premium quality window tint films from reputable brands like Vinyl Frog. High-quality films are more resistant to bubbling, cracking, and fading, offering better long-term value.
- Meticulous Window Preparation: Whether you’re doing it yourself or hiring a professional, ensure the windows are thoroughly cleaned before tint application. Use appropriate, ammonia-free window cleaners to remove all dirt, grease, and contaminants. A clean environment is crucial – vacuum the garage and car interior to minimize airborne particles.
- Follow Proper Application Procedures: If you’re attempting DIY tinting, strictly adhere to recommended application procedures. Watch tutorials, understand the process, and take your time. Proper squeegeeing technique is essential for eliminating air and ensuring good adhesion.
Frequently Asked Questions About Car Tint Bubbles
Is it safe to use a heat gun and needle on my window tint?
Yes, when done carefully. Use caution and gentle movements to avoid scratching the glass or tearing the tint. Patience is key. Rushing can lead to damage.
How long does it take to remove bubbles from car tint?
The time varies based on the number, size, and location of bubbles. It could take from a few minutes to several hours. Taking your time ensures a better outcome.
Do bubbles in car tint affect its performance?
Yes, bubbles can compromise the tint’s effectiveness. They can reduce its ability to block UV rays and heat, and definitely detract from the vehicle’s appearance.
Is it normal for new window tint to have bubbles?
Yes, it’s normal to see some water bubbles in freshly installed tint. These should disappear within a couple of weeks as the moisture evaporates. If bubbles persist beyond this period, they need to be addressed.
How long should water bubbles in window tint last?
Water bubbles should typically disappear within two weeks, depending on sun exposure which aids evaporation. If they remain longer, it could indicate installation issues or low-quality film.
Final Thoughts
Removing bubbles from car window tint is a manageable DIY task with the right tools, patience, and techniques. By following the steps outlined in this guide, you can effectively restore the sleek look of your car windows. Preventing bubbles through professional installation, quality films, and careful preparation is always the best approach. If you’re uncertain about bubble removal or encounter persistent issues, seeking professional advice is recommended. For high-quality window tints and tools, explore Vinyl Frog’s extensive online store and ensure your car always looks its best.