How to Fix Car Seat Upholstery: A DIY Guide for Every Car Owner
Torn car seat upholstery can quickly diminish the appeal of your car’s interior. Even a small rip or burn can detract from an otherwise well-maintained vehicle. Before you consider expensive seat covers or professional reupholstery, there are several straightforward DIY methods to restore your car’s interior and save money.
repair car upholstery
1. Assessing the Damage to Your Car Seat Upholstery
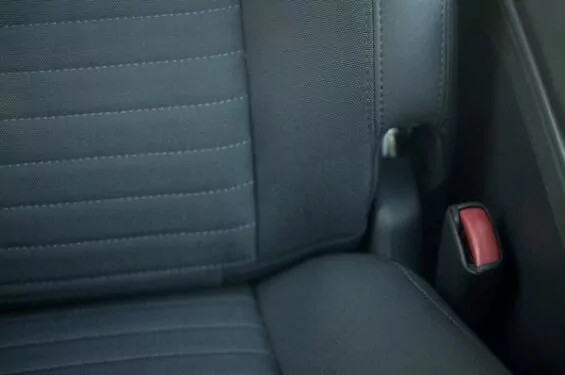
The first critical step in car seat upholstery repair is to thoroughly assess the extent of the damage. For leather upholstery, significant tears or large holes might be beyond DIY repair. Crucially, if the damage extends to safety features like seat belts, it’s imperative to consult a professional for repairs. Never attempt to fix damage that compromises your vehicle’s safety systems.
Remember that while DIY repairs can effectively mend tears and holes, they may not restore the upholstery to a factory-new condition. If the damage is in a prominent area, or if you plan to keep your car for many years, professional upholstery repair might be a worthwhile investment for a seamless finish.
2. Sewing Tears in Cloth Car Seats
For minor tears in cloth seats, simple sewing techniques can provide effective repairs. You’ll need a curved upholstery needle and durable, upholstery-specific thread in a color that closely matches your car seats.
Steps to Sew Tears:
- Thread the Needle: Thread your curved upholstery needle with the matching thread and knot the end securely.
- Stitch the Tear Closed: Starting from the underside of the seat fabric if possible, carefully stitch the edges of the tear together. Use small, tight stitches to ensure a strong and discreet repair. If you’re new to sewing, practice on a scrap piece of fabric to get comfortable with your stitch.
- Secure the Stitch: Once the tear is completely sewn, knot and trim the thread.
- Apply Fabric Sealant: To prevent fraying and reinforce the repair, apply a fabric sealant along both sides of the stitched area. This will help ensure the longevity of your DIY car seat upholstery repair.
3. Patching Small Holes in Car Seats
Small holes, particularly those less than two inches in diameter caused by cigarette burns or pet damage, are often easily patched on cloth car seats. This method involves using a heat-activated fabric interfacing and adhesive. You’ll need to find a patch fabric that closely matches the color and texture of your existing car upholstery and purchase fabric adhesive from a craft or auto supply store.
Steps to Patch Holes:
- Prepare the Patch Fabric: Measure the hole and cut a piece of your chosen patch fabric slightly larger than the hole to allow for overlap. Ensure the edges of your patch are neat and square for a clean finish.
- Insert Fabric Adhesive: Cut a piece of fabric adhesive larger than the hole. Carefully tuck the adhesive inside the torn area, positioning it beneath the hole.
- Apply the Fabric Patch: Place the fabric patch directly over the hole, aligning it carefully with the surrounding upholstery.
- Heat and Bond: Following the adhesive manufacturer’s instructions, use an iron on a low setting to gently heat the fabric patch. The heat will activate the adhesive, bonding the patch to the underside of the upholstery and effectively covering the hole. Ensure proper ventilation when using adhesives and sealants.
4. Buffing Out Scratches in Leather Car Seats
Leather car upholstery requires different repair techniques compared to cloth. While deep tears or punctures in leather often necessitate professional attention, surface scratches can often be improved with DIY methods.
Steps to Buff Scratches:
- Clean the Leather Surface: Before attempting any scratch repair, thoroughly clean the leather car seat surface with a leather cleaner to remove dirt and grime.
- Apply Leather Conditioner: Use a high-quality leather conditioning cream. Apply a small amount to a soft cloth and gently buff the scratched area in a circular motion. Leather conditioner can often minimize the appearance of minor scratches by hydrating the leather.
- Consider Leather Lacquer (for Deeper Scratches): If leather conditioner alone is insufficient, a specialized spray leather lacquer designed for car interiors may help. Apply a very light coat of spray lacquer to the scratched area, following the manufacturer’s directions meticulously. It’s always better to apply multiple thin coats than one thick coat to avoid overdoing it. Allow each coat to dry completely before applying another.
- Explore Leather Repair Kits: Contact your car dealership or auto parts store for leather repair kits specifically designed for your car’s interior. These kits often contain color-matched fillers and sealants for more comprehensive leather scratch repair.
Regular cleaning and conditioning are vital for maintaining leather car seats and preventing further damage.
By following these DIY steps, you can effectively address common car seat upholstery issues, saving money and maintaining the appearance of your car’s interior. Remember to prioritize safety and consider professional help for significant damage or repairs involving safety components.