How to Fix a Car Horn Not Working: A Step-by-Step Guide
A working car horn is not just a courtesy; it’s a crucial safety feature of your vehicle. It allows you to alert other drivers and pedestrians, potentially preventing accidents. Discovering your car horn is not working can be frustrating and, more importantly, unsafe. Fortunately, diagnosing and fixing a car horn that’s stopped working is often something you can do yourself with a few simple steps. This guide will walk you through troubleshooting and fixing a car horn that isn’t working, ensuring you get back on the road safely and with a voice for your vehicle.
Troubleshooting Steps to Fix a Car Horn
When your car horn fails, don’t immediately assume it’s a complicated issue. Often, the problem is something simple to check and fix. Follow these steps in a logical order to pinpoint the issue and get your horn honking again.
Step 1: Check the Fuse
The first and easiest place to start is the fuse box. Car horns are protected by a fuse, and a blown fuse is a common cause of horn failure.
- Locate your fuse box: Refer to your car’s owner’s manual to find the location of the fuse box. It’s usually under the dashboard, in the glove compartment, or under the hood.
- Identify the horn fuse: Again, your owner’s manual is your best friend here. It will have a diagram of the fuse box and label each fuse. Look for a fuse labeled “Horn” or something similar.
- Inspect the fuse: Carefully remove the fuse. You can usually pull it out with your fingers or use a fuse puller tool if available. Hold the fuse up to the light and check the thin wire inside. If the wire is broken or melted, the fuse is blown and needs replacement.
- Replace the fuse: Replace the blown fuse with a new fuse of the exact same amperage. Using a fuse with a higher amperage can cause damage to your car’s electrical system. Start with a new fuse and test the horn. If it blows again immediately, there’s likely a short circuit somewhere else in the system, and you’ll need to investigate further.
Step 2: Test the Horn Directly
If the fuse isn’t the problem, the next step is to test the horn itself to see if it’s functioning.
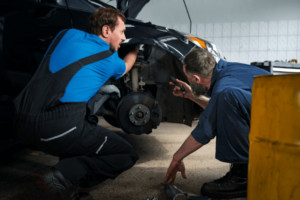
- Locate the horn: Car horns are typically located under the hood, often near the front grille area. You might see one or two round, trumpet-shaped devices.
- Access the horn connectors: You’ll see wires connected to the horn. There are usually two terminals on the horn.
- Directly connect to the battery: Using jumper cables or spare wires, carefully connect one wire directly from the positive (+) terminal of your car battery to one of the horn terminals. Then, connect another wire from the negative (-) terminal of the battery to the other horn terminal.
- Observe the horn: If the horn is working, it should sound loudly when you complete the circuit by touching the second wire to the negative battery terminal.
- If the horn works: This means the horn itself is fine, and the problem lies in the wiring, horn button, or relay.
- If the horn doesn’t work: Even with a direct battery connection, the horn is likely faulty and needs to be replaced. Since you already tried a new horn and it didn’t work (as mentioned in the original post), double-check your direct battery connection to be absolutely sure before concluding both horns are bad. It’s less likely both are faulty, so re-test the new horn directly to be certain.
Step 3: Inspect the Wiring and Connections
A common issue with car horns, especially in older vehicles, is corroded or damaged wiring.
- Visually inspect the wires: Trace the wires leading to the horn, starting from the horn itself and going back towards the fuse box and steering column if possible. Look for:
- Damage: Cracked, frayed, or melted wire insulation.
- Breaks: Wires that are completely severed.
- Corrosion: Greenish or white buildup on the wires or connectors, especially at connection points.
- Check the connections: Pay close attention to the connectors at the horn, fuse box, and any relays in the horn circuit.
- Loose connections: Make sure the connectors are firmly attached and not loose.
- Corrosion: Clean any corrosion from the connectors using a wire brush or electrical contact cleaner. Disconnect and reconnect the connectors to ensure a good connection.
- Grounding issues: Car horns rely on a good ground connection to complete the circuit. Check the ground wire (usually attached to the car’s chassis near the horn) to ensure it’s securely fastened and free from corrosion. A bad ground can prevent the horn from working even if power is reaching it.
Step 4: Examine the Horn Relay (if applicable)
Some vehicles use a relay in the horn circuit. A relay is an electrical switch that uses a small current to control a larger current. If your car has a horn relay, a faulty relay could be the culprit.
- Locate the horn relay: Check your owner’s manual for the location of the horn relay. It’s often found in the fuse box under the hood or in a separate relay box. It may be labeled “Horn Relay.”
- Test the relay: Relays can be tested in a couple of ways:
- Relay swapping: If you have an identical relay in your fuse box (for example, for the headlights or windshield wipers), you can try swapping it with the horn relay. If the horn starts working after the swap, the original relay is likely faulty. Make sure the replacement relay has the same part number or specifications.
- Listening for a click: When someone presses the horn button, you should be able to hear a faint “click” from the relay if it’s functioning. If you don’t hear a click, the relay might not be getting the signal to activate.
- Replace the relay: If you suspect a faulty relay, replace it with a new relay of the correct type. Relays are relatively inexpensive and easy to replace.
Step 5: Investigate the Horn Button and Steering Column
If you’ve ruled out the fuse, horn itself, wiring, and relay, the problem might be with the horn button in your steering wheel or the associated components in the steering column.
- Horn button continuity: Testing the horn button directly often requires some disassembly of the steering wheel and column, which can be complex and may involve airbags in modern vehicles. If you are not comfortable working with these components, it’s best to consult a professional mechanic. However, in older vehicles (like the MG Midget mentioned in the original post), the horn button mechanism might be simpler to access.
- Steering column wiring: Inside the steering column, there are wires and contacts that allow the horn signal to pass from the rotating steering wheel to the car’s electrical system. These contacts can become corroded or worn over time, especially in older vehicles.
- Cleaning contacts: If you are comfortable accessing the steering column contacts (again, proceed with caution, especially with airbags), carefully inspect and clean them with electrical contact cleaner. Sometimes, simply cleaning these contacts can restore the horn function. The original forum post mentions cleaning the “copper contact ring and contactor” in the steering column as a solution.
Conclusion
Troubleshooting a car horn that’s not working involves a systematic approach. Start with the simplest and most common causes like the fuse, and then move to more complex components like the horn itself, wiring, relay, and finally the horn button and steering column.
If you’ve gone through these steps and still can’t get your car horn to work, or if you are uncomfortable working with car electrical systems or steering column components, it’s always best to consult a qualified mechanic. A professional can accurately diagnose the problem and perform the necessary repairs to ensure your car horn is functioning reliably and safely. Regular car maintenance, including checking basic functions like the horn, can help prevent these issues and keep you safe on the road.