How to Fix Bad Touch Up Paint on Your Car
Bad touch-up paint jobs can be an eyesore, detracting from your car’s appearance instead of improving it. Whether it’s a mismatched color, uneven application, or simply too much paint, a poor touch-up can be more noticeable than the original scratch or chip. Fortunately, fixing bad touch-up paint is a manageable DIY project with the right approach and tools. This guide will walk you through the steps to correct common touch-up paint mistakes and restore a smooth, flawless finish to your car’s paintwork.
Identifying and Assessing Bad Touch Up Paint
Before you start fixing, it’s crucial to identify what makes the touch-up job “bad”. Common signs include:
- Color Mismatch: The touch-up paint is noticeably different in shade or hue compared to the surrounding original paint.
- Paint Blobs or High Spots: The touch-up paint is applied too thickly, creating raised areas that are visually and tactilely uneven.
- Rough Texture: The touch-up area feels rough or gritty, lacking the smooth, glossy finish of the original paint.
- Visible Brush Strokes: If applied with a brush, you might see distinct brush marks within the touch-up area.
- Clear Coat Issues (if applicable): If a clear coat was improperly applied over the touch-up, it might appear cloudy, peel, or have an orange peel texture.
Understanding the specific issue will help you choose the right correction method. For minor imperfections, a simple leveling and polishing might suffice. For more severe problems like significant color mismatch or thick paint blobs, more aggressive techniques like wet sanding may be necessary.
Tools and Materials You’ll Need
To effectively fix bad touch up paint, gather these essential tools and materials:
- Automotive Wet/Dry Sandpaper: Assortment of grits, typically starting with 2000, 2500, and 3000 grit. For very thick applications, you might need coarser grits like 1500 initially, but proceed cautiously.
- Sanding Block: A rubber or felt sanding block to ensure even pressure and prevent finger marks.
- Spray Bottle with Water and a Drop of Car Wash Soap: Used for wet sanding.
- Rubbing Compound: A mildly abrasive compound to level the touch-up paint and remove scratches from sanding.
- Polishing Compound: A finer compound to refine the finish after rubbing compound and enhance gloss.
- Microfiber Cloths: For applying compounds, buffing, and cleaning.
- Detailing Swabs or Pointed Foam Applicators: For precise application of compound in small areas.
- Masking Tape (Automotive Grade): To protect surrounding paint.
- Wax or Sealant: To protect the corrected area after polishing.
- Gloves: To protect your hands.
- Good Lighting: Essential for seeing imperfections and monitoring your progress.
Step-by-Step Guide to Fixing Bad Touch Up Paint
1. Preparation and Cleaning:
Thoroughly wash and dry the area around the bad touch-up paint. Remove any dirt, wax, or contaminants that could interfere with the correction process. Use a quality car wash soap and ensure the area is completely dry before proceeding.
2. Assessing the Severity and Deciding on Sanding (If Necessary):
For minor imperfections like slight texture differences or minor high spots, you might be able to skip sanding and go directly to rubbing compound. However, for significant blobs, noticeable brush strokes, or unevenness, wet sanding will be necessary. Start with the least aggressive method first and increase abrasiveness only if needed.
3. Wet Sanding (For Raised or Uneven Touch Up Paint):
- Start with Finer Grit: Begin with 2500 or 3000 grit sandpaper. Soaking the sandpaper in water for a few minutes beforehand makes it more pliable and effective.
- Wet Sanding Technique: Lightly spray the area and the sandpaper with soapy water. Gently sand the high spots of the touch-up paint using the sanding block and light, even pressure. Sand in straight, overlapping strokes, keeping the surface wet at all times. Avoid sanding the surrounding original paint as much as possible.
- Check Progress Frequently: Wipe the area clean with a microfiber cloth and inspect your progress. You want to level the touch-up paint to be flush with the surrounding paint. Don’t sand too much, as you can remove too much clear coat or even the base coat.
- Step Up Grit if Needed (Cautiously): If 2500 or 3000 grit is too slow, you can cautiously move to 2000 grit, or even 1500 for very thick applications. However, coarser grits will leave deeper scratches that require more compounding and polishing to remove.
4. Rubbing Compound Application:
- Apply Rubbing Compound: After sanding (or if sanding is not needed), apply a small amount of rubbing compound to a microfiber cloth or a foam applicator.
- Work in Small Sections: Work the compound into the touch-up area using firm, even pressure in circular or back-and-forth motions. Focus on the sanded area (or the bad touch-up area if not sanded).
- Buff Off Residue: After a few passes, buff off the compound residue with a clean microfiber cloth. Inspect the area. The rubbing compound should have leveled out any remaining imperfections and removed sanding scratches (if sanding was performed).
5. Polishing Compound Application:
- Apply Polishing Compound: After rubbing compound, apply a small amount of polishing compound to a clean microfiber cloth or foam applicator.
- Polish to a High Gloss: Work the polishing compound in a similar manner to the rubbing compound, but with slightly less pressure. This step refines the finish, removes any remaining fine scratches or swirl marks from the rubbing compound, and enhances the gloss.
- Buff to Shine: Buff off the polishing compound residue with a clean microfiber cloth to reveal a smooth, glossy finish.
6. Cleaning and Protection:
Clean the area with a detailer spray or waterless wash to remove any remaining compound residue. Finally, apply a quality wax or sealant to protect the corrected area and enhance the shine.
Prevention is Key: Avoiding Bad Touch Up Paint in the Future
While knowing how to fix bad touch-up paint is valuable, preventing the issue in the first place is even better. Here are some tips to achieve better touch-up results:
- Use High-Quality Touch Up Paint: Opt for reputable brands like Dr. Colorchip for better color matching and application characteristics. Avoid generic or low-quality touch-up kits.
- Apply Thin Coats: Multiple thin coats are always better than one thick coat. Allow each coat to dry slightly before applying the next. This prevents paint blobs and runs.
- Use the Right Application Tools: Fine-tipped brushes or even toothpicks can be better for precise application in small chips than the brush often included in touch-up kits.
- Consider Leveling Paint: For larger chips, consider using a leveling or filling touch-up paint to build up the paint in thin layers without creating a high spot.
- Don’t Sand Chips Down (Initially): As mentioned in the original article, sanding down chips initially can be detrimental. The edge of the chip helps contain the touch-up paint. Sanding is only for correcting after the touch-up is applied and is uneven.
- Practice Makes Perfect: If you’re new to touch-up paint, practice on a less visible area or a piece of scrap metal to refine your technique before tackling prominent areas of your car.
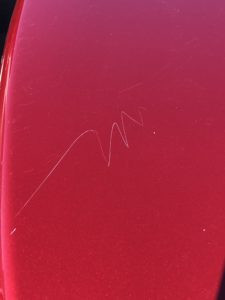
Key scratch on red paint
Fixing bad touch-up paint requires patience and attention to detail, but the results are well worth the effort. By following these steps and using the right techniques, you can effectively correct imperfections and achieve a professional-looking finish, restoring the beauty of your car’s paintwork. Remember to always start with the least aggressive method and proceed cautiously to avoid damaging the surrounding original paint.