How to Fix a Bad Spray Paint Job on Your Car: A DIY Guide

Spray painting your car can be a cost-effective way to refresh its look or tackle minor repairs. However, achieving a flawless, factory-like finish with spray paint can be challenging, even for experienced DIYers. Common issues like orange peel texture, runs, or uneven coverage can leave you with a less-than-desirable result. If you’ve found yourself with a bad spray paint job, don’t despair! Before you consider stripping it all back and starting over, there’s a less drastic and often highly effective solution: micro-abrasion polishing. This guide will walk you through how to fix a bad spray paint job and achieve a smooth, professional-looking finish without the need for a complete repaint.
Often, the culprit behind a poor spray paint finish is applying too much paint too quickly, or improper technique leading to uneven drying. This frequently results in “orange peel,” a textured surface that resembles the skin of an orange. Luckily, this, along with other minor imperfections, can be rectified with the right tools and approach. Forget the frustration of starting from scratch; let’s explore how micro-abrasion pads and polishing compounds can be your best friends in rescuing your DIY paint project.
First, let’s understand what we’re dealing with. A bad spray paint job can manifest in several ways:
- Orange Peel: A bumpy, uneven texture.
- Runs or Sags: Drips of paint that have flowed downwards before drying.
- Uneven Finish: Areas with different levels of gloss or texture.
- Dust or Debris Under Paint: Particles trapped in the paint layer creating bumps.
While severe runs or embedded debris might require more extensive correction, orange peel and minor unevenness are perfect candidates for micro-abrasion correction. This method essentially involves gently leveling the clear coat (or top coat) of your paint to create a smooth, reflective surface.
The key to fixing a bad spray paint job without repainting lies in using micro-abrasion pads. These pads, typically used for polishing wood and other delicate surfaces, come in extremely fine grits, ranging from around 1500 to 12000 and beyond. They allow you to gradually and precisely refine the paint surface, removing imperfections without aggressively cutting through the paint layers.
Here’s a step-by-step guide to fixing your bad spray paint job:
Step 1: Preparation and Cleaning
Before you start sanding, ensure the paint is completely dry and cured. Depending on the type of paint and environmental conditions, this can take anywhere from a few days to a couple of weeks. Once cured, thoroughly clean the area you’ll be working on. Wash the car with car soap and water to remove any dirt, grime, or wax. Dry the surface completely. This prevents any debris from being ground into the paint during the sanding process, which could cause scratches.
Step 2: Micro-Abrasion Sanding
Start with a 3000 grit micro-abrasion pad. Wet sand the affected area by lightly spraying the pad and the paint surface with water. The water acts as a lubricant and helps to carry away paint particles, preventing clogging of the pad and reducing scratching. Use light, even pressure and work in small, overlapping strokes. Avoid pressing too hard, as you only want to level the surface, not remove significant amounts of paint.
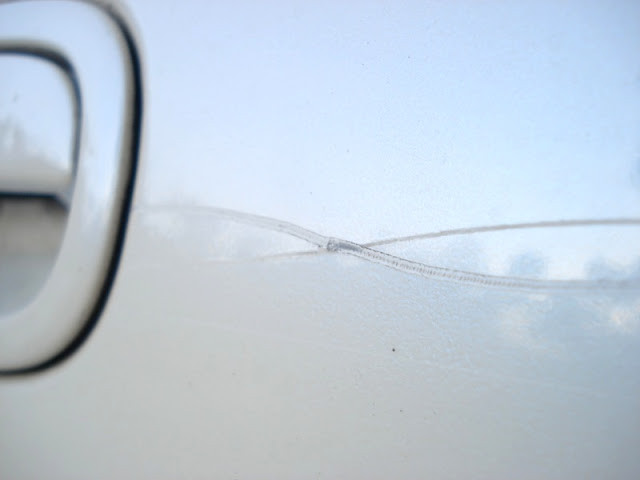
Orange peel after spray painting
Work your way up through the grits. After using the 3000 grit pad, wipe the area clean and inspect the surface. You should notice the orange peel starting to diminish and the surface becoming smoother and duller. Continue with progressively finer grits, such as 4000, 6000, and 8000, repeating the wet sanding process with each grit. The surface will become increasingly smooth and less dull as you move to higher grits.
Step 3: Polishing Compound
Once you’ve sanded with the highest grit pad (e.g., 8000 or 12000), the surface will be smooth but lack gloss. This is where polishing compound comes in. Apply a small amount of polishing compound to a foam polishing pad or a microfiber cloth. Work the compound into the sanded area using circular motions, applying moderate pressure. The polishing compound will refine the surface further and restore the gloss and clarity to the paint.
 Micro-abrasion pads used to fix paint
Step 4: Waxing or Sealing (Optional but Recommended)
After polishing, you’ll have a much-improved finish. For added protection and enhanced shine, consider applying a coat of car wax or paint sealant. This will protect your newly corrected paint from the elements and give it an even deeper gloss.
 Polished paint after using micro-abrasion pads
Tips for Preventing Bad Spray Paint Jobs in the Future:
- Preparation is Key: Thoroughly clean and degrease the surface before painting.
- Apply Thin Coats: Multiple thin coats are always better than one thick coat. Allow each coat to tack up (become slightly sticky) before applying the next.
- Maintain Proper Distance: Hold the spray can at the correct distance from the surface (usually specified on the can).
- Consistent Movement: Move the spray can in smooth, even strokes, overlapping each stroke by about 50%.
- Ideal Conditions: Paint in a well-ventilated area with moderate temperature and low humidity. Avoid painting in direct sunlight or windy conditions.
- Practice: Before painting your car, practice your technique on a piece of cardboard or scrap metal.
Fixing a bad spray paint job doesn’t have to be a nightmare. With patience, the right micro-abrasion pads, and polishing techniques, you can salvage your DIY paint project and achieve a finish you can be proud of. This method is a testament to the fact that even when things don’t go perfectly with spray paint, there’s always a way to refine and improve the outcome without resorting to drastic measures.