How to Fix a Key Scratch on Your Car: A Step-by-Step Guide
Finding a key scratch on your car can be incredibly frustrating. Whether accidental or intentional, these unsightly marks can detract from your vehicle’s appearance and potentially lower its value. The good news is that fixing a key scratch yourself is achievable and can save you a trip to the body shop. This guide will walk you through a detailed process to repair a deep key scratch, similar to how a car enthusiast tackled a deliberate scratch on their pearl white car.
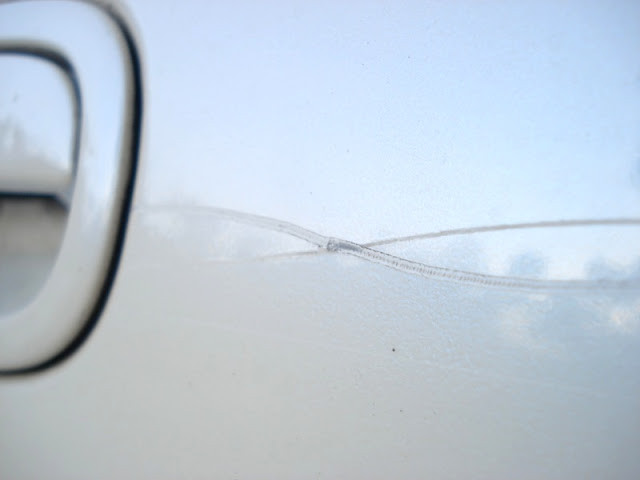
Deep key scratch on car door, starting from handle
 Close-up of key scratch damage on car paint
Sometimes, these scratches go beyond just the clear coat, reaching into the color coat and even the primer. While a minor surface scratch might be buffed out, deeper scratches require a more involved approach, including touch-up paint and careful leveling.
 Key scratch penetrating clear coat, color coat, down to primer
 Extent of deep key scratch along car door and fender
Materials You’ll Need:
- Automotive touch-up paint (matching your car’s color code)
- Toothpicks or fine-tipped brushes
- Wet/dry sandpaper (800, 1000, 1200, 1500, and 2000 grit)
- Detailing spray or lubricant (like ONR QD)
- Compound (like Optimum Hyper Compound)
- Polish (like Optimum Hyper Polish)
- Wool and polishing pads
- Rotary buffer (optional, but recommended for best results)
- Microfiber cloths
- Water
Step-by-Step Guide to Fixing a Key Scratch:
-
Clean the Scratch: Thoroughly clean the scratched area and the surrounding paint with soap and water, then dry it completely. This removes any dirt or debris that could interfere with the repair process.
-
Apply Touch-Up Paint: Using a toothpick or a fine-tipped brush, carefully apply thin layers of touch-up paint directly into the scratch. The goal is to fill the scratch, allowing each coat to dry for several hours (ideally 12 hours or more) before applying the next. Multiple thin coats are better than one thick coat to prevent drips and ensure proper drying. In the original example, four coats were applied over three days.
 Applying touch-up paint to car key scratch with toothpick
 Touch-up paint covering primer in key scratch, still visible
 Multiple coats of touch-up paint applied to car scratch
- Wet Sand the Area: Once the touch-up paint is completely dry and slightly raised above the original paint (this is important to allow for leveling), begin wet sanding. Start with 800 grit sandpaper, then progressively move to 1000, 1200, 1500, and finally 2000 grit. Use a detailing spray or lubricant to keep the area wet during sanding. The purpose of wet sanding is to carefully level the new paint with the surrounding original paint. Sand lightly and evenly, checking your progress frequently.
 Wet sanding touch-up paint on car scratch with sandpaper
 Leveled touch-up paint after wet sanding car scratch
- Compound and Polish: After wet sanding, the area will appear dull. This is where compounding and polishing come in. Apply a compound to a wool pad and use a rotary buffer (or by hand, though it will take more effort) to remove the sanding marks and restore gloss. Follow this with a polish on a polishing pad to refine the finish and enhance the shine. This step blends the repaired area seamlessly with the rest of the car’s paint.
 Compounding touch-up paint on car scratch with rotary buffer
 Car scratch repair after compounding and polishing, barely visible
- Final Inspection: Clean the area and inspect your work. In most cases, the scratch should be significantly less visible or even completely gone. While under very close inspection, you might still detect a slight trace, the overall improvement will be dramatic.
 Repaired key scratch on car door, almost gone
 Satisfying result of car key scratch repair on rear panel
 Car paint repair blending seamlessly under sunlight
 Close-up of flawless car paint after key scratch repair in sunlight
 Undetectable car scratch repair after sunlight reflection
 Side view of car paint repair, scratch invisible
 Angle view of car door after key scratch repair
 Minor trace of repaired key scratch visible upon close inspection
 Close-up of faint trace remaining after car scratch repair
Before and After:
The difference is truly remarkable. By following these steps, you can effectively eliminate or significantly reduce the appearance of key scratches on your car.
 Before and after car key scratch repair comparison
 Side-by-side before and after key scratch fix on car door
 Car scratch repair before and after, showing significant improvement
 Comparison of car paint damage and repair after key scratch
 Dramatic before and after of car key scratch repair
Fixing a key scratch at home is a rewarding process that restores your car’s finish and protects it from further damage. With patience and the right technique, you can achieve professional-looking results and maintain your car’s pristine condition.