How to Fix Your Car Real Good: A Practical Guide to Automotive Independence
Last week, even for a seasoned DIY enthusiast like myself, something unexpected happened: my car had a real problem. I’ve often talked about how owning a dependable car and minimizing driving can drastically reduce car maintenance. Regular oil changes and occasional spark plug or air filter replacements were about the extent of it. And I always made sure to handle these simple tasks personally, aiming to become more proficient with car maintenance overall.
But recently, my good fortune changed. Just before a summer trip to Canada, I noticed a humming sound, like tire noise, coming from the rear left wheel of my Honda minivan. Initially, I thought it was just tire feathering, a common issue where uneven tire wear creates a noisy tread pattern. So, I turned up the radio and drove the 1500 miles to Canada without any issues, in a bit of a hurry to help my mother.
After settling in, I used some free time to visit Costco and get new rear tires installed while picking up groceries. The new tires looked great, so I was optimistic as I started the engine to drive home.
But the roaring sound was still there, just as loud as before. This was definitely a mechanical issue, something I hadn’t dealt with before. In situations like this, when you’re unsure what’s wrong, how do you actually fix your car real good?
Most people would take their car to a service center or dealership, eventually getting it fixed along with a hefty bill. Hundreds or even thousands of dollars later, it’s often just accepted as the cost of car ownership. While convenient for some, these expenses can significantly increase the cost of maintaining an older car, sometimes even pushing people into buying new cars, which is often a less financially sound decision in the long run.
But what if you aim for a different approach? What if you wanted to cut your car maintenance costs significantly, maybe by 75%, and become someone who can keep a 20-year-old car running smoothly and looking great? Or even someone who can buy a quality used car, maintain it for years, and potentially sell it for more than they paid?
My personal goal is to become exactly that kind of person. And I’ve learned some key techniques along the way, which I’m sharing with you now:
Mr. Money Mustache’s Guide to Automotive Independence: How to Fix Your Car Real Good
-
Diagnose the Problem Like a Pro: Online Sleuthing. My first step was to describe the symptom: “noise from rear wheels”. I typed this into Google, and it quickly led me to the possibility of worn-out wheel bearings. Then, searching “wheel bearing noise” on YouTube, I found a video demonstrating the sound of a car with this exact problem. It sounded identical to what I was experiencing. Online forums also indicated that mechanics typically charge $250-$400 for this repair, assuming you can find a trustworthy mechanic.
-
YouTube University: Your Free Auto Repair School. Next, I went back to YouTube and searched for “1999 Odyssey replace rear wheel bearings”. This led me to a detailed video from 1aAuto showing a wheel bearing replacement on a van very similar to mine. I learned that replacing the entire “Hub and Bearing assembly” is common practice because it’s cost-effective and simplifies the job. Since the first video featured a 2003 Odyssey with rear disc brakes, I also watched a video by Eric the Car Guy about 1999 Odyssey drum brakes to understand the differences. Fortunately, the drum brake procedure looked even simpler, as it eliminated the need to remove the caliper. In the past, this kind of knowledge required a shop manual, but YouTube provides a much more accessible and visual learning experience.
-
Parts Hunting: Finding the Right Components. I then searched for “1999 Odyssey rear hub and bearing assembly”. This search directed me to various auto parts retailers, including Amazon, providing information about the part and its general price range. The price of around $40.55 was surprisingly affordable for such a crucial component.
-
Smart Shopping for Auto Parts: Where to Buy. If I were at home in Colorado, I would have ordered the part from Amazon and waited for delivery. However, being in Canada and needing the van for an upcoming 300-mile drive, I needed a quicker solution. Using Google Maps, I located auto parts stores in Hamilton, called around to compare prices (ranging from $150 down to $67 for the same part), and went to pick up the best-priced option.
-
Tool Up: Getting Ready for the Job. The YouTube videos indicated that I would need a car jack, jack stand, standard socket set, a hammer, and a large 36MM socket to remove the axle nut securing the rear hub. I purchased the large socket from Princess Auto, a Canadian store similar to Harbor Freight, known for affordable auto tools. I already owned or could borrow the rest of the necessary tools.
-
Get Your Hands Dirty: The DIY Repair Process. For added enjoyment and support, I enlisted the help of a friend, Nick, a Canadian indie rocker known as The Kettle Black. Knowing Nick had maintained his 30-year-old Toyota himself for years, I knew he would be a valuable partner.
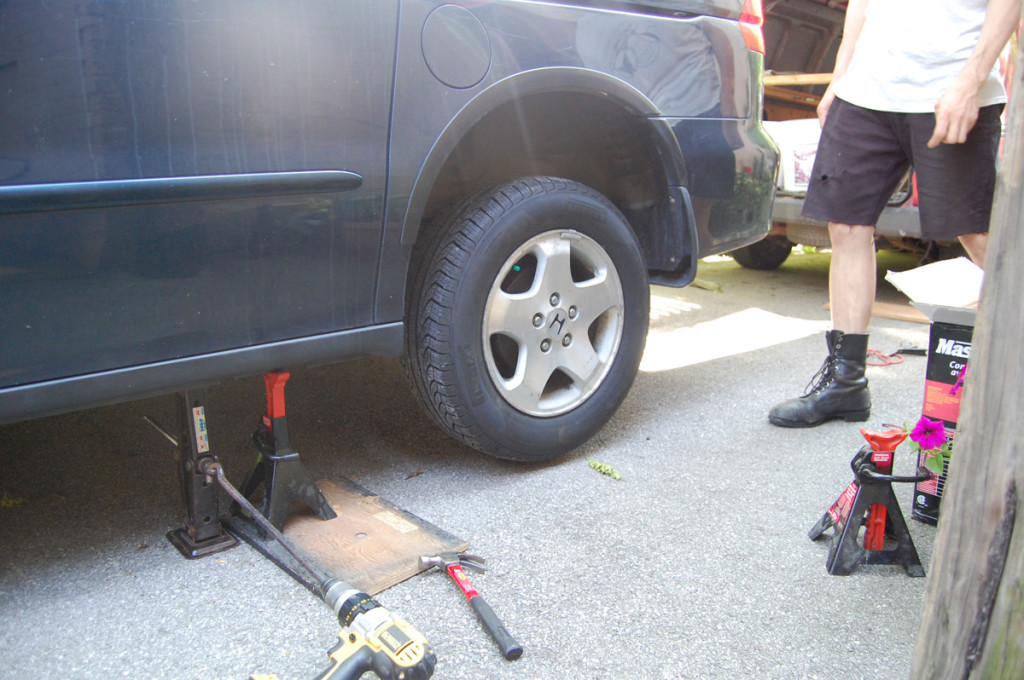
[Van jacked up on the left and secured with a jack stand on the right, preparing for wheel removal.]
Nick and I started the project. Our equipment was basic – no air compressor for my impact gun, and his jack was just barely adequate for the van. However, we improvised and successfully executed the repair.
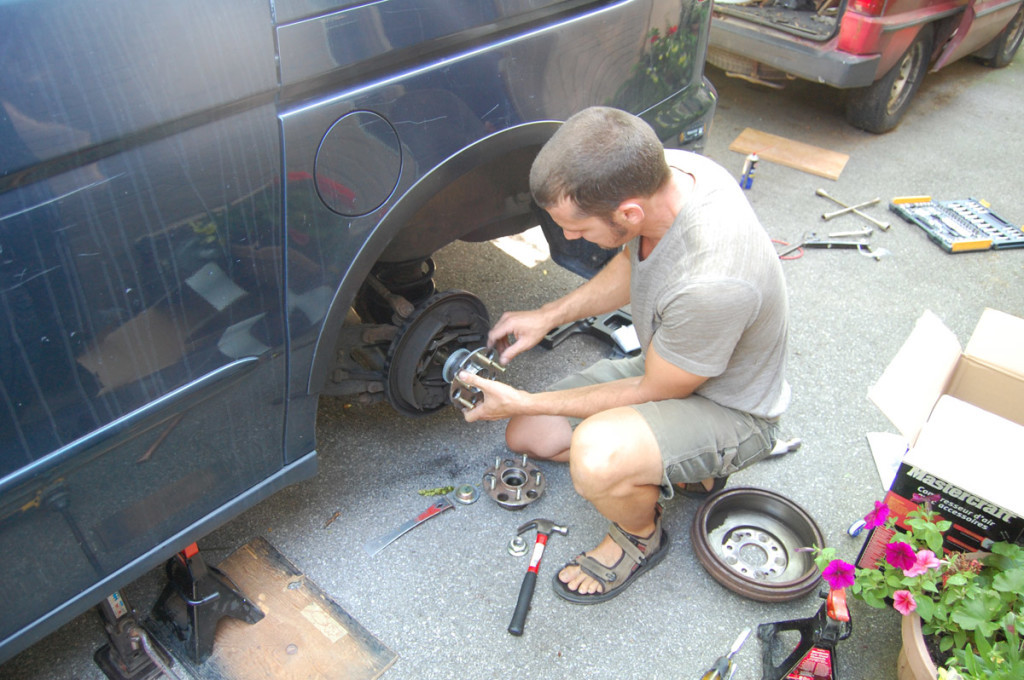
First, we jacked up the van and secured it with a jack stand. With the parking brake engaged, we removed the five lug nuts and the rear wheel – a straightforward step.
[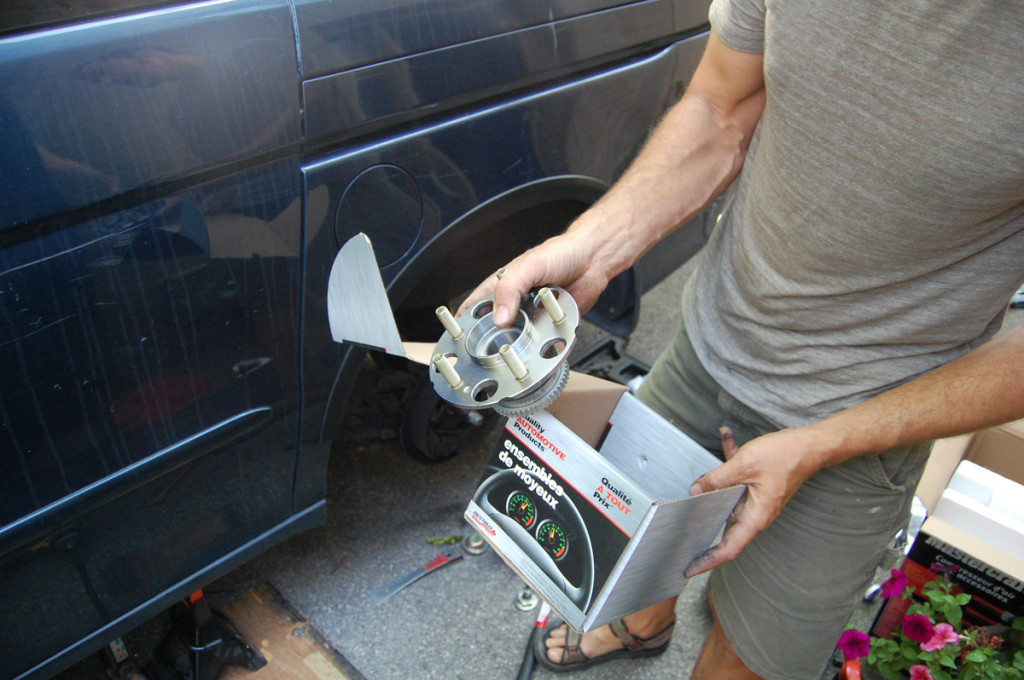 Showing a new car hub assembly purchased from a local auto parts store.]
I examined the new hub assembly, a surprisingly well-engineered piece of equipment.
[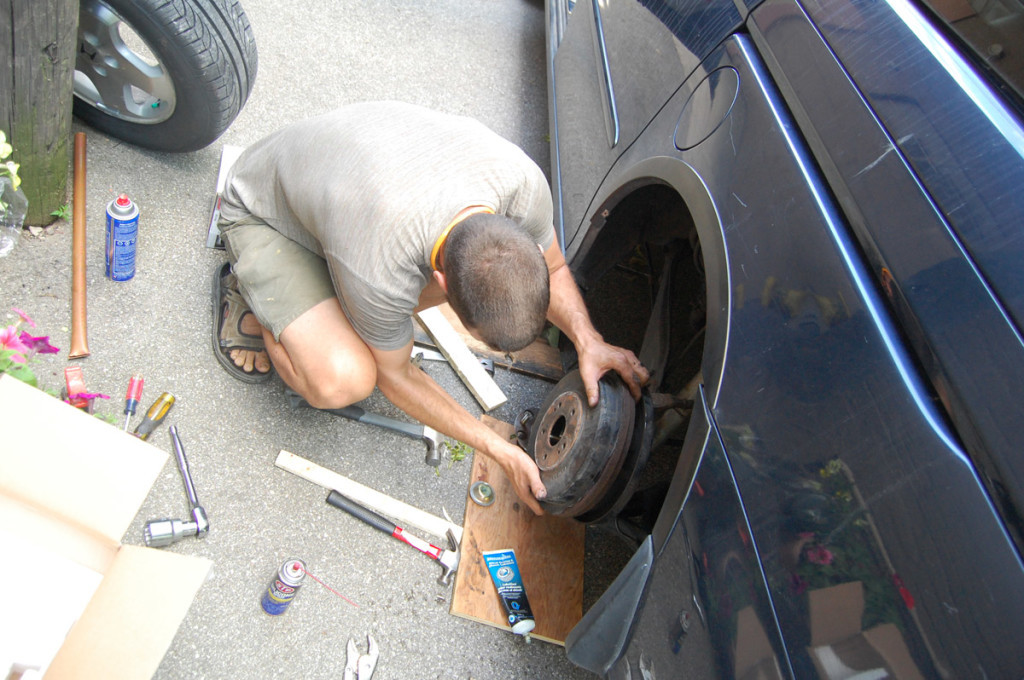 Removing the brake drum after taking off the wheel, revealing brake shoes.]
After removing the wheel, we carefully pried and wiggled off the brake drum (remembering to release the parking brake). This step also provided easy access to the brake shoes if replacement were ever needed.
[ The new hub being carefully installed onto the axle with tapping and grease for smooth fitting.]
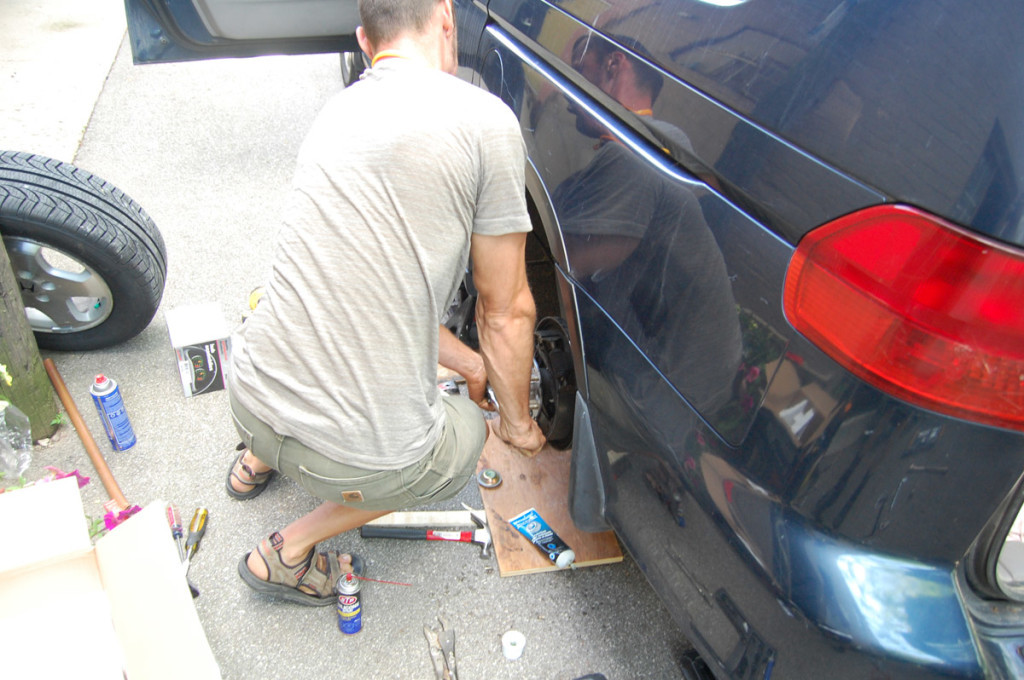
Installing the new hub onto the axle proved to be the most challenging part. It was a tight fit and required precise alignment to avoid getting stuck. There was a moment of doubt, wondering if the van would be stranded there permanently. Taking a breath, I reminded myself that this procedure had been done countless times before. By using a block of wood and a hammer to gently tap the new hub onto the axle, and then using the axle nut to tighten it the rest of the way, we overcame the hurdle.
[ Tightening the spindle nut with a socket wrench to secure the new wheel hub assembly.]
Finally, we tightened the large 36MM spindle nut with a socket wrench. The specification called for 180 ft-lbs of torque, but lacking a torque wrench, I applied my weight to the one-foot wrench, estimating it to be close enough.
Be Patient and Persistent: First-time DIY repairs often come with unexpected challenges. While disassembly went smoothly, installing the new hub was tricky. Alignment was critical, and patience was key. Remember that setbacks are part of the learning process. If others have done it, you can too.
The feeling of driving away in my now quiet and smooth van, knowing I had successfully tackled a new repair, was a major highlight of the trip. I now look forward to future car maintenance challenges as opportunities to learn and grow.
The high cost of car repairs often stems from inflated parts prices and high labor rates. Dealerships can mark up parts significantly, and labor costs can exceed the hourly earnings of many professionals. Mastering DIY car repair can not only save you money but also potentially open doors to a lucrative side hustle, as friends and neighbors might seek your help with their car troubles.