How to Fix a Car Horn: A DIY Troubleshooting Guide
Your car horn is crucial for safety, used to alert other drivers and pedestrians. Most of the time, you might not think about it until it stops working. Suddenly, a simple tap of the horn yields no sound, which can be frustrating and potentially dangerous. Fortunately, diagnosing and fixing a car horn issue is often something you can do yourself with basic tools and a little know-how.
Car horns are typically located in a vulnerable spot, often behind the front grille. This placement exposes them to the elements – rain, road grime, and corrosive road salt. Over time, this exposure can lead to internal damage, particularly shorting out the horn’s coil and causing it to fail. However, a silent horn can also stem from other problems within your vehicle’s electrical system. These can include a faulty horn switch in the steering wheel, a malfunctioning clock spring, a bad relay, or wiring issues like breaks or shorts.
This guide will walk you through the steps to troubleshoot and potentially fix your car horn, saving you a trip to the mechanic.
Step 1: Inspect the Horn for Corrosion
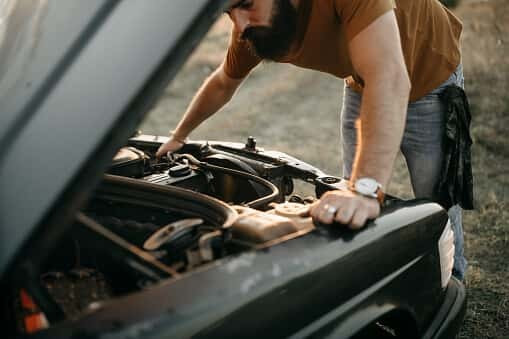
Before you start gathering tools or worrying about complex electrical problems, begin with a visual inspection. Open your car’s hood and locate the horn(s). Often, you can identify the problem with a simple look.
Carefully examine the electrical connections to the horn. Ensure they are securely attached and not loose. Disconnect the wires from the horn terminals. Use a wire brush or terminal cleaner to remove any corrosion from both the terminals and the wire connectors. After cleaning, firmly reconnect the wires. Try the horn again. If you hear a clicking sound from the horn area, or still no sound at all, the issue might be elsewhere. Move on to checking the fuse.
Inspecting car horn connections for corrosion
Step 2: Check the Car Horn Fuse
The next step is to check the fuse that protects the horn circuit. Locate your car’s fuse box(es). Refer to your owner’s manual for the exact location, as fuse boxes can be under the dashboard, in the engine compartment, or even on the side of the dashboard.
Once you’ve found the fuse box, inspect it for any signs of damage like charring or melting around any of the fuses. If you see such signs, it could indicate a more serious electrical issue beyond just the horn circuit.
Next, identify the fuse specifically for the car horn. Your owner’s manual will contain a fuse box diagram indicating each fuse’s function.
- If the fuse is blown (the thin wire inside is broken or the plastic is melted): Replace it with a new fuse of the same amperage rating. After replacing the fuse, test the horn. If it blows again immediately, there’s likely a short circuit in the horn system that needs further investigation.
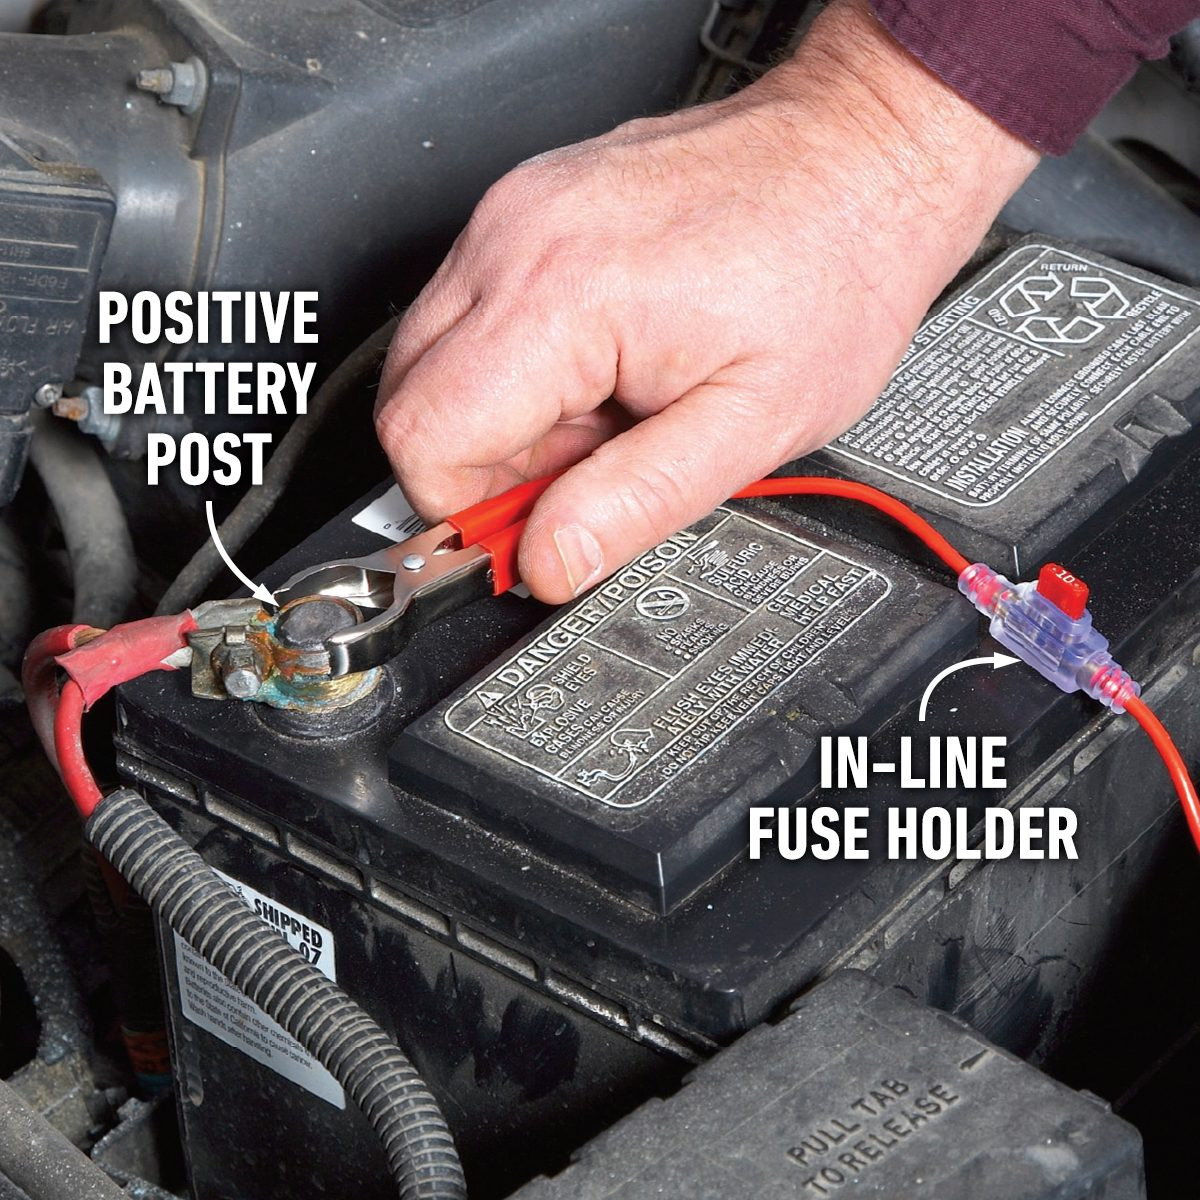
- If the fuse is intact: You’ll need to test the horn directly. Use a fused jumper wire to bypass the car’s wiring and send power directly to the horn. A fused jumper can be easily made with battery clips, a length of wire, and an inline fuse holder with a fuse (as shown in the photo). Connect one clip to the positive battery terminal and the other to the positive terminal on the horn. Ground the horn by ensuring it’s mounted to a clean metal surface or by connecting a separate ground wire. If the horn makes a clicking sound when you apply power with the jumper, it could indicate a poor ground connection is the problem.
Clean the horn’s ground connection point to the vehicle’s chassis thoroughly to remove any rust or grime that could be hindering a good electrical ground. Try powering the horn again with the jumper. If the horn still only clicks or remains silent, the horn unit itself is likely faulty and needs to be replaced.
 Using a fused jumper to test the car horn directly
Step 3: Examine the Horn Relay
If the fuse is good, and the car horn works when directly powered with a jumper wire, then the problem is located “upstream” of the horn itself – meaning in the wiring, relay, or switch that provides power to the horn. Before spending time tracing wires, the relay is the next easiest component to check.
Locate the horn relay in your car’s fuse box. Again, your owner’s manual will have a diagram indicating its location. Relays are typically small, plug-in components. If there are identical relays in your fuse box (for example, for the headlights or windshield wipers), try swapping the horn relay with one of these known working relays.
If, after swapping the relay, the horn starts working, then the original horn relay was faulty and needs to be replaced. Relays are inexpensive and easy to replace. However, if swapping the relay doesn’t solve the problem, the issue is likely further upstream in the electrical circuit, possibly involving the horn switch in the steering wheel, the clock spring, or a break in the wiring. These issues are more complex to diagnose and repair.
If you’ve checked the horn, fuse, and relay and still have no horn, it’s advisable to take your vehicle to a qualified and trusted professional mechanic for further diagnosis and repair. Electrical problems can be intricate, and a mechanic will have specialized tools and knowledge to pinpoint the exact cause and fix your car horn reliably.
By following these steps, you can systematically troubleshoot and often fix a non-working car horn yourself. This DIY approach can save you time and money, and get your horn honking again, ensuring safer driving.