Range Rover 2017: Full Restyling With 2018MY Rear Updates
Range Rover 2017 full restyling with the 2018MY rear updates completely transforms your vehicle, offering a modern aesthetic and enhanced functionality, easily achieved through CARDIAGTECH.NET’s specialized tools. Discover how to upgrade your ride with advanced features, including custom lighting and bumper enhancements, and benefit from our high-quality auto repair solutions and extensive support. Unlock your Range Rover’s potential with updated auto body kits and auto diagnostic tools that promise both performance and style.
Contents
- 1. Introduction to Range Rover 2017 Restyling
- 2. Understanding the SVO Design Pack for Range Rover
- 3. Why Choose a Full Restyling for Your Range Rover 2017?
- 3.1. Benefits of Restyling
- 3.2. Market Trends
- 4. Key Components for the 2018MY Rear Restyling
- 4.1. Taillight Assembly
- 4.2. Rear Bumper
- 4.3. Exhaust System
- 4.4. Additional Trim and Inserts
- 5. Step-by-Step Installation Guide
- 5.1. Preparation
- 5.2. Removing the Old Components
- 5.3. Installing the New Components
- 5.4. Final Checks
- 6. Essential Tools for Range Rover Restyling
- 6.1. Diagnostic Tools
- 6.2. Trim Removal Tools
- 6.3. Socket and Wrench Sets
- 6.4. Torque Wrenches
- 6.5. Multimeters
- 6.6. Scan Tools
- 6.7. Lifting Equipment
- 7. Choosing the Right Parts and Kits
- 7.1. Compatibility
- 7.2. Quality
- 7.3. Reliability
- 7.4. Comprehensive Kits
- 7.5. Sourcing Parts
- 8. Cost Analysis of the Restyling Project
- 8.1. Component Costs
- 8.2. Labor Costs
- 8.3. Additional Costs
- 8.4. Cost-Saving Tips
- 9. Maintaining Your Restyled Range Rover
- 9.1. Regular Cleaning
- 9.2. Protecting the New Components
- 9.3. Inspections and Maintenance
- 9.4. Addressing Common Issues
- 10. Troubleshooting Common Issues After Restyling
- 10.1. Electrical Problems
- 10.2. Fitment Issues
- 10.3. Exhaust System Problems
- 10.4. General Tips
- 11. Expert Tips for a Seamless Restyling Process
- 11.1. Planning and Preparation
- 11.2. Component Selection
- 11.3. Installation Techniques
- 11.4. Professional Help
- 11.5. Post-Installation Checks
- 12. Real-World Examples of Successful Range Rover Restyling
- 12.1. Case Study 1: 2017 Range Rover to 2018MY Conversion
- 12.2. Case Study 2: SVO Design Pack Installation
- 12.3. Case Study 3: DIY Restyling Project
- 13. How CARDIAGTECH.NET Can Help You
- 13.1. Comprehensive Tool Selection
- 13.2. Expert Support and Guidance
- 13.3. High-Quality Products
- 13.4. Convenient Online Shopping
- 14. Conclusion: Elevate Your Range Rover Today
1. Introduction to Range Rover 2017 Restyling
The Range Rover 2017 model represents a blend of luxury and off-road capability, yet owners often seek to refresh its appearance to match newer models. One of the most impactful upgrades is the full restyling to incorporate the 2018 Model Year (MY) rear design. This transformation involves significant changes to the rear of the vehicle, including taillights, bumper, and exhaust system, revitalizing its overall aesthetic. Upgrading offers a blend of modern aesthetics and enhanced features, making it a popular choice for Range Rover enthusiasts. This restyling not only enhances the vehicle’s appearance but also potentially increases its market value.
2. Understanding the SVO Design Pack for Range Rover
The SVO (Special Vehicle Operations) Design Pack is an exclusive option for Range Rovers, known for its premium quality and distinctive styling. This design package typically includes enhancements such as unique front and rear bumpers, side skirts, and exhaust finishers, all designed to elevate the vehicle’s aesthetic appeal and aerodynamic performance. The SVO Design Pack enhances the vehicle’s appearance and provides a sportier, more aggressive look.
Key components of the SVO Design Pack generally include:
- Front Bumper: A more aggressive design that improves airflow and adds visual appeal.
- Rear Bumper: Designed to complement the front, often including integrated exhaust outlets.
- Side Skirts: These enhance the vehicle’s profile, creating a more grounded and sporty stance.
- Exhaust Finishers: Custom designs that add a touch of exclusivity to the exhaust system.
These components are designed to integrate seamlessly with the existing Range Rover structure, ensuring a factory-quality fit and finish.
3. Why Choose a Full Restyling for Your Range Rover 2017?
Selecting a full restyling for your Range Rover 2017 offers numerous benefits that enhance both its appearance and functionality. Upgrading can significantly modernize your vehicle’s look, bringing it in line with the aesthetics of newer Range Rover models. This is particularly appealing for those who appreciate the latest designs but are not ready to purchase a new vehicle.
3.1. Benefits of Restyling
- Enhanced Aesthetics: A full restyling dramatically improves the vehicle’s visual appeal, making it look more modern and stylish.
- Increased Vehicle Value: Upgrading the appearance can increase the resale value of your Range Rover.
- Personalization: Restyling allows you to customize your vehicle to reflect your personal taste and preferences.
- Improved Features: Newer components may offer improved functionality, such as enhanced lighting or better aerodynamics.
3.2. Market Trends
The market for automotive restyling is growing, with an increasing number of vehicle owners looking to upgrade their cars. According to a report by Grand View Research, the global automotive aftermarket size was valued at USD 407.3 billion in 2022 and is expected to grow at a compound annual growth rate (CAGR) of 3.8% from 2023 to 2030. This growth is driven by the desire to extend vehicle lifespan and customize vehicles to meet individual needs and preferences.
4. Key Components for the 2018MY Rear Restyling
The transformation of a Range Rover 2017 to the 2018MY rear design involves several key components, each contributing to the overall aesthetic and functional upgrade.
4.1. Taillight Assembly
- The 2018MY taillights feature a sleeker design with LED technology, offering improved visibility and a modern look.
- The installation process generally requires connecting the new LED taillights, which may involve some rewiring depending on the existing setup.
- The cost can range from $800 to $1,500, depending on the brand and specific features.
4.2. Rear Bumper
- The rear bumper is a critical element, often redesigned to integrate seamlessly with the new taillights and exhaust system.
- The bumper typically includes integrated exhaust tips, adding to the sporty appearance.
- Installation involves removing the old bumper and fitting the new one, ensuring proper alignment and secure attachment.
- Expect to pay between $1,200 and $2,500 for a high-quality rear bumper, including paintwork and installation.
4.3. Exhaust System
- An updated exhaust system can enhance both the vehicle’s performance and sound. Many restyling packages include integrated dual nozzle exhaust systems.
- The installation involves connecting the new exhaust system to the existing exhaust manifolds, ensuring a proper seal to prevent leaks.
- The cost for an exhaust system upgrade can range from $1,000 to $3,000.
4.4. Additional Trim and Inserts
- Side inserts on the front doors and lower door side trims add subtle yet significant aesthetic improvements.
- These components are usually installed using adhesive or clips, ensuring a secure fit.
- The cost for these trims and inserts can range from $300 to $800.
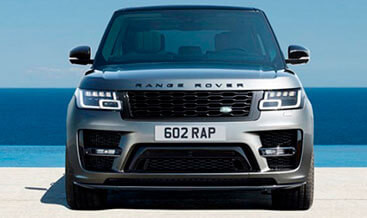
Range Rover 2017 full restyling with SVO Design Pack 2018MY rear bumper and exhaust tips
5. Step-by-Step Installation Guide
Installing the 2018MY rear restyling components on a Range Rover 2017 requires careful attention to detail and a systematic approach. Here’s a step-by-step guide to help ensure a successful upgrade. Remember, CARDIAGTECH.NET is your partner, providing top-tier auto diagnostic tools to ensure everything aligns perfectly.
5.1. Preparation
- Gather Tools and Materials:
- Socket set
- Wrenches
- Screwdrivers
- Trim removal tools
- New taillights, rear bumper, exhaust system, and trim pieces
- Safety glasses
- Gloves
- Disconnect the Battery: Before starting any electrical work, disconnect the negative terminal of the battery to prevent shorts.
5.2. Removing the Old Components
- Remove the Taillights:
- Open the tailgate and locate the access panels behind the taillights.
- Disconnect the electrical connectors from the taillights.
- Remove the bolts or clips holding the taillights in place and carefully remove them.
- Remove the Rear Bumper:
- Locate and remove all screws and bolts holding the rear bumper to the vehicle’s frame. These are typically found along the edges of the bumper and in the wheel wells.
- Carefully detach any sensors or wiring connected to the bumper, such as parking sensors or license plate lights.
- With all attachments removed, gently pull the bumper away from the vehicle.
- Remove the Exhaust System (if applicable):
- Loosen the clamps connecting the exhaust system to the manifolds.
- Support the exhaust system with stands to prevent it from falling once disconnected.
- Remove the bolts holding the exhaust system in place and carefully lower it.
5.3. Installing the New Components
- Install the New Taillights:
- Connect the electrical connectors to the new taillights.
- Align the taillights with the mounting points and secure them using the bolts or clips.
- Test the taillights to ensure they are working correctly.
- Install the New Rear Bumper:
- Carefully align the new bumper with the vehicle’s frame.
- Attach any sensors or wiring to the new bumper.
- Secure the bumper using the screws and bolts, ensuring it is properly aligned and securely fastened.
- Install the New Exhaust System:
- Align the new exhaust system with the exhaust manifolds.
- Secure the exhaust system with bolts and tighten the clamps.
- Ensure the exhaust system is properly supported and does not rattle against the vehicle’s frame.
- Install Additional Trim and Inserts:
- Clean the surfaces where the trim and inserts will be attached.
- Remove the backing from the adhesive strips and carefully attach the trim pieces to the vehicle.
- Apply pressure to ensure a secure bond.
5.4. Final Checks
- Reconnect the Battery: Reconnect the negative terminal of the battery.
- Test All Systems:
- Turn on the ignition and test all lights, including headlights, taillights, brake lights, and turn signals.
- Check for any error messages on the dashboard.
- Start the engine and listen for any exhaust leaks or unusual noises.
- Final Inspection:
- Ensure all components are securely attached and properly aligned.
- Clean the vehicle and inspect the overall appearance.
6. Essential Tools for Range Rover Restyling
Completing a full restyling on a Range Rover 2017 requires specialized tools that ensure precision, safety, and efficiency. CARDIAGTECH.NET offers a range of high-quality tools designed for automotive professionals and enthusiasts.
6.1. Diagnostic Tools
- Purpose: Diagnostic tools are essential for identifying and resolving any electronic issues that may arise during the restyling process. These tools can read and clear error codes, test electronic components, and reprogram control units.
- Benefits: Ensure all electronic systems are functioning correctly, prevent future problems, and optimize vehicle performance.
6.2. Trim Removal Tools
- Purpose: These tools are designed to safely remove interior and exterior trim pieces without causing damage. They come in various shapes and sizes to fit different types of trim.
- Benefits: Prevent damage to trim pieces and vehicle surfaces, save time, and ensure a professional finish.
6.3. Socket and Wrench Sets
- Purpose: A comprehensive set of sockets and wrenches is necessary for removing and installing various components, such as bumpers, lights, and exhaust systems.
- Benefits: Provide the right tools for the job, ensure proper torque, and prevent damage to fasteners.
6.4. Torque Wrenches
- Purpose: Torque wrenches are used to tighten bolts and nuts to a specific torque setting, ensuring they are neither too loose nor too tight.
- Benefits: Prevent damage to components, ensure proper assembly, and maintain vehicle safety.
6.5. Multimeters
- Purpose: Multimeters are used to measure voltage, current, and resistance in electrical circuits. They are essential for diagnosing electrical problems and ensuring proper connections.
- Benefits: Accurately diagnose electrical issues, verify proper connections, and prevent electrical damage.
6.6. Scan Tools
- Purpose: Scan tools are used to access the vehicle’s computer system and retrieve diagnostic information. They can read and clear error codes, monitor sensor data, and perform various diagnostic tests.
- Benefits: Quickly identify and resolve issues, monitor vehicle performance, and prevent future problems.
6.7. Lifting Equipment
- Purpose: Equipment like hydraulic jacks and jack stands are used to safely lift and support the vehicle, providing access to the undercarriage and other hard-to-reach areas.
- Benefits: Provide safe and easy access to the vehicle’s underside, making it easier to perform repairs and modifications.
7. Choosing the Right Parts and Kits
Selecting the appropriate parts and kits is crucial for a successful Range Rover 2017 restyling project. It’s essential to focus on compatibility, quality, and reliability to achieve the desired aesthetic and functional improvements.
7.1. Compatibility
- Vehicle Model and Year: Always ensure that the parts and kits you choose are specifically designed for the Range Rover 2017 model. Parts intended for other models may not fit properly or function correctly.
- OEM vs. Aftermarket: Decide whether you prefer Original Equipment Manufacturer (OEM) parts or aftermarket options. OEM parts are made by the vehicle manufacturer and guarantee a perfect fit and finish. Aftermarket parts can be more affordable but may vary in quality and fit.
7.2. Quality
- Material: Look for parts made from high-quality materials that can withstand the rigors of daily use and exposure to the elements. For example, bumpers made from durable ABS plastic or steel are preferable.
- Finish: Ensure that the finish of the parts matches the vehicle’s existing paint and trim. A consistent finish will give the restyling a professional and cohesive look.
7.3. Reliability
- Brand Reputation: Research the brands of the parts and kits you are considering. Choose reputable brands known for producing reliable and durable products.
- Reviews and Ratings: Read reviews and ratings from other Range Rover owners who have used the same parts and kits. This can provide valuable insights into the quality and performance of the products.
7.4. Comprehensive Kits
- Completeness: Opt for comprehensive kits that include all necessary components for the restyling project. This will save time and effort by ensuring that you have everything you need on hand.
- Instructions: Check that the kit includes clear and detailed installation instructions. This will make the restyling process easier and reduce the risk of errors.
7.5. Sourcing Parts
- Authorized Dealers: Purchase parts from authorized dealers to ensure that you are getting genuine products with a warranty.
- Online Retailers: Online retailers like CARDIAGTECH.NET offer a wide selection of parts and kits at competitive prices. Be sure to verify the retailer’s reputation and return policy before making a purchase.
8. Cost Analysis of the Restyling Project
Undertaking a full restyling project for a Range Rover 2017 involves various costs that need careful consideration. Here’s a detailed breakdown of the expenses involved:
8.1. Component Costs
- Taillight Assembly:
- OEM: $800 – $1,500
- Aftermarket: $500 – $1,000
- Rear Bumper:
- OEM: $1,200 – $2,500
- Aftermarket: $800 – $1,800
- Exhaust System:
- OEM: $1,000 – $3,000
- Aftermarket: $700 – $2,000
- Trim and Inserts:
- OEM: $300 – $800
- Aftermarket: $200 – $500
- SVO Design Pack (Full Kit):
- $10,000 – $20,000 (including all components and installation)
8.2. Labor Costs
- Professional Installation: Hiring a professional installer can ensure that the restyling is done correctly and efficiently. Labor costs can vary depending on the complexity of the project and the hourly rate of the installer.
- Taillight Installation: $100 – $300
- Rear Bumper Installation: $200 – $500
- Exhaust System Installation: $200 – $600
- Full Restyling Project: $1,000 – $3,000
- DIY Installation: If you choose to do the installation yourself, you can save on labor costs, but you will need to invest in the necessary tools and equipment.
8.3. Additional Costs
- Paintwork: If the new components need to be painted to match the vehicle’s existing color, this can add to the overall cost.
- Bumper Paintwork: $200 – $500
- Full Kit Paintwork: $500 – $1,500
- Tools and Equipment: If you don’t already have the necessary tools, you may need to purchase them.
- Basic Tool Set: $100 – $300
- Specialized Tools (e.g., diagnostic tools): $500 – $2,000
- Permits and Inspections: In some areas, you may need to obtain permits for certain modifications to your vehicle. Additionally, you may need to have the restyling inspected to ensure it meets safety standards.
- Permits: $50 – $200
- Inspections: $50 – $100
8.4. Cost-Saving Tips
- Shop Around: Compare prices from different suppliers and installers to find the best deals.
- Buy in Bulk: Purchase a comprehensive kit that includes all the necessary components to save on individual part costs.
- DIY Installation: If you have the skills and tools, consider doing the installation yourself to save on labor costs.
- Used Parts: Consider purchasing used parts in good condition to save money.
- Finance Options: Explore financing options to spread the cost of the restyling project over time.
9. Maintaining Your Restyled Range Rover
Proper maintenance is essential to keep your restyled Range Rover 2017 looking and performing its best. Regular care will help preserve the appearance and functionality of the new components, ensuring they last for years to come.
9.1. Regular Cleaning
- Washing: Wash your Range Rover regularly to remove dirt, grime, and road salt. Use a mild soap and water solution and a soft sponge or microfiber cloth to avoid scratching the paint.
- Waxing: Apply wax to the paint finish every few months to protect it from the elements and maintain its shine.
- Detailing: Consider professional detailing services to keep your Range Rover looking its best. Detailers can perform tasks such as paint correction, interior cleaning, and trim restoration.
9.2. Protecting the New Components
- Taillights: Regularly clean the taillights to ensure they are free from dirt and debris. Use a plastic cleaner and polish to keep them clear and bright.
- Rear Bumper: Protect the rear bumper from scratches and dings by using a bumper protector or applying a clear paint protection film.
- Exhaust System: Inspect the exhaust system regularly for signs of corrosion or damage. Clean the exhaust tips to maintain their appearance.
- Trim and Inserts: Clean the trim and inserts with a mild cleaner and protect them from UV damage with a trim protectant.
9.3. Inspections and Maintenance
- Regular Inspections: Perform regular inspections of the restyled components to identify any issues early on. Check for loose fasteners, damaged trim, and signs of wear and tear.
- Scheduled Maintenance: Follow the manufacturer’s recommended maintenance schedule for your Range Rover. This includes oil changes, fluid checks, and filter replacements.
- Professional Servicing: Take your Range Rover to a qualified mechanic for regular servicing and repairs. A professional can identify and address any potential issues before they become major problems.
9.4. Addressing Common Issues
- Paint Chips and Scratches: Repair paint chips and scratches promptly to prevent rust and corrosion. Use touch-up paint or consider professional paint repair services.
- Loose Trim: Reattach any loose trim pieces using adhesive or clips. If the trim is damaged, replace it with a new part.
- Exhaust Leaks: Address exhaust leaks immediately to prevent damage to the engine and other components. Have the exhaust system repaired or replaced by a qualified mechanic.
- Electrical Problems: If you experience any electrical problems with the taillights or other components, consult a qualified electrician.
10. Troubleshooting Common Issues After Restyling
Even with careful installation and high-quality parts, some issues may arise after restyling your Range Rover 2017. Here are some common problems and how to troubleshoot them.
10.1. Electrical Problems
- Issue: Taillights not working.
- Troubleshooting Steps:
- Check the electrical connections to ensure they are secure.
- Inspect the fuses and replace any that are blown.
- Use a multimeter to test the voltage at the taillight connectors.
- Check the wiring for any damage or corrosion.
- Consult a qualified electrician if the problem persists.
- Troubleshooting Steps:
- Issue: Error messages on the dashboard.
- Troubleshooting Steps:
- Use a scan tool to read the error codes.
- Research the error codes to identify the cause of the problem.
- Check the affected components and wiring.
- Clear the error codes after resolving the issue.
- Troubleshooting Steps:
10.2. Fitment Issues
- Issue: Gaps or misalignments with the new bumper.
- Troubleshooting Steps:
- Loosen the bumper and reposition it to ensure proper alignment.
- Check the mounting points for any damage or obstructions.
- Use shims or spacers to adjust the fit if necessary.
- Ensure all fasteners are properly tightened.
- Troubleshooting Steps:
- Issue: Trim pieces not fitting correctly.
- Troubleshooting Steps:
- Ensure the trim pieces are designed for your vehicle model.
- Clean the surfaces where the trim will be attached.
- Use adhesive or clips to secure the trim in place.
- Apply pressure to ensure a secure bond.
- Troubleshooting Steps:
10.3. Exhaust System Problems
- Issue: Exhaust leaks.
- Troubleshooting Steps:
- Inspect the exhaust system for signs of leaks, such as black soot or corrosion.
- Tighten the clamps and bolts connecting the exhaust system.
- Replace any damaged gaskets or seals.
- Consult a qualified mechanic if the problem persists.
- Troubleshooting Steps:
- Issue: Rattling noises.
- Troubleshooting Steps:
- Check the exhaust system for any loose components or hangers.
- Ensure the exhaust system is not hitting against the vehicle’s frame.
- Tighten or replace any loose hangers or brackets.
- Troubleshooting Steps:
10.4. General Tips
- Consult Professionals: If you are unable to resolve the issues yourself, consult a qualified mechanic or electrician.
- Use Quality Parts: Use high-quality replacement parts to ensure proper fit and function.
- Document Everything: Keep a record of all the steps you take during the troubleshooting process. This will help you identify the cause of the problem and find a solution more quickly.
11. Expert Tips for a Seamless Restyling Process
Achieving a seamless restyling process for your Range Rover 2017 requires careful planning, attention to detail, and the right tools. Here are some expert tips to help ensure a successful project:
11.1. Planning and Preparation
- Research: Thoroughly research the restyling options available for your Range Rover 2017. Look at different kits, parts, and designs to find the best fit for your vehicle and personal taste.
- Budget: Set a realistic budget for the project and stick to it. Consider all the costs involved, including parts, labor, tools, and paintwork.
- Timeline: Create a timeline for the project and break it down into smaller, manageable tasks. This will help you stay organized and on schedule.
- Workspace: Prepare your workspace by ensuring it is clean, well-lit, and equipped with the necessary tools and equipment.
11.2. Component Selection
- Quality: Prioritize quality over price when selecting parts and kits. High-quality components will last longer and provide better performance.
- Compatibility: Ensure that the parts and kits you choose are specifically designed for your Range Rover 2017 model.
- Reviews: Read reviews and ratings from other Range Rover owners to get insights into the quality and performance of the products.
- Warranty: Choose parts and kits that come with a warranty to protect against defects and premature failure.
11.3. Installation Techniques
- Instructions: Follow the installation instructions carefully and take your time. Rushing the process can lead to errors and damage.
- Tools: Use the right tools for the job. Using the wrong tools can damage the components and make the installation more difficult.
- Safety: Prioritize safety by wearing safety glasses and gloves. Disconnect the battery before working on any electrical components.
- Assistance: Ask a friend or family member to help with the installation. Having an extra set of hands can make the process easier and safer.
11.4. Professional Help
- Qualified Mechanic: If you are not comfortable performing the installation yourself, hire a qualified mechanic to do the job.
- Paintwork: Consider hiring a professional painter to paint the new components. A professional painter can ensure a perfect color match and a flawless finish.
- Electrical Work: Consult a qualified electrician for any electrical work. Electrical problems can be dangerous and should be handled by a professional.
11.5. Post-Installation Checks
- Inspection: Inspect the restyled components to ensure they are properly installed and aligned.
- Testing: Test all the functions of the new components to ensure they are working correctly.
- Adjustments: Make any necessary adjustments to ensure a perfect fit and finish.
- Cleaning: Clean the vehicle and inspect the overall appearance.
12. Real-World Examples of Successful Range Rover Restyling
Examining real-world examples of successful Range Rover restyling projects can provide inspiration and guidance for your own project.
12.1. Case Study 1: 2017 Range Rover to 2018MY Conversion
- Objective: To update a 2017 Range Rover to match the appearance of the 2018 model.
- Components Used: 2018MY taillights, rear bumper, exhaust system, and trim pieces.
- Installation Process: The owner hired a professional mechanic to perform the installation. The mechanic followed the step-by-step instructions and used high-quality tools to ensure a proper fit and finish.
- Results: The restyling was a success, and the Range Rover looked almost identical to the 2018 model. The owner was very happy with the results and received many compliments on the updated appearance.
12.2. Case Study 2: SVO Design Pack Installation
- Objective: To install an SVO Design Pack on a 2017 Range Rover to enhance its sporty appearance.
- Components Used: SVO front bumper, rear bumper, side skirts, and exhaust finishers.
- Installation Process: The owner purchased a comprehensive SVO Design Pack kit that included all the necessary components and instructions. He followed the instructions carefully and took his time to ensure a proper fit and finish.
- Results: The SVO Design Pack dramatically improved the appearance of the Range Rover, giving it a more aggressive and sporty look. The owner was very satisfied with the results and enjoyed driving the restyled vehicle.
12.3. Case Study 3: DIY Restyling Project
- Objective: To perform a budget-friendly restyling project on a 2017 Range Rover using aftermarket parts.
- Components Used: Aftermarket taillights, rear bumper, and trim pieces.
- Installation Process: The owner decided to do the installation himself to save on labor costs. He researched the project thoroughly and purchased the necessary tools and equipment.
- Results: The restyling was a success, and the Range Rover looked much more modern and stylish. The owner was proud of his accomplishment and enjoyed the savings from doing the installation himself.
13. How CARDIAGTECH.NET Can Help You
CARDIAGTECH.NET is your ultimate partner for all your Range Rover restyling needs. We offer a wide range of high-quality tools, equipment, and diagnostic solutions to help you achieve a seamless and successful restyling project.
13.1. Comprehensive Tool Selection
- Diagnostic Tools: Our diagnostic tools can help you identify and resolve any electronic issues that may arise during the restyling process. These tools can read and clear error codes, test electronic components, and reprogram control units.
- Trim Removal Tools: Our trim removal tools are designed to safely remove interior and exterior trim pieces without causing damage.
- Socket and Wrench Sets: We offer a comprehensive selection of socket and wrench sets to help you remove and install various components.
- Torque Wrenches: Our torque wrenches are used to tighten bolts and nuts to a specific torque setting, ensuring they are neither too loose nor too tight.
- Multimeters: Our multimeters are used to measure voltage, current, and resistance in electrical circuits.
- Scan Tools: Our scan tools are used to access the vehicle’s computer system and retrieve diagnostic information.
- Lifting Equipment: We offer a range of lifting equipment, such as hydraulic jacks and jack stands, to safely lift and support your vehicle.
13.2. Expert Support and Guidance
- Technical Support: Our team of experienced technicians can provide expert technical support and guidance throughout the restyling process.
- Installation Tips: We offer detailed installation tips and instructions to help you install the new components correctly.
- Troubleshooting Assistance: We can help you troubleshoot any issues that may arise after the restyling is complete.
13.3. High-Quality Products
- Reliable Brands: We only offer products from reputable brands known for their quality and durability.
- Warranty: Our products come with a warranty to protect against defects and premature failure.
- Customer Satisfaction: We are committed to providing excellent customer service and ensuring your satisfaction with our products and services.
13.4. Convenient Online Shopping
- Wide Selection: Our online store offers a wide selection of tools, equipment, and diagnostic solutions for Range Rover restyling.
- Competitive Prices: We offer competitive prices to help you save money on your restyling project.
- Secure Ordering: Our online store uses secure encryption technology to protect your personal and financial information.
- Fast Shipping: We offer fast shipping to get the products you need quickly.
14. Conclusion: Elevate Your Range Rover Today
Transforming your Range Rover 2017 with a full restyling, especially incorporating the sought-after 2018MY rear design, is an investment that enhances both its aesthetic appeal and market value. Whether you choose to upgrade the taillights, rear bumper, exhaust system, or opt for a complete SVO Design Pack, the result is a refreshed, modern vehicle that reflects your personal style.
By following the detailed steps, utilizing the right tools from CARDIAGTECH.NET, and considering the cost analysis, you can confidently undertake this project. Remember, proper maintenance and prompt troubleshooting are key to preserving the longevity and performance of your restyled Range Rover.
Ready to elevate your Range Rover? Contact CARDIAGTECH.NET today at +1 (641) 206-8880, visit our website CARDIAGTECH.NET, or stop by our location at 276 Reock St, City of Orange, NJ 07050, United States. Let us help you transform your Range Rover 2017 into the vehicle of your dreams.
1. What does a full restyling of a Range Rover 2017 typically include?
A full restyling usually includes updates to the front and rear bumpers, taillights, headlights, side skirts, and sometimes interior modifications to match newer models.
2. Can I install 2018MY taillights on my 2017 Range Rover?
Yes, installing 2018MY taillights on a 2017 Range Rover is a common upgrade. However, ensure you have the correct adapters or wiring modifications for compatibility.
3. What is the cost of a full SVO Design Pack restyling?
An SVO Design Pack can range from $10,000 to $20,000, including parts, paintwork, and installation. Prices vary based on the specific components and labor rates.
4. Is it better to use OEM or aftermarket parts for restyling?
OEM parts guarantee fit and finish but are more expensive. Aftermarket parts are cost-effective, but quality can vary. Choose reputable brands for aftermarket options.
5. How can CARDIAGTECH.NET assist with my restyling project?
CARDIAGTECH.NET offers essential diagnostic tools, expert technical support, and high-quality products to ensure a smooth and successful restyling process.
6. Do I need professional help for installing restyling components?
While some installations can be DIY, complex modifications like electrical work or bumper replacements are best handled by professionals.
7. What tools are essential for a Range Rover restyling project?
Essential tools include diagnostic scanners, trim removal tools, socket sets, torque wrenches, and multimeters.
8. How often should I maintain the restyled components of my Range Rover?
Regular maintenance includes washing, waxing, and inspecting components every few months to prevent wear and tear.
9. Will restyling my Range Rover affect its resale value?
Yes, a well-executed restyling can increase the resale value by making the vehicle more appealing and modern.
10. What should I do if I encounter electrical issues after restyling?
Check all electrical connections, fuses, and wiring. Use a diagnostic tool to identify error codes, and consult a professional electrician for complex issues.
Don’t wait any longer to give your Range Rover 2017 the upgrade it deserves. Contact CARDIAGTECH.NET now to explore your options and start your restyling journey. Our team is ready to provide the tools and support you need to achieve a stunning transformation. Call us at +1 (641) 206-8880 or visit our website today.

