Can I Fix Cruise Control to My Car? A DIY Guide to Cruise Control Repair

Cruise control is a fantastic feature that enhances driving comfort, especially on long journeys. If you’re experiencing issues with your car’s cruise control, like difficulty engaging or inconsistent performance, you might be wondering, “Can I Fix Cruise Control To My Car myself?” The answer is often yes, especially if you’re dealing with a common problem in older vehicles: dirty cruise control switch contacts.
This guide, tailored for DIY car enthusiasts, focuses on troubleshooting and potentially fixing a malfunctioning cruise control system, particularly in older GM B-body vehicles. We’ll walk you through a step-by-step process to diagnose and address a frequently overlooked culprit – the cruise control switch located on your turn signal stalk.
Cruise Control switch not working? Here
Is Your Cruise Control Giving You Trouble? Spotting the Symptoms
Before diving into repairs, let’s identify if your cruise control issue aligns with the problem we’re addressing. You might be facing dirty switch contacts if you experience these symptoms:
- Intermittent Cruise Control Engagement: You struggle to turn the cruise control on, requiring multiple attempts or specific pressure on the stalk.
- Unresponsive Resume/Acceleration: Once cruise control is set, the resume or acceleration functions on the stalk are unreliable or don’t work at all.
- Deceleration and Set Work Fine: Interestingly, setting the speed and deceleration functions might still operate normally, even when other stalk controls are failing.
If these symptoms resonate with your cruise control woes, there’s a good chance that dirty contacts within the stalk switch are the root cause.
Ruling Out Other Potential Issues
While dirty switch contacts are a common problem, it’s wise to briefly consider other potential culprits before focusing solely on the stalk. Ensure the following are functioning correctly:
- Brake Pedal Switches: Cruise control disengages when you press the brake. Faulty brake pedal switches can disrupt the system.
- Cruise Control Module Power: Check for any blown fuses or wiring issues that might be preventing power from reaching the cruise control module.
- Cruise Control Module Itself: While less common, the module itself could be faulty.
- Wiring Breaks: Inspect for any visible damage or breaks in the wiring harness related to the cruise control system.
- CHMSL (Center High Mount Stop Lamp): Some older GM factory service manuals suggest a functional CHMSL is necessary for cruise control. Although, as the original article notes, cruise control can sometimes function even with a non-working CHMSL.
If you’ve ruled out these factors, then focusing on the cruise control stalk switch is a logical next step.
Gathering Your Tools for the Cruise Control Switch Fix
Fortunately, this repair is relatively straightforward and requires minimal tools:
- Needle-Nose Pliers: For manipulating small clips and connectors.
- Flashlight: To illuminate the work area under the steering column.
- Fine-Bladed Screwdriver or Pick: For gently prying connectors and releasing latches.
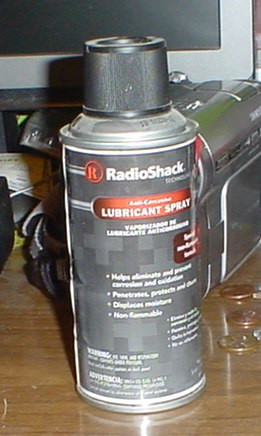
- Electrical Contact Cleaner Spray: Crucial for cleaning the switch contacts. Opt for a quality electronic contact cleaner with a spray tube for precise application. Avoid using WD-40, as it’s not designed for this purpose and can damage plastics. Brands like DeOxit or RadioShack’s 64-057 (which contains DeOxit) are good choices.
 Cruise Control switch not working? Here
Step-by-Step Guide to Cleaning Your Cruise Control Switch Contacts
Safety First: While not strictly necessary, disconnecting your car battery is a good safety practice when working on electrical components.
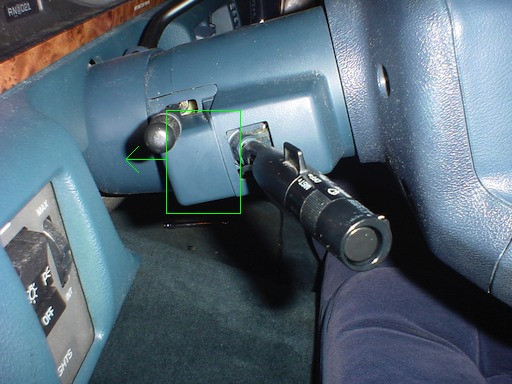
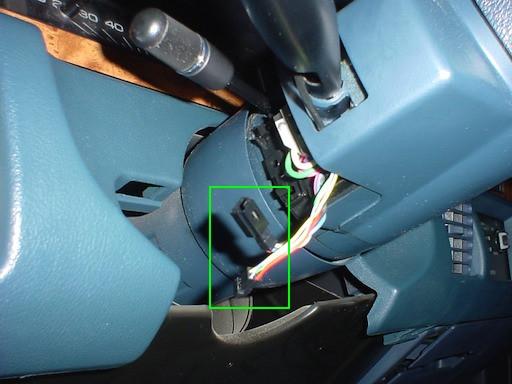
1. Remove the Steering Column Trim:
Locate the trim piece behind the multifunction lever (turn signal/cruise control stalk) on the steering column, near the driver’s side door. Gently slide this piece towards the steering wheel and remove it. It’s held in place by pressure clips and should come off with minimal force.
 Cruise Control switch not working? Here
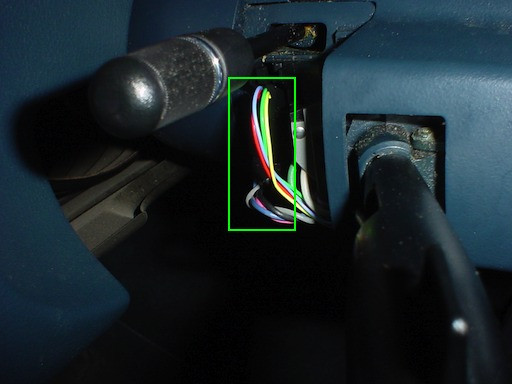
2. Disconnect the Wiring Connector:
With the trim removed, you’ll see the wiring connected to the cruise control switch. Carefully locate the connector and gently unplug it. There’s usually a small latch or peg that needs to be released. Work it patiently to avoid damaging the delicate wires.
 Cruise Control switch not working? Here
 Cruise Control switch not working? Here
3. Separate the Connector Halves:
Once unplugged, the connector itself might be in two halves. Use your fine-bladed screwdriver or pick to gently separate these halves at their latching point.
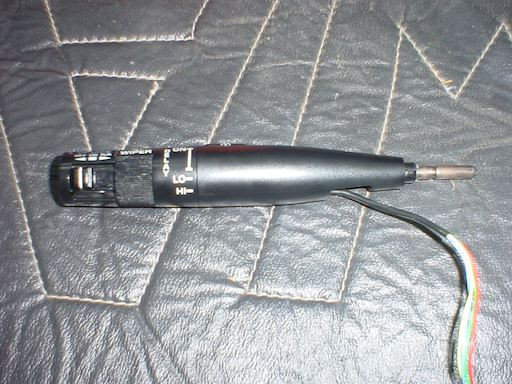
4. Remove the Cruise Control Stalk:
This is surprisingly easy! Simply grip the cruise control stalk and pull it straight out from the steering column towards you. It should pop out with moderate force. Ensure the windshield wipers are off and the washer paddle isn’t depressed to ease removal.
 Cruise Control switch not working? Here
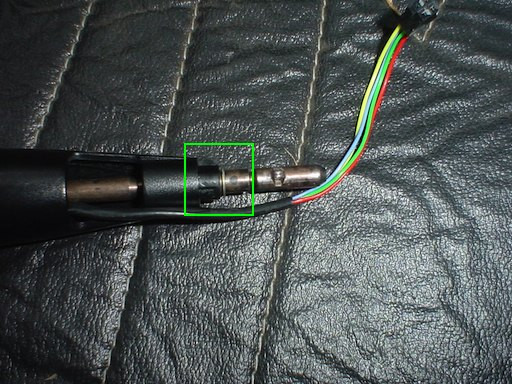
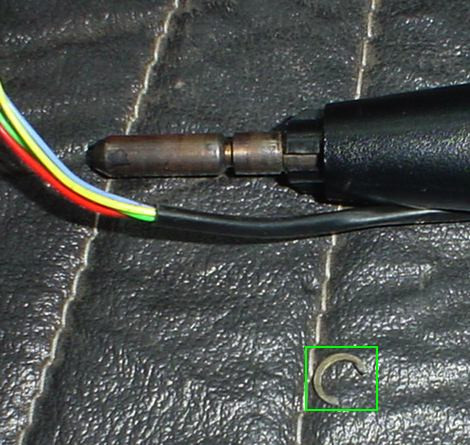
5. Access the Switch Contacts by Removing the C-Clip:
Examine the stalk closely, and you’ll find a C-clip (circlip) holding the stalk assembly together. Position the stalk with the open side of the C-clip facing downwards onto a soft surface to prevent losing it. Use needle-nose pliers to gently push the two open ends of the C-clip downwards and off the metal shaft.
 Cruise Control switch not working? Here
 Cruise Control switch not working? Here
 Cruise Control switch not working? Here
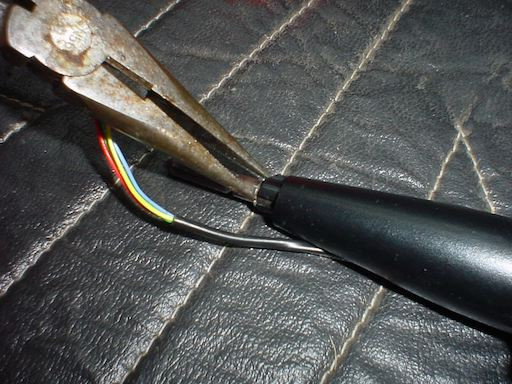
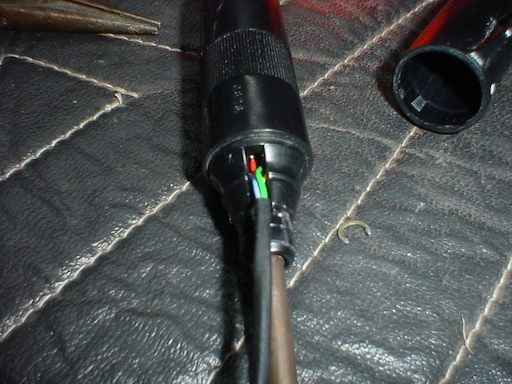
6. Expose the Wiring and Switch Mechanism:
Carefully slide the lower plastic portion (windshield washer paddle) off the stalk. You might need to align a keyway on the metal shaft with a cutout in the paddle for it to slide off smoothly. Gently guide the wiring through the opening in the paddle as you remove it.
 Cruise Control switch not working? Here
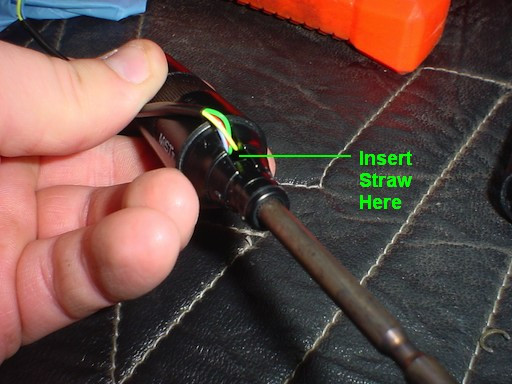
7. Clean the Switch Contacts:
Now you can see the bundle of wires leading into the cruise control switch mechanism. Attach the spray tube to your electrical contact cleaner. Gently insert the tube into the opening where the wires enter the switch housing, directing the spray downwards. Apply a generous amount of contact cleaner, allowing it to drip out, ideally through the “decel/set” button end. While spraying, repeatedly work all the switch functions (on/off, accel/resume, set/decel) to help the cleaner reach all contact points.
 Cruise Control switch not working? Here
 Cruise Control switch not working? Here
8. Reassemble the Cruise Control Stalk:
Reassembly is essentially the reverse of disassembly.
- Slide the Windshield Washer Paddle Back On: Guide the wiring back through the paddle opening and slide it onto the metal shaft. Align the keyway for proper fit.
- Reinstall the C-Clip: Carefully push the C-clip back into its groove on the metal shaft to secure the assembly.
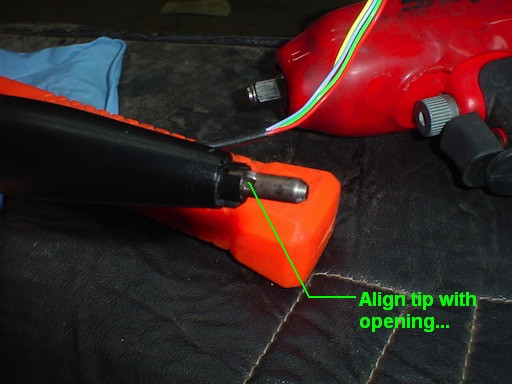
- Reinstall the Stalk into the Steering Column: Align the stalk and push it straight back into the steering column socket until it clicks into place.
- Reconnect the Wiring Connector: Reattach the connector, ensuring it clicks securely.
- Reinstall the Steering Column Trim: Snap the trim piece back into place.
9. Test Your Cruise Control:
Take your car for a test drive. If dirty switch contacts were the sole issue, your cruise control should now function correctly. Verify all functions: on/off, set/decelerate, and resume/accelerate.
Conclusion: Cruise Control Fixed!
Cleaning the cruise control switch contacts is a simple yet effective DIY repair that can restore functionality to a malfunctioning cruise control system, especially in older vehicles. By following these steps, you can potentially save yourself the cost of replacing the entire stalk and enjoy the convenience of cruise control once again.
Remember to exercise caution when working with electrical components and always prioritize safety. If you’re uncomfortable performing this repair yourself, consult a qualified automotive technician.
This guide provides a solution to a common cruise control issue. If you continue to experience problems after cleaning the switch contacts, further diagnosis of the cruise control system may be necessary.