How to Fix Scratched Paint on Your Car: A Comprehensive DIY Guide

Car scratches are an unfortunate reality for vehicle owners. Whether it’s a minor brush against a bush or a more noticeable key mark, scratches can detract from your car’s appearance and potentially decrease its resale value. The good news is that not all scratches require a costly trip to the body shop. Many can be effectively repaired at home with the right tools and techniques. This guide will walk you through how to fix scratched paint on your car, covering everything from assessing the damage to the final polishing steps.
Understanding Car Scratches and When to DIY
Before diving into the repair process, it’s crucial to understand the anatomy of your car’s paint and the different types of scratches. Automotive paint typically consists of several layers:
- Clear Coat: This is the outermost, transparent layer that provides shine and protection against UV rays and environmental damage. Most minor scratches only affect this layer.
- Base Coat (Color Coat): This layer provides the actual color of your car. Scratches that penetrate the clear coat and reach the base coat are more noticeable and require more attention.
- Primer: This layer promotes adhesion between the base coat and the metal body. Scratches reaching the primer are deep and may require professional repair for a perfect finish.
- Metal Body: The actual body panel of your car. Damage to this layer often involves dents and rust issues, requiring significant repair.
For DIY scratch repair, we’ll primarily focus on scratches affecting the clear coat and light base coat damage. Deep scratches that expose the primer or metal, or those that are very wide or deep, are best left to professionals.
Essential Tools and Materials for DIY Scratch Repair
Having the right tools and materials is essential for a successful DIY scratch repair. Here’s a list of what you’ll likely need:
- Car Wash Soap and Water: For thoroughly cleaning the area before and after repairs.
- Microfiber Cloths: Soft cloths for washing, drying, applying products, and buffing.
- Rubbing Alcohol or Car Detailing Spray: To remove wax and contaminants from the scratch area.
- Polishing Compound: A mildly abrasive compound designed to remove light clear coat scratches.
- Scratch Remover (Optional): Specialized products for light scratches, often containing fillers and polishes.
- Wax or Paint Sealant: To protect the repaired area and restore shine.
- Applicator Pads or Sponges: For applying compounds and waxes.
- Water Spray Bottle: For wet sanding (for deeper scratches).
- Sandpaper (Various Grits – e.g., 2000, 2500, 3000): For leveling deeper scratches (use only if necessary and with caution).
- Rubbing Compound (More Abrasive): For use after sanding to remove sanding marks.
- Machine Polisher (Optional but Recommended for Best Results): A dual-action (DA) polisher will make buffing and polishing much easier and more effective, especially for larger areas or deeper scratches.
- Paint Touch-Up Kit (For Deep Scratches Reaching Base Coat): Includes touch-up paint matching your car’s color and clear coat.
Step-by-Step Guide to Fixing Light Scratches (Clear Coat Only)
Light scratches, often referred to as swirl marks or spiderwebs, are superficial and only affect the clear coat. These are the easiest to fix at home.
- Clean the Area: Wash the scratched area and the surrounding panel with car wash soap and water. Rinse thoroughly and dry with a microfiber cloth. This removes dirt and debris that could further scratch the paint during the repair process.
- Assess the Scratch: Run your fingernail lightly across the scratch. If your nail doesn’t catch, it’s likely a light clear coat scratch.
- Apply Polishing Compound: Apply a small amount of polishing compound to an applicator pad or microfiber cloth.
- Rub the Compound into the Scratch: Using firm, even pressure, rub the polishing compound into the scratch in a circular motion. Work in small sections.
- Buff Off Excess Compound: Use a clean microfiber cloth to buff away the excess compound. Check the scratch. You may need to repeat steps 3-5 several times for optimal results.
- Apply Wax or Sealant: Once the scratch is minimized or gone, apply a coat of wax or paint sealant to protect the area and enhance the shine.
Turtle Wax scratch repair products showing minimal improvement on car scratches.
Image: Turtle Wax products may offer minimal improvement for light scratches.
Step-by-Step Guide to Fixing Medium to Deep Scratches (Reaching Base Coat)
Medium to deep scratches are more noticeable and may have penetrated the clear coat and reached the base coat. These require a more involved process, potentially including sanding and touch-up paint.
- Clean and Assess: As with light scratches, thoroughly clean the area and assess the scratch depth with your fingernail. If your nail catches, it’s likely a medium to deep scratch.
- Consider Wet Sanding (For Moderate Scratches): If polishing compound alone isn’t sufficient, you may need to lightly wet sand the area to level the clear coat.
- Prepare Sandpaper: Soak 2000 or 2500 grit sandpaper in water for a few minutes.
- Wet Sand Gently: Spray the scratched area and the sandpaper with water to keep it lubricated. Lightly sand the scratch in straight, back-and-forth motions, following the direction of the scratch. Use very light pressure and sand for a short period. The goal is to subtly level the clear coat, not remove paint.
- Clean and Inspect: Wipe the area clean and inspect your progress. The sanded area will look hazy.
- Apply Rubbing Compound (After Sanding): If you sanded, apply rubbing compound to an applicator pad. This is more abrasive than polishing compound and will remove the sanding marks and further level the clear coat. Rub firmly in circular motions and buff clean.
- Apply Polishing Compound: After using rubbing compound, switch to polishing compound to refine the finish and restore shine. Use the same application and buffing technique as with rubbing compound.
- Touch-Up Paint (For Deep Scratches Exposing Base Coat): If the scratch is deep enough to expose the base coat, you’ll need to use touch-up paint before polishing.
- Apply Touch-Up Paint: Clean the scratch thoroughly. Use a fine-tipped brush or applicator from the touch-up kit to carefully apply thin layers of touch-up paint into the scratch, allowing each layer to dry completely before applying the next. Build up the paint until it is level with or slightly above the surrounding paint.
- Level Touch-Up Paint (After Drying): Once the touch-up paint is fully dry (usually after 24-48 hours), you may need to gently level it. You can use very fine-grit sandpaper (3000 grit or higher) and wet sand lightly to bring the touch-up paint flush with the surrounding clear coat. Proceed with caution and test in an inconspicuous area first.
- Compound and Polish: After leveling the touch-up paint, use rubbing compound and then polishing compound to blend the repaired area and restore shine.
 Meguiar's DA Power System effectively removing light car scratches.
Image: Machine polishers like Meguiar’s DA Power System enhance scratch removal.
- Final Polish and Wax: After compounding and polishing, apply a final polish for maximum gloss and then apply a coat of wax or sealant to protect your work.
Product Recommendations for Car Scratch Repair
Several products are available for DIY car scratch repair. Based on testing and effectiveness, here are a few recommendations:
-
For Very Light Scratches (Minimal Improvement Expected): Turtle Wax Scratch Repair Kit – These products are readily available and inexpensive but may only offer minimal improvement for even light scratches.
-
For Light to Moderate Scratches (Better Results, Machine Polisher Recommended): Meguiar’s Ultimate Compound, Polish, and Wax – Meguiar’s products are a step up in performance. Using a machine polisher like the Meguiar’s DA Power System significantly improves the results, making light scratches virtually disappear and improving moderate scratches.
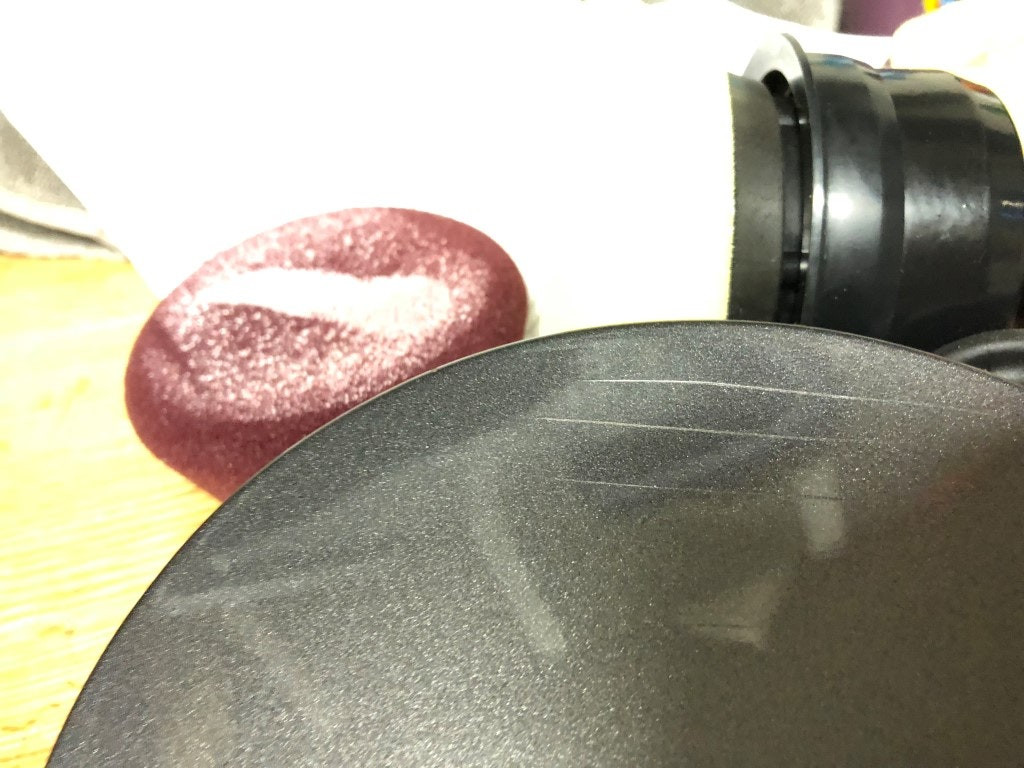
 3M Trizact Precision Scratch Kit significantly improving but not completely removing deeper car scratches.
Image: 3M Trizact system shows noticeable improvement on deeper scratches after sanding and polishing.
- For Moderate to Deeper Scratches (Sanding Required for Best Results): 3M Trizact Precision Scratch Kit – This kit includes sandpaper and is designed for more significant scratch removal. The 3M Trizact system, involving sanding, compounding, and polishing, can effectively improve even deeper scratches, although complete removal may not always be possible, especially for very deep damage.
When to Seek Professional Help
While DIY scratch repair can be effective for many types of scratches, there are situations where professional help is necessary:
- Deep Scratches Exposing Primer or Metal: These require more complex repairs to prevent rust and ensure proper paint adhesion.
- Large or Wide Scratches: Repairing large areas evenly can be challenging for DIYers and may result in noticeable imperfections.
- Damage to Multiple Panels: Extensive damage is best handled by professionals with the right equipment and expertise to ensure a seamless repair.
- If You’re Unsure or Uncomfortable: If you’re hesitant about sanding or using power tools, or if you’re unsure about the scratch depth, it’s always best to consult a professional auto body shop.
Conclusion
Fixing scratched paint on your car at home is achievable with patience and the right approach. By understanding the type of scratch, using appropriate tools and products, and following these step-by-step guides, you can significantly improve your car’s appearance and protect its paintwork. Remember to start with the least aggressive methods and gradually increase the intensity as needed. For deeper or more complex damage, don’t hesitate to seek professional assistance to ensure a flawless finish.
