How to Fix a Broken Car Window: A Step-by-Step Guide
Discovering a broken car window is frustrating and can compromise your vehicle’s security and your safety. Just like a broken window in a building can signal neglect and lead to further issues, a damaged car window, if left unattended, can escalate into bigger problems, from theft and weather damage to decreased vehicle value. This guide provides you with a comprehensive approach on how to fix a broken car window, whether you’re considering a DIY fix or seeking professional help.
Assessing the Damage and Deciding on a Repair Strategy
Before you jump into fixing your broken car window, it’s crucial to properly assess the damage. The extent of the damage will largely dictate whether you can tackle the repair yourself or if you should seek professional auto glass services.
- Minor Chips or Cracks: Small chips or cracks, particularly on the windshield, can sometimes be repaired with specialized resin. These repairs are often less expensive and can prevent further damage. However, this is typically for windshields, and side or rear windows might require different approaches depending on the damage type and location.
- Shattered or Large Cracks: If your car window is shattered or has large, extensive cracks, replacement is usually the only viable option. Driving with severely damaged windows is not only illegal in many places but also extremely dangerous.
- Type of Window: Understand what type of car window is damaged. Windshields are laminated glass, designed to crack but not shatter. Side and rear windows are typically tempered glass, which shatters into small, relatively harmless pieces upon impact. This difference affects the repair and replacement methods.
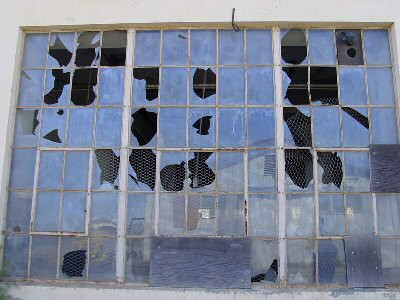
Broken car window symbolizing neglect and the need for prompt repair
Safety First: Essential Precautions
Working with broken glass is inherently dangerous. Prioritize safety throughout the entire repair process.
- Wear Protective Gear: Always wear safety glasses and heavy-duty gloves to protect your eyes and hands from sharp glass shards.
- Secure the Area: If the window is shattered, carefully remove as much loose glass as possible from both inside and outside the car. Use a vacuum cleaner to collect small glass fragments to prevent injuries later.
- Stabilize the Window (If Necessary): If the window is still partially intact but unstable, use strong tape to carefully secure it to prevent further breakage or falling during the repair process.
DIY Car Window Repair: Step-by-Step Guide for Replacement
For shattered or extensively damaged car windows, replacement is usually necessary. Here’s a general step-by-step guide for replacing a typical car window. Note: This is a general guide, and specific steps may vary depending on your car’s make and model. Always consult your vehicle’s repair manual for precise instructions.
Step 1: Gather Necessary Tools and Materials
- Replacement Window: Obtain the correct replacement window for your car model. You can usually order this from a dealership or auto parts supplier.
- Glass Removal Tools: You’ll need tools to remove the old window. This might include:
- Glass Suction Cups: To safely handle and maneuver the glass.
- Panel Removal Tools: To remove interior door panels and trim.
- Utility Knife or Glass Cutter: (Use with extreme caution and only if needed to separate adhesive, often not required for modern cars).
- Wrench Set and Screwdrivers: To remove door panels and window regulators if necessary.
- Sealant and Adhesive: Automotive-grade glass sealant or adhesive is essential for properly sealing the new window and preventing leaks.
- Cleaning Supplies: Glass cleaner, cloths, and possibly a scraper to clean the window frame.
Step 2: Remove the Door Panel and Access the Window Mechanism
- Locate and Remove Screws: Carefully inspect the interior door panel and locate all screws. These are often hidden behind plastic covers or in door handle recesses. Use the appropriate screwdriver to remove them.
- Detach the Door Panel: Once screws are removed, gently pry the door panel away from the door frame. Use panel removal tools to avoid damaging the panel or clips. Work your way around the edges, carefully detaching clips as you go.
- Peel Back Weather Barrier (If Present): Some vehicles have a plastic weather barrier sheet behind the door panel. Carefully peel this back to access the window mechanism.
Step 3: Remove the Broken Window
- Lower the Window (If Possible): If there are still pieces of the window attached to the regulator and it can be lowered slightly, carefully do so. This can provide better access to the window mounting points. If the window is completely shattered and detached from the regulator, proceed to the next step.
- Detach Window from Regulator: Identify how the window is attached to the window regulator. It’s usually held in place by bolts, clips, or pressure fittings. Carefully detach these fixings. You may need to use a wrench or screwdriver.
- Remove the Broken Glass: Using suction cups, carefully lift and remove any remaining large pieces of broken glass. If the window is shattered, meticulously remove all fragments from the door cavity.
Step 4: Install the New Window
- Clean the Window Frame: Thoroughly clean the window frame opening, removing any old sealant, debris, or glass fragments. Ensure the surface is clean and dry for proper sealant adhesion.
- Apply Sealant: Apply a bead of automotive glass sealant around the window frame opening where the new window will sit. Follow the sealant manufacturer’s instructions for application and drying time.
- Install the New Window: Carefully position the new window using suction cups and gently lower it into the frame opening. Ensure it is properly aligned and seated in the sealant.
- Attach Window to Regulator: Reconnect the new window to the window regulator using the fixings you removed earlier. Ensure it’s securely attached.
- Test the Window Mechanism: Before reassembling everything, test the window regulator to ensure the new window moves up and down smoothly and correctly.
Step 5: Reassemble Door Panel and Final Checks
- Reattach Weather Barrier: If you removed a weather barrier, carefully reattach it.
- Reinstall Door Panel: Align the door panel and gently push it back into place, ensuring all clips are engaged. Reinstall all screws and covers.
- Final Cleaning: Clean the new window and surrounding area.
- Test Thoroughly: Test the window operation several times to ensure smooth movement and proper sealing. Check for any leaks, especially if you applied sealant.
When to Seek Professional Help
While DIY car window repair is possible, there are situations where professional auto glass service is highly recommended or necessary:
- Lack of Experience: If you are not comfortable working with cars or handling glass, it’s best to leave it to professionals. Incorrect installation can lead to leaks, window malfunction, or even safety issues.
- Complex Window Systems: Some modern vehicles have complex window systems, including sensors, embedded antennas, or advanced regulators. Repairing these systems often requires specialized tools and expertise.
- Windshield Replacement: Windshield replacement, in particular, is a safety-critical repair best left to professionals due to the windshield’s structural role in the vehicle.
- Time Constraints: If you need the repair done quickly and efficiently, a professional service can save you significant time and effort.
Conclusion: Maintaining Your Vehicle’s Integrity
A broken car window is more than just a cosmetic issue. Promptly addressing it is crucial for your vehicle’s security, your safety, and maintaining its overall condition. Whether you choose to tackle a DIY repair or seek professional assistance, understanding the process and taking swift action is key to fixing your broken car window and preventing further problems. Just like fixing that first broken window in a neighborhood, addressing car window damage promptly helps maintain the integrity and value of your vehicle.