How to Fix Cloudy Car Headlights: A Step-by-Step Guide to Crystal Clear Lenses
Cloudy or hazy car headlights are not just an aesthetic issue; they significantly reduce your visibility at night and compromise your safety on the road. If you’re struggling with dim headlights due to clouding, you might have heard about quick fixes like toothpaste. But let’s be clear: for truly effective and lasting results, you need a more professional approach. This guide will walk you through the proven method of restoring your headlights using sanding and polishing techniques, ensuring they become crystal clear and significantly improve your driving safety.
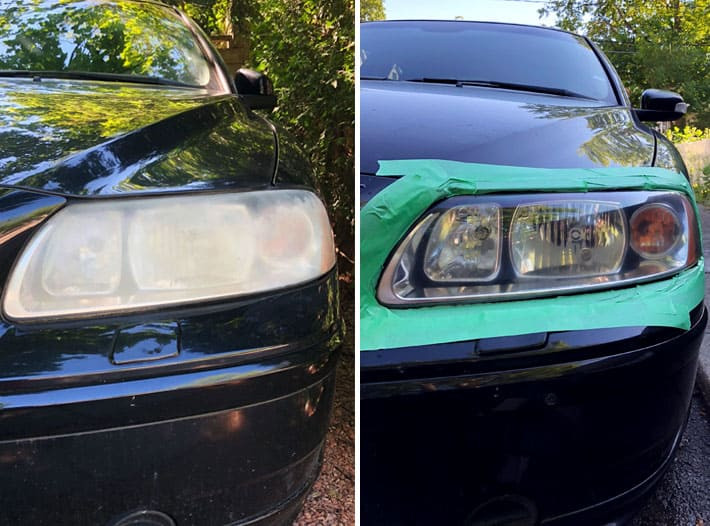
Side by side comparison of a cloudy headlight versus a clear headlight after restoration.
Forget the myths about toothpaste or household cleaners. While these might offer a temporary, superficial clean, they don’t address the root cause of cloudy headlights. The cloudiness is caused by degradation of the UV protective coating on the plastic headlight lenses. To truly restore your headlights, you need to remove this damaged layer and reseal the plastic. This involves a bit of elbow grease, but the results are well worth the effort, both in terms of appearance and, more importantly, safety.
Understanding Why Headlights Get Cloudy
Modern car headlights are primarily made of plastic, not glass. To protect this plastic from sun damage and premature aging, manufacturers apply a UV-protective coating. Over time, this coating deteriorates due to constant exposure to sunlight, road debris, and weather elements. This degradation leads to oxidation, causing the plastic to become cloudy, yellowed, and opaque. This clouding isn’t just surface dirt; it’s a breakdown of the protective layer itself.
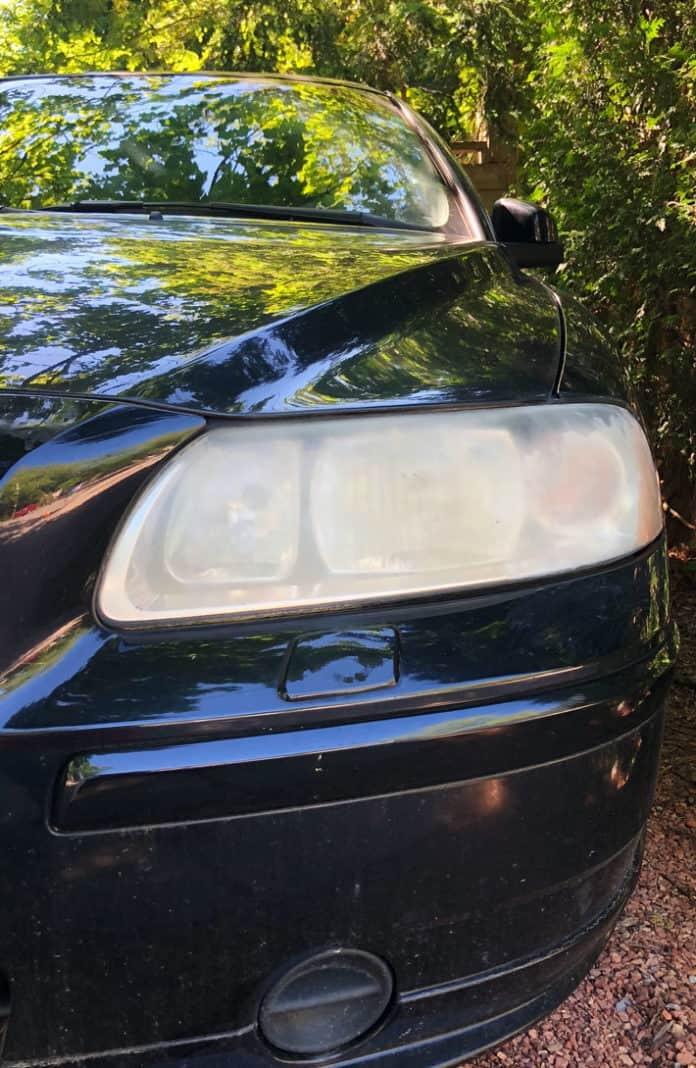 Close up of a severely cloudy car headlight showing the opaque plastic lens.
Therefore, simply wiping the surface won’t solve the problem. You need to remove the damaged UV coating to reveal the clear plastic underneath. This is where sanding comes in. It might sound counterintuitive to sand your headlights, but it’s the key to professional-level restoration.
Materials You’ll Need to Fix Cloudy Headlights
To properly restore your cloudy headlights, gather the following materials. You can purchase these items individually at an automotive store or opt for a headlight restoration kit, which conveniently includes most of these essentials.
- Sandpaper:
- 320-800 grit sandpaper (for initial, heavier sanding)
- 1000-1500 grit sandpaper (for refining and smoothing)
- 2500-3000 grit sandpaper (for final sanding and polishing preparation)
- Padded Sanding Block or Dish Sponge: Provides even pressure and control during sanding.
- Spray Bottle with Water: For wet sanding.
- Isopropyl Alcohol: For cleaning and preparing the surface for clear coat.
- Headlight Polish/Leveling Compound: To buff and polish the plastic to clarity.
- Headlight Clear Coat with UV Protectant: Crucial for sealing and protecting the restored headlights from future clouding.
- Orbital Sander (Optional but Recommended): For faster and more even polishing. Can be substituted with hand polishing if needed.
- Soft Microfiber Cloths: For wiping and polishing.
- Painter’s Tape: To protect the car’s paint around the headlights.
Headlight Restoration Kits:
For convenience, consider purchasing a complete headlight restoration kit. These kits often include various grades of sandpaper, polishing compounds, and clear coat, specifically formulated for headlight restoration.
- Hand-Powered Kit with Drill Attachment: Check Kit Example – Offers manual sanding with a drill attachment for polishing.
- Drill-Powered Kit: Check Kit Example – Utilizes a drill for both sanding and polishing steps, speeding up the process.
Choosing a kit can simplify the process, especially for beginners, ensuring you have all the necessary components readily available.
Step-by-Step Instructions to Clean Cloudy Headlights
Follow these detailed steps to restore your headlights from cloudy to crystal clear:
Step 1: Taping and Initial Sanding (320-800 Grit – Dry Sand)
-
Protect Your Car: Apply painter’s tape generously around the edges of your headlights to safeguard your car’s paint from accidental sanding scratches.
-
Dry Sand with Coarse Grit: Begin sanding with 320 to 800 grit sandpaper. For heavily clouded headlights, start with a lower grit like 400 for faster removal of the damaged coating. Use a back and forth, left-to-right motion. Maintain even pressure and a fluid movement. Initially, sanding will make the headlight appear even cloudier – this is normal as you are removing the old, damaged UV layer.
-
Rinse and Wipe: After the initial sanding, rinse the headlight with water to remove sanding debris and wipe it clean with a microfiber cloth. This allows you to inspect your progress.
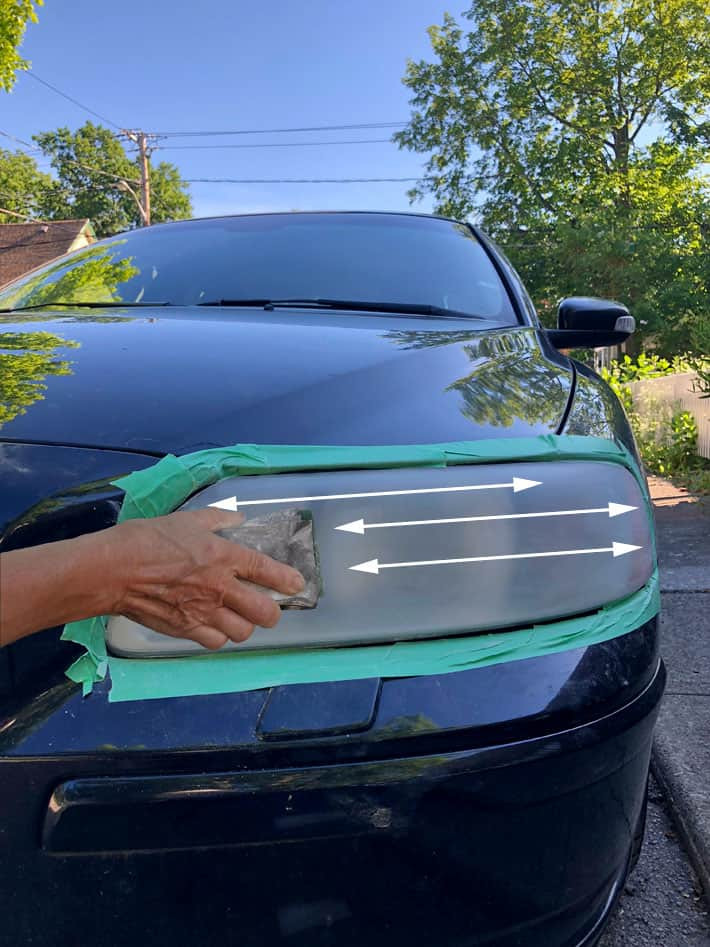 Horizontal sanding of a cloudy headlight using 800 grit sandpaper.
Step 2: Refining Sanding (1000-1500 Grit – Wet Sand)
-
Wet Sand with Medium Grit: Switch to 1000 to 1500 grit sandpaper. This time, use wet sanding. Keep the sandpaper and headlight surface lightly wet with water from your spray bottle. Change your sanding direction to up-and-down motions. This cross-directional sanding helps to remove the scratches created by the coarser grit sandpaper in the previous step.
-
Rinse and Wipe: Again, rinse the headlight with water and wipe it clean to remove plastic particles and inspect your work. The headlight should start to appear less hazy.
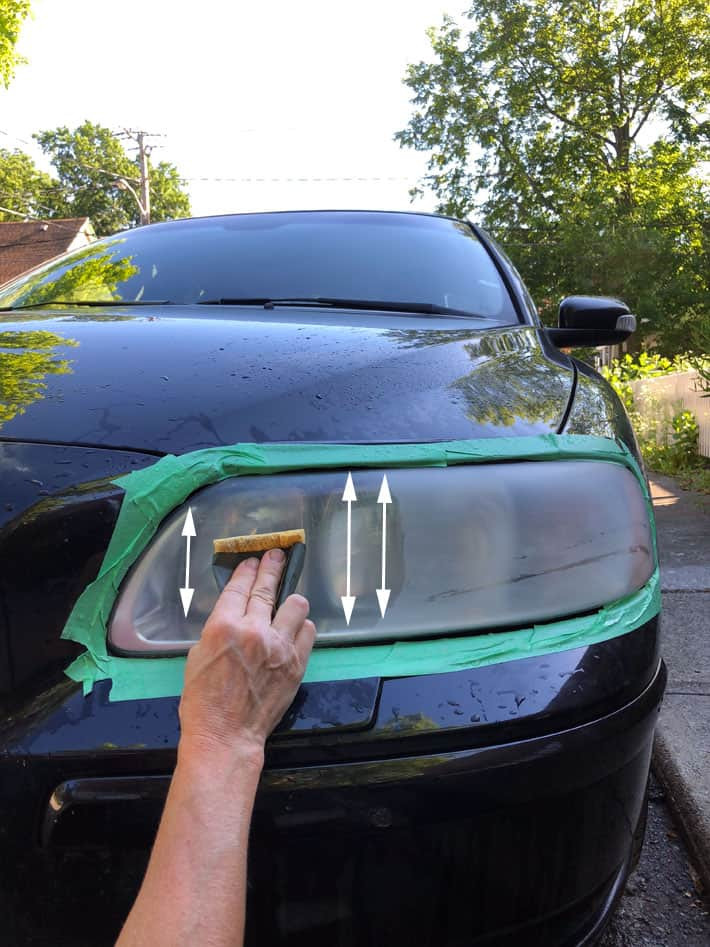 Vertical sanding of a headlight using wet 1500 grit sandpaper.
Step 3: Final Sanding (2500-3000 Grit – Wet Sand)
-
Wet Sand with Fine Grit: Use the finest grit sandpaper (2500-3000 grit) for the final sanding stage. Continue wet sanding, switching back to a left-to-right motion. This ultra-fine grit will further smooth the plastic surface, preparing it for polishing.
-
Rinse and Wipe: Rinse thoroughly and wipe dry. At this stage, the headlight should look significantly clearer, almost ready for polishing.
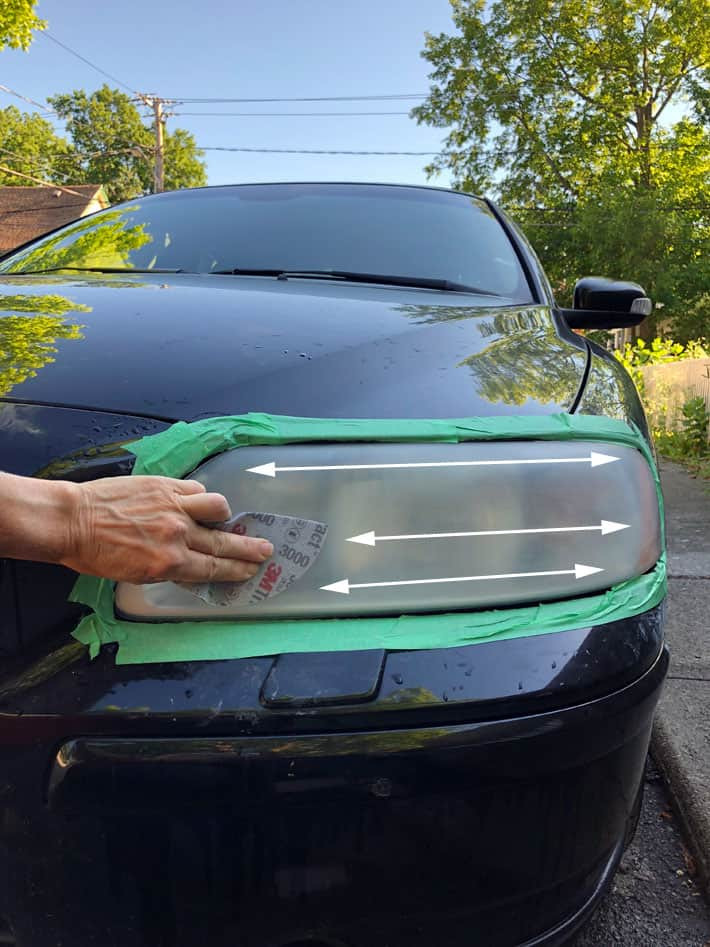 Horizontal sanding of a headlight with wet 3000 grit sandpaper.
Step 4: Polishing/Buffing
-
Prepare Polishing Tool: If using an orbital sander, attach a microfiber or wool polishing pad. For hand polishing, use a soft microfiber cloth.
-
Apply Polishing Compound: Apply a headlight polishing compound to the pad or cloth. Work the compound into the pad to ensure even distribution.
-
Polish Headlights: Polish the headlights using firm, even pressure. If using an orbital sander, work in overlapping passes. If polishing by hand, use circular motions. Continue polishing until the headlight becomes crystal clear. You will see a dramatic improvement in clarity during this step.
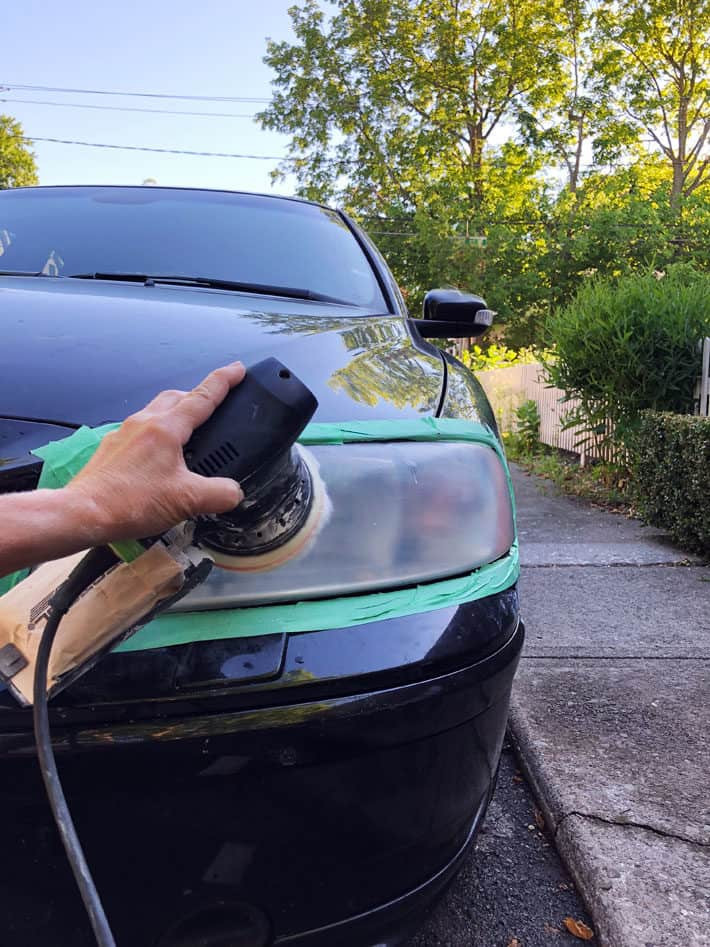 Polishing a headlight using a hand sander with a wool buffing pad.
Step 5: Cleaning and Clear Coat Application
- Clean with Isopropyl Alcohol: Thoroughly clean the headlights with isopropyl alcohol. This removes any remaining polishing compound and prepares the surface for the clear coat.
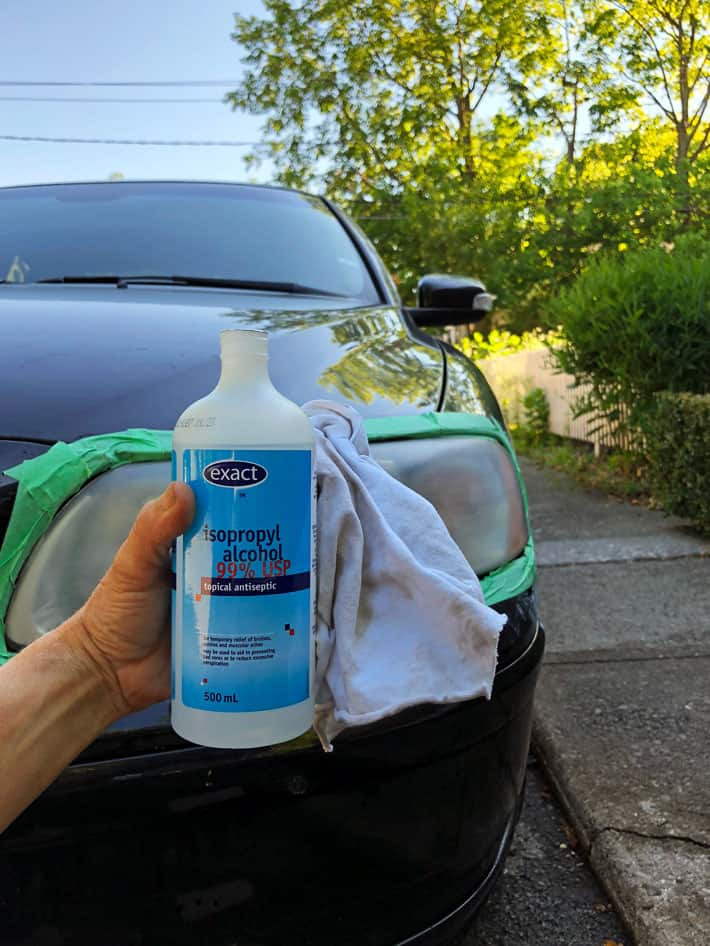 A bottle of isopropyl alcohol with a car headlight in the background.
- Apply Headlight Clear Coat: Apply the headlight clear coat with UV protectant according to the product instructions. Most clear coats are spray-on, requiring even, thin coats. This clear coat is essential as it seals the restored headlight and provides new UV protection, preventing future clouding. Apply 2-3 thin coats, allowing each coat to dry slightly before applying the next.
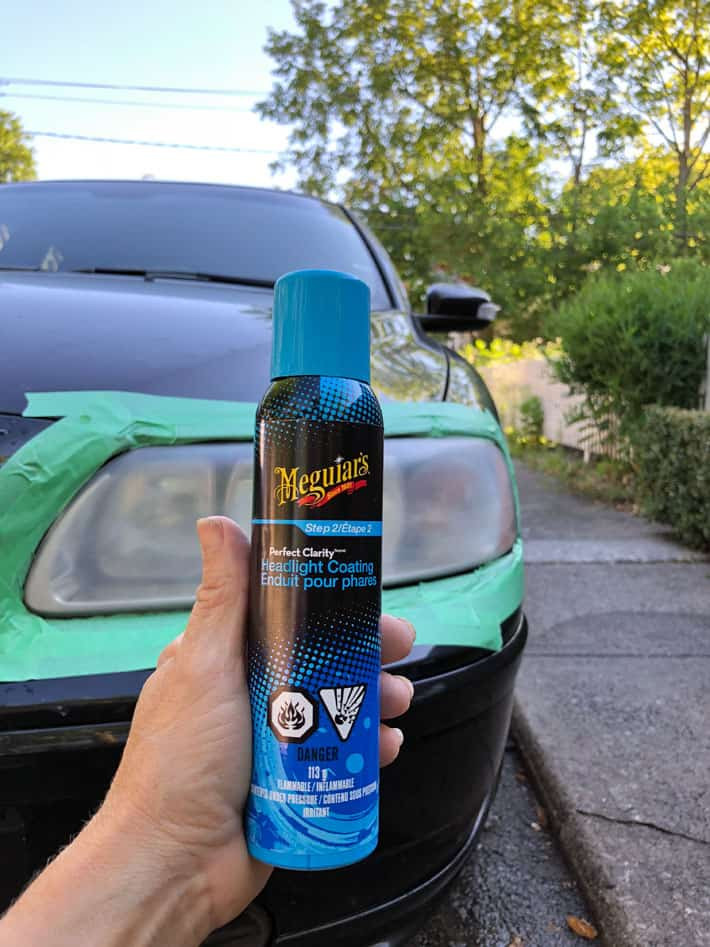 Applying Meguiar's headlight clear coat spray to a car headlight.
Step 6: Final Result
Once the clear coat is fully dried, your headlight restoration is complete! Admire your crystal-clear headlights and enjoy the improved visibility.
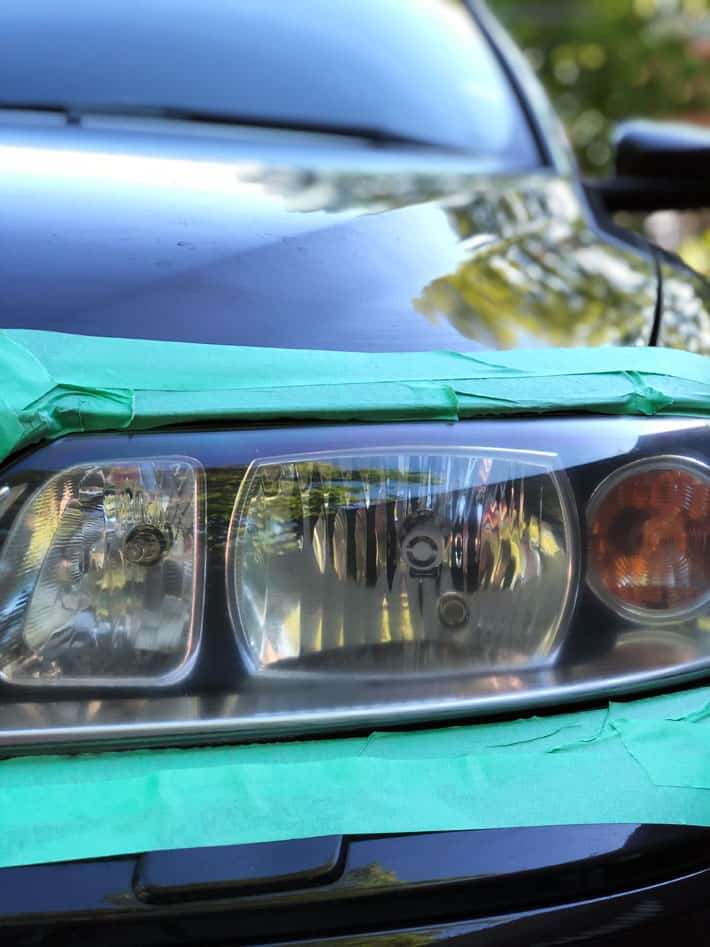 A sparkling clean car headlight after the restoration process.
Conclusion: Clear Headlights for Safer Driving
Restoring your cloudy car headlights through sanding and polishing is a worthwhile DIY project. It not only enhances the appearance of your vehicle but, more importantly, dramatically improves headlight performance. Clear headlights can increase light output significantly, making nighttime driving safer for you and other drivers.
While the process requires about an hour and a modest investment in materials (around $25-$50 if buying a kit or individual components), the benefits of improved safety and aesthetics are undeniable. Ditch the ineffective quick fixes and take the professional approach to fix your cloudy headlights, ensuring clear vision and safer journeys on the road.