How to Fix a Gas Line Leak on Your Car: Step-by-Step Guide
Gas line leaks in your car are a serious issue that needs immediate attention. A fuel leak not only wastes gas and decreases your car’s fuel efficiency but also poses a significant fire hazard. Addressing a gas leak promptly can save you money and, more importantly, ensure your safety and the safety of others. While some minor leaks might be temporarily patched, understanding how to properly identify and address them is crucial for every car owner.
Identifying a gas line leak often starts with noticing a distinct smell of gasoline, especially after parking your car. You might also observe a puddle of fuel under your vehicle. Besides the smell and visible leaks, other symptoms can include decreased fuel efficiency or your engine running rough, as the fuel system’s pressure is compromised.
If you suspect a gas line leak, safety should be your utmost priority. Never ignore a gas leak. Gasoline is highly flammable, and even a small spark can ignite it, leading to a dangerous fire.
Here’s a step-by-step guide on how to approach fixing a gas line leak on your car, emphasizing safety and proper procedures:
1. Safety First: Immediate Precautions
Before you even think about inspecting or fixing anything, ensure you are in a safe environment.
- Ventilation: If you are in a garage, open all doors and windows to ensure maximum ventilation. Work in a well-ventilated area to avoid inhaling fumes and to disperse any leaked gas.
- No Open Flames or Sparks: Absolutely no smoking, open flames, or anything that could create a spark should be near your car when you suspect a gas leak. This includes avoiding using electronic devices that could potentially spark.
- Battery Disconnect (Optional but Recommended): To further minimize the risk of sparks, consider disconnecting the negative terminal of your car battery. This reduces the chance of electrical shorts igniting fuel vapors.
2. Identify the Location of the Leak
Once you’ve taken safety precautions, carefully try to pinpoint where the leak is coming from.
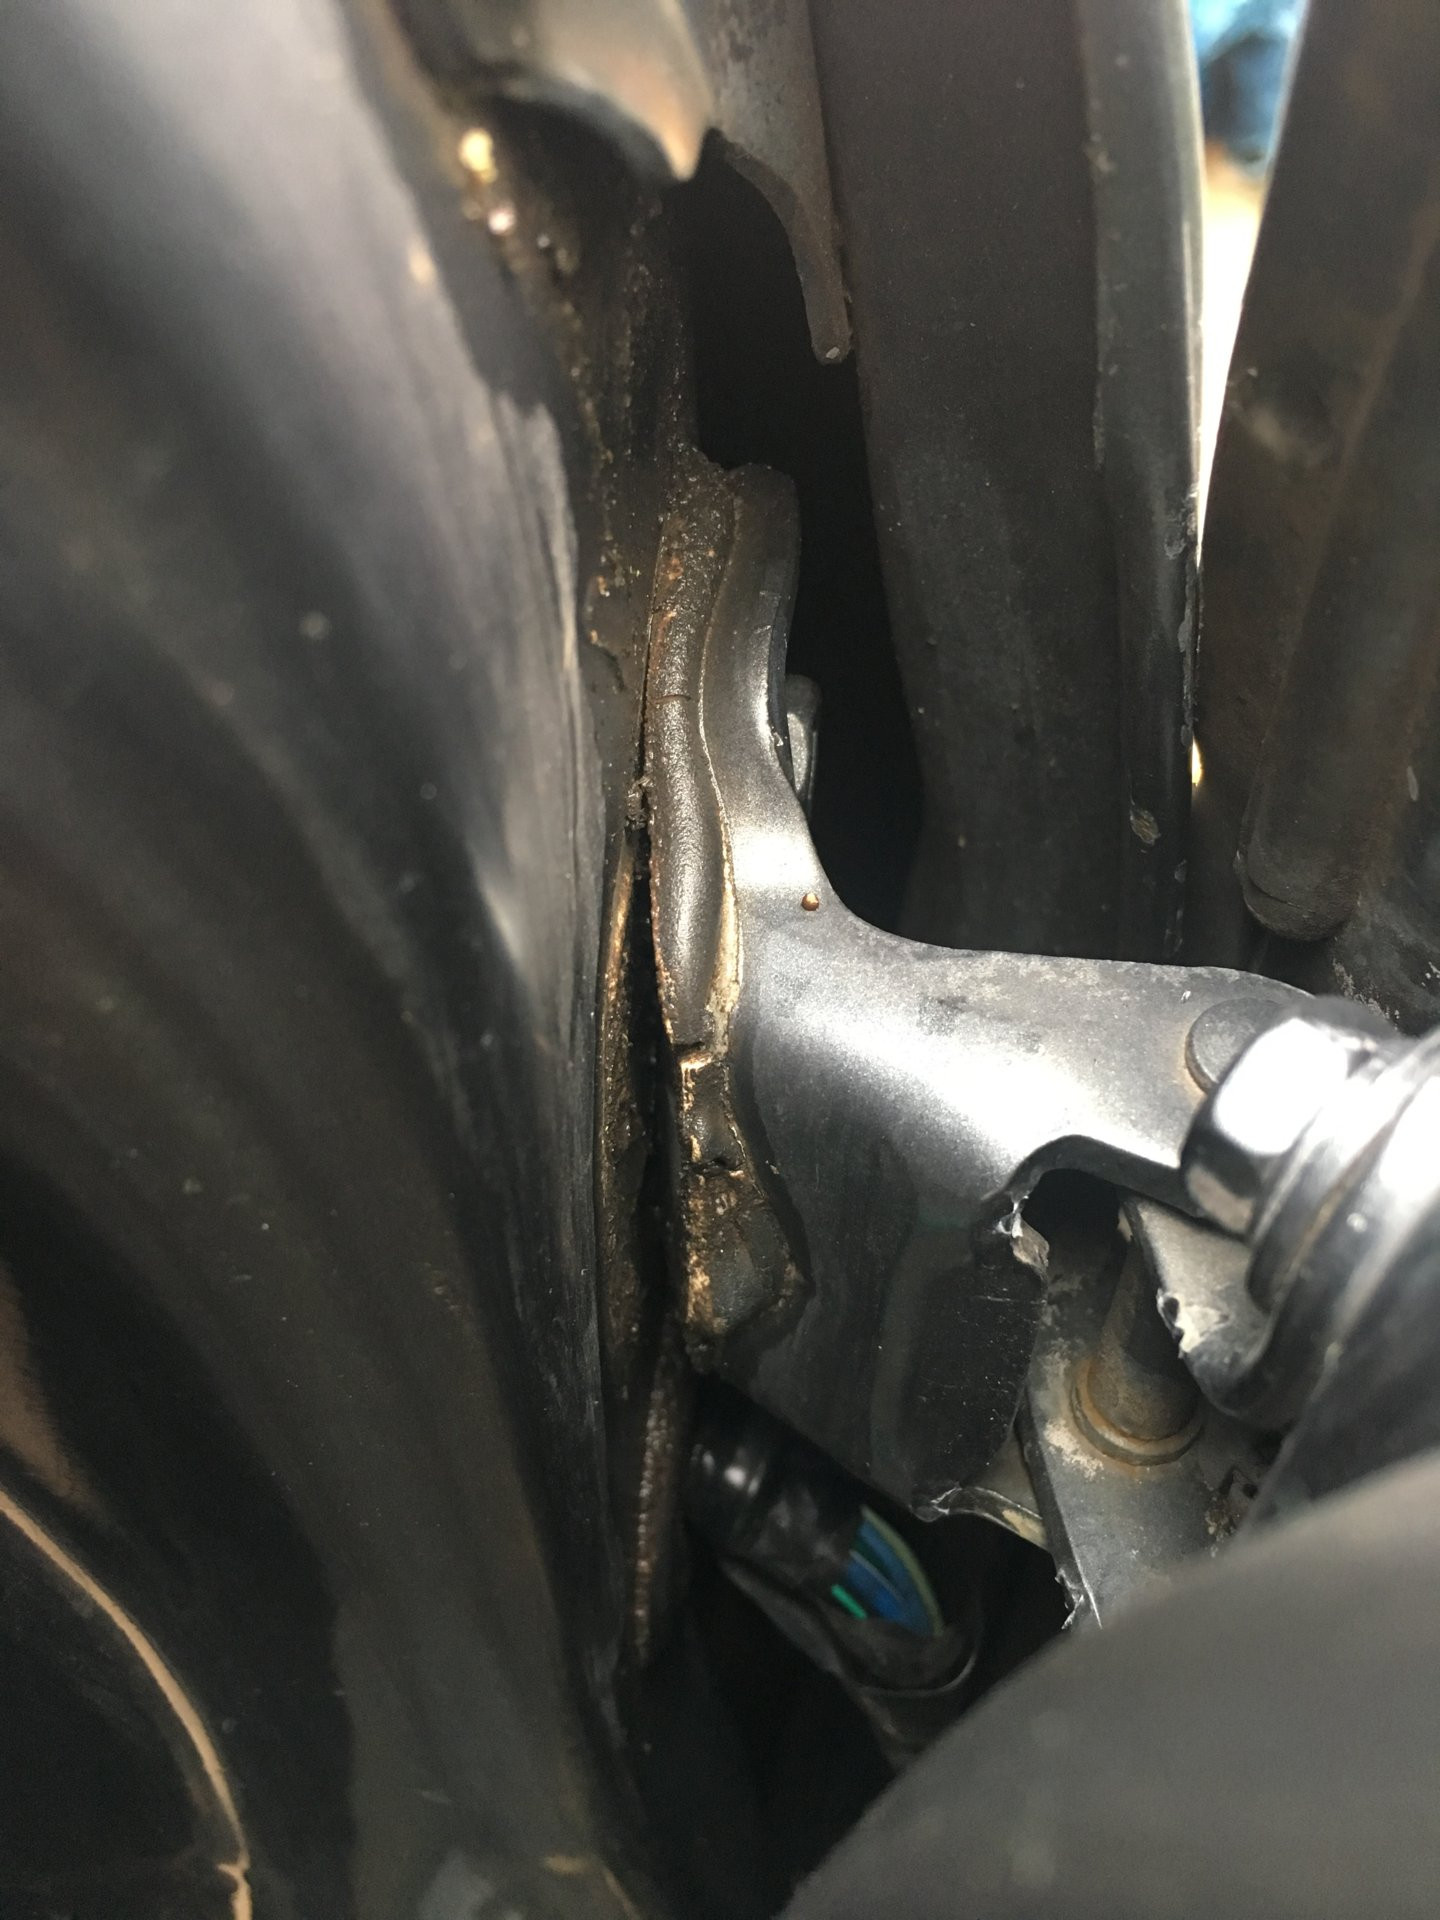
- Visual Inspection: Look under your car for signs of dripping fuel. Follow the fuel lines from the gas tank towards the engine compartment. Fuel lines are typically metal or reinforced rubber hoses running along the undercarriage of your vehicle.
- Smell Test (Cautiously): Use your sense of smell to help locate the strongest point of the gas odor. Be cautious not to inhale too much gasoline vapor.
- Check Connections: Pay close attention to connection points in the fuel line. These are often areas where leaks occur, especially if lines are old or have been disturbed. Look for wet spots or gasoline residue around fittings and joints.
3. Assess the Severity and Type of Leak
The type and severity of the leak will dictate the necessary repair.
- Minor Leak (Seepage or Small Drip): If the leak is a slow seep or a small drip from a connection, it might be due to a loose fitting or a worn-out seal.
- Major Leak (Steady Drip or Spray): A more significant leak, like a steady drip or spray, indicates a more serious problem, such as a hole or crack in the fuel line, or a severely damaged connection.
4. Possible Fixes (Temporary vs. Permanent)
For Minor Leaks at Connections:
- Tighten Fittings: If the leak appears to be from a loose connection, gently try tightening the fitting. Use the correct wrench size to avoid damaging the fitting. Do not overtighten, as this can also cause leaks or damage.
- Check and Replace Seals/O-rings: If tightening doesn’t work, the seal or O-ring at the connection might be worn or damaged. Replacing these seals can often resolve minor connection leaks. You’ll need to disconnect the fuel line (after depressurizing the fuel system – see safety warnings below) to replace the seal.
For Leaks in Fuel Lines (More Complex):
-
Temporary Patch (Emergency Fix): In an emergency situation, you might consider a temporary patch to stop a leak long enough to get to a repair shop. This is not a permanent solution and should be treated as a very short-term fix. Options include:
- Fuel Line Repair Tape: Specialized fuel-resistant repair tape can be tightly wrapped around a small leak in a metal or rigid plastic fuel line.
- Rubber Hose and Clamps (for Metal Line Section Replacement): If the leak is in a section of metal line that is corroded or damaged, and you have some mechanical experience, you might be able to carefully cut out the damaged section and replace it with a piece of fuel-rated rubber hose, secured with fuel-line clamps. Ensure the hose is properly rated for fuel and pressure.
-
Professional Repair and Fuel Line Replacement (Recommended for Most Cases): For any significant leak, leaks not easily fixed with tightening, or if you are not comfortable working on fuel systems, it is highly recommended to seek professional repair. A qualified mechanic can:
- Properly Diagnose the Leak: Professionals have tools and expertise to accurately diagnose the source and extent of the leak.
- Replace Damaged Fuel Lines: Mechanics can replace sections of fuel line or the entire fuel line assembly with the correct parts, ensuring a safe and permanent repair. As mentioned in the original text, using genuine Honda or high-quality, compatible parts is crucial for proper sealing and function, especially with quick disconnect fittings.
- Ensure System Integrity: They can check the entire fuel system for other potential issues and ensure the repair is done correctly and safely.
5. Crucial Safety Warnings When Working on Fuel Lines
- Depressurize the Fuel System: Modern cars have pressurized fuel systems. Before disconnecting any fuel lines, you MUST depressurize the system. Consult your car’s repair manual for the correct procedure for your vehicle. This often involves relieving pressure at the fuel pressure relief valve in the engine compartment. Fuel spray under pressure is dangerous.
- Fuel is Flammable and Toxic: Always handle gasoline with extreme care. Wear gloves and eye protection. Work in a well-ventilated area. Dispose of any fuel-soaked rags properly in a sealed, fire-resistant container.
- Quick Disconnect Fittings: Many modern cars use quick disconnect fittings on fuel lines. Understand how these fittings work before attempting to disconnect them. Using the wrong technique can damage the fitting or the fuel line. Special tools are often required for certain types of quick disconnect fittings.
6. Post-Repair Checks
After any repair, whether temporary or professional, it’s essential to check for leaks again.
- Visual Inspection: Carefully inspect the repaired area and around it for any signs of new leaks.
- Smell Test: Check for any lingering gasoline odor.
- Start the Engine and Monitor: Start your car and let it run for a few minutes. Re-inspect for leaks while the engine is running and the fuel system is pressurized.
Conclusion
Fixing a gas line leak is not always a simple task, and safety should always be your top concern. While minor connection leaks might sometimes be resolved with simple tightening or seal replacement, any significant leak, damage to fuel lines, or if you are uncomfortable working on fuel systems, requires professional attention. Ignoring a gas leak is never an option due to the serious safety risks involved. By understanding the steps, prioritizing safety, and knowing when to seek professional help, you can effectively address gas line leaks and keep your car running safely and efficiently.