How to Fix Car Window Trim: A DIY Restoration Guide

Car window trim, exposed to years of harsh weather and relentless sunlight, can degrade significantly over time. The rubber surface, layered over a metal piece, is particularly vulnerable, leading to unsightly cracks, peeling, and chipping. If you’re noticing your vehicle’s window trim looking worse for wear, you might think a costly replacement is your only option. However, restoring your car window trim is a surprisingly straightforward DIY project that can dramatically improve your vehicle’s appearance without breaking the bank. This guide will walk you through the process of How To Fix Car Window Trim, making it look fresh and new again.
Damaged car window trim showing cracks and weathering
Materials You’ll Need to Restore Window Trim
Before you begin, gather the necessary materials to ensure a smooth and efficient restoration process. You’ll need:
- Sandpaper: Start with 80-150 grit for initial sanding, and progress to finer grits like 220, 320, 400, and even 600 for a smooth finish.
- Wax and Grease Remover: Essential for cleaning the trim before applying filler and paint, ensuring proper adhesion.
- Body Filler (Bondo): Used to fill in chipped areas and cracks, creating a flush surface.
- Self-Etching Primer: Provides excellent adhesion to metal and helps prevent rust.
- Filler Primer: Fills in minor scratches and imperfections for a smoother paint finish.
- VHT Trim Paint: Specifically designed for trim, offering a durable, OEM-like finish.
- Sand Block or Sanding Sponge: For even sanding and reaching contoured areas.
- Masking Tape and Paper: To protect surrounding areas from overspray.
- Gloves and Respirator: Safety gear for sanding and painting.
- Clean Rags: For wiping down surfaces.
Step-by-Step Guide: How to Restore Car Window Trim
Follow these steps to effectively restore your car window trim and bring back its original luster.
Step 1: Removing the Window Trim
Carefully remove the window trim from your vehicle. This is usually done by gently prying it away from the door or body panel. Use plastic trim removal tools to avoid scratching the paint. Take your time and be cautious not to bend or damage the trim pieces during removal.
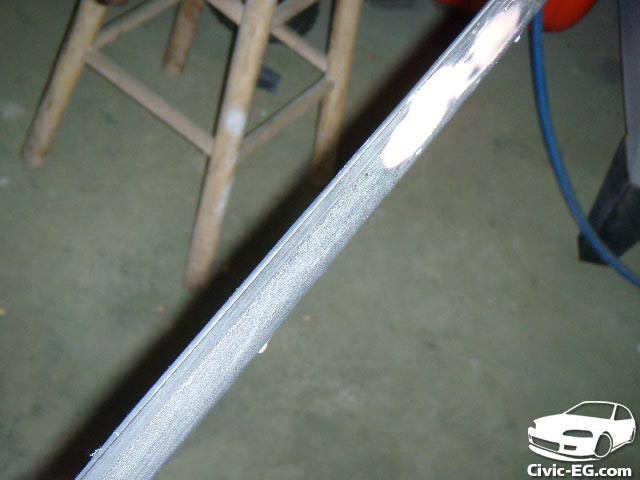 Close-up of removed car window trim, ready for sanding
Step 2: Sanding Down the Damaged Trim
Once removed, inspect the trim and identify areas with peeling rubber or cracks. Begin sanding these areas with 80-150 grit sandpaper. The goal is to smooth out any raised edges and remove loose, peeling rubber. Be mindful of the pressure you apply; you want to smooth the surface without aggressively removing material. After the initial sanding, clean the trim with wax and grease remover to remove dust and debris.
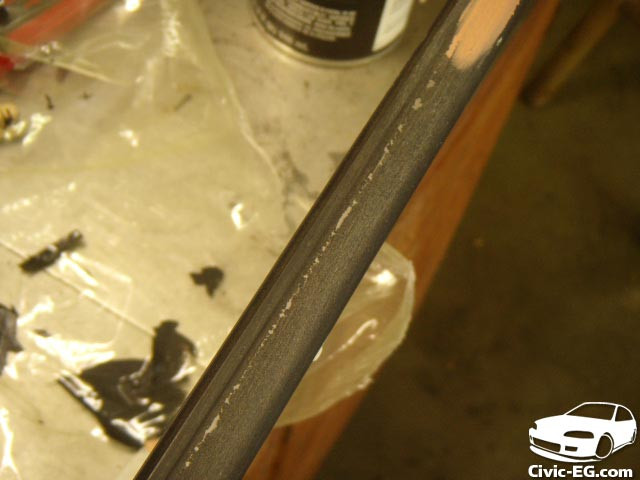 Sanded car window trim with smoothed edges and cleaned surface
Step 3: Applying Body Filler (Bondo) to Fill Imperfections
For areas where the rubber coating has chipped away significantly, or where deep cracks are present, apply a thin layer of body filler (Bondo). The purpose of the filler is to bring the damaged areas level with the intact rubber coating. Apply it sparingly, focusing on filling in the recessed areas and cracks. Let the filler dry completely according to the manufacturer’s instructions.
 Car window trim with body filler applied to chipped areas
Step 4: Sanding the Filler and Smoothing the Trim
After the filler has dried, sand it down using the same 80-150 grit sandpaper to shape and contour it to match the original trim profile. Once you’re satisfied with the overall shape, switch to finer grits (220, 320, and 400) to remove scratches left by the coarser paper and further smooth the surface. For an exceptionally smooth finish, you can even finish with 600 grit sandpaper. Remember to clean the trim with wax and grease remover between sanding grits.
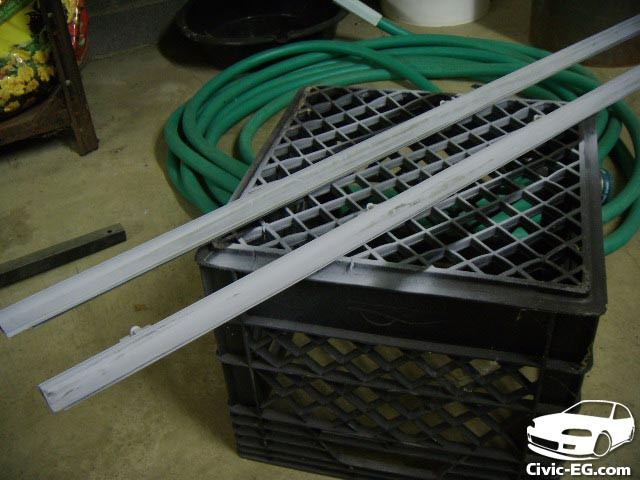
 Car window trim after sanding filler and smoothing the surface with finer grits
Step 5: Priming the Trim for Paint
Apply a couple of light coats of self-etching primer to the sanded trim. This primer promotes paint adhesion and protects the metal underneath. Follow this with a few coats of filler primer. Filler primer is designed to fill any remaining minor scratches and create an ultra-smooth base for the topcoat. After the filler primer dries, perform a final light sanding with 400 and then 600 grit sandpaper to ensure a flawless surface. Clean the trim thoroughly with wax and grease remover before proceeding to painting.
 Primed car window trim with self-etching primer and filler primer layers
Step 6: Painting and Reinstalling the Restored Trim
Apply several light coats of VHT Trim Paint, allowing each coat to dry slightly before applying the next. VHT Trim Paint is formulated to provide a durable, factory-like finish that closely matches OEM trim colors. Once the paint is completely dry, carefully reinstall the restored window trim back onto your vehicle. Ensure it is securely attached and properly aligned.
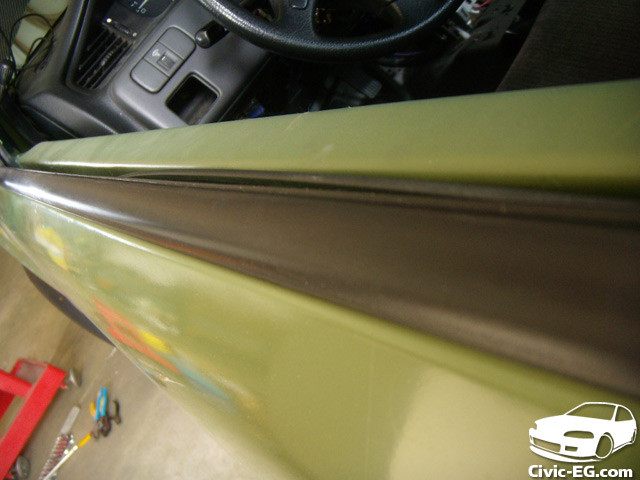 Finished and reinstalled car window trim with fresh black paint
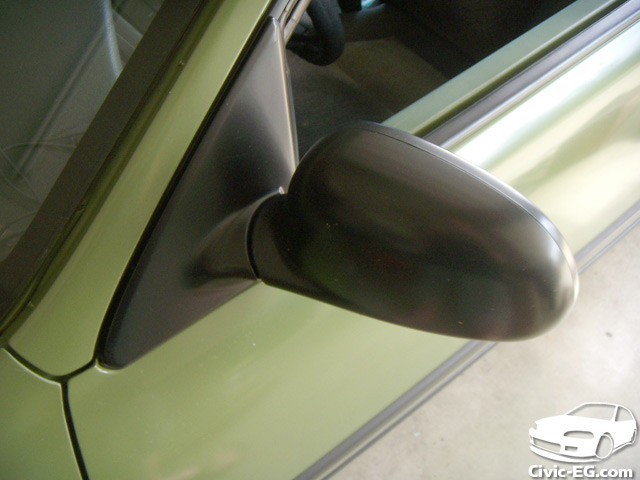 Close-up of restored car mirror trim painted with VHT trim paint
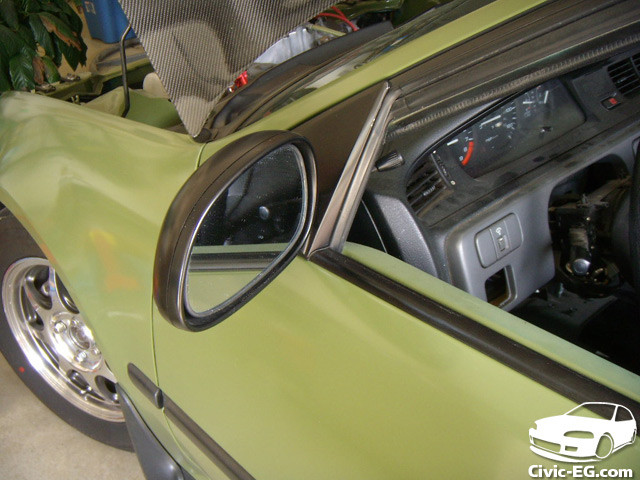 Vehicle with fully restored window and mirror trim, enhancing overall appearance
Conclusion: Revitalize Your Car’s Look with Trim Restoration
Restoring your car window trim is a rewarding DIY project that can significantly enhance your vehicle’s overall aesthetic. By following these steps on how to fix car window trim, you can save money and achieve professional-looking results. With a little time and effort, you can bring your faded and cracked window trim back to life, making your car look years younger and well-maintained.