How to Fix Your Car Door Light: A Simple Troubleshooting Guide
Car door lights are a small but essential feature in any vehicle. They illuminate your path as you enter or exit your car in the dark, adding a touch of convenience and safety. However, like any electrical component in your car, door lights can sometimes malfunction. If you’re facing a car door light that’s not working, don’t worry. Often, the fix is simpler than you might think and can be addressed without needing immediate professional help. This guide will walk you through the common causes of car door light problems and provide step-by-step instructions on how to troubleshoot and fix them.
Understanding Your Car Door Light System
Before diving into troubleshooting, it’s helpful to understand the basic components of your car door light system. Typically, a car door light system involves:
- Light Bulb: This is the most straightforward component – the actual light source. It could be a traditional halogen bulb or a more modern LED.
- Door Jamb Switch: This small switch is usually located on the door frame and is activated when the door opens. It signals the car’s electrical system to turn the door light (and often other interior lights) on.
- Wiring: Wires connect the bulb, switch, and fuse to the car’s power source. Damage or breaks in these wires can disrupt the circuit.
- Fuse: A fuse protects the circuit from electrical overloads. A blown fuse is a common cause of lighting issues in cars.
Understanding these parts will make diagnosing and fixing the problem much easier.
Troubleshooting Steps: How to Fix Car Door Lights
When your car door light isn’t working, follow these troubleshooting steps in a logical order to pinpoint and resolve the issue:
1. Check the Light Bulb First
The simplest and most common cause of a non-working door light is a burned-out bulb. Just like any light bulb, car bulbs have a limited lifespan.
How to check and replace the bulb:
- Locate the door light: It’s usually housed in a small plastic cover on the door panel itself or on the side of the dashboard near the door.
- Remove the cover: Typically, you can gently pry off the cover using a flathead screwdriver or a plastic trim removal tool. Be careful not to scratch the surrounding paint or plastic.
- Inspect the bulb: Once the cover is off, you’ll see the bulb. Check if the filament inside the bulb is broken or if the glass is blackened, which indicates a burnout.
- Replace the bulb: If the bulb looks faulty, replace it with a new bulb of the same type and specification. You can usually find the correct bulb type in your car’s owner’s manual or by checking the old bulb itself (it may have a number printed on it). Automotive parts stores will also be able to assist you in finding the correct bulb.
- Test the light: After replacing the bulb, close and reopen the door to see if the light now works.
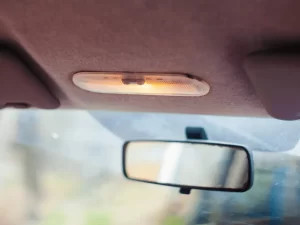
Troubleshooting Car Door Lights: Step-by-step guide to fix car door lights that are not working, highlighting common issues and solutions.
2. Examine the Fuse Box
If a new bulb doesn’t solve the problem, the next most likely culprit is a blown fuse. Fuses are designed to protect your car’s electrical system, and a surge in electricity can cause them to blow, interrupting the power supply to the door light.
How to check and replace a fuse:
- Locate the fuse box: Your car has one or more fuse boxes, typically located in the engine bay or under the dashboard. Consult your owner’s manual to find the exact location of your car’s fuse boxes and a fuse box diagram.
- Identify the correct fuse: Refer to the fuse box diagram in your owner’s manual to locate the fuse that controls the interior lights or specifically the door lights. The diagram will usually indicate the function of each fuse.
- Inspect the fuse: Once you’ve found the fuse, carefully pull it out using a fuse puller (often found in the fuse box itself) or a pair of small pliers. Examine the thin wire inside the fuse. If the wire is broken or melted, the fuse is blown.
- Replace the fuse: Replace the blown fuse with a new fuse of the exact same amperage (the number printed on the fuse). Using a fuse with a higher amperage rating can be dangerous and could damage your car’s electrical system.
- Test the light: After replacing the fuse, check if the door light is now working.
Important Note: If the fuse blows again immediately after replacement, it indicates a more serious electrical problem, such as a short circuit, which needs further investigation.
3. Inspect the Door Jamb Switch
The door jamb switch is responsible for activating the door light when the door opens. If this switch is faulty, it won’t signal the lights to turn on, even if the bulb and fuse are fine.
How to check the door jamb switch:
- Locate the switch: The door jamb switch is usually a small, plunger-like button located on the door frame, near the door latch.
- Visually inspect the switch: Check for any visible damage, corrosion, or if it’s stuck in one position.
- Test the switch manually: With the door open and the ignition off, try pressing the switch in and releasing it. You should hear a faint click. If the switch feels sticky, doesn’t move smoothly, or doesn’t click, it might be faulty.
- Use a multimeter (advanced): For a more precise test, you can use a multimeter to check the continuity of the switch. When the switch is released (door open), it should show continuity (circuit closed), and when pressed (door closed), it should show no continuity (circuit open). If it doesn’t behave as expected, the switch may need replacing.
Replacing a door jamb switch is usually a straightforward process, but it might require removing a couple of screws. Replacement switches are readily available at auto parts stores.
4. Check for Wiring Issues
While less common than bulbs or fuses, wiring problems can also cause door light malfunctions. Wires can become damaged due to wear and tear, corrosion, or rodent damage.
How to check for wiring problems:
- Visual inspection: Carefully inspect the wiring around the door light assembly and the door jamb switch. Look for any frayed, cracked, or exposed wires.
- Check connections: Ensure that all wiring connectors are securely attached to the bulb socket and the door jamb switch. Loose connections can interrupt the circuit.
- Trace the wires: If you suspect a wiring issue, you may need to trace the wires back to the fuse box or other parts of the electrical system to look for damage along the way. This can be more complex and may require some automotive electrical knowledge.
Repairing wiring issues can range from simply re-insulating a damaged wire with electrical tape to replacing sections of wiring. If you’re not comfortable working with car wiring, it’s best to seek professional help.
When to Seek Professional Help
While many car door light issues can be resolved with DIY troubleshooting, there are times when it’s best to consult a qualified mechanic.
- Repeatedly blown fuses: If you replace a fuse and it blows again immediately, it signals a more serious electrical problem like a short circuit that needs professional diagnosis and repair.
- Complex wiring issues: If you suspect a wiring problem but are not comfortable or experienced in automotive electrical work, it’s safer to have a mechanic handle it.
- Uncertainty: If you’ve gone through the troubleshooting steps and are still unsure of the cause or how to fix it, don’t hesitate to seek professional assistance.
A trusted mechanic can quickly diagnose the issue, perform any necessary repairs, and ensure your car door lights are functioning correctly and safely. Regular car services can also help identify and prevent potential electrical issues before they become major problems. If you are in the Northern Beaches area, consider seeking assistance from a reputable Northern Beaches mechanic for any car lighting or electrical repairs.

