How to Fix Little Paint Chips on Your Car: A Step-by-Step Guide

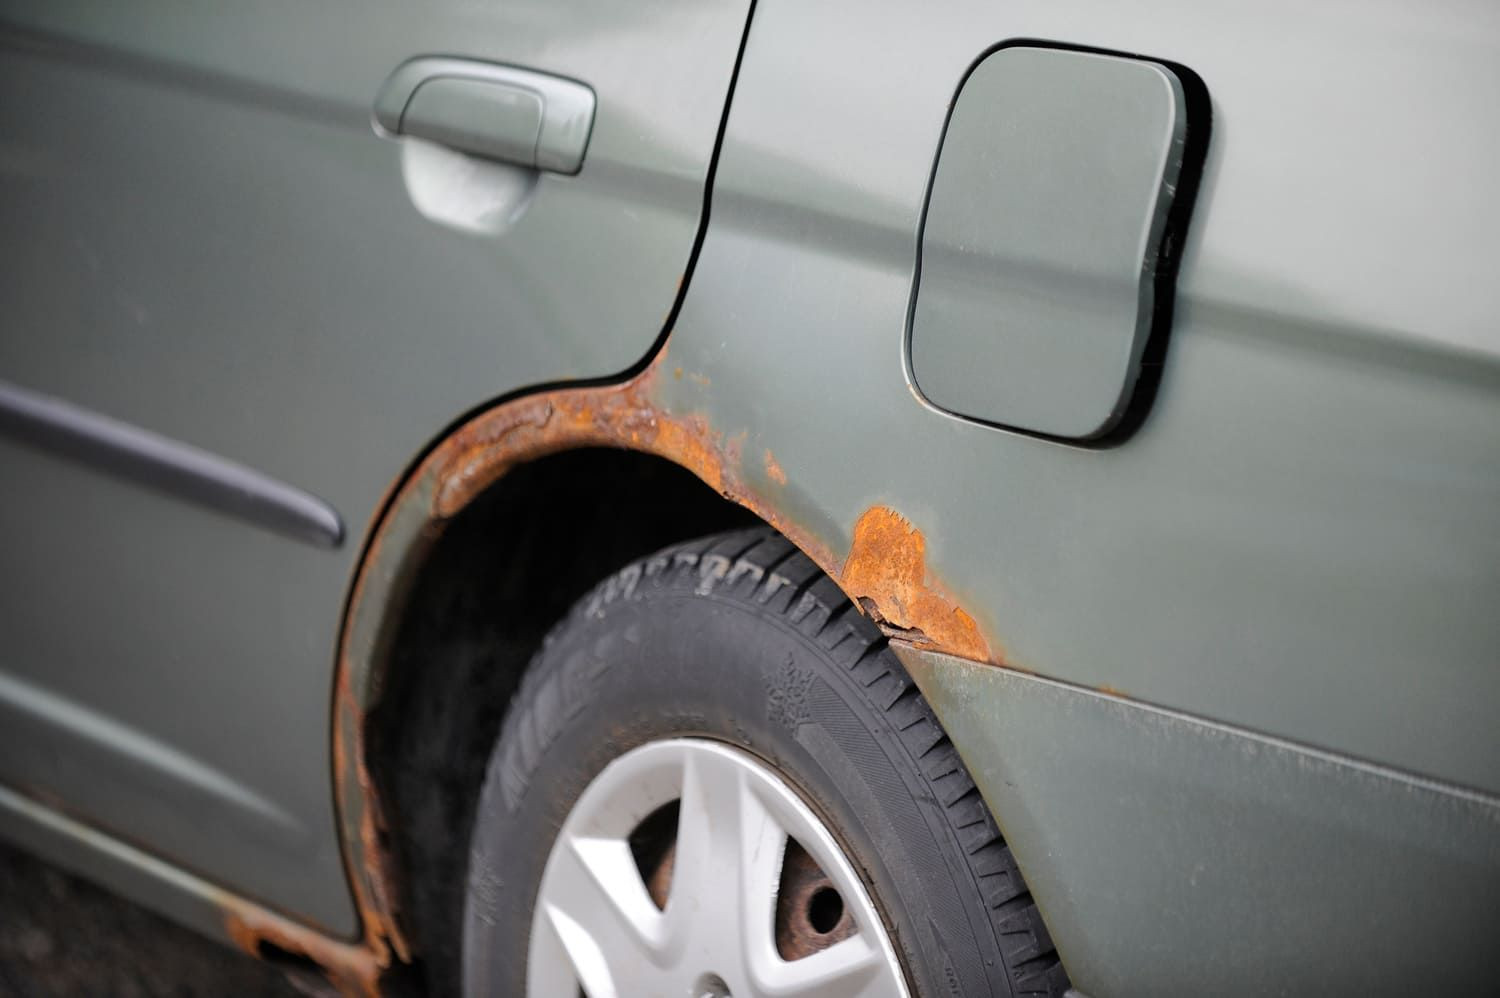
Stone chips are an unfortunate but common part of car ownership. These small blemishes in your car’s paintwork, often found on the hood, bumper, and fenders, are typically caused by gravel and road debris kicked up by other vehicles. Highway driving, especially behind trucks or in areas with loose road surfaces, increases the likelihood of these pesky marks appearing. While seemingly minor, these little paint chips can detract from your car’s appearance and, if left unattended, can lead to more serious issues like rust.
Fortunately, fixing little paint chips on your car is a straightforward process that can often be handled at home, saving you time and money. This guide will walk you through the steps on How To Fix Little Paint Chips On Car, ensuring your vehicle looks its best and is protected from the elements. Addressing these chips promptly is crucial, especially as exposure to moisture, salt, and fluctuating temperatures can worsen the damage and potentially lead to rust formation.
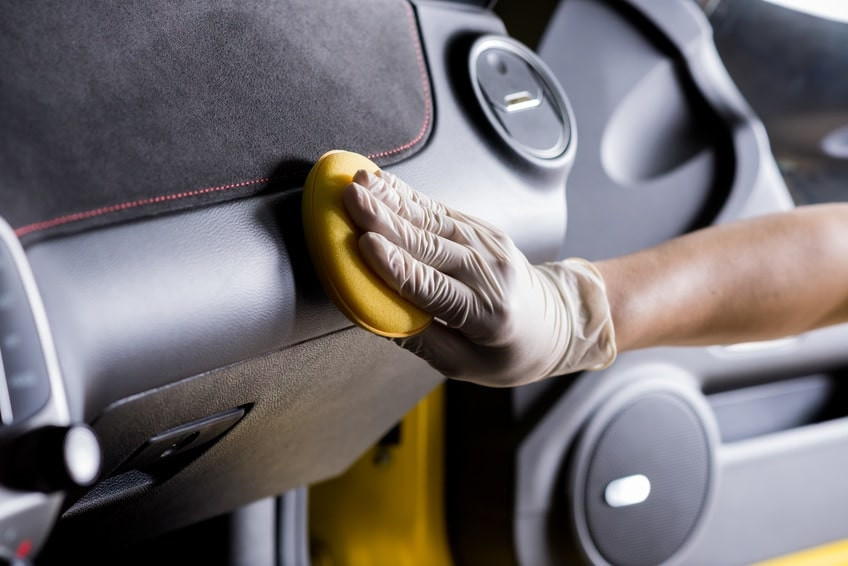
Detailed view of a technician expertly fixing little paint chips on a car using touch-up paint, demonstrating a key step in how to repair minor automotive paint damage.
Understanding Car Paint Chips: Causes and Why They Matter
Before diving into the repair process, it’s helpful to understand why car paint chips occur and why fixing them is important. As mentioned, loose gravel and road debris are primary culprits, especially at higher speeds where impact force is greater. Winter conditions exacerbate the issue, with salt and grit spread on roads contributing to more debris being kicked up and impacting your vehicle.
Beyond the initial cosmetic imperfection, leaving paint chips unrepaired can have further consequences. Once the protective layers of paint and primer are breached, the bare metal underneath is exposed to the environment. This exposure, particularly to moisture and salt, can initiate rust. Rust is not only unsightly but can also weaken the metal structure of your car over time, leading to more extensive and costly repairs down the road. Therefore, addressing even small paint chips is a proactive step in maintaining your car’s condition and longevity.
DIY vs. Professional Repair: When to Choose Which
When it comes to fixing little paint chips, you have two main options: DIY repair or professional service. For minor, surface-level chips that haven’t penetrated deeply into the metal, a DIY approach is often sufficient and cost-effective. However, there are situations where professional repair is recommended to ensure a high-quality and lasting fix.
When DIY Repair is Suitable:
- Small, superficial chips: If the chip is small and primarily affects the top layers of paint without exposing bare metal or showing signs of rust, DIY touch-up is usually adequate.
- No rust present: If there is no rust visible within or around the chip, it simplifies the repair process and makes DIY more feasible.
- Cosmetic improvement is the primary goal: If you are mainly concerned with improving the appearance and preventing minor surface rust, DIY can be a good solution.
When Professional Repair is Recommended:
- Chips exposing bare metal: If the chip is deep and has reached the bare metal, professional repair is advisable to properly treat the exposed metal and prevent rust effectively.
- Presence of rust: If rust is already present in or around the chip, professional treatment is necessary to remove the rust and ensure it doesn’t spread after the repair. Attempting to paint over rust without proper treatment will only lead to further problems.
- Multiple or large chips: Dealing with numerous chips or larger areas of damage can be time-consuming and challenging for DIY. Professionals have the tools and expertise to handle these situations efficiently and achieve a seamless finish.
- Desire for a flawless finish: If you are aiming for a perfect, factory-like finish, professional repair is typically the best choice. They have color-matching technology and advanced techniques to minimize the visibility of the repair.
Step-by-Step Guide: How to Fix Little Paint Chips Yourself
For those opting for the DIY route to fix little paint chips on their car, here’s a detailed step-by-step guide:
Tools and Materials You’ll Need
Before you begin, gather the necessary supplies:
- Car wash soap and water: For cleaning the area.
- Rubbing alcohol or wax and grease remover: To ensure a clean surface for paint adhesion.
- Touch-up paint: Specifically matched to your car’s paint code. You can usually find this code on a sticker inside your driver’s side doorjamb or in your car’s owner’s manual. Purchase touch-up paint from your dealership or an automotive paint supplier.
- Fine-tipped applicator brush or toothpick: For precise paint application. Some touch-up paint kits come with a brush.
- Primer (optional but recommended): For chips that reach the primer layer or bare metal, primer improves paint adhesion and corrosion protection.
- Clear coat (if your car has a clear coat finish): To protect the color coat and provide a glossy finish. Check your car’s paint type; most modern cars use a base coat/clear coat system.
- Fine-grit sandpaper (2000-3000 grit) and rubbing compound (optional): For leveling the paint and blending the repair (use with caution).
- Microfiber cloths: For cleaning and wiping.
- Masking tape (optional): To protect surrounding areas if needed.
Step 1: Cleaning the Area
Thoroughly clean the area around the paint chip with car wash soap and water. Rinse and dry completely. Next, use rubbing alcohol or a wax and grease remover to eliminate any remaining wax, grease, or contaminants that could interfere with paint adhesion. Allow the area to dry completely. This step is crucial for ensuring the touch-up paint bonds properly.
Step 2: Applying Primer (Optional but Recommended for Bare Metal)
If the paint chip has exposed bare metal or reached the primer layer (often a grey or off-white layer beneath the color coat), apply a thin layer of automotive primer to the chip using a fine-tipped brush or applicator. Primer helps the touch-up paint adhere better and provides corrosion protection to the exposed metal. Let the primer dry completely according to the manufacturer’s instructions. This usually takes about 30 minutes to an hour.
Step 3: Applying Touch-Up Paint
Shake the touch-up paint bottle thoroughly as per the instructions. Using a fine-tipped applicator brush or a toothpick, carefully apply a very small amount of touch-up paint to the center of the chip. The goal is to fill the chip, not to paint over the surrounding good paint. Apply the paint in thin, even layers, allowing each layer to dry for 15-30 minutes before applying the next. Multiple thin layers are better than one thick layer, as they prevent drips and ensure proper drying. Continue applying thin layers until the paint is level with or slightly above the surrounding paint surface.
Step 4: Leveling and Blending (Optional and Requires Caution)
Once the touch-up paint is completely dry (allow to dry overnight for best results), you can attempt to level and blend the repair with the surrounding paint if needed. This step is optional and requires caution to avoid damaging the surrounding clear coat. For minor imperfections or raised edges, you can use a very fine-grit sandpaper (2000-3000 grit) very gently and wet. Wrap the sandpaper around a small, flat block to ensure even pressure. Lightly sand the touch-up paint, keeping the sandpaper wet, until it is level with the surrounding paint. After sanding, you can use a rubbing compound to further blend the edges and restore shine. Apply a small amount of rubbing compound to a microfiber cloth and gently rub the repaired area in a circular motion. Wipe away residue with a clean microfiber cloth. If you are unsure about this step, it’s best to skip it to avoid potential damage.
Step 5: Applying Clear Coat (If Applicable)
If your car has a clear coat finish (most modern cars do), apply a thin layer of clear coat over the touch-up paint once the color coat is completely dry. This will protect the color coat and restore the glossy finish. Apply the clear coat in thin, even layers, just like the touch-up paint, allowing each layer to dry between applications.
Cost of DIY vs. Professional Stone Chip Repair
The cost to fix little paint chips on your car can vary depending on whether you choose the DIY or professional route.
DIY Repair Costs:
- Touch-up paint kit: $10 – $30 (includes paint, applicator, sometimes primer/clear coat)
- Additional supplies (rubbing alcohol, sandpaper, cloths etc.): $10 – $20 (if you don’t already have these)
Total DIY Cost: Approximately $20 – $50
Professional Repair Costs:
Professional stone chip repair costs can vary depending on the number and severity of chips, the type of paint, and the repair method used. SMART (Small to Medium Area Repair Technology) repair is a common and cost-effective method for stone chips.
- Professional SMART repair: Typically ranges from $80 – $200+ per panel (e.g., hood, bumper). The cost will increase with the number of chips or panels requiring repair.
Professional vs. DIY Cost Comparison:
While DIY repair is significantly cheaper upfront, professional repair offers benefits such as:
- Higher quality finish: Professionals have color-matching expertise and techniques for a more seamless repair.
- Durability: Professional repairs are often more durable and longer-lasting.
- Convenience: Professionals handle the entire process, saving you time and effort.
- Rust treatment: Professionals can properly address rust if present, ensuring it doesn’t recur.
For minor, purely cosmetic chips, DIY is a budget-friendly option. However, for more significant damage, chips exposing metal, or if you desire a flawless finish and long-term protection, professional repair is a worthwhile investment.
Preventing Stone Chips: Tips and Protective Measures
While you can’t entirely eliminate the risk of stone chips, you can take preventative measures to minimize their occurrence and severity:
- Maintain a safe following distance: Increase the distance between your car and the vehicle in front of you, especially on highways and roads with loose gravel. This reduces the likelihood of debris being kicked up and hitting your car.
- Avoid driving on gravel or unpaved roads when possible: These surfaces are primary sources of road debris that cause stone chips.
- Consider paint protection film (PPF): PPF is a clear, self-healing film applied to vulnerable areas of your car (hood, bumper, fenders). It provides a robust barrier against stone chips and scratches. While more expensive initially, it offers excellent long-term protection.
- Use mud flaps: Mud flaps, especially on front wheels, can help deflect road debris away from your car’s paintwork.
- Regularly wash and wax your car: Keeping your car clean helps remove abrasive particles that can contribute to paint damage. Waxing adds a protective layer that can make the paint more resistant to minor impacts.
- Car paint sealants: Paint sealants offer a more durable protective layer than wax and can provide enhanced resistance against stone chips and environmental elements.
By understanding how to fix little paint chips on car and taking preventative steps, you can maintain your vehicle’s appearance and protect it from potential long-term damage. Whether you choose DIY or professional repair, addressing stone chips promptly is key to preserving your car’s value and ensuring it looks its best for years to come. For more extensive damage or for professional stone chip repair services, consult with a qualified automotive repair specialist for a tailored assessment and solution.