How to Fix Car Timing: A Step-by-Step Guide for Peak Performance
You’ve just finished assembling your brand-new engine and excitement is running high. You pump the accelerator, turn the key, and… the engine performs terribly. It might idle smoothly, but as soon as you press the gas pedal, it either bogs down like a sluggish animal or starts knocking as if it’s about to fall apart. The culprit? Ignition timing issues.
Even if your car’s problems aren’t that extreme, incorrect ignition timing can significantly reduce performance. Fine-tuning your distributor can dramatically change how your engine behaves. If the word “distributor” sounds outdated, this guide is for you, as we’re diving into the realm of classic engines to get your timing just right.
message-editor%2F1620760718566-harmonicbalancer.jpg
Consider this your guide to mastering ignition timing, helping you restore that spark to your engine and unleash its true potential. Let’s get started!
Understanding Ignition Timing Basics
Estimated Time Needed: 1-2 Hours
Skill Level: Intermediate
Vehicle System: Ignition System
 message-editor%2F1620522912382-hnet.com-image.gif
Before you start making adjustments, it’s crucial to understand what ignition timing actually is. Incorrect timing can cause serious engine damage, so precision is key.
What Exactly Is Ignition Timing?
If you’re familiar with the four-stroke engine cycle, you know that combustion is initiated by spark plugs. Ideally, the spark plug fires precisely when the piston reaches Top Dead Center (TDC) on the compression stroke. This timing ensures that the combustion force pushes the piston down, completing the power stroke.
However, in reality, the air-fuel mixture doesn’t burn instantly. To achieve optimal combustion and power, the spark needs to occur slightly before the piston reaches TDC. This “advance” ignition allows the mixture to fully ignite just as the piston starts its descent, maximizing the force of the burn. This is why engines typically have an initial timing setting, often around 10 degrees BTDC (Before Top Dead Center).
When we talk about timing, there are two main settings to consider: initial timing and total timing. Initial timing is the timing setting when the engine is idling, like the 10 degrees BTDC mentioned earlier. Total timing, on the other hand, is the maximum timing advance at higher engine speeds, which might be around 34 degrees BTDC.
The reason timing needs to advance as engine speed increases is due to the burn rate of the air-fuel mixture. Despite the piston moving faster at higher RPMs, the fuel mixture takes roughly the same amount of time to burn. To ensure peak cylinder pressure occurs at the optimal point after TDC, the spark must be initiated earlier as engine speed increases.
If you only adjust initial timing and neglect total timing, you’re likely to encounter problems. Distributors are designed with a mechanical advance mechanism that adds a specific amount of timing as RPMs increase. For example, if your engine is designed for 10 degrees initial timing and 34 degrees total timing, the distributor will mechanically add 24 degrees of advance, regardless of your initial setting.
In a stock engine with older gasoline, this might not be a major issue. However, if you’ve upgraded components like heads, camshaft, and exhaust headers, or even if you’re using modern gasoline formulations, your engine’s timing requirements likely have changed. Modern fuels often benefit from slightly more ignition advance. Increasing your initial timing to 14-16 degrees BTDC, for instance, could push your total timing to a potentially excessive 38-40 degrees BTDC. This over-advanced timing can lead to engine knocking or pinging, indicating uncontrolled detonation. Therefore, adjusting ignition timing is often necessary, and it involves more than just rotating the distributor. Don’t worry, we’ll guide you through the process.
Mechanical Advance vs. Vacuum Advance
Before you lift your hood, there’s more to understand about timing advance in older engines. Timing advance is typically managed in two ways: mechanical and vacuum advance. Mechanical advance relies on springs, weights, and limiters within the distributor, while vacuum advance uses engine vacuum.
Many engines, especially classic ones like the 440 V8, often utilize both mechanical and vacuum advance systems. Vacuum advance primarily improves fuel economy by providing additional timing advance during light-throttle cruising conditions, promoting a more complete combustion.
However, engine vacuum diminishes rapidly when you accelerate, which is where mechanical advance takes over. To fully grasp how these systems interact, let’s examine the components inside a distributor.
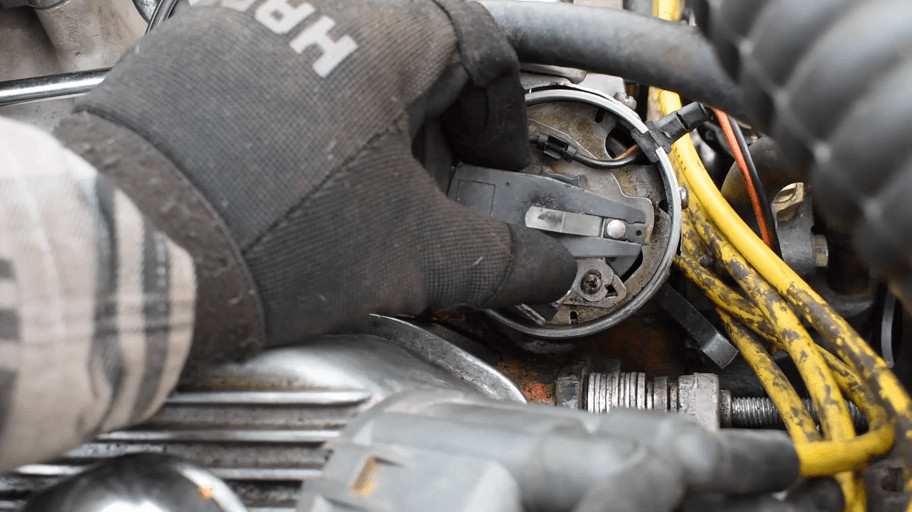
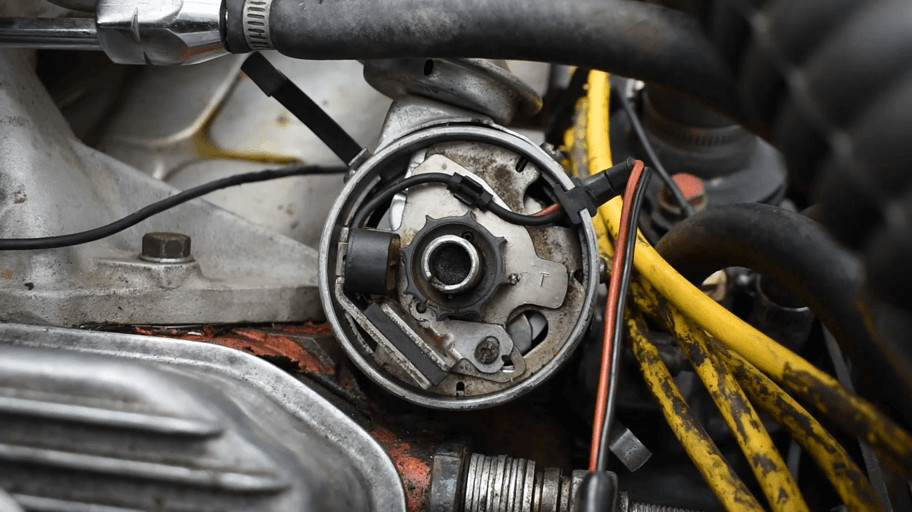
Inside the Distributor
The distributor’s central shaft is driven by the camshaft, rotating to establish the initial timing. However, this shaft is segmented to allow movement of the rotor, which is crucial for achieving total timing advance.
Mechanical advance controls the rotor’s position. As engine speed increases, centrifugal force causes advance weights to move outwards. This outward movement advances the rotor, adding to the ignition timing. The extent of weight travel, limited by stops, determines the amount of timing advance. Springs connected to these weights control how quickly the timing advance comes in, or the RPM at which total advance is reached.
 message-editor%2F1620580307534-hnet-image7.gif
Vacuum advance comes into play when you reach cruising speeds after acceleration. The vacuum advance canister, located on the distributor’s exterior, is also linked to the same shaft controlled by the mechanical advance. As engine RPMs stabilize and vacuum builds, a diaphragm inside the canister is pulled, further advancing the timing. This additional advance promotes cleaner, more efficient combustion during steady cruising.
Vacuum advance can add a significant amount of timing, sometimes as much as 25 degrees. If vacuum advance isn’t correctly adjusted, it can lead to detonation, especially during cruising.
This is why some performance enthusiasts choose to eliminate vacuum advance when adjusting initial and mechanical advance, particularly in racing applications. However, for street-driven vehicles, retaining and properly adjusting vacuum advance is recommended for optimal fuel efficiency and cruising performance.
Essential Pre-Adjustment Knowledge
Before you start adjusting your timing, some preparation is needed. Different automakers implemented timing advance systems in various ways. While many older engines use both mechanical and vacuum advance, some rely on only one. Understanding your specific system is crucial.
 message-editor%2F1620525384475-distributorweights.jpg
Furthermore, distributors vary in their mechanical advance components. If you have an HEI (High Energy Ignition) or MSD-type distributor, adjusting mechanical advance is relatively straightforward. These distributors typically use weights attached to springs and bushings, located under the rotor, to control timing advance and limits. Swapping springs and bushings in these systems is generally easy. You’ll still need to research the appropriate springs and bushings for your desired timing curve, but the physical work is simpler.
For other distributor types, accessing and adjusting the mechanical advance components can be more complex. While they still utilize weights and springs, accessing them and limiting the advance might require more intricate procedures.
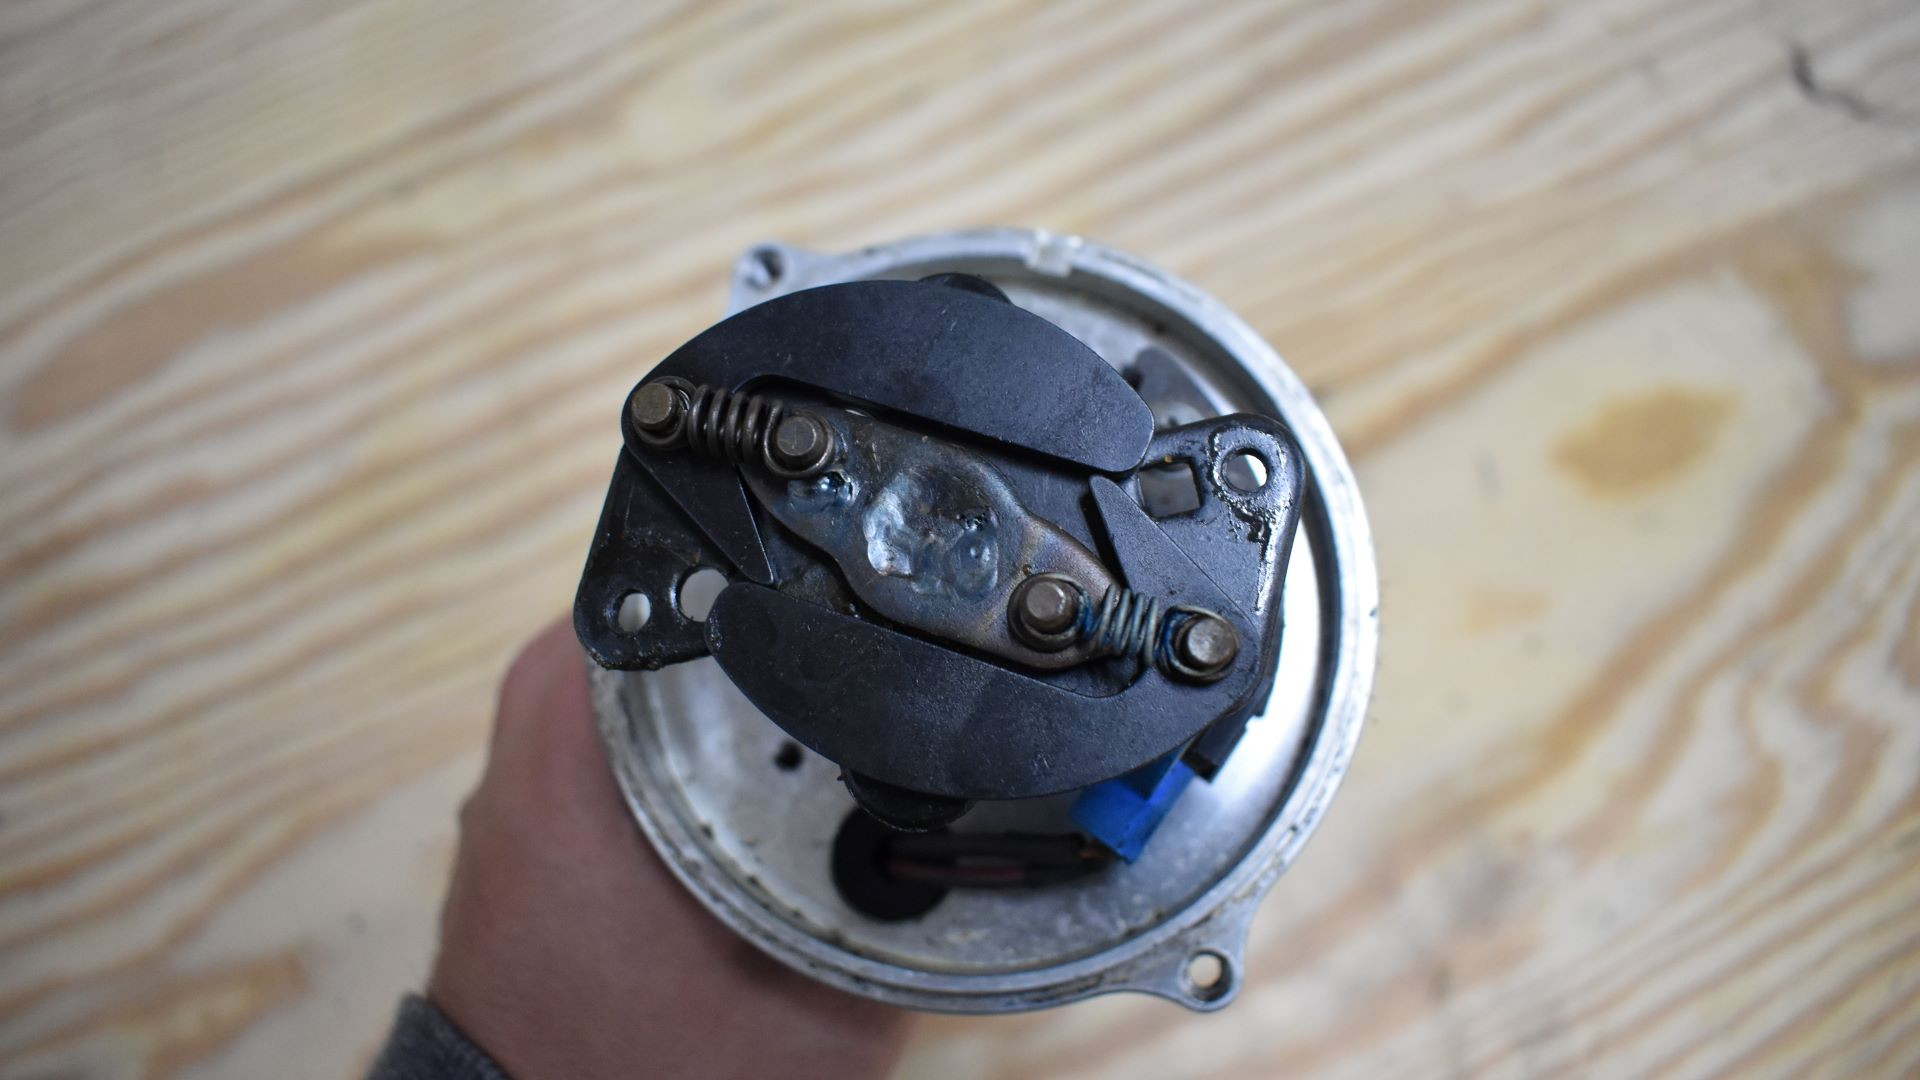
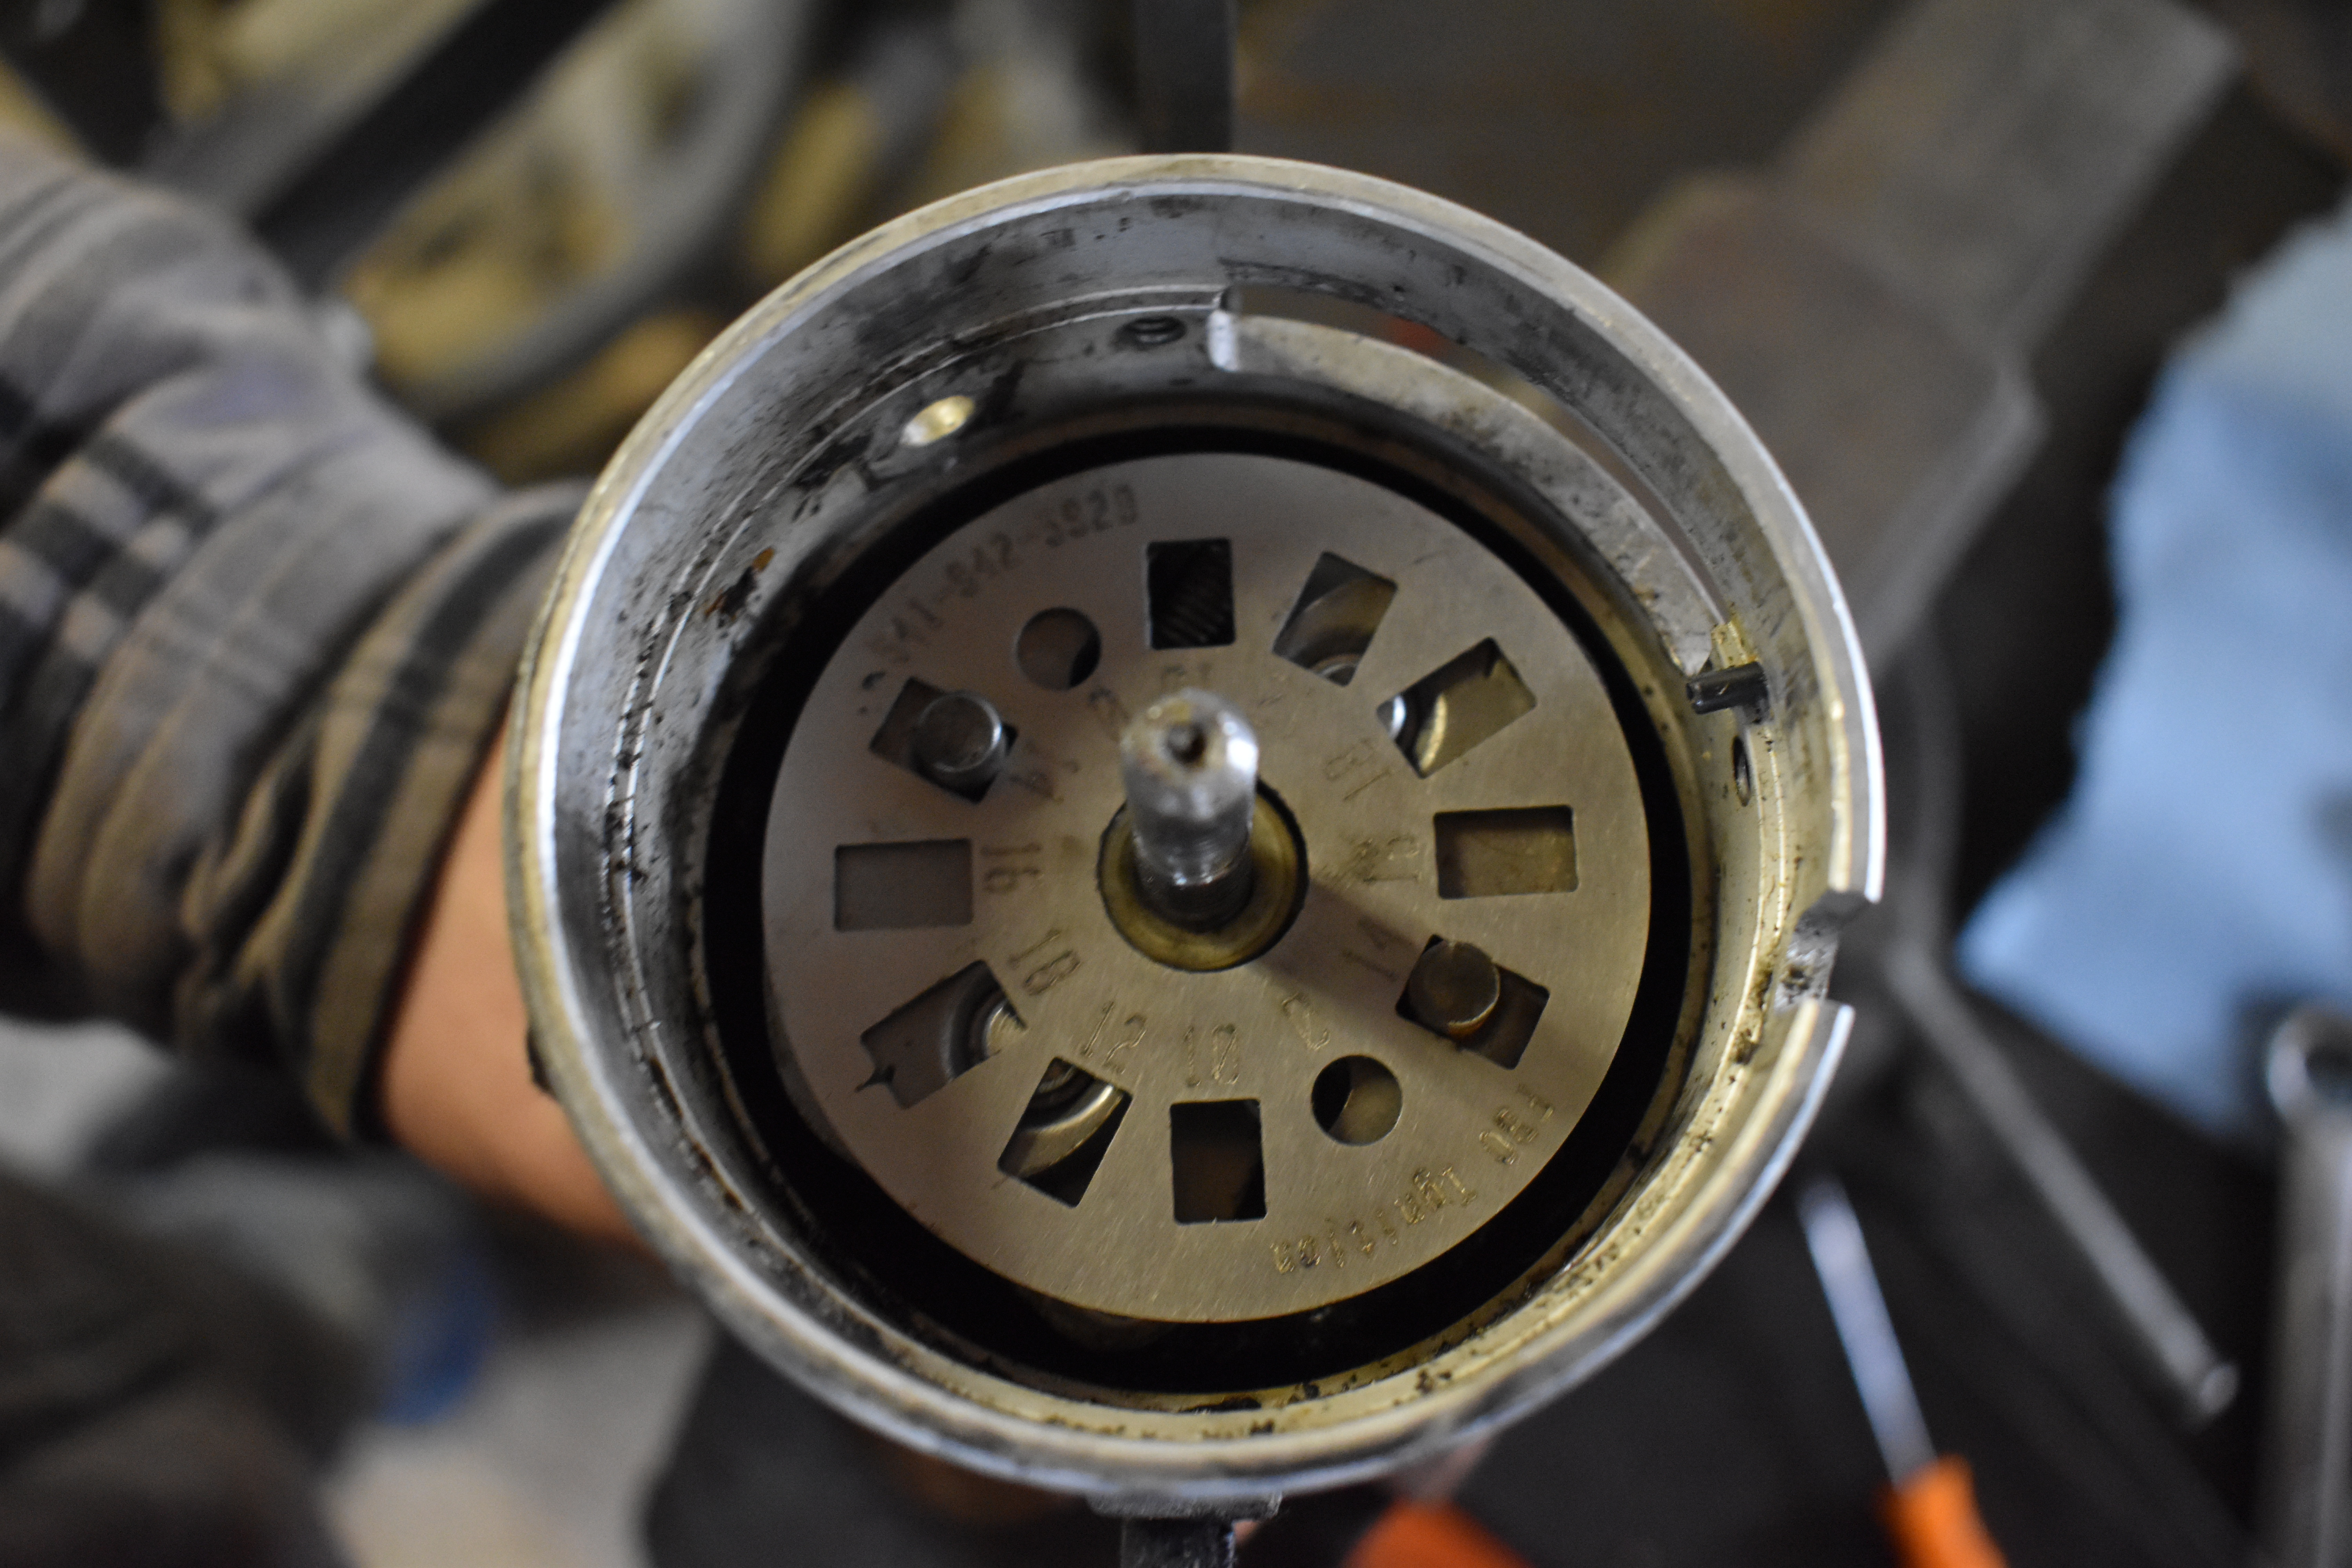
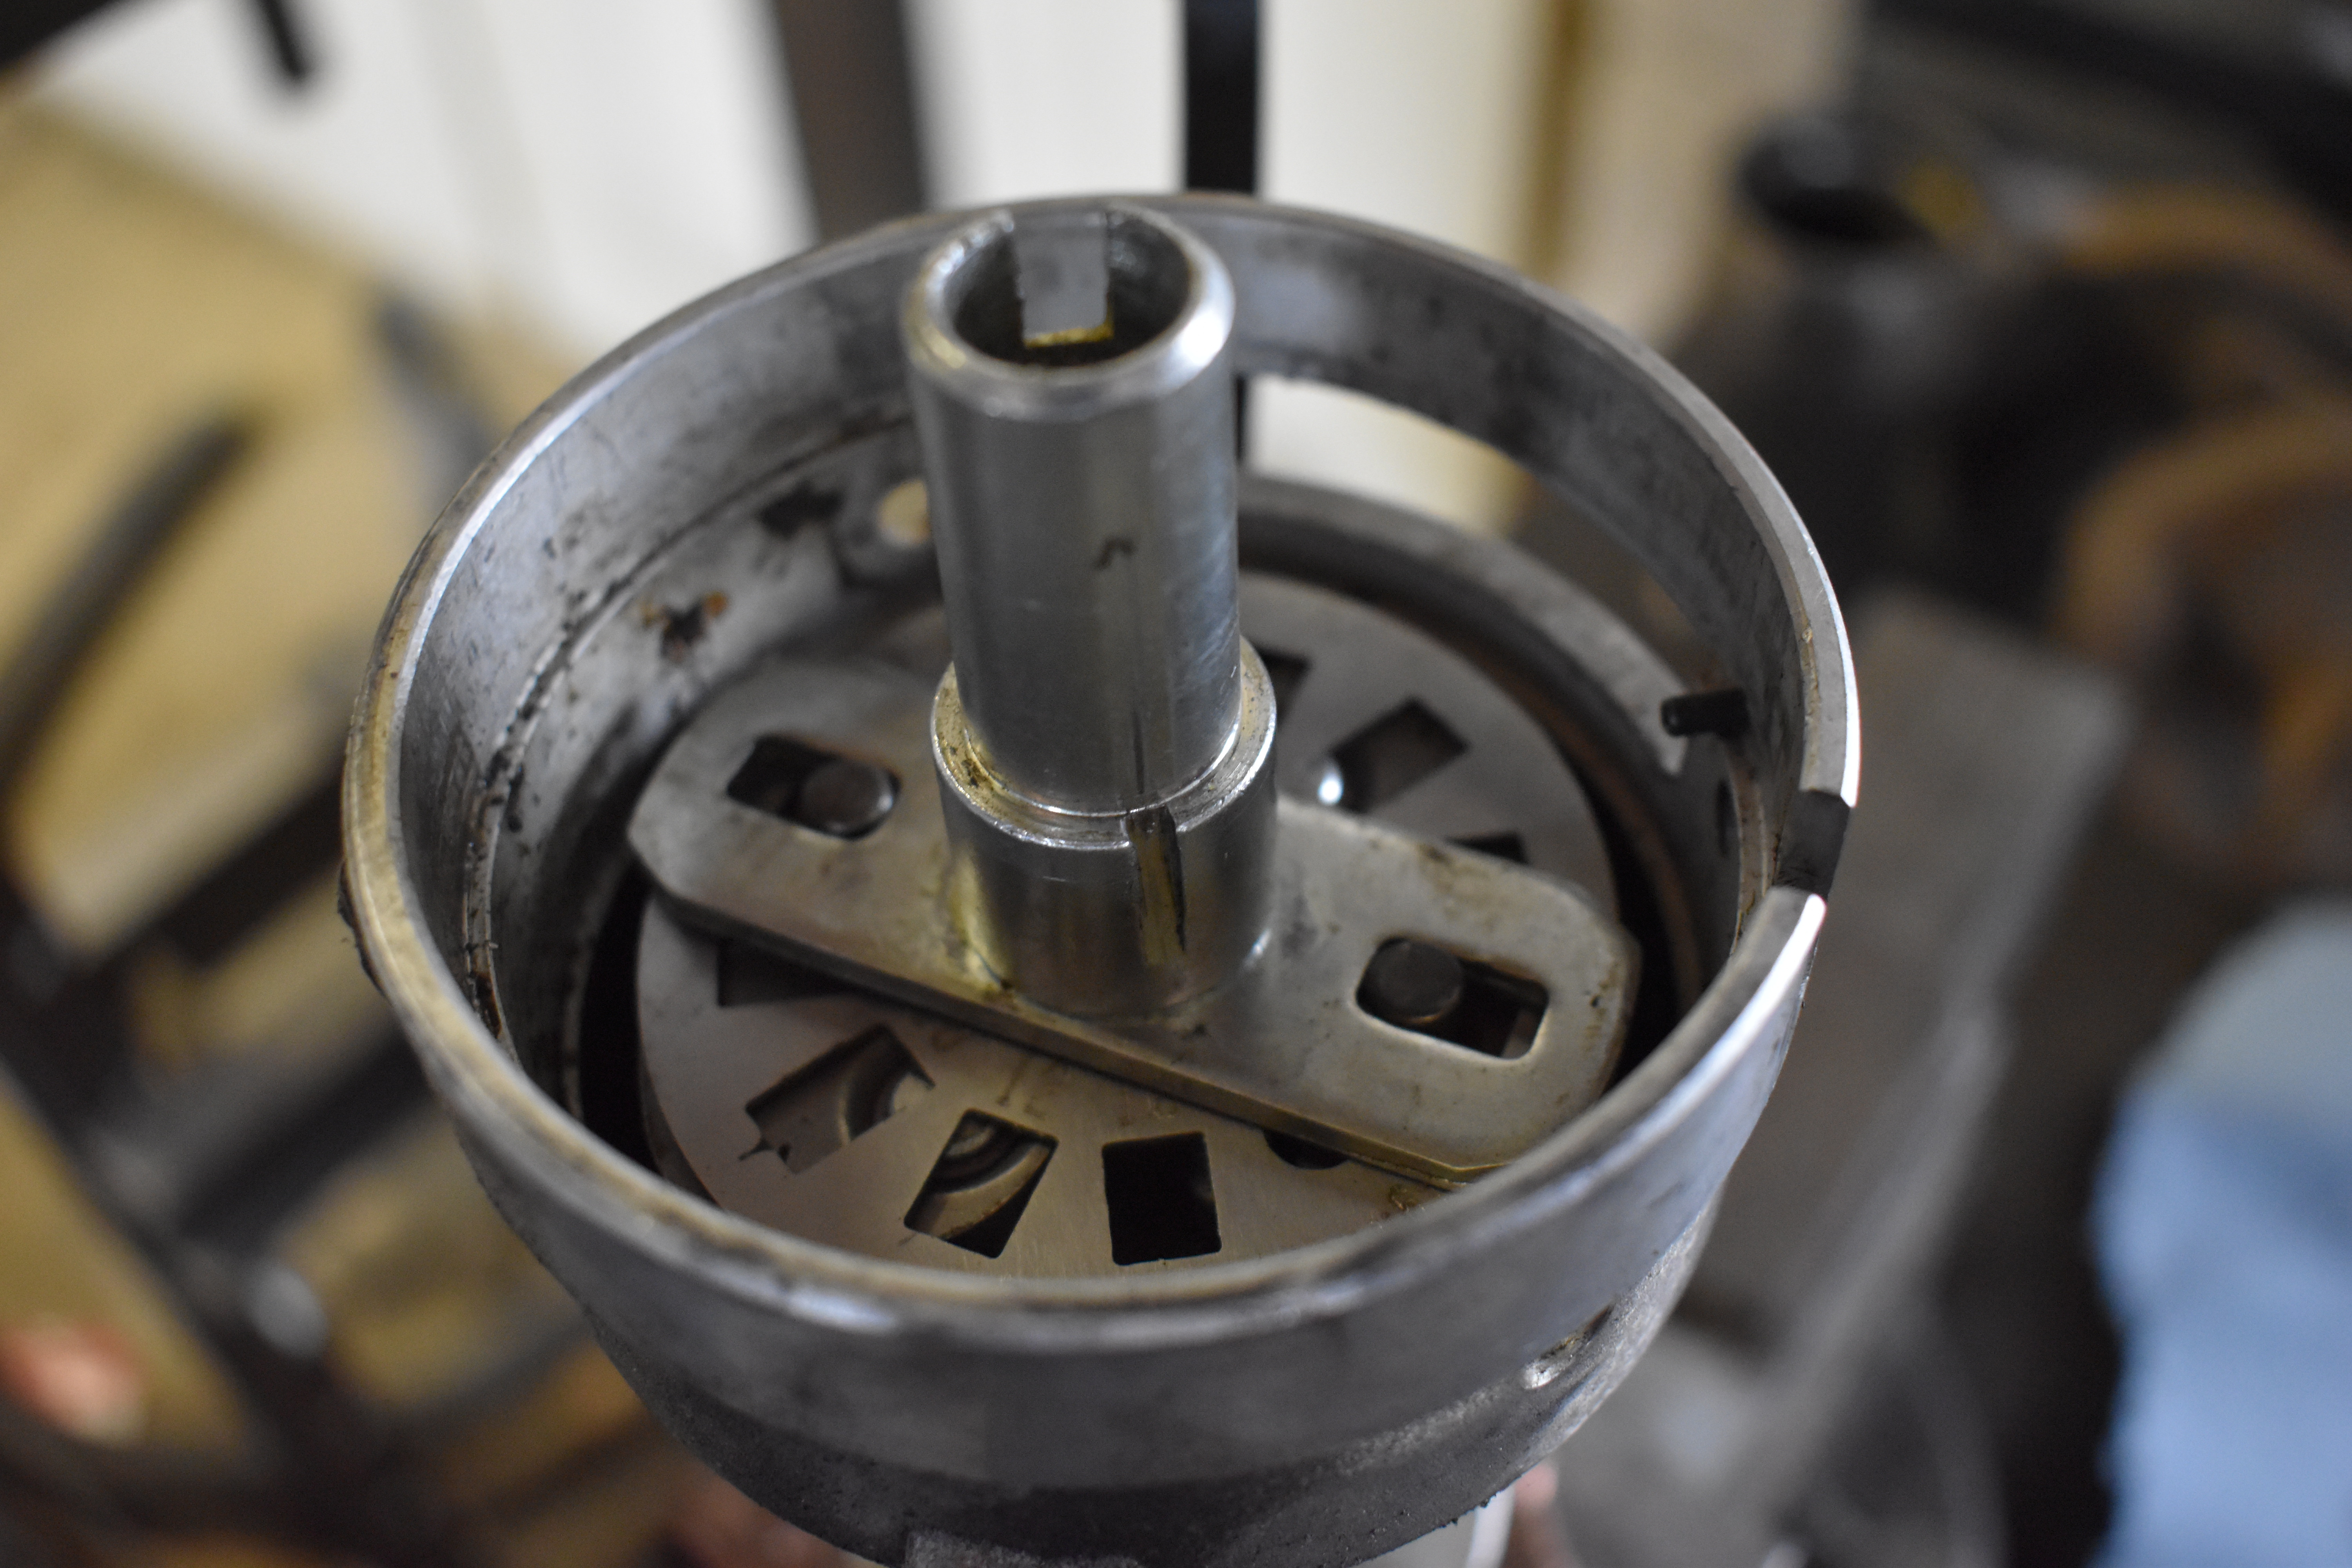
Consider Mopar distributors as an example. They also use springs and advance weights, but accessing them often requires distributor removal. Moreover, limiting total advance isn’t done with bushings. Instead, the weights have rods that insert into slots on a plate, acting as stops to limit weight travel.
To limit total advance in such systems, you have a couple of options. Traditionally, the slots in the plate were welded to restrict weight movement. A more modern and adjustable method involves using a limiting plate that installs over the weights.
 message-editor%2F1620523147168-dsc_0465.jpg
Limiting plates are generally preferable as they remove the guesswork and labor of welding and grinding. These plates come with various slots precisely marked to indicate the amount of mechanical advance they allow. Companies like FBO Systems specialize in ignition components for classic Mopars and offer these limiting plates as essential tuning aids for Chrysler enthusiasts.
 message-editor%2F1620523313168-dsc_0468.jpg
You’ll also need to determine your ideal initial and total timing settings. Without access to a dynamometer, this can be challenging. A good starting point is to research online forums and communities dedicated to your engine type and performance modifications. See what timing settings others with similar setups are using. Remember that total timing usually remains relatively constant, while you’ll primarily adjust initial timing and the RPM at which total timing is fully achieved.
Timing Adjustment Safety
Adjusting ignition timing involves working under the hood with a running engine. This presents potential hazards if safety precautions aren’t followed. Use common sense and these safety tips to minimize risks:
- Protect Yourself. Wear safety glasses and gloves. A running engine has many moving and hot parts, and protective gear adds a crucial layer of safety.
- Be Aware of the Fan. Engine cooling fans, especially older mechanical ones, can be very dangerous. Keep your hands, clothing, and timing light wires well clear of the fan blades.
- Engine Heat. Exhaust manifolds and other engine components get extremely hot quickly. Avoid touching hot parts and be mindful of your proximity to them to prevent burns.
Tools and Parts for Timing Adjustment
Besides the knowledge discussed, you’ll need specific tools and potentially some parts to adjust your ignition timing. While some specialized tools are required, they are generally affordable. The satisfaction of fine-tuning your engine’s performance makes the investment worthwhile.
Tool List
- Timing Light (Inductive)
- Socket Set and Wrenches
- Screwdrivers (Flathead and Phillips)
- Allen Key Set (for vacuum advance adjustment)
- Dwell Meter/Tachometer (if adjusting dwell angle on older systems)
- Timing Tape or Timing Marks
- Shop Rags
- Wire brush or terminal cleaner
Part List (Potentially)
- Distributor Spring and Bushing Kit (for mechanical advance adjustment)
- Advance Limiter Plate (for certain distributors)
- Vacuum Advance Adjustment Tool (Allen key type)
- Replacement Vacuum Lines (if needed)
Organizing your tools and parts for easy access will save time. You’ll also need a safe, level workspace like a garage floor or driveway.
Step-by-Step Guide to Setting and Adjusting Timing
Let’s get to work!
Adjusting Mechanical Advance Timing
1. Install Timing Tape or Mark Your Balancer. You can use timing tape for easier reading or mark your harmonic balancer directly. For this example, we’ll use timing tape.
2. Warm Up the Engine. Bring the engine up to its normal operating temperature. Address any existing engine issues that prevent stable idling before proceeding with timing adjustments.
3. Connect the Timing Light. If using a standard timing light, connect the power leads to the battery terminals and the inductive pickup to the number one spark plug wire. Wireless timing lights simplify this connection.
4. Loosen the Distributor Clamp. You’ll need to rotate the distributor for timing adjustments, so loosen the clamp bolt just enough to allow rotation while still holding the distributor in place.
5. Disconnect Vacuum Advance. Disconnect the vacuum advance hose from the distributor canister and plug the hose to prevent vacuum leaks.
 message-editor%2F1620523750956-pluggedline.jpg
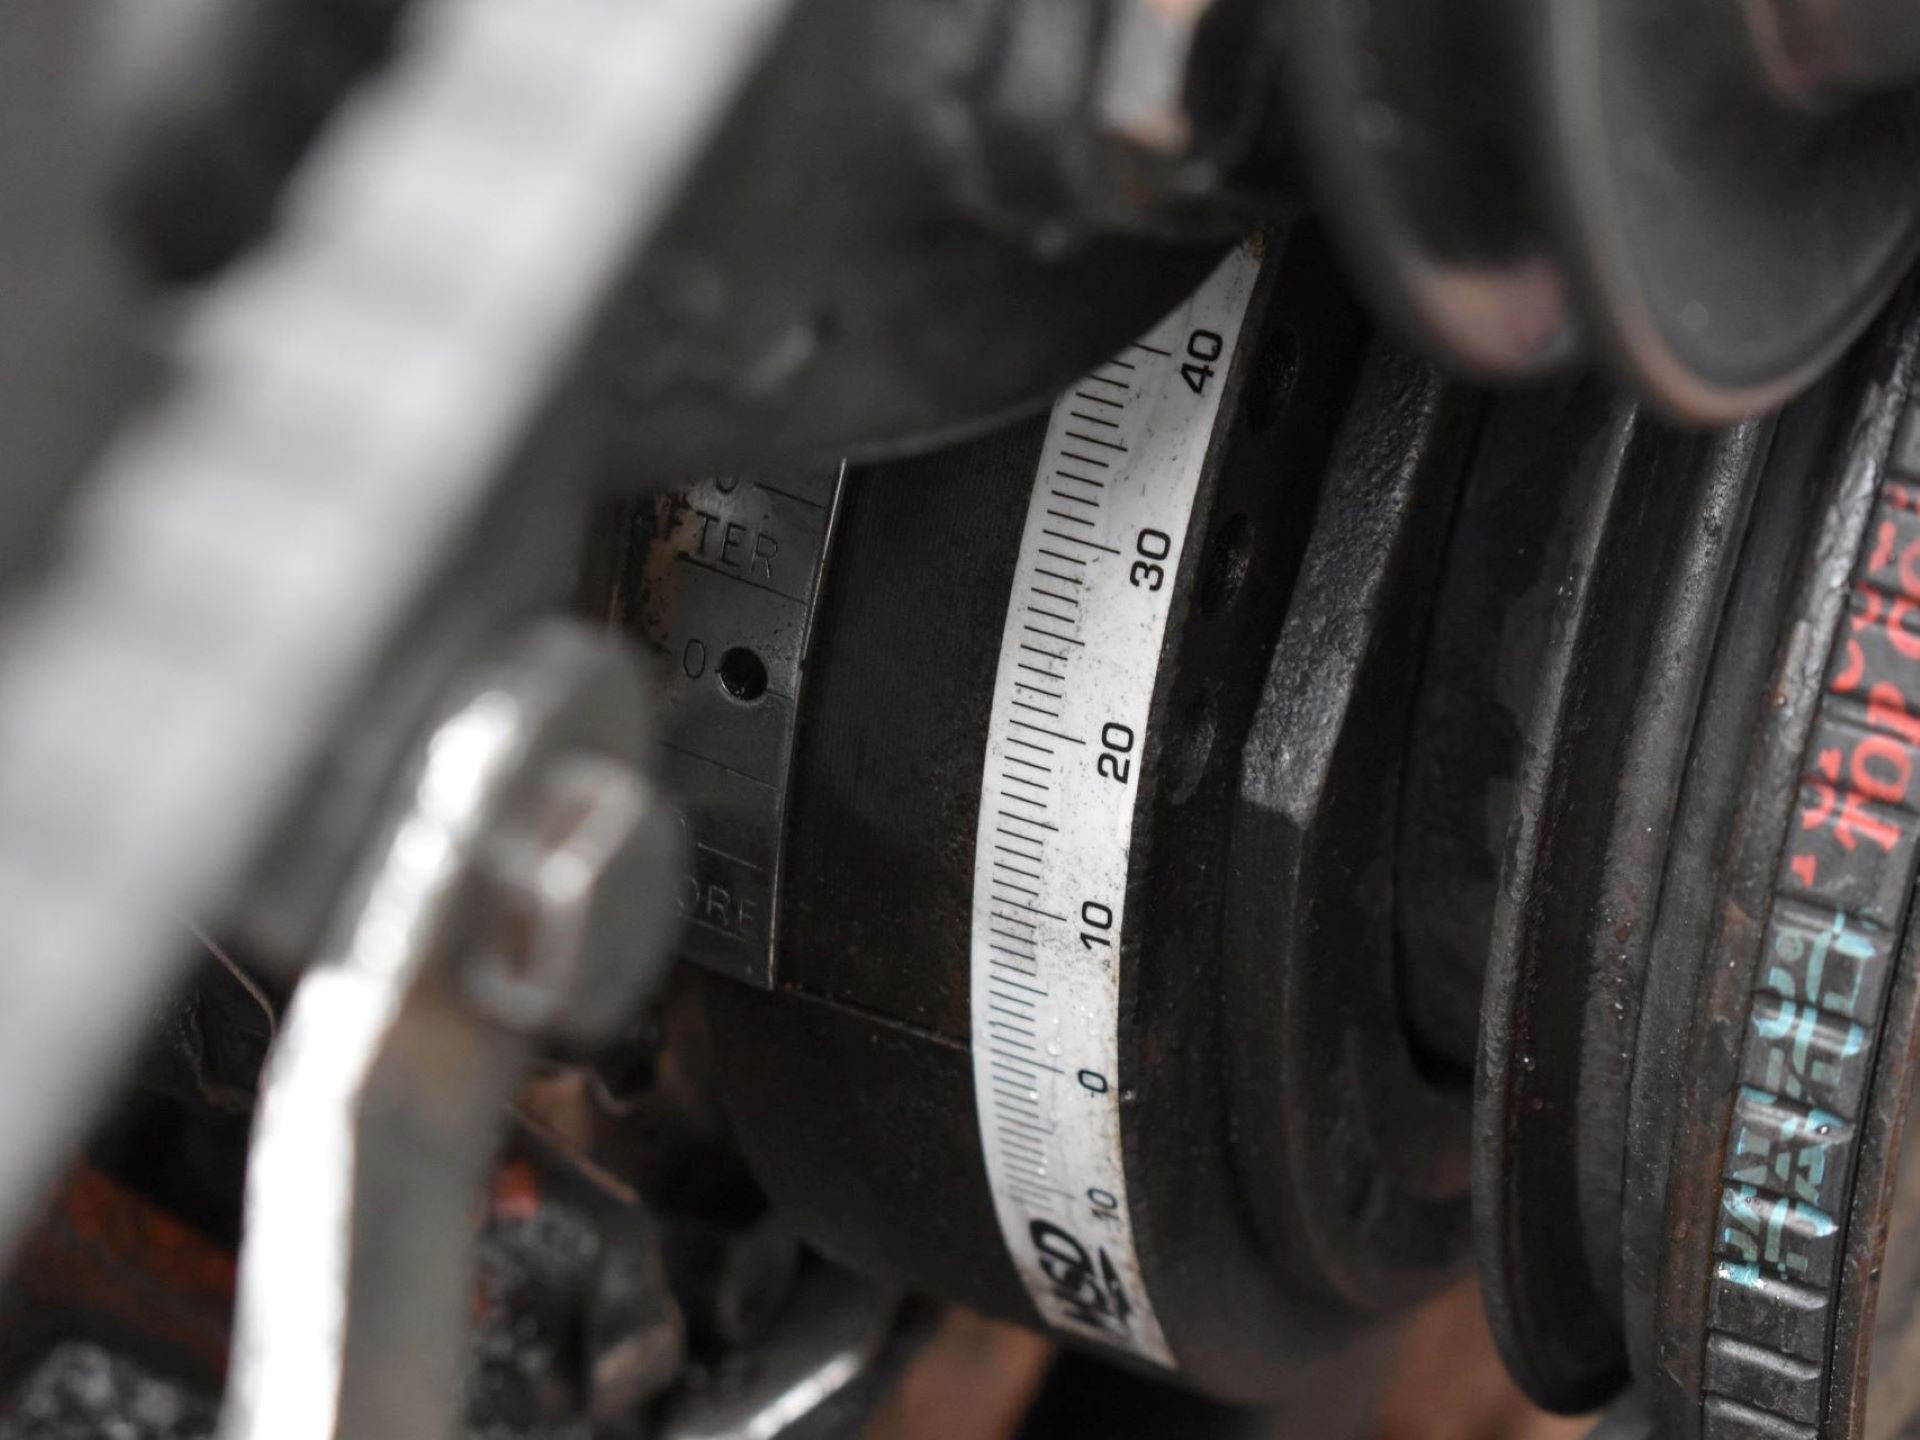
6. Aim and Read. Position yourself to clearly see both the harmonic balancer and the timing marks or tape. Point the timing light at the marks and observe the reading while the engine is idling. For initial timing, we’re aiming for 20 degrees BTDC in this example.
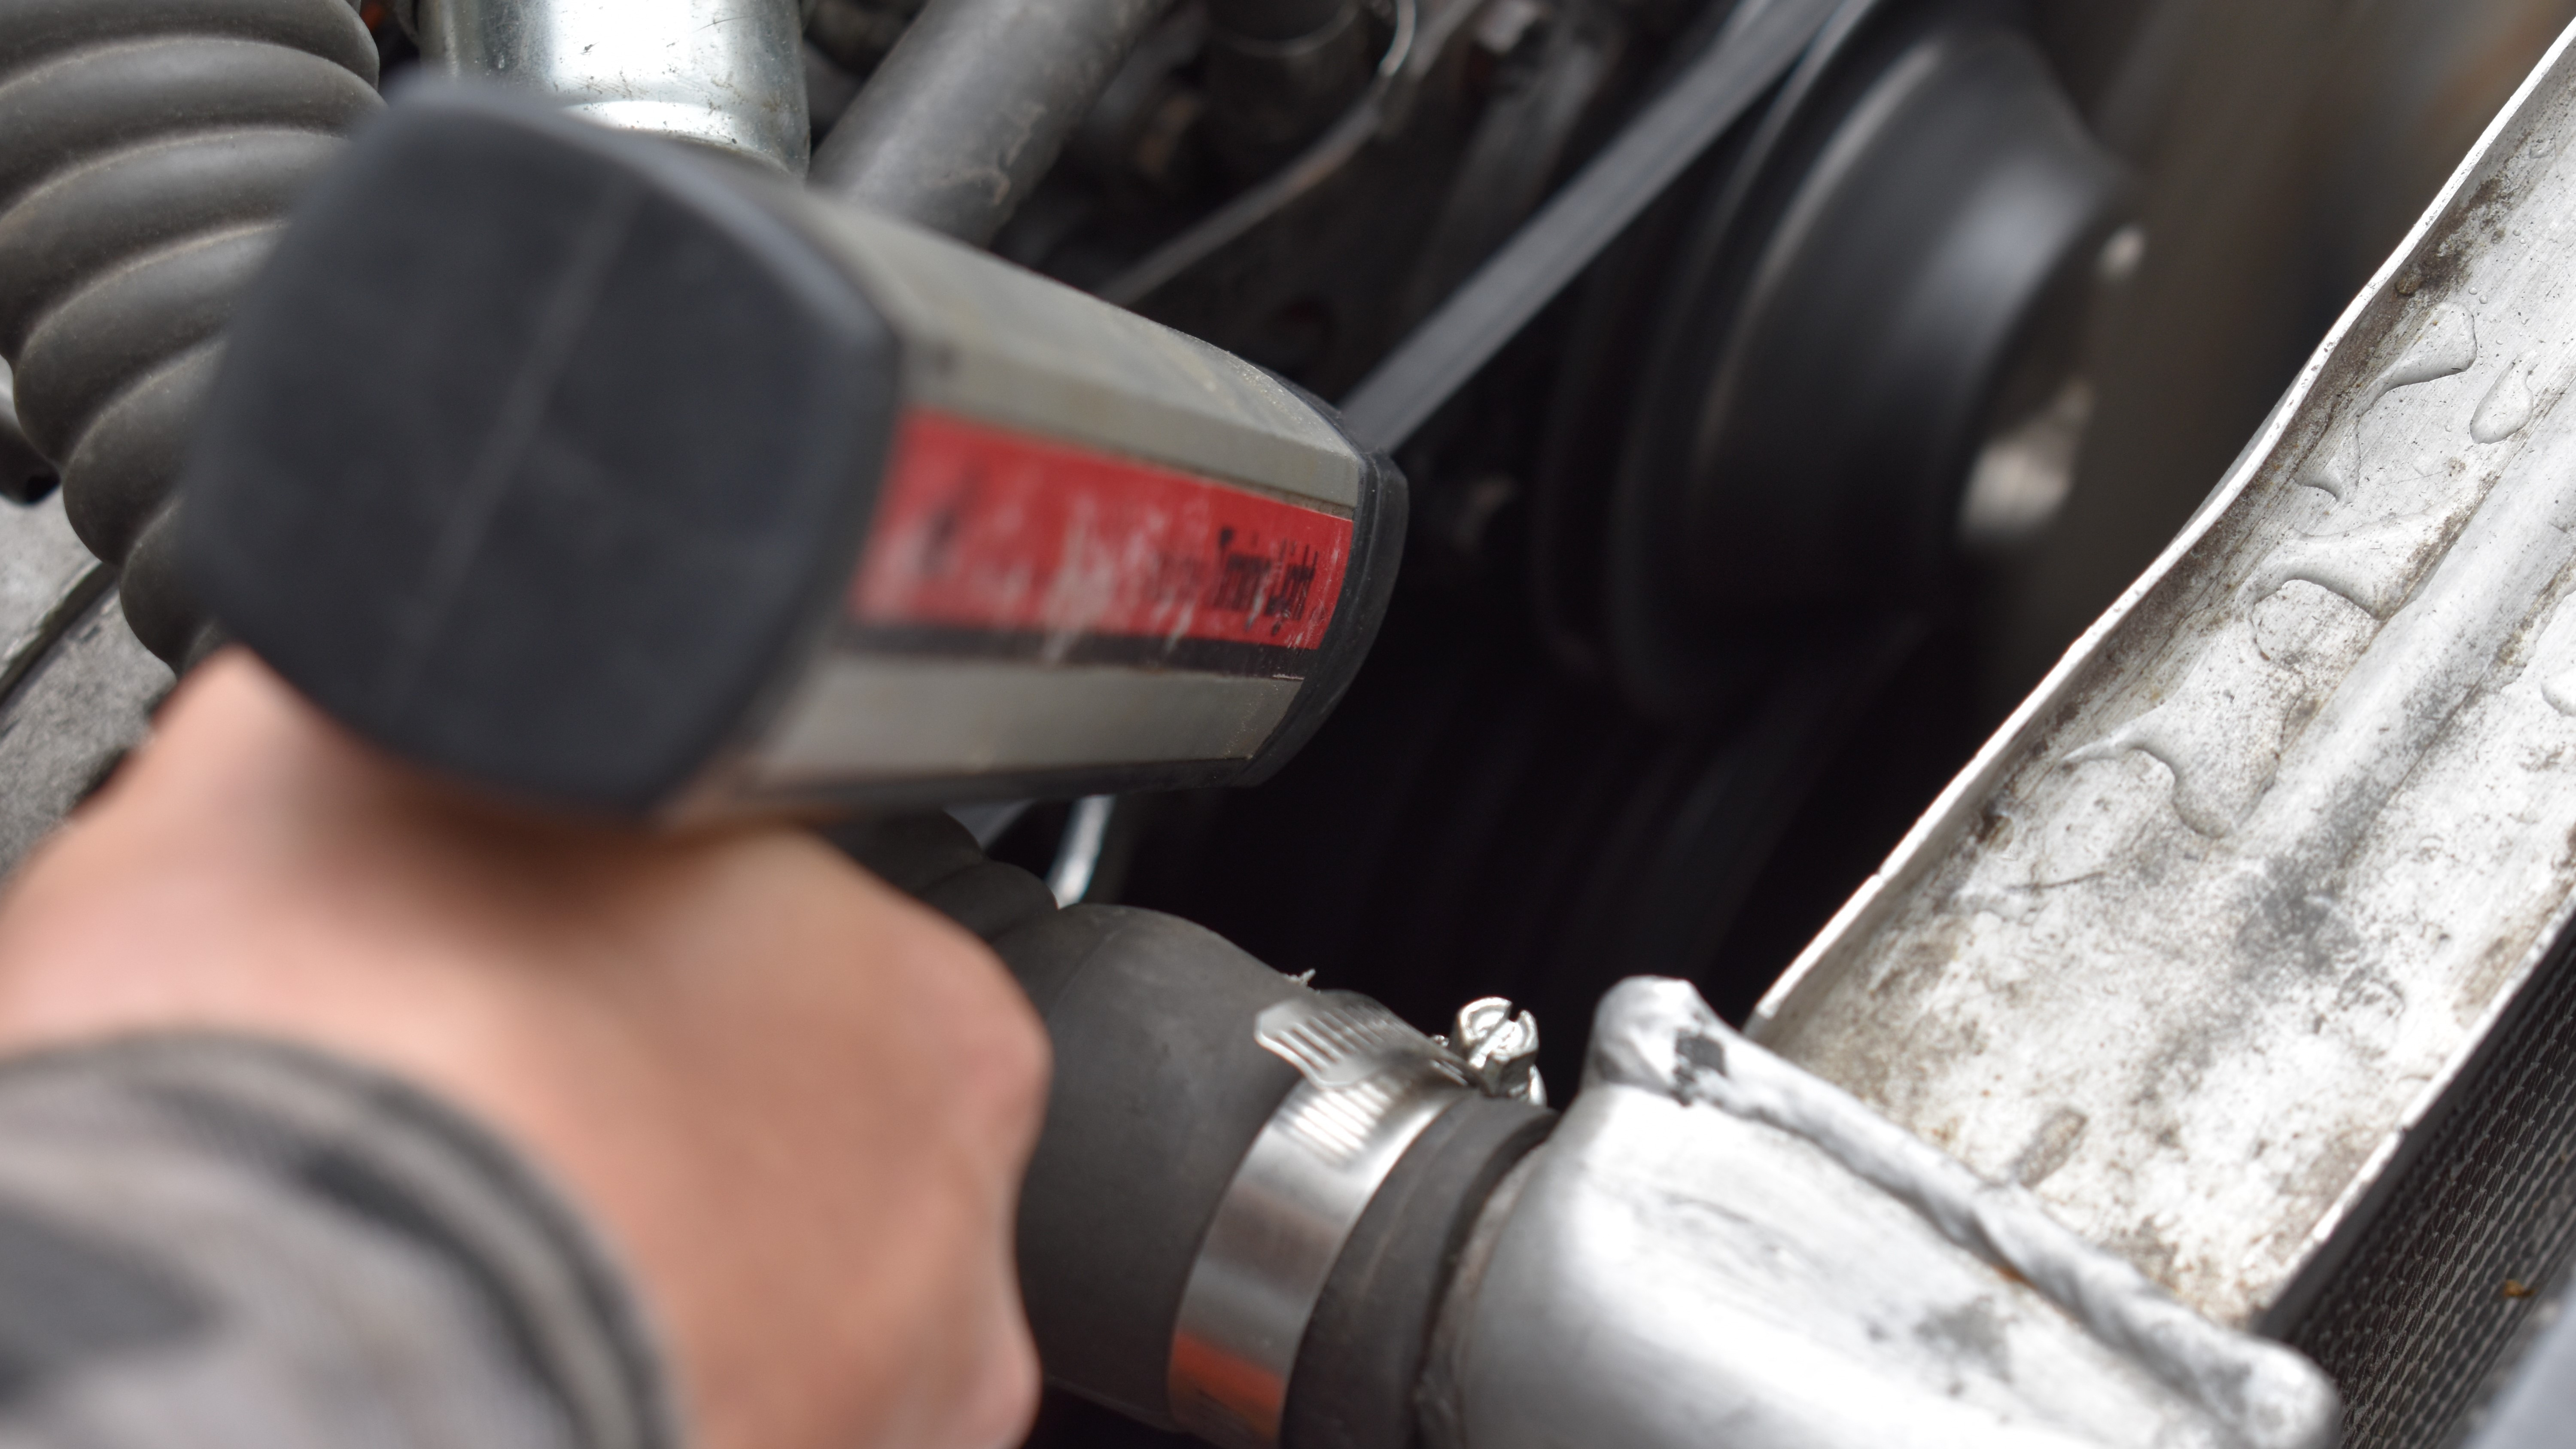 message-editor%2F1620523832760-shootingtiming.jpg
7. Set Initial Timing. With the timing light flashing, gently rotate the distributor until the desired initial timing mark (e.g., 20 degrees BTDC) aligns with the zero mark on the timing tab.
8. Check and Record Total Timing. Once initial timing is set, tighten the distributor clamp. Have an assistant slowly increase the engine RPM while you monitor the timing marks with the timing light. Note the maximum timing advance reached (total timing) and the RPM at which it stabilizes.
9. Engine Off Adjustments. Shut off the engine. Now, based on your total timing reading and the RPM at which it occurs, determine if adjustments to the mechanical advance are needed. This might involve changing distributor springs for faster or slower advance curves, or installing bushings or a limiter plate to adjust total advance amount. Adjust the distributor’s mechanical advance mechanism as needed.
10. Verify Results. Restart the engine and re-check both initial and total timing with the timing light to confirm your adjustments.
11. Road Test. Take the vehicle for a test drive to evaluate engine performance under various conditions. If needed, repeat the adjustment process to further refine timing for optimal performance.
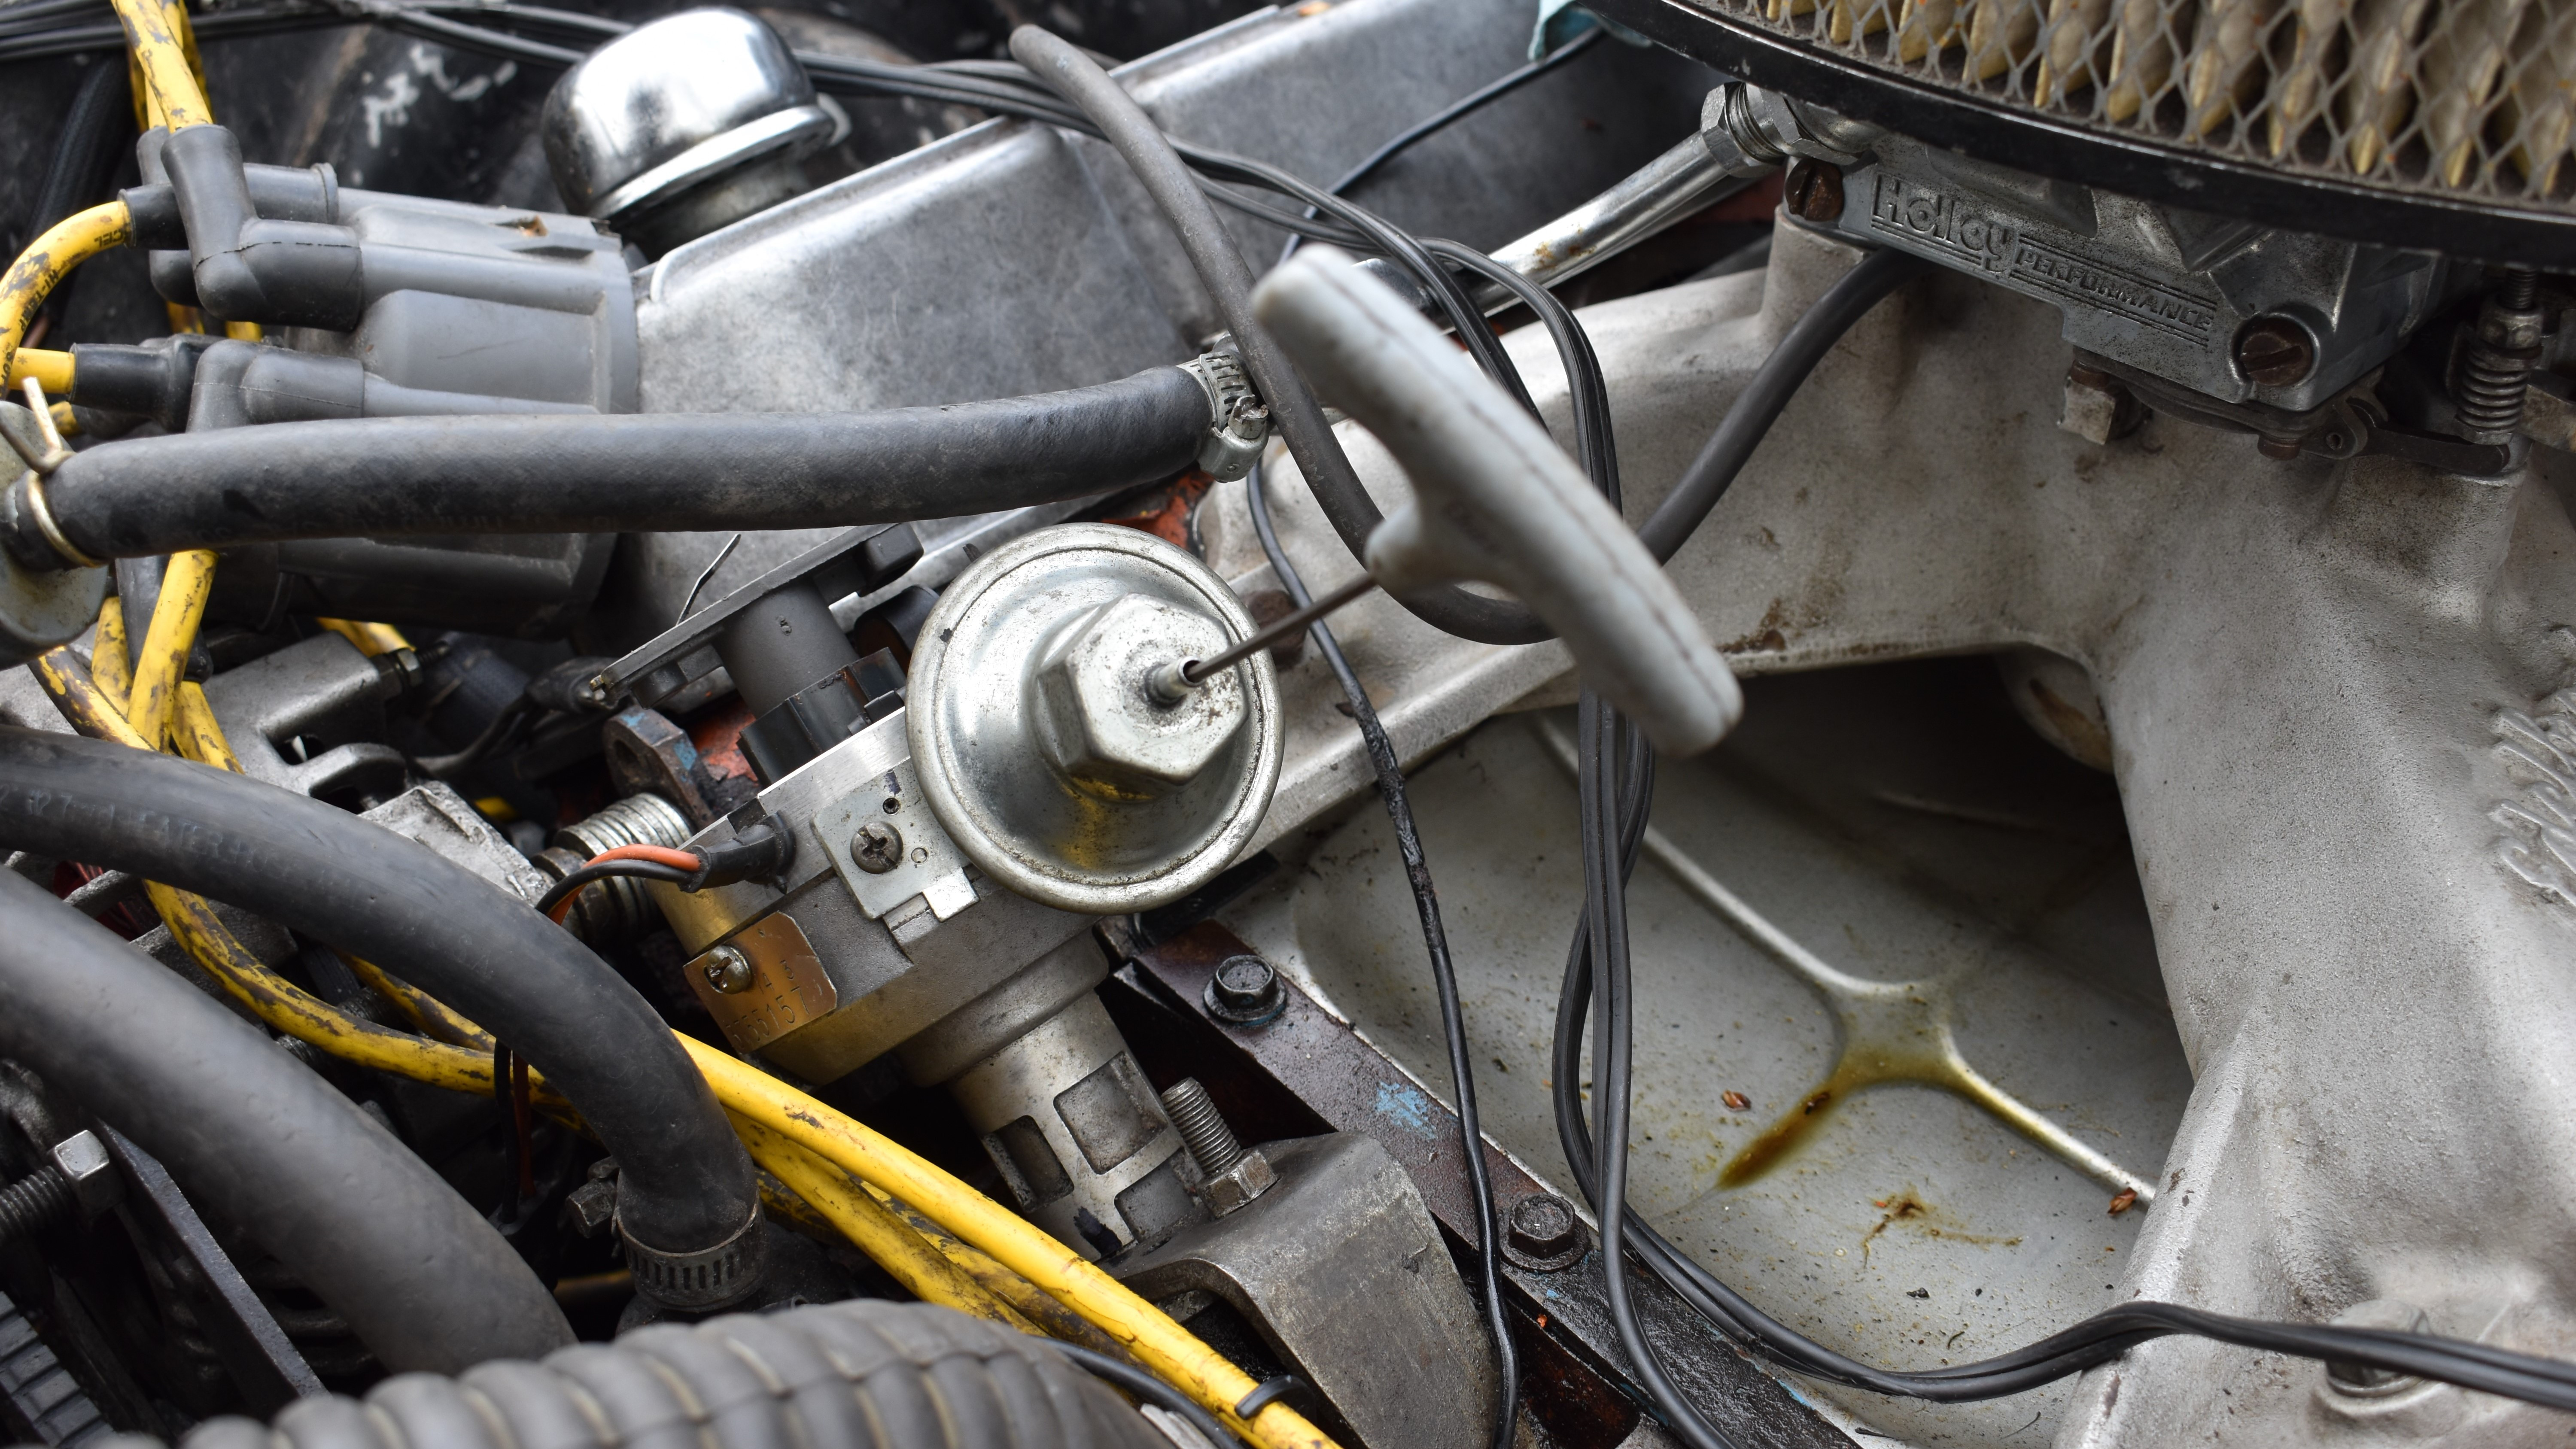 message-editor%2F1620523670326-vacuumadvance.jpg
Adjusting Vacuum Advance
If your engine runs lean (indicated by pinging or detonation) during cruising but not under acceleration, excessive vacuum advance is likely the cause. Here’s how to adjust it:
1. Use an Allen Key. T-handle Allen keys provide better control and comfort for vacuum advance adjustments.
2. Disconnect Vacuum Line. Disconnect the vacuum line from the distributor’s vacuum advance canister. This adjustment can be done with the engine off.
3. Locate the Keyway. Insert the Allen key into the vacuum advance adjustment screw opening on the canister. Carefully feel for the keyway or adjustment screw. Be gentle to avoid damage. Starting with a larger Allen key to locate the keyway and then gradually decreasing sizes can be helpful.
4. Reduce Timing (Counter-Clockwise). In most vacuum advance systems, rotating the adjustment screw counter-clockwise reduces the amount of vacuum advance. Clockwise rotation typically increases advance. However, always verify the specific adjustment direction for your system through research or a service manual.
5. Test and Repeat. Reconnect the vacuum line. Take the car for a test drive, paying attention to cruising conditions. If pinging persists, repeat the process, further reducing vacuum advance by turning the adjustment screw counter-clockwise again. Continue adjusting until pinging disappears during cruising.
Monitoring Your Timing Adjustments
Accurate timing adjustments rely on precise readings. Using a timing light and clear timing marks are essential for monitoring changes.
A timing light connects to the car’s battery and the number one spark plug wire. When pointed at the harmonic balancer and timing tab while the engine is running, the light flashes each time the number one spark plug fires, effectively “freezing” the timing marks for observation.
At a minimum, your harmonic balancer should have a timing mark. This mark aligns with the timing tab on the engine to indicate ignition timing. Painting the timing mark with white paint makes it much easier to see under the timing light’s strobe. As engine speed increases, observe the timing mark’s movement relative to the timing tab to assess timing advance.
Many older timing tabs, like those on some classic engines, may only be marked up to 10 or 15 degrees BTDC. For settings beyond this, you’ll need to apply timing tape to the harmonic balancer. Timing tape is marked in degrees of advance. When using timing tape, you observe which number on the tape aligns with the zero mark on your timing tab. This number indicates the total degrees of ignition advance.
Pro Timing Adjustment Tips
- Cam Timing is Separate. Cam timing adjustments are distinct from ignition timing. While both affect engine performance, they are different systems and procedures.
- Mark Your Balancer. Timing tape can degrade or peel off. Once you’ve found your ideal total timing setting, create a permanent mark (notch) on the balancer aligned with the desired timing mark on the tape. Paint this notch white for easy future reference, even without timing tape.
- Listen to Your Engine. Forum recommendations are great starting points, but every engine is unique. Pay attention to how your engine responds to timing changes. Listen for pinging, rough idling, or sluggishness. Fine-tune timing based on your engine’s feedback.
- Check Balancer Condition. An old, deteriorated harmonic balancer with worn rubber can slip, causing inaccurate timing readings. Inspect your balancer for signs of wear or separation before adjusting timing. Replace it if necessary.
- Faster Isn’t Always Better. Advancing timing too aggressively can improve throttle response but may make the car harder to control, especially on the street. Start with conservative adjustments and progressively refine timing while prioritizing drivability and engine safety.
FAQs About Ignition Timing
Q: What happens if engine timing is off?
A: The effects vary depending on how far off and in which direction. Severely incorrect timing can prevent the engine from starting at all. If timing is too advanced, you might experience overheating, detonation (pinging or knocking), and backfiring through the carburetor. Insufficient timing advance can lead to rough running and backfiring through the exhaust.
Q: How long does it take to fix timing on a car?
A: Setting timing back to factory specifications can be quick, often just a few minutes. However, making performance adjustments to mechanical and vacuum advance can take an hour or two, as it often involves testing and iterative refinement.
Q: Does advancing timing increase power?
A: Yes, it can. However, it depends on the engine’s current timing settings and whether additional advance is needed for optimal combustion. Too much advance can actually reduce power and even damage the engine due to detonation.
Q: How do you check timing without a timing light?
A: Accurately checking timing without a timing light is not possible. You can estimate initial timing based on distributor position relative to the number one cylinder and harmonic balancer marks. But you’ll be guessing at total timing and the timing curve without a timing light. A timing light provides the only reliable way to measure ignition timing dynamically.
Q: How does retarding timing affect the engine?
A: Retarding timing, in the context of reducing advance, can be useful to combat detonation or pinging, especially in engines running on lower octane fuel or experiencing hot conditions. However, if timing is excessively retarded (meaning ignition occurs too late relative to TDC), the engine will likely run poorly or not at all, as combustion happens too late in the power stroke.
Helpful Video Resource
Understanding ignition timing can be complex. This video offers a visual explanation and simplifies the process:
Connect and Share: Talk to Our Experts
We’re here to guide you through automotive DIY. Have questions, tips, or stories about timing adjustments? Comment below and engage with our team and fellow enthusiasts! Share your experiences and learn from others. You can also reach out to us on social media. For questions or pro tips, send us a message!
Get Equipped with Recommended Gear
Our team rigorously tests tools and equipment to help you equip your garage with the best. Explore our guides for proven gear recommendations.
SEE GIFT GUIDES