How to Fix a Flat Car Tire: A Step-by-Step Guide for Beginners
Experiencing a flat tire can be a stressful and inconvenient event for any driver. Knowing how to fix a flat car tire yourself is a valuable skill that can save you time, money, and get you back on the road quickly. Before you find yourself stranded, it’s crucial to understand the essential tools and the step-by-step process involved in changing a flat tire safely and efficiently. This guide will walk you through everything you need to know to confidently tackle a flat tire repair.
Essential Tools for Fixing a Flat Tire
Being properly equipped is the first step to successfully fixing a flat tire. Make sure you have these essential tools readily available in your vehicle:
- Inflated Spare Tire: This is your replacement tire. Regularly check its pressure to ensure it’s ready when you need it.
- Car Jack: This tool is used to lift your vehicle so you can remove the flat tire and install the spare. Familiarize yourself with your car jack’s operation and designated jacking points.
- Lug Wrench: This wrench is specifically designed to loosen and tighten the lug nuts that secure your wheels.
- Vehicle Owner’s Manual: Your manual is a crucial resource. It provides specific instructions for your car model, including the location of your spare tire and tools, and proper jacking points.
- Wheel Wedges (or Chocks): These are safety devices placed behind or in front of the wheels to prevent the car from rolling, especially on inclines. Bricks or sturdy pieces of wood can also work in a pinch.
- Work Gloves: Protect your hands from dirt and injury while changing the tire.
Most vehicles come with these tools as standard equipment. It’s important to locate them in your car and ensure they are in good working condition before you need them. Typically, you can find these tools in the trunk, under the floorboard, or sometimes attached to the trunk lid.
Step-by-Step Guide: How to Change a Flat Tire
Changing a flat tire might seem daunting, but by following these steps carefully, you can do it yourself safely and efficiently:
-
Find a Safe Location: As soon as you realize you have a flat tire, safely pull over to a level surface away from traffic. Avoid stopping on a hill or a busy road. If you can’t reach a safe spot, it’s best to call for roadside assistance.
-
Engage Safety Measures: Turn on your hazard lights to alert other drivers. Put your car in “Park” (or in gear for manual transmissions) and firmly apply the parking brake. If you’re on any kind of incline, use wheel wedges to block the wheels that are diagonally opposite to the flat tire. For example, if the front right tire is flat, block the rear left wheel.
-
Gather Your Tools and Spare Tire: Retrieve your spare tire, car jack, lug wrench, and gloves from their storage location in your vehicle.
-
Loosen the Lug Nuts: Before jacking up the car, use the lug wrench to loosen the lug nuts on the flat tire. Turn the wrench counterclockwise. They might be tight, so use firm, steady pressure. You don’t need to remove them completely at this stage, just break them loose – about half to one full turn should suffice.
-
Position the Jack: Consult your vehicle owner’s manual to identify the correct jacking points for your car model. These are typically reinforced areas of the vehicle frame near each wheel. Position the jack securely under the designated jacking point closest to the flat tire.
-
Raise the Vehicle: Slowly and steadily raise the vehicle with the jack until the flat tire is a few inches off the ground. Enough clearance to remove the flat tire and install the inflated spare is needed. Ensure the car is stable and the jack is securely positioned before proceeding.
-
Remove the Lug Nuts: Now, fully unscrew the lug nuts counterclockwise and carefully remove them. Keep them together in a safe place, like your glove compartment or lug nut container, to prevent them from rolling away and getting lost.
-
Remove the Flat Tire: Grip the flat tire firmly and pull it straight towards you to remove it from the wheel hub. It might require a bit of wiggling. Set the flat tire aside.
-
Mount the Spare Tire: Align the spare tire with the wheel studs and carefully mount it onto the hub. Ensure the valve stem is facing outwards.
-
Hand-Tighten Lug Nuts: Put the lug nuts back on and hand-tighten them in a star pattern (opposite nuts first) to evenly secure the wheel. Tighten them clockwise as much as you can by hand.
-
Lower the Vehicle: Slowly lower the vehicle using the jack until the spare tire just touches the ground, but the full weight of the car is not yet on it.
-
Fully Tighten Lug Nuts: Now, use the lug wrench to fully tighten the lug nuts in the same star pattern. Ensure they are snug and secure, but avoid over-tightening, which can damage the studs or wheel.
-
Lower Vehicle Completely: Lower the jack completely and remove it from under the vehicle.
-
Final Lug Nut Check: Give the lug nuts one last firm tightening with the lug wrench to ensure they are securely fastened.
-
Stow Flat Tire and Tools: Place the flat tire and tools back in their designated storage locations in your vehicle.
-
Check Lug Nut Torque and Tire Pressure: As soon as possible, ideally within the first 50-100 miles, use a torque wrench to ensure the lug nuts are tightened to the vehicle manufacturer’s specified torque. Also, check the pressure of your spare tire and inflate it to the recommended pressure, if necessary.
-
Get Your Flat Tire Repaired or Replaced: Spare tires are often temporary and may have speed and distance limitations. Visit a tire service center to have your flat tire repaired or replaced and to have your spare tire inspected.
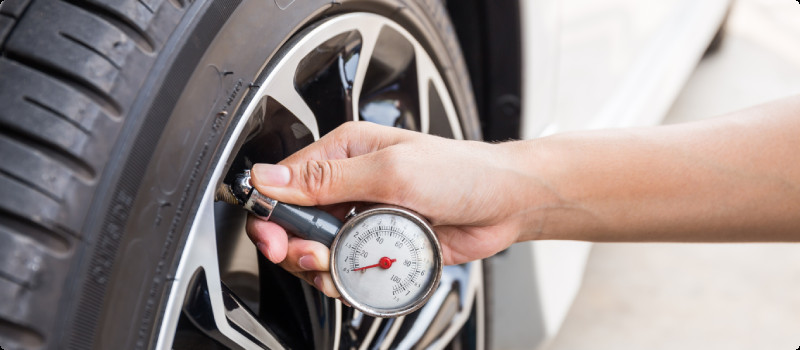
Picture of a person checking tire pressure
Preventing Flat Tires: Proactive Measures
While knowing how to fix a flat tire is essential, preventing them in the first place is even better. Here are some proactive steps you can take:
- Avoid Road Hazards: Be vigilant and try to steer clear of road debris like potholes, sharp objects (nails, glass, metal), and construction zones where hazards are more likely.
- Maintain Proper Tire Pressure: Regularly check your tire pressure at least once a month and before long trips using a reliable tire pressure gauge. Inflate your tires to the recommended pressure specified on the sticker inside your driver’s side doorjamb or in your owner’s manual. Proper inflation helps prevent punctures and blowouts.
- Don’t Overload Your Vehicle: Exceeding your vehicle’s weight capacity puts extra stress on your tires, increasing the risk of damage and flats. Check your owner’s manual or the sticker on the driver’s side doorjamb for weight limits.
- Regular Tire Rotation: Have your tires rotated every 5,000 to 7,000 miles, or as recommended by your vehicle manufacturer. Rotation helps ensure even wear, extending tire life and reducing the chance of premature failure.
- Inspect Your Tires Regularly: Visually inspect your tires regularly for signs of wear and tear, such as bulges, sidewall cracks, and embedded objects. Address any issues promptly.
- Consider Tire Sealant: Tire sealant can be added to your tires to help prevent flats from minor punctures. However, it’s not a substitute for proper tire maintenance and repair.
Temporary Fix: Using a Tire Patch Kit
In situations where you have a minor puncture and no spare tire, a tire patch kit can offer a temporary solution to get you to a service station. These kits usually include sealant and plugs to seal small punctures. Here’s a general guide:
- Locate the Puncture: Find the puncture in the tire. It might be indicated by a hissing sound or an embedded object.
- Remove the Object (if possible): If the puncturing object is still in the tire, carefully remove it using pliers, if possible.
- Use Tire Sealant: Follow the instructions on your tire sealant product to inject the sealant into the tire through the valve stem. This can temporarily seal small punctures.
- Use a Tire Plug (if applicable): For larger punctures, some kits include tire plugs that you can insert into the hole using a special tool to create a physical seal.
- Inflate the Tire: Many kits include a small air compressor to reinflate the tire after applying sealant or a plug.
- Drive to a Service Station: Tire patch kits offer a temporary fix. Drive cautiously to the nearest service station to get a professional tire repair or replacement.
Knowing how to fix a flat car tire is an empowering skill for any driver. By being prepared with the right tools and knowledge, you can handle this common roadside emergency safely and get back on your journey with confidence. Remember, regular tire maintenance and proactive prevention are the best ways to minimize the chances of experiencing a flat tire in the first place.