How to Fix a Paint Chip on Your Car: A Comprehensive Guide

обнаружили Stone chips are an unfortunate reality for car owners. These small blemishes, often found on the hood, bumper, and fenders, are more than just cosmetic annoyances. They are localized areas of damage that penetrate the paint layers, potentially exposing the bare metal underneath. Gravel, road debris, and salt, especially common during winter driving, are frequent culprits, kicked up by tires and impacting your vehicle’s paint at high speeds. Ignoring these chips can lead to further problems, especially in wet or icy conditions where moisture can seep into the exposed metal and cause rust.
Car paint chip damage on a vehicle hood
Fortunately, fixing paint chips is a straightforward process that can often be done yourself, saving you from more extensive and costly repairs down the line. Addressing these chips promptly is crucial to prevent rust and maintain your car’s appearance and value. This guide will walk you through the steps of DIY paint chip repair and help you decide when it’s best to seek professional assistance.
When DIY Isn’t the Answer: Recognizing When to Call a Professional
While many paint chips are easily manageable at home, certain situations warrant professional intervention. Attempting a DIY repair in these cases could lead to further damage or a less than satisfactory result. It’s time to consider professional paint chip repair if:
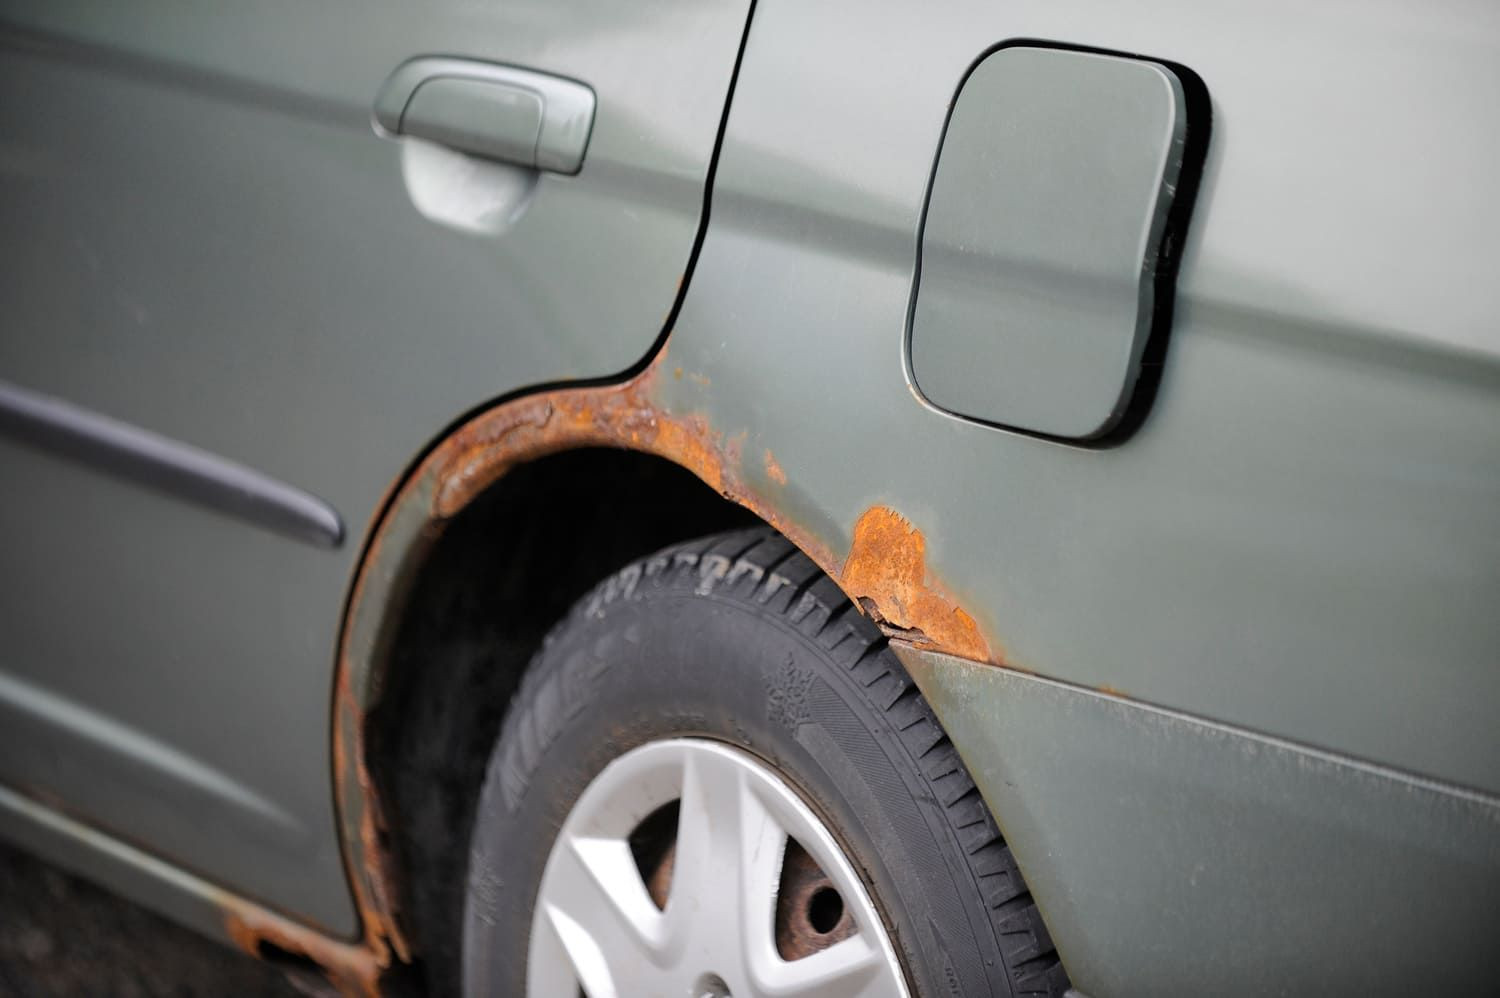
- Base Metal Exposure: If the chip has gone through all paint layers and exposed the bare metal underneath, professional treatment is recommended to ensure proper rust protection and paint adhesion.
- Rust Formation: If rust is already present within or around the chip, simply painting over it will not solve the problem. Rust needs to be properly treated and removed before any paint repair to prevent it from spreading.
- Extensive Damage: Multiple chips clustered together or very large chips might be beyond the scope of a simple DIY touch-up. Professionals have the tools and expertise to handle more significant damage seamlessly.
Ignoring rust is a critical mistake. Paint will not properly adhere to rusted metal, and the corrosion will continue to spread beneath the new paint, leading to more serious structural issues and expensive repairs in the future. For complex rust issues, consulting with specialists is always the best approach.
Cost-Effective Solutions: Understanding Paint Chip Repair Costs
The cost of fixing paint chips can vary depending on whether you choose a DIY approach or professional service. DIY repair kits are readily available and generally range from £10 to £50. However, be mindful that cheaper kits might have a limited color selection, potentially resulting in a noticeable repair. Opting for kits that offer paint matching to your car’s specific color code, while slightly more expensive, will generally yield a less visible repair.
Professional paint repairs, especially a full panel respray, can be significantly more costly, reaching into the hundreds of pounds. However, many auto body shops offer SMART (Small to Medium Area Repair Technology) repair options. SMART repair focuses specifically on the damaged area, minimizing the repair area and thus reducing both time and cost. Professionals utilize advanced color-matching technology to precisely blend the new paint with your car’s existing finish, often achieving a near-invisible repair that surpasses the results of DIY kits.
DIY Guide: Step-by-Step Paint Chip Repair
For minor paint chips that haven’t reached the bare metal or developed rust, a DIY touch-up can be an effective and affordable solution. Here’s a detailed step-by-step guide:
-
Thorough Cleaning: Begin by meticulously cleaning the affected area with soap and water to remove dirt and debris. Follow this with a wipe down using isopropyl alcohol or white spirit. This crucial step eliminates grease and contaminants, ensuring proper paint adhesion. Allow the area to dry completely.
-
Smooth Out Edges: Carefully inspect the chip for any raised edges of paint around the perimeter. Use a cutting compound like T-Cut or very fine-grit wet and dry sandpaper to gently smooth these edges. Exercise caution to avoid damaging the surrounding clear coat. If using sandpaper, work gently and avoid applying excessive pressure.
-
Primer Application (Optional but Recommended): For chips that are deeper or have reached the primer layer, applying a thin layer of primer is beneficial. Primer creates a uniform surface and enhances paint adhesion. Use a fine brush or the applicator provided in your touch-up kit to apply a small amount of primer within the chip. Allow it to dry completely according to the manufacturer’s instructions.
-
Layered Paint Application: Apply the touch-up paint in thin, even layers, mimicking the original factory paint application. Use a fine-tipped brush, a paint pen (if included in your kit), or a toothpick for precise application. Confine the paint application to the chip itself, avoiding spreading onto the surrounding undamaged paint. Allow each layer to dry completely before applying the next. Multiple thin layers are better than one thick layer, as they prevent runs and ensure proper drying.
-
Leveling and Blending: Once the final paint layer is completely dry, gently level the touched-up paint to match the surrounding paint surface. Wrap very fine-grit wet sandpaper (2000 grit or higher) around a small, flat object like the blunt end of a pencil to create a small, controlled sanding block. Lightly wet the sandpaper and gently sand the repaired area using circular motions. The goal is to level the new paint with the old, not to remove the new paint.
-
Clear Coat/Lacquer Application: To seal and protect your repair, and to restore the shine, apply a clear coat or lacquer over the touched-up area. This step is essential for durability and blending the repair seamlessly. Apply a thin, even layer, again using a fine brush or applicator. Allow it to dry thoroughly.
-
Polishing (Final Step for Seamless Finish): For the most seamless finish, once the clear coat is completely dry, use a polishing compound and a soft cloth to gently buff the repaired area. This will help blend the edges of the repair into the surrounding paint and enhance the shine. Work in small circular motions and avoid excessive pressure.
Car paint chip damage on a vehicle hood
Frequently Asked Questions About Stone Chip Repair
Can stone chips be completely repaired?
Yes, stone chips can be effectively repaired, though the level of repair can vary depending on the severity of the damage and the method used. DIY touch-ups can significantly improve the appearance of minor chips. Professional repairs, especially SMART repairs, can achieve near-invisible results. While a perfectly flawless repair might be challenging to achieve in all cases, especially with DIY methods, the appearance can be greatly enhanced, and further damage prevented. For severe damage, professional body shops can offer panel replacement and full resprays for a factory-new finish.
Is WD-40 effective for removing car scratches?
No, WD-40 is not a scratch remover. While it might temporarily mask scratches by filling them with oil and adding shine, it does not repair the paint damage. WD-40 is a lubricant and water displacer, not a paint repair product. For actual scratch removal, use dedicated automotive scratch removers or polishes. These products contain mild abrasives that gently level the clear coat to minimize the appearance of scratches.
Is repairing stone chips worthwhile?
Absolutely. Repairing stone chips offers several benefits:
- Prevents Rust: Chips expose bare metal, making it vulnerable to rust and corrosion. Repairing them prevents further, more costly damage.
- Maintains Vehicle Value: A car free of chips and scratches is more appealing to potential buyers and helps maintain resale value.
- Enhances Appearance: Repairing chips improves your car’s overall aesthetic, giving it a cleaner and better-maintained look.
- Cost-Effective: Addressing chips early, whether DIY or professionally, is generally cheaper than dealing with rust or more extensive paint damage later.
Are stone chips a common car problem?
Yes, stone chips are very common, especially on areas like the hood, front bumper, and rocker panels. They are caused by road debris impacting the paint surface. Driving on highways and roads with loose gravel increases the risk of stone chips.
Can you simply paint over stone chips without filling them?
No. Simply spraying paint over stone chips will not create a smooth, even surface. The indentations of the chips will still be visible. Chips need to be filled with touch-up paint to level the surface before any topcoat is applied for a proper repair.
Why does my car keep getting stone chips?
Stone chips are often unavoidable due to road conditions. However, you can minimize them by:
- Avoiding gravel roads: Reduce driving on unpaved or gravel roads when possible.
- Using mud flaps: Mud flaps behind the tires can help deflect road debris.
- Paint Protection Film (PPF): Consider applying PPF to vulnerable areas like the hood and bumper for a durable protective layer.
- Regular washing and waxing: Keeping your car clean and waxed can help protect the paint and make it slightly more resistant to chips.
What’s the best way to protect my car from stone chips?
The most effective protection is paint protection film (PPF). This transparent film is professionally applied and creates a robust barrier against stone chips and scratches. While more expensive upfront, it offers superior long-term protection. Other options include spray-on paint sealants and regular application of car wax and sealants, which offer some level of protection at a lower cost.
Considering professional stone chip repair? ChipsAway specialists are experts in car paint chip and scratch repair, offering mobile service for convenience. Get a free, no-obligation repair estimate online or by phone to see how they can help restore your car’s finish.