How to Fix a Flat Tire on Your Car: A Step-by-Step Guide
Dealing with a flat tire is an unavoidable part of car ownership. It always seems to happen at the most inconvenient times, whether you’re rushing to work, heading out on a road trip, or simply running errands. Knowing how to fix a flat tyre in car is not just a valuable skill, it’s a necessity for every driver’s safety and independence. While calling for roadside assistance is always an option, being able to change a tire yourself can save you time, money, and get you back on the road faster.
This comprehensive guide will walk you through each step of changing a flat tire safely and efficiently. We’ll also cover essential tools, crucial safety precautions, and tips on how to prevent flat tires in the first place. By the end of this article, you’ll feel confident and prepared to handle a flat tire situation like a pro.
Essential Tools for Changing a Flat Tire
Before you even begin, ensuring you have the right tools is paramount. Most vehicles come equipped with the basics, but it’s always wise to double-check and familiarize yourself with their location. Here’s a checklist of essential tools you’ll need to change a flat tire:
- Inflated Spare Tire: This is your most crucial tool. Regularly check your spare tire’s pressure to ensure it’s ready when you need it. The recommended pressure is usually found on a sticker inside your driver’s side doorjamb or in your owner’s manual.
- Car Jack: This mechanical device lifts your vehicle, allowing you to remove the flat tire and install the spare. Consult your owner’s manual to locate the correct jacking points on your car’s frame to prevent damage.
- Lug Wrench: This tool is specifically designed to loosen and tighten the lug nuts that secure your wheels. Standard lug wrenches are often L-shaped, but some vehicles may come with telescoping or cross wrenches for added leverage.
- Vehicle Owner’s Manual: Don’t underestimate the importance of your owner’s manual. It contains crucial information specific to your car model, including the location of your spare tire and tools, correct jacking points, and recommended lug nut torque specifications.
- Wheel Wedges (or Wheel Chocks): These are essential safety devices used to prevent your car from rolling, especially on even slight inclines. They are placed behind the wheels that are opposite the flat tire.
- Work Gloves: Changing a tire can get your hands dirty. Gloves will protect your hands and provide a better grip on tools, especially in less-than-ideal weather conditions.
Highly Recommended, But Not Always Standard:
- Flashlight or Headlamp: If you happen to get a flat tire at night or in low-light conditions, a flashlight or headlamp is invaluable for visibility and safety.
- Tire Pressure Gauge: While you should check your spare tire regularly, a tire pressure gauge allows you to confirm the spare is properly inflated before installation.
- Piece of Wood (2×4 or similar): If you find yourself changing a tire on soft or uneven ground, placing a piece of wood under the jack can provide a more stable and secure base.
Take a moment to locate these tools in your vehicle before you need them. Knowing where they are stored (usually in the trunk, under the floorboard, or attached to the rear door) will save you valuable time and frustration when you’re dealing with a flat tire.
Step-by-Step Guide: How to Change a Flat Tire
Changing a flat tire might seem daunting if you’ve never done it before, but by following these steps carefully, you can safely and effectively get back on the road. Safety is paramount, so always prioritize these precautions:
-
Find a Safe Location: As soon as you realize you have a flat tire, do not brake hard or make any sudden maneuvers. Slowly and carefully steer your car to a safe location away from traffic. Pull over to a level, stable surface as far off the road as possible, such as a wide shoulder, parking lot, or rest area. Avoid stopping on a hill or in soft sand or gravel.
-
Turn on Hazard Lights and Engage Parking Brake: Activate your hazard lights immediately to alert other drivers to your situation. Firmly engage your parking brake to prevent the car from rolling.
-
Apply Wheel Wedges: Place wheel wedges (or wheel chocks) behind the wheels that are diagonally opposite the flat tire. For example, if you have a flat front right tire, place wedges behind the rear left wheel. This is crucial for preventing your vehicle from rolling, especially on any incline.
-
Gather Your Tools and Spare Tire: Retrieve your spare tire, car jack, lug wrench, gloves, and owner’s manual from their storage locations in your vehicle. Lay out your tools within easy reach.
-
Loosen the Lug Nuts: Before jacking up the car, use the lug wrench to loosen the lug nuts on the flat tire. Turn the wrench counterclockwise to loosen. Do not remove them completely at this stage, just break them free. They can be very tight, so you may need to use your body weight or even your foot on the wrench for extra leverage. Loosening them now while the tire is still on the ground provides resistance and makes the process easier and safer.
-
Position the Jack: Consult your vehicle’s owner’s manual to identify the correct jacking points on your car’s frame. These are reinforced areas designed to safely support the vehicle’s weight. Position the jack firmly and correctly under the designated jacking point closest to the flat tire. Incorrect jack placement can damage your vehicle’s frame or body.
-
Raise the Vehicle: Slowly and steadily raise the vehicle with the jack until the flat tire is a few inches off the ground. You need enough clearance to remove the flat tire and install the inflated spare. Ensure the jack is stable and securely positioned before proceeding. Never place any part of your body under the vehicle while it is supported only by a jack.
-
Remove the Lug Nuts: Now, fully unscrew the lug nuts and carefully remove them. Keep them together in a safe place, such as your glove compartment or lug nut wrench cap, so they don’t get lost.
-
Remove the Flat Tire: Grip the flat tire firmly with both hands and pull it straight towards you, away from the wheel hub. It might require some gentle wiggling. Set the flat tire aside, away from your work area.
-
Mount the Spare Tire: Align the spare tire with the wheel studs on the hub. Lift the spare tire into position and push it onto the studs. Ensure the wheel is sitting flush against the hub.
-
Hand-tighten the Lug Nuts: Reinstall the lug nuts by hand, tightening them in a star pattern (opposite nuts first) to ensure even pressure. Tighten them as much as you can by hand.
-
Lower the Vehicle Partially: Carefully lower the vehicle using the jack until the spare tire just touches the ground, but the full weight of the car is not yet on the tire.
-
Tighten Lug Nuts with Wrench: Now, use the lug wrench to fully tighten the lug nuts in the same star pattern. Tighten them firmly and securely, but avoid over-tightening. Over-tightening can damage the studs or warp the brake rotor. If you have a torque wrench and know your vehicle’s lug nut torque specification (usually in the owner’s manual), use it to tighten them to the correct torque. If not, tighten them as firmly as you can with the lug wrench.
-
Lower the Vehicle Completely: Lower the jack completely and remove it from under the vehicle.
-
Final Tightening: Give the lug nuts one last firm tightening with the lug wrench to ensure they are secure.
-
Stow Flat Tire and Tools: Place the flat tire and all your tools back in their designated storage locations in your vehicle.
-
Check Lug Nut Tightness Again: After driving a short distance (about 50-100 miles), re-check the tightness of the lug nuts with the lug wrench to ensure they haven’t loosened.
-
Get Your Flat Tire Repaired or Replaced ASAP: Spare tires are often temporary, smaller, or have speed limitations. Visit a tire service center as soon as possible to have your flat tire repaired or replaced with a new tire that matches your other tires. A professional can also inspect your wheel and ensure everything is in proper working order.
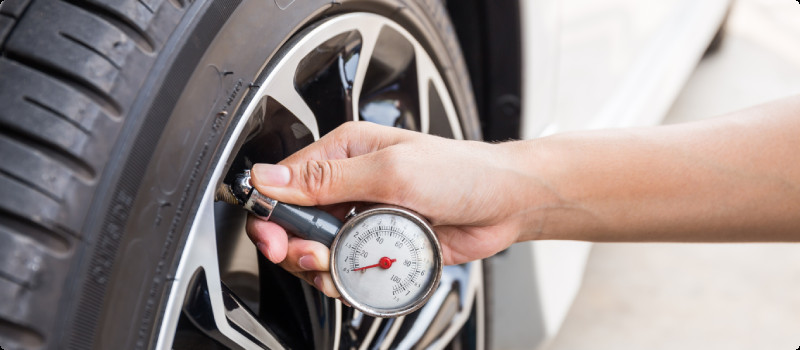
Checking Tire Pressure
Preventing Flat Tires: Proactive Measures
While you can’t entirely eliminate the possibility of a flat tire, taking preventative measures can significantly reduce your chances and extend the life of your tires. Here are some key steps to consider:
-
Regularly Check Tire Pressure: Maintain proper tire inflation by checking your tire pressure at least once a month and before long trips. Use a reliable tire pressure gauge and inflate your tires to the recommended pressure specified on the sticker inside your driver’s side doorjamb or in your owner’s manual. Proper inflation reduces the risk of punctures, improves fuel efficiency, and ensures optimal tire wear.
-
Avoid Road Hazards: Be vigilant and scan the road ahead for potential hazards like potholes, sharp objects (nails, glass, debris), construction zones, and uneven road surfaces. Whenever possible, safely steer around these hazards to minimize the risk of tire damage.
-
Don’t Overload Your Vehicle: Exceeding your vehicle’s weight capacity puts excessive stress on your tires, leading to premature wear and increased susceptibility to punctures and blowouts. Consult your owner’s manual or the sticker on your doorjamb for your vehicle’s maximum load capacity and avoid overloading.
-
Rotate Your Tires Regularly: Tire rotation involves periodically changing the position of your tires on your vehicle (e.g., front to rear, side to side). This helps to distribute wear evenly across all four tires, extending their lifespan and preventing uneven wear patterns that can make tires more vulnerable to flats. Aim to rotate your tires every 5,000 to 7,000 miles, or as recommended in your owner’s manual.
-
Regular Tire Inspections: Periodically visually inspect your tires for signs of wear and tear, including:
- Tread Depth: Ensure you have adequate tread depth. Most tires have tread wear indicators, or you can use the “penny test.”
- Sidewall Damage: Check for bulges, cuts, cracks, or abrasions on the sidewalls.
- Uneven Wear: Look for uneven wear patterns, which can indicate alignment issues or other problems.
- Embedded Objects: Inspect for nails, screws, glass, or other objects embedded in the tire tread.
What to Do If You Don’t Have a Spare Tire
Modern vehicles are increasingly being manufactured without spare tires to save weight and space. If your car doesn’t have a spare, you still have options when faced with a flat tire:
-
Tire Repair Kit (with sealant and inflator): Many vehicles without spares are equipped with tire repair kits. These kits typically include a tire sealant and a small air compressor. The sealant is injected into the tire to temporarily plug the puncture, and the compressor inflates the tire. These kits are designed for temporary repairs of minor punctures and may not work for larger tears or sidewall damage. Always follow the instructions provided with your specific tire repair kit and drive cautiously to a service station for a proper repair or tire replacement.
-
Run-Flat Tires: Some vehicles are equipped with run-flat tires. These tires are designed with reinforced sidewalls that allow you to drive for a limited distance (usually up to 50 miles at a reduced speed of around 50 mph) even after losing air pressure. If you have run-flat tires and get a flat, you may be able to drive to a safe location or service station. However, it’s still crucial to have the tire inspected and replaced as soon as possible.
-
Roadside Assistance: If you are uncomfortable using a tire repair kit, have a severe flat, or are in an unsafe location, calling for roadside assistance is always a reliable option. Most car insurance policies or auto clubs offer roadside assistance services that can dispatch a professional to change your tire or tow your vehicle to a repair shop.
Conclusion: Be Prepared and Stay Safe
Knowing how to fix a flat tyre in car is an essential skill that empowers you to handle unexpected situations on the road. By understanding the tools required, following the step-by-step guide, and practicing preventative maintenance, you can minimize the inconvenience and potential dangers of a flat tire. Remember, safety should always be your top priority. Take your time, follow these instructions carefully, and you’ll be back on your journey with confidence. Always prioritize getting your flat tire properly repaired or replaced as soon as possible to ensure your vehicle is safe and roadworthy.